This post may contain affiliate links. Please read our policy page.
If you’re looking for delicious meals that won’t eat up your evening, you’ve got plenty of options! Whip up a zesty One-Pan Lemon Garlic Chicken with asparagus or enjoy vibrant Shrimp Tacos with Mango Salsa. For a hearty dish, try the 30-Minute Beef Stir-Fry or a revitalizing Caprese Pasta Salad. Don’t forget about Teriyaki Salmon with Broccoli or a comforting Creamy Tuscan Garlic Chicken. Keep exploring, and you’ll uncover even more quick and tasty dinner ideas!
One-Pan Lemon Garlic Chicken and Asparagus
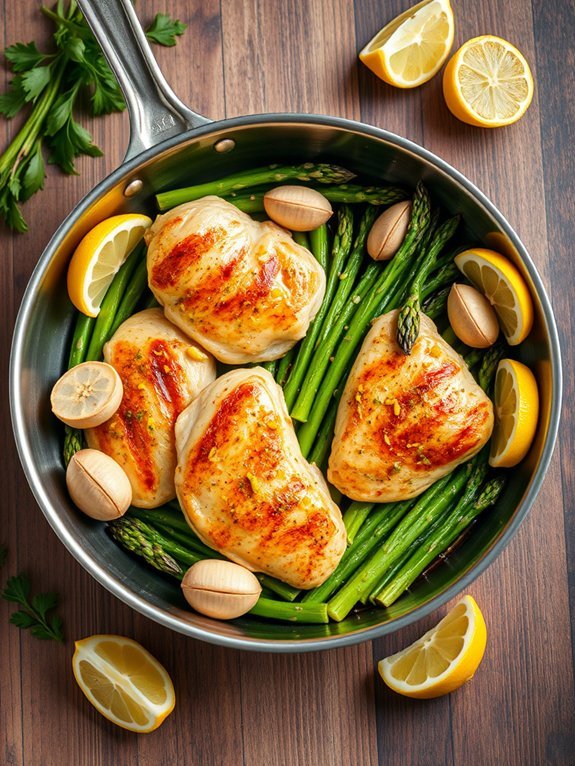
One-Pan Lemon Garlic Chicken and Asparagus is a delightful and nutritious meal that perfectly balances protein and vegetables. This dish isn’t only delicious but also easy to prepare, making it an ideal choice for a busy weeknight dinner. The zesty lemon combined with the savory garlic creates a tantalizing flavor profile that elevates the simple chicken and asparagus into a wholesome feast.
Cooking this one-pan meal allows for quick cleanup, which is always a plus when you’re short on time. The combination of roasting chicken and asparagus together guarantees they soak up all the delicious juices and seasonings, making every bite flavorful. With only a few ingredients and minimal prep, you’ll have dinner on the table in no time at all.
Ingredients:
- 4 boneless, skinless chicken breasts
- 1 pound fresh asparagus, trimmed
- 3 tablespoons olive oil
- 4 cloves garlic, minced
- Juice and zest of 1 lemon
- Salt and pepper, to taste
- 1 teaspoon dried oregano (optional)
- Lemon wedges, for serving
Season the chicken breasts with salt, pepper, and dried oregano (if using), then heat 2 tablespoons of olive oil in a large oven-safe skillet over medium-high heat. Add the chicken to the skillet and sear each side until golden brown, about 4-5 minutes per side. Remove the chicken from the skillet and set aside.
In the same skillet, add the remaining tablespoon of olive oil, asparagus, and garlic. Cook for about 2 minutes until the asparagus starts to soften, then stir in the lemon juice and zest. Nestle the chicken back into the skillet with the asparagus, then transfer the skillet to a preheated oven at 400°F (200°C). Bake for 15-20 minutes, or until the chicken is cooked through and the asparagus is tender.
For the best results, verify that all ingredients are at room temperature before cooking to promote even cooking. Feel free to customize the seasoning to your liking; adding herbs like thyme or rosemary can bring a new dimension to the dish.
Also, consider serving this meal with a side of rice or quinoa to soak up the delicious lemon-garlic juices, or a simple green salad for added freshness.
Recommended Items
Get ready to whip up some quick and tasty meals with these essential products and tools!
Products
Shrimp Tacos With Mango Salsa

Shrimp tacos with mango salsa are a deliciously vibrant dish that can be whipped up in just 30 minutes. The combination of succulent shrimp, zesty lime, and sweet mango creates a rejuvenating meal that’s perfect for any weeknight dinner or a weekend gathering. The beauty of this recipe lies in its simplicity, allowing the fresh flavors to shine through while still packing a punch of seasoned goodness.
Assemble your favorite toppings to customize these tacos to your liking. From crunchy cabbage to creamy avocado, each element can enhance the overall flavor profile. Your family or guests will be impressed with the contrast between the savory shrimp and the bright mango salsa, creating a delightful bite with every morsel.
Ingredients:
- 1 pound shrimp, peeled and deveined
- 2 tablespoons olive oil
- 1 tablespoon chili powder
- 1 teaspoon cumin
- 1 lime, juiced
- Salt and pepper to taste
- 8 corn tortillas
- 1 ripe mango, diced
- 1/4 red onion, finely diced
- 1 jalapeño, finely chopped (optional)
- 1/4 cup fresh cilantro, chopped
- 1 avocado, sliced
- 1 cup shredded cabbage
In a medium bowl, combine shrimp, olive oil, chili powder, cumin, lime juice, salt, and pepper, and let marinate for about 10 minutes.
In the meantime, prepare the mango salsa by mixing the diced mango, red onion, jalapeño, cilantro, and a squeeze of lime juice in a separate bowl.
Heat a skillet over medium-high heat and cook the marinated shrimp for 2-3 minutes on each side until they’re pink and cooked through.
Warm the corn tortillas in a dry skillet or microwave, then assemble the tacos by layering the shrimp, mango salsa, avocado slices, and shredded cabbage.
For best results, choose fresh shrimp that are still slightly translucent; this guarantees they remain juicy after cooking.
You can easily substitute the mango for other fruits like pineapple or peach if you wish to experiment with flavors.
Additionally, if you’re short on time, pre-made salsa can save you extra minutes without sacrificing too much on flavor.
Enjoy your shrimp tacos warm and garnished with extra lime wedges for an added zesty kick!
30-Minute Beef Stir-Fry

Minute Beef Stir-Fry is a classic quick meal that’s perfect for those busy weeknights when you want something delicious without spending too much time in the kitchen. The beauty of this dish lies in its simplicity and versatility. With thinly sliced beef cooked at high heat and paired with fresh vegetables, you can have a colorful and satisfying dinner ready in just half an hour.
To make your stir-fry even easier, you can prep your ingredients ahead of time. Slice your beef the night before and marinate it to enhance the flavor. Consider using a mix of your favorite vegetables to keep things interesting — bell peppers, broccoli, and snap peas work particularly well. This recipe can easily be adjusted to your taste preferences, letting you use whatever you have on hand.
Ingredients:
- 1 lb beef sirloin, thinly sliced
- 2 tablespoons soy sauce
- 1 tablespoon cornstarch
- 2 tablespoons vegetable oil
- 2 cloves garlic, minced
- 1 bell pepper, sliced
- 1 cup broccoli florets
- 1 cup snap peas
- 2 tablespoons oyster sauce
- Cooked rice, for serving
Heat 1 tablespoon of vegetable oil in a large skillet or wok over high heat. Add the sliced beef and cook for 2-3 minutes until browned. Remove the beef and set aside. In the same skillet, add another tablespoon of oil, then stir in the garlic, bell pepper, broccoli, and snap peas, cooking for about 3-4 minutes until tender-crisp.
Return the beef to the skillet and add the soy sauce and oyster sauce, stirring everything together. Cook for another 2 minutes until heated through and well combined. Serve the stir-fry over cooked rice.
When cooking Minute Beef Stir-Fry, make sure your ingredients are prepped and ready to go before you start. Stir-frying is a quick process, so having everything lined up will help prevent overcooking the beef and vegetables.
To get the most flavor, consider marinating the beef for at least 15 minutes in soy sauce and cornstarch before cooking. This not only enhances the taste but also helps tenderize the meat. Additionally, using a high smoke point oil like vegetable or peanut oil will prevent the pan from smoking and allow for that signature stir-fry char.
Enjoy your meal!
Caprese Pasta Salad
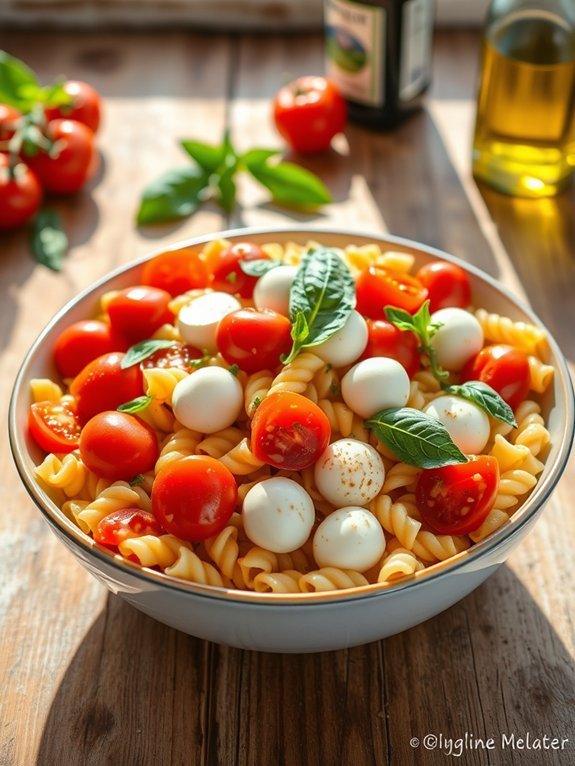
Caprese Pasta Salad is a delightful and revitalizing dish that combines the classic flavors of Caprese salad with the heartiness of pasta. Perfect for summer gatherings, potlucks, or a quick weeknight dinner, this recipe brings together fresh tomatoes, creamy mozzarella, and fragrant basil, all tossed in a light balsamic dressing.
It’s a wonderfully versatile dish that can be served cold or at room temperature, making it ideal for meal prep.
The best part about Caprese Pasta Salad is how quickly it comes together. With just a handful of ingredients and a bit of time, you can create a colorful and tasty meal that pleases everyone at the table. This dish not only satisfies your taste buds but also adds a burst of color to your dinner plate, making it perfect for any occasion. Plus, it’s an excellent way to utilize fresh produce during tomato season!
- 8 oz rotini or penne pasta
- 2 cups cherry tomatoes, halved
- 8 oz fresh mozzarella balls, halved
- 1 cup fresh basil leaves, torn
- 3 tablespoons olive oil
- 2 tablespoons balsamic vinegar
- Salt and pepper to taste
Cook the pasta according to package instructions until al dente. Drain and rinse under cold water to cool. In a large bowl, combine the cooled pasta, cherry tomatoes, mozzarella, and basil.
In a small bowl, whisk together the olive oil, balsamic vinegar, salt, and pepper. Pour the dressing over the pasta salad, tossing gently to combine. Serve chilled or at room temperature.
For peak flavor, consider letting the salad sit for about 15 minutes after tossing with the dressing. This allows the pasta to absorb the dressing and the flavors to meld beautifully.
Feel free to customize your Caprese Pasta Salad by adding ingredients like avocado, olives, or grilled chicken for added protein. The dish can also be stored in the refrigerator for up to three days, making it a great option for leftovers or meal prep!
Teriyaki Salmon With Broccoli
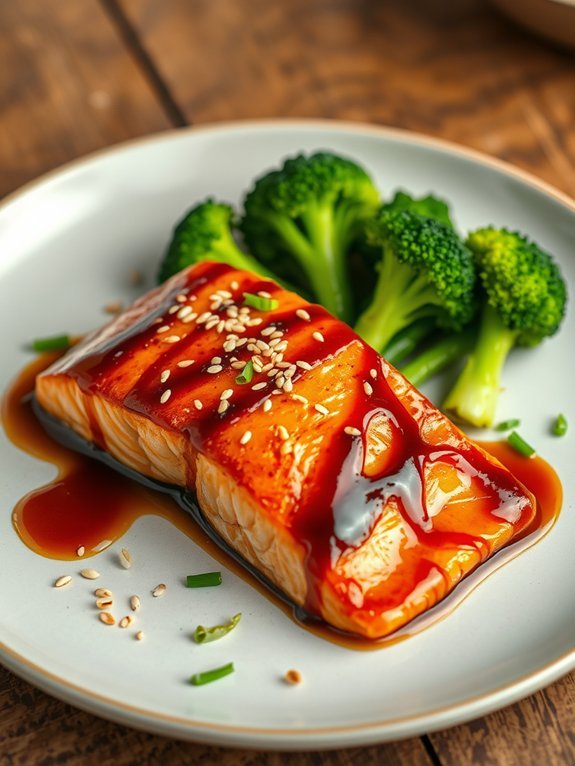
Teriyaki Salmon with Broccoli is a delectable dish that combines the rich flavors of marinated salmon and the freshness of broccoli, making it a perfect choice for a weeknight dinner. The teriyaki sauce, which typically consists of soy sauce, mirin, and sugar, adds a delightful sweetness and umami to the salmon while perfectly complementing the lightly steamed broccoli. Not only is this dish quick to prepare, but it also delivers a nutritious meal packed with protein and vitamins.
Cooking this dish is convenient and can be done in just about 30 minutes, making it an ideal option for busy evenings. The salmon is seared to perfection while the broccoli is blanched until it retains a vibrant green color and a slight crunch. Together, these elements create a visually appealing and mouth-watering plate that you and your family will love.
Ingredients:
- 2 salmon fillets
- 2 cups broccoli florets
- 1/4 cup teriyaki sauce
- 1 tablespoon olive oil
- 1 teaspoon sesame seeds (optional, for garnish)
- Salt and pepper, to taste
Start by heating the olive oil in a large skillet over medium-high heat. Season the salmon fillets with salt and pepper, then place them skin-side down in the skillet. Pour half of the teriyaki sauce over the salmon and cook for about 4-5 minutes.
Once the salmon is halfway cooked, carefully flip it over and add the remaining teriyaki sauce. In the last couple of minutes of cooking, add broccoli florets to the pan and cover with a lid to steam slightly. Cook everything for another 3-4 minutes until the salmon is cooked through and the broccoli is bright green and tender.
For best flavor, ascertain the salmon skin is crispy before flipping, as this will add texture to your meal. You can also customize the level of sweetness in the teriyaki sauce by using a low-sodium version or adding a bit of honey if preferred.
Additionally, consider serving with a sprinkle of sesame seeds or green onions for an extra touch of flavor and presentation. Enjoy your delicious Teriyaki Salmon with Broccoli!
Veggie Quesadillas
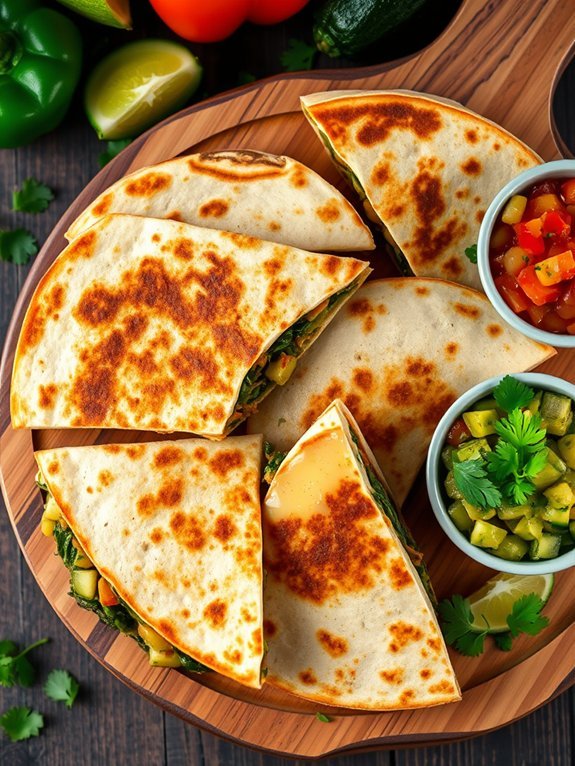
Veggie quesadillas are a delightful and quick meal option that packs a punch in flavors and colors. Perfect for busy weeknights, these cheesy treats are filled with an array of fresh vegetables that not only add nutrition but also give a burst of vibrant hues.
Pairing the sautéed veggies with gooey cheese and crispy tortillas brings a satisfying texture that everyone will love.
Making veggie quesadillas isn’t only simple but also versatile—you can customize the fillings based on what you have on hand. Whether you prefer a specific blend of vegetables or want to incorporate leftovers, this recipe allows you to be creative. Served with a side of salsa, guacamole, or sour cream, these quesadillas are sure to please both adults and kids alike.
- 4 flour tortillas
- 1 cup shredded cheese (cheddar, mozzarella, or a blend)
- 1 bell pepper, diced
- 1 small zucchini, diced
- 1 small onion, diced
- 1 cup fresh spinach
- 1 tablespoon olive oil
- Salt and pepper to taste
- Optional: avocado slices, salsa, or sour cream for serving
Heat olive oil in a large skillet over medium heat. Add the diced onion, bell pepper, and zucchini, and sauté for about 5 minutes, or until the vegetables are softened.
Stir in the spinach and season with salt and pepper. Once the spinach has wilted, remove the mixture from the heat.
Place one tortilla in the same skillet, sprinkle half of it with shredded cheese, add a generous layer of the veggie mixture, and then top with more cheese before folding the tortilla.
Cook until golden brown on one side, then flip and cook until the other side is golden and the cheese is melted.
Repeat with the remaining tortillas and filling.
For an extra crispy quesadilla, make sure to use a medium-high heat and avoid overfilling them, which can cause them to tear while cooking.
Also, let the quesadillas rest for a minute after cooking; this helps the cheese to set slightly, making them easier to cut and serve.
Experiment with different vegetables and spices to tailor the flavor to your liking!
Proposed Recipe
Spaghetti Aglio E Olio
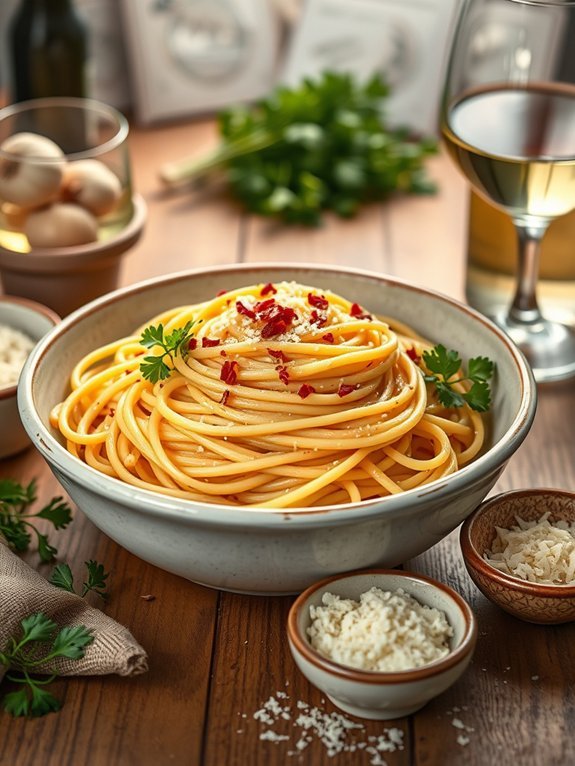
Spaghetti Aglio E Olio is a classic Italian dish that epitomizes the beauty of simplicity and is perfect for quick weeknight dinners. With its origins in Naples, this dish showcases the incredible flavors of just a few key ingredients: garlic, olive oil, and red pepper flakes, all tossed with al dente spaghetti.
It’s an excellent option for both novice cooks and culinary enthusiasts alike, offering a rich, satisfying meal made in under 30 minutes. Not only is Spaghetti Aglio E Olio a true representation of Italian cooking, but it also allows for endless customization. While the basic recipe calls for just a few pantry staples, you can easily elevate it by adding ingredients like parsley, lemon zest, or even grilled shrimp or chicken for extra protein.
This versatility makes it a go-to option for any occasion, from a casual family dinner to an impressively quick date night meal.
Ingredients:
- 400g spaghetti
- 6 cloves garlic, thinly sliced
- ½ cup extra-virgin olive oil
- 1 tsp red pepper flakes (adjust for spice preference)
- Salt, to taste
- Fresh parsley, chopped (for garnish)
- Grated Parmesan cheese (optional)
Cook the spaghetti according to the package instructions in a large pot of salted boiling water until al dente. While the pasta is cooking, heat the olive oil over medium heat in a large skillet and add the sliced garlic. Sauté until the garlic is golden brown, being careful not to burn it.
Add the red pepper flakes, then drain the spaghetti, reserving about a cup of pasta water. Toss the spaghetti in the skillet with the garlic oil, adding a splash of the reserved pasta water if necessary to create a silky sauce. Season with salt to taste and garnish with chopped parsley.
When making Spaghetti Aglio E Olio, remember that the quality of your ingredients can greatly influence the final dish. Use high-quality extra-virgin olive oil and fresh garlic for the best flavor.
Additionally, don’t skimp on the pasta water; it helps in emulsifying the sauce to create a cohesive dish. Ultimately, serve immediately to enjoy the perfect combination of textures and flavors, and feel free to experiment with add-ins like vegetables, meats, or different herbs!
Chicken Fajitas
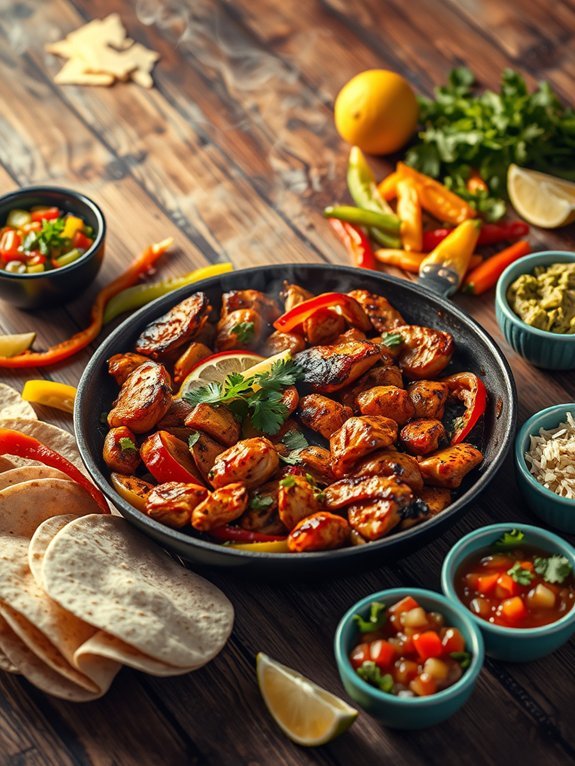
Chicken fajitas are a quick and flavorful dish that can easily fit into a busy weeknight dinner schedule. With vibrant veggies and marinated chicken, they offer a delightful combination of textures and tastes. The sizzling, aromatic cooking process adds an element of excitement, making these fajitas enjoyable for both cooking and eating. Served with warm tortillas and your favorite toppings, chicken fajitas are bound to become a regular in your meal rotation.
The beauty of chicken fajitas lies in their versatility. Feel free to customize the ingredients based on your preferences or what you have on hand. You can add extra veggies like zucchini or mushrooms, or spice it up with jalapeños for a kick. The preparation and cooking time of just 30 minutes make them perfect for those busy evenings when you want a satisfying meal without spending hours in the kitchen.
Ingredients:
- 1 pound boneless, skinless chicken breasts, sliced into thin strips
- 1 bell pepper (any color), sliced
- 1 onion, sliced
- 2 tablespoons olive oil
- 2 teaspoons chili powder
- 1 teaspoon cumin
- 1/2 teaspoon paprika
- Salt and pepper, to taste
- Tortillas, for serving
- Optional toppings: sour cream, guacamole, salsa, shredded cheese, lime wedges
In a large skillet, heat the olive oil over medium-high heat. Add the sliced chicken and cook until browned, about 5-7 minutes. Stir in the sliced bell pepper and onion, cooking until they’re softened, about 3-4 minutes.
Add the chili powder, cumin, paprika, salt, and pepper, mixing well to coat the chicken and vegetables in the spices. Let them cook together for another 2-3 minutes until everything is heated through and fragrant. Serve the chicken mixture warm with tortillas and your choice of toppings.
For the best results, slice your chicken and vegetables as evenly as possible to guarantee even cooking. Marinating the chicken for even just 15-30 minutes with the spices and olive oil can enhance the flavor considerably.
Additionally, serve your fajitas sizzling on a hot skillet or plate for an impressive presentation that adds to the dining experience. Enjoy with friends or family for a fun build-your-own fajita night!
Thai Peanut Noodles
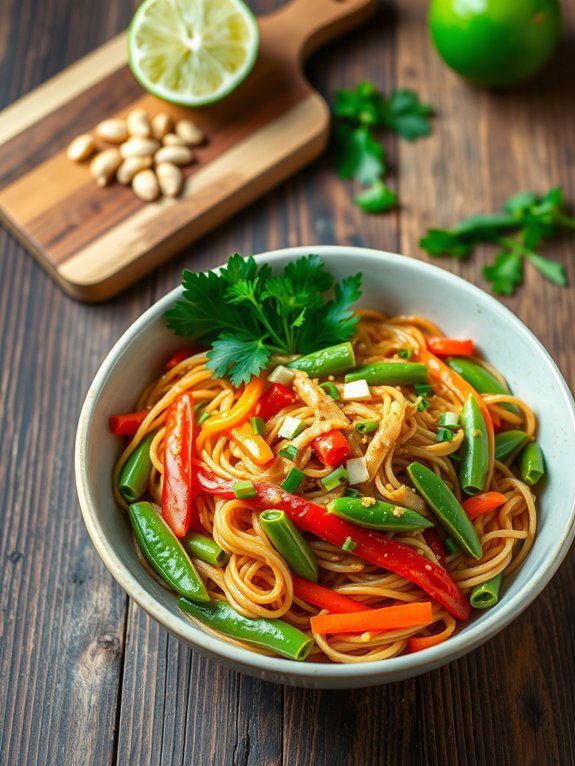
Thai Peanut Noodles are a delicious and quick meal that can satisfy your cravings for takeout right at home. This dish brings together the vibrant flavors of Thailand with a rich, creamy peanut sauce that coats tender noodles, making it a favorite among both kids and adults. In just 30 minutes, you can whip up a bowl of these tantalizing noodles, topped with fresh vegetables and garnished with herbs.
Not only is this dish easy to prepare, but it’s also highly customizable. You can incorporate your favorite vegetables, add protein like chicken or tofu, and adjust the level of spiciness to suit your taste. Perfect for a weeknight dinner or a casual get-together, Thai Peanut Noodles promise to deliver a burst of flavor and color to your meal.
Ingredients:
- 8 oz rice noodles or spaghetti
- 1 cup snap peas, trimmed
- 1 red bell pepper, sliced
- 1 carrot, julienned
- 1/2 cup green onions, chopped
- 1/2 cup unsweetened peanut butter
- 1/4 cup soy sauce
- 2 tbsp honey or maple syrup
- 2 tbsp lime juice
- 1 tsp grated ginger
- 2 cloves garlic, minced
- 1-2 tsp sriracha (or to taste)
- Chopped peanuts and cilantro for garnish
Cook the noodles according to package instructions, adding the snap peas for the last 2 minutes of cooking. In a large bowl, whisk together the peanut butter, soy sauce, honey, lime juice, ginger, garlic, and sriracha to create the sauce.
Drain the noodles and snap peas, then toss them in the peanut sauce with bell pepper, carrot, and green onions until well combined. Serve hot, garnished with chopped peanuts and cilantro.
For the best flavor and texture, make sure not to overcook the noodles—they should be al dente.
Feel free to add cooked chicken, shrimp, or tofu for a heartier dish, and consider placing any leftover sauce in the refrigerator to serve with salads or sandwiches later. Additionally, using fresh lime juice will enhance the freshness of your sauce, so avoid bottled alternatives when possible.
Mediterranean Chickpea Salad
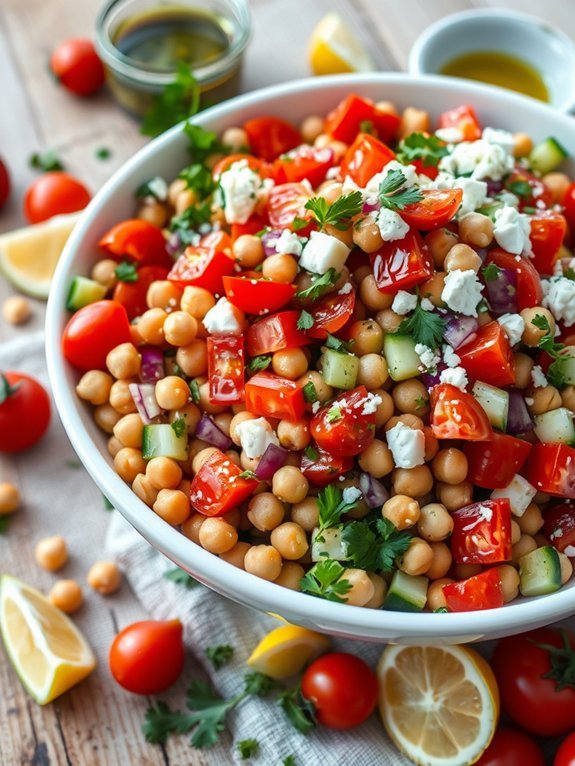
Mediterranean Chickpea Salad is a vibrant and nutritious dish that perfectly embodies the flavors of the Mediterranean region. Packed with protein from chickpeas, fresh vegetables, and aromatic herbs, this salad is as hearty as it’s revitalizing.
It’s a fantastic option for a quick weeknight dinner, a lunch to take on-the-go, or as a side dish at gatherings. This salad can be customized to suit your tastes and is equally delicious served chilled or at room temperature.
In addition to chickpeas, this salad features classic Mediterranean ingredients like cucumbers, tomatoes, red onions, and parsley, all tossed together in a zesty lemon-olive oil dressing. The combination of these components creates a delightful medley of textures and flavors, making this salad not just healthy, but incredibly satisfying.
Whether you’re a seasoned cook or a kitchen novice, this recipe is straightforward and can be prepared in just 30 minutes.
- 1 can chickpeas, drained and rinsed
- 1 cup cherry tomatoes, halved
- 1 cucumber, diced
- ½ red onion, finely chopped
- 1 red bell pepper, diced
- ¼ cup fresh parsley, chopped
- ¼ cup feta cheese, crumbled (optional)
- 3 tablespoons olive oil
- 2 tablespoons lemon juice
- Salt and pepper to taste
In a large bowl, combine the chickpeas, cherry tomatoes, cucumber, red onion, red bell pepper, and parsley. In a small bowl, whisk together the olive oil, lemon juice, salt, and pepper.
Pour the dressing over the salad and toss gently to combine all the ingredients evenly. If desired, sprinkle feta cheese on top for added flavor.
For a more flavorful salad, allow it to sit for about 10 minutes after tossing to let the ingredients marinate, enhancing the flavors. You can also add other vegetables according to your preference, such as olives or artichokes.
This dish is perfect for meal prep, as it keeps well in the refrigerator for a couple of days, making it an excellent option for quick lunches throughout the week. Adjust the ingredient portions as needed to accommodate your taste and dietary needs. Enjoy this fresh and wholesome salad as part of a balanced meal.
Quick Beef Tacos
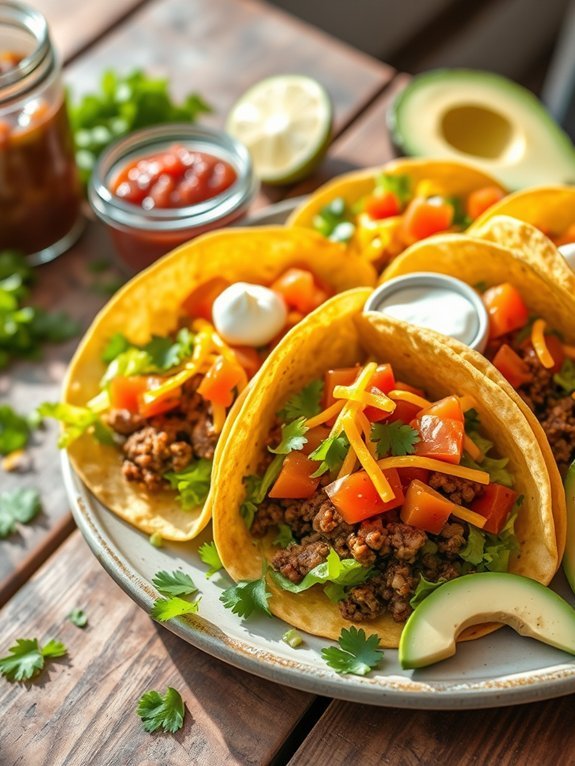
When you’re in need of a quick and satisfying meal, quick beef tacos are a go-to solution. With their vibrant flavors and customizable toppings, these tacos can be on the table in just 30 minutes, making them perfect for busy weeknights or impromptu gatherings.
The juicy, seasoned ground beef pairs beautifully with fresh vegetables, creamy toppings, and zesty sauces, allowing you to create a dish that everyone in the family will love. This recipe offers you the flexibility to adjust the ingredients based on your preferences.
You can spice up the beef with chili powder or cumin, add a variety of toppings like diced avocados, shredded cheese, and fresh cilantro, or opt for alternative proteins such as turkey or plant-based meat. Whether you’re making them for a casual dinner or a festive taco night, these quick beef tacos will surely satisfy your hunger and taste buds.
Ingredients:
- 1 lb ground beef
- 1 small onion, diced
- 2 cloves garlic, minced
- 1 tablespoon taco seasoning
- 1/2 cup water
- Salt and pepper to taste
- 8 small taco shells or tortillas
- 1 cup lettuce, shredded
- 1 cup diced tomatoes
- 1/2 cup shredded cheese (cheddar or Mexican blend)
- Optional toppings: sour cream, salsa, avocado, cilantro
In a skillet over medium heat, brown the ground beef along with the diced onion and minced garlic until the beef is fully cooked and the onions are tender, about 5-7 minutes.
Drain any excess fat, then stir in the taco seasoning and water. Let the mixture simmer for another 5 minutes, allowing the flavors to meld. While the beef is cooking, warm the taco shells or tortillas in the oven or microwave according to package instructions.
Once ready, fill each shell with the seasoned beef mixture and top with lettuce, tomatoes, cheese, and any other desired toppings. For perfect quick beef tacos, consider using a cast-iron skillet to achieve a delicious sear on the beef, which adds depth of flavor.
Make sure to prepare all your toppings ahead of time to streamline assembly. You can also personalize the spice levels in the beef by adjusting the amount of taco seasoning used or adding fresh jalapeños for extra heat. Enjoy experimenting with various toppings to find your family’s favorite combination!
Lemon Herb Grilled Shrimp Skewers
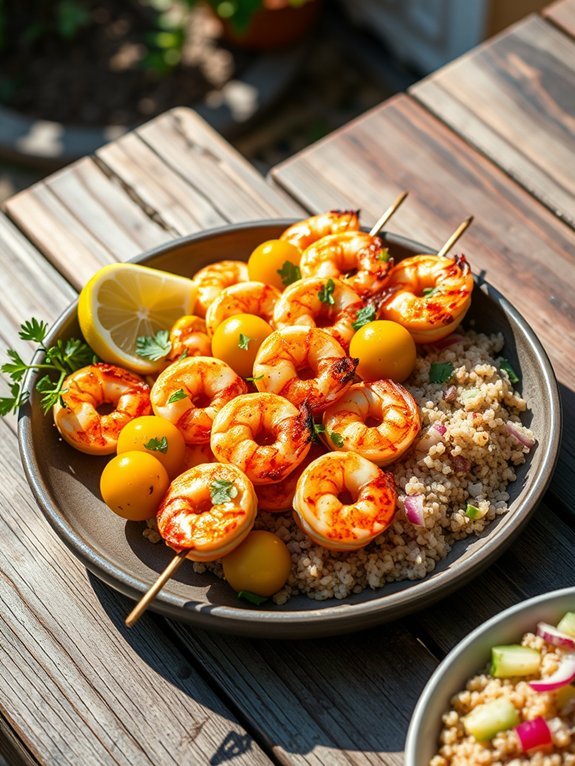
Lemon Herb Grilled Shrimp Skewers are a delightful and easy dish perfect for a quick weeknight dinner or a weekend barbecue.
The combination of savory garlic, fresh herbs, and a zesty lemon marinade creates a tantalizing flavor profile that pairs beautifully with the juicy shrimp.
These skewers aren’t only delicious but also low in calories, making them a healthy choice for any meal.
Marinating the shrimp for just a short period enhances their natural sweetness, while the grilling process gives them a pleasant char and smoky flavor.
Serve these skewers with a fresh garden salad or over a bed of quinoa for a complete meal that you can prepare in just about 30 minutes.
Ingredients:
- 1 pound large shrimp, peeled and deveined
- 2 tablespoons olive oil
- Juice of 1 lemon
- Zest of 1 lemon
- 3 cloves garlic, minced
- 1 tablespoon fresh parsley, chopped
- 1 tablespoon fresh basil, chopped
- 1 teaspoon salt
- 1/2 teaspoon black pepper
- Skewers (wooden or metal)
In a mixing bowl, whisk together the olive oil, lemon juice, lemon zest, minced garlic, chopped parsley, chopped basil, salt, and black pepper.
Add the shrimp and make certain they’re well coated with the marinade. Allow the shrimp to marinate for 10-15 minutes.
While the shrimp marinates, preheat your grill to medium-high heat.
Thread the marinated shrimp onto skewers, then grill for about 2-3 minutes on each side, or until the shrimp are pink and opaque.
For the best results, soak wooden skewers in water for about 30 minutes before grilling to prevent them from burning.
To add an extra layer of flavor, try adding slices of lemon or cherry tomatoes in between the shrimp on the skewers.
Also, make sure the grill is properly preheated to achieve a nice sear on the shrimp, and don’t overcrowd the skewers to allow for even cooking.
This dish can be easily customized with different herbs or spices to suit your taste!
Spinach and Ricotta Stuffed Shells
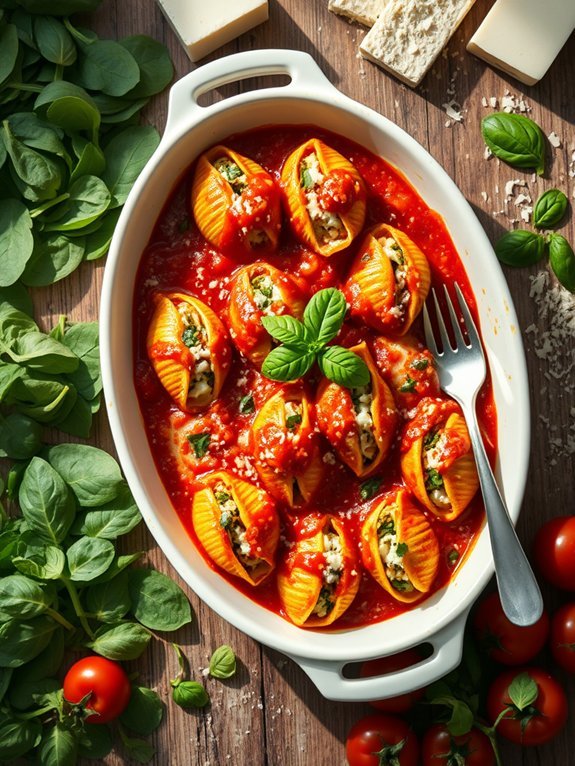
Spinach and Ricotta Stuffed Shells are a delightful and comforting dish that can be prepared in just 30 minutes, making them perfect for a quick weeknight dinner. The combination of creamy ricotta cheese, nutrient-rich spinach, and savory marinara sauce creates a symphony of flavors that’s sure to please both kids and adults alike.
This dish also showcases large pasta shells filled with the delicious stuffing and baked to perfection, ensuring every bite is a creamy, savory experience. Not only is it quick to prepare, but it’s also an excellent way to sneak some vegetables into your meal. The fresh spinach adds a pop of color and essential nutrients while blending harmoniously with the ricotta and a touch of Parmesan cheese.
With just a few pantry staples and a bit of time, you can create a sumptuous dinner that feels far more elaborate than it is.
Ingredients:
- 12-15 jumbo pasta shells
- 1 cup ricotta cheese
- 1 ½ cups fresh spinach, chopped
- 1/2 cup grated Parmesan cheese
- 1 cup marinara sauce
- 1/2 teaspoon garlic powder
- Salt and pepper, to taste
- 1/2 teaspoon olive oil
- 1/2 teaspoon Italian seasoning
- 1 cup shredded mozzarella cheese
Preheat your oven to 375°F (190°C). Cook the jumbo pasta shells in a large pot of salted boiling water for about 8-10 minutes or until al dente.
While the pasta cooks, heat olive oil in a skillet over medium heat and sauté the chopped spinach until wilted, about 2-3 minutes. In a mixing bowl, combine cooked spinach, ricotta cheese, grated Parmesan, garlic powder, Italian seasoning, salt, and pepper.
Drain the pasta shells and fill each shell with the ricotta-spinach mixture. In a baking dish, spread a layer of marinara sauce on the bottom, arrange the filled shells on top, and cover with the remaining marinara sauce. Sprinkle mozzarella cheese over the shells and bake for 15-20 minutes or until bubbly and golden.
For an extra flavor boost, consider adding chopped fresh herbs, such as basil or parsley, to the filling before stuffing the shells. You can also substitute the ricotta with cottage cheese for a lighter version.
If you want to add more depth to the dish, consider mixing in some sautéed mushrooms or cooked sausage with the spinach filling. Serve these stuffed shells alongside a fresh salad or garlic bread to create a complete meal. Enjoy!
Roasted Vegetable and Quinoa Bowl
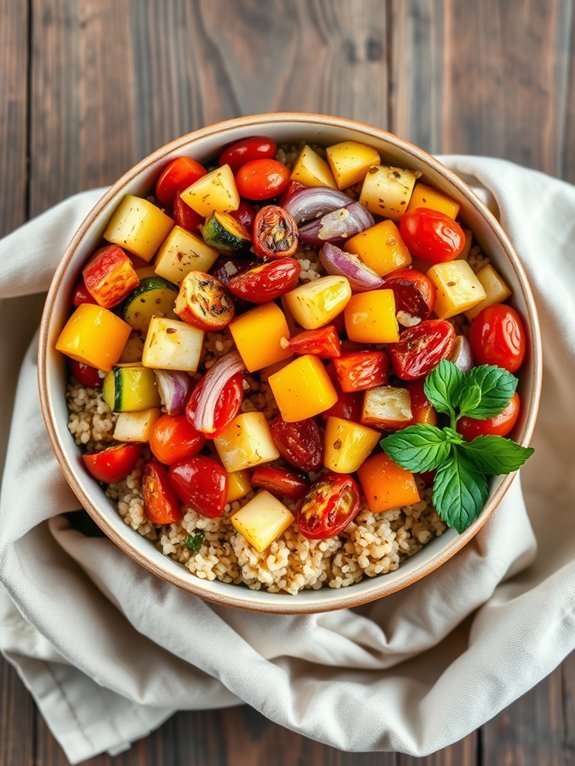
A Roasted Vegetable and Quinoa Bowl is a delightful, healthy, and filling meal that can be prepared in just 30 minutes. This versatile dish features an array of colorful roasted vegetables wonderfully complemented by fluffy quinoa. Packed with nutrients, fiber, and protein, this bowl isn’t only vibrant but also makes for an ideal weeknight dinner or a quick lunch option.
Roasting the vegetables enhances their natural sweetness, making them a flavorful base for the quinoa. You can customize the recipe with your favorite vegetables, making it a perfect way to use up whatever you have on hand. Plus, this recipe is easily scalable, so whether you’re cooking for one or feeding a crowd, you can adjust the quantities accordingly.
Ingredients:
- 1 cup quinoa
- 2 cups vegetable broth or water
- 1 zucchini, diced
- 1 bell pepper, diced
- 1 cup cherry tomatoes, halved
- 1 red onion, diced
- 2 tablespoons olive oil
- 1 teaspoon dried oregano
- 1 teaspoon garlic powder
- Salt and pepper to taste
- Fresh parsley or basil for garnish (optional)
Preheat your oven to 400°F (200°C). On a baking sheet, toss the diced zucchini, bell pepper, cherry tomatoes, and red onion with olive oil, oregano, garlic powder, salt, and pepper. Spread them out in a single layer and roast for about 20 minutes, or until they’re tender and golden.
Meanwhile, rinse the quinoa under cold water and then cook it in the vegetable broth or water according to package instructions. Once everything is cooked, fluff the quinoa with a fork and combine it with the roasted vegetables in a large bowl. Toss to combine and garnish with fresh herbs if desired.
For an extra layer of flavor, try adding a splash of lemon juice or a drizzle of balsamic glaze before serving. Additionally, feel free to mix in your favorite beans or chickpeas for added protein.
The dish can also be served warm or at room temperature, making it a great meal prep option for busy days. Leftovers can be stored in airtight containers in the fridge, allowing you to enjoy this delicious bowl for lunch the next day!
Creamy Tuscan Garlic Chicken
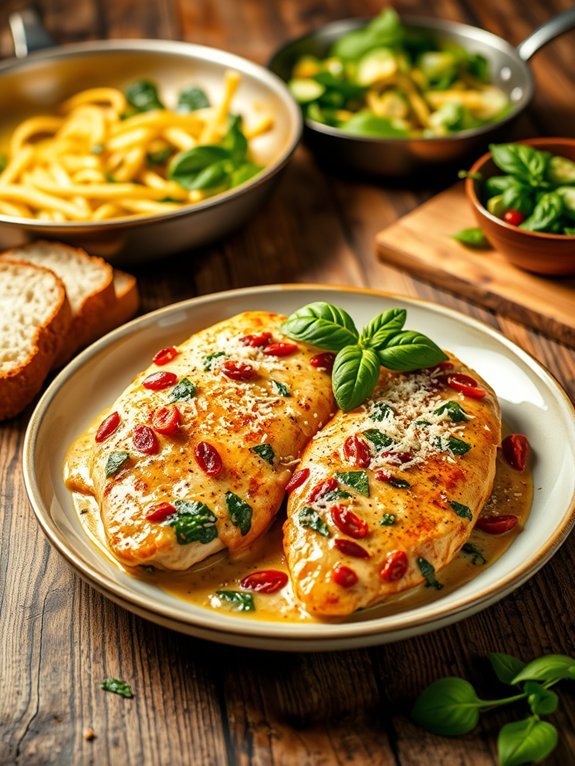
Creamy Tuscan Garlic Chicken is a delightful dish that combines tender chicken breasts with a rich and creamy garlic sauce, bursting with the flavors of sun-dried tomatoes and fresh spinach. This recipe not only delivers a delicious meal ready in just 30 minutes but also adds a touch of sophistication to your dinner table. Perfect for a weeknight meal or a special occasion, this dish is sure to impress family and friends alike.
The beauty of Creamy Tuscan Garlic Chicken lies in its simplicity and the harmony of its flavors. The aromatic garlic, combined with the earthiness of the sun-dried tomatoes and the freshness of spinach, complements the juiciness of the chicken perfectly.
Served over pasta, rice, or a bed of mashed potatoes, this meal will become a favorite in your recipe repertoire.
Ingredients:
- 4 boneless, skinless chicken breasts
- Salt and pepper, to taste
- 2 tablespoons olive oil
- 3-4 cloves garlic, minced
- 1 cup heavy cream
- 1 cup chicken broth
- 1/2 cup grated Parmesan cheese
- 1 cup fresh spinach
- 1/2 cup sun-dried tomatoes, chopped
- 1 teaspoon Italian seasoning
- Fresh basil for garnish (optional)
Sear the seasoned chicken breasts in olive oil over medium-high heat until golden brown and cooked through, about 6-7 minutes per side.
Once cooked, remove from the pan and set aside. In the same pan, add minced garlic and sauté until fragrant. Stir in chicken broth, heavy cream, Italian seasoning, sun-dried tomatoes, and Parmesan cheese. Bring to a simmer and return the chicken to the sauce.
Cook until heated through, then stir in fresh spinach and allow it to wilt before serving.
For a deliciously creamy sauce, make sure you scrape up any brown bits from the bottom of the pan after cooking the chicken to add extra flavor.
If you prefer a thicker sauce, let it simmer longer for a few more minutes. Feel free to customize this dish by adding other vegetables like mushrooms or bell peppers.
Pair the meal with garlic bread or a crisp salad for a complete and satisfying dining experience.

