This post may contain affiliate links. Please read our policy page.
Looking for sweet and guilt-free vegan desserts? You’ve got plenty of options! Try the decadent chocolate avocado mousse for a creamy treat or indulge in rich vegan chocolate cake. There’s also zesty lemon blueberry bars for a rejuvenating twist, and chewy oatmeal raisin cookies to satisfy that sweet tooth. Don’t miss out on creamy coconut milk ice cream or silky pumpkin spice pudding. Keep exploring, and you’ll discover even more delightful vegan options perfect for any occasion!
Decadent Chocolate Avocado Mousse
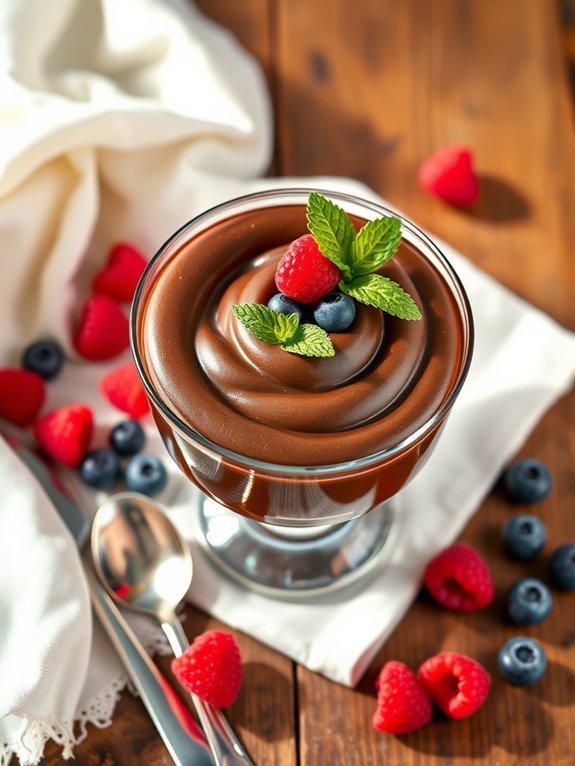
Indulging in a rich, chocolatey dessert doesn’t have to derail your healthy eating goals, and this Decadent Chocolate Avocado Mousse is proof. The creamy texture of ripe avocados provides a luxurious base for this mousse, allowing you to enjoy a guilt-free treat while packing in essential nutrients. This vegan dessert not only satisfies your sweet tooth but is also loaded with healthy fats, making it a nourishing option for any occasion.
This mousse is incredibly easy to make and can be whipped up in just a matter of minutes. Perfect for dinner parties or a quick evening treat, it’s sure to impress anyone who tries it. With just a few simple ingredients blended together, you’ll have a smooth, silky dessert that’s perfect for garnishing with fresh berries or a sprinkle of cocoa powder.
So, get ready to make a dessert that’s as good for your body as it’s for your taste buds!
- 2 ripe avocados
- ½ cup unsweetened cocoa powder
- ½ cup maple syrup or agave nectar
- 1 teaspoon vanilla extract
- ¼ cup almond milk (or any plant-based milk)
- A pinch of salt
Scoop the flesh of the avocados into a food processor, then add the cocoa powder, maple syrup, vanilla extract, almond milk, and a pinch of salt. Blend the mixture on high speed until it’s completely smooth and creamy, scraping down the sides as needed.
Taste and adjust sweetness or cocoa if desired, then transfer the mousse into serving dishes or a large bowl, and chill in the refrigerator for about 30 minutes before serving.
For a delightful twist, consider adding a touch of espresso powder to enhance the chocolate flavor or fold in some vegan whipped cream for an even lighter texture. This mousse can be stored in the refrigerator for up to three days, but keep in mind that it’s best enjoyed fresh for peak creaminess.
Additionally, be sure to use perfectly ripe avocados, as they’ll yield the smoothest consistency and richest flavor in your mousse.
Creamy Coconut Milk Ice Cream
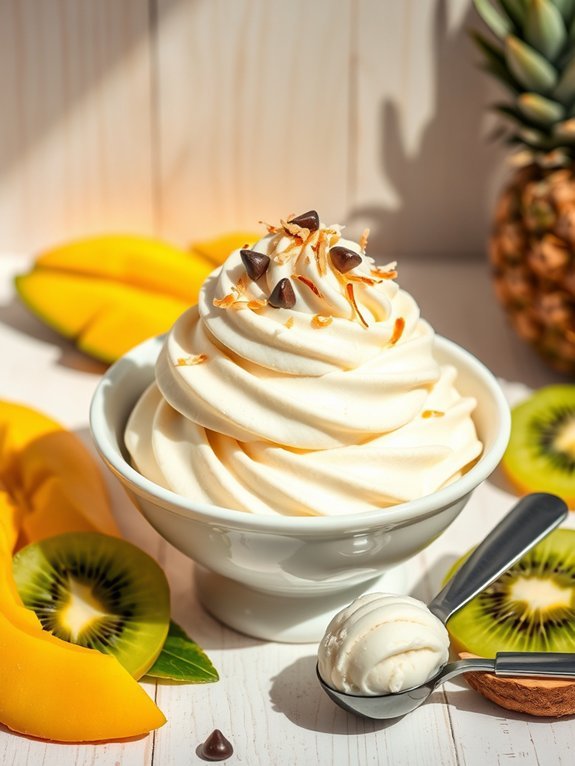
Creamy Coconut Milk Ice Cream is an incredibly versatile and delicious dessert that’s perfect for any vegan diet. Made with rich coconut milk, this ice cream is naturally dairy-free and packed with flavor. The creamy texture mimics traditional ice cream, making it a favorite for those looking for a rejuvenating treat on a warm day or just a delightful dessert to satisfy their sweet tooth.
This recipe is simple and requires minimal ingredients, so you can whip up a batch in no time. Infused with the natural sweetness of maple syrup and the subtle flavors of vanilla, this creamy delight will impress both vegan and non-vegan friends alike. Pair it with fresh fruit, chocolate sauce, or just enjoy it on its own for a guilt-free indulgence.
Ingredients:
- 2 cans full-fat coconut milk
- 3/4 cup maple syrup
- 1 tablespoon vanilla extract
- 1/4 teaspoon sea salt
- Optional: 1 cup shredded coconut or other mix-ins (like chocolate chips or fruit)
To make the ice cream, start by placing the coconut milk, maple syrup, vanilla extract, and sea salt into a blender. Blend the mixture until it’s smooth and well combined. If you want to add any mix-ins, such as shredded coconut or chocolate chips, stir them in by hand after blending.
Pour the mixture into an ice cream maker and churn according to the manufacturer’s instructions until it reaches a soft-serve consistency. Transfer the ice cream to a lidded container and freeze for at least 4 hours or until firm.
For best results, make sure to chill your coconut milk in the refrigerator overnight for maximum creaminess before blending. If you don’t have an ice cream maker, pour the mixture into a shallow dish and stir it every 30 minutes until it reaches the desired consistency.
Additionally, feel free to experiment with different flavor variations by incorporating other extracts or fruits, ensuring your ice cream experience is delightful and uniquely yours.
Rich Vegan Chocolate Cake

Indulging in a rich vegan chocolate cake doesn’t mean sacrificing flavor or texture. This decadent dessert is a perfect treat for any occasion, from casual gatherings to elegant celebrations. Using simple plant-based ingredients, this recipe guarantees everyone—vegans and non-vegans alike—will be reaching for seconds.
Plus, it’s an easy recipe that doesn’t require any complicated techniques, making it perfect for both novice and experienced bakers.
This vegan chocolate cake is moist, fluffy, and packed with deep chocolate flavor. It leverages the natural sweetness of ingredients like maple syrup and the richness of cocoa powder to create a dessert that satisfies any chocolate lover’s cravings. Once baked, you can top it with a velvety vegan frosting or enjoy it plain, perhaps dusted with powdered sugar for a simple yet elegant touch.
Ingredients:
- 1 ½ cups all-purpose flour
- 1 cup granulated sugar
- 1/3 cup unsweetened cocoa powder
- 1 tsp baking soda
- ½ tsp salt
- 1 cup almond milk (or any plant-based milk)
- 1/3 cup vegetable oil (or melted coconut oil)
- 1 tbsp apple cider vinegar
- 1 tsp vanilla extract
In a large mixing bowl, combine the flour, sugar, cocoa powder, baking soda, and salt, and whisk until well blended. In a separate bowl, mix the almond milk, vegetable oil, apple cider vinegar, and vanilla extract.
Pour the wet ingredients into the dry ingredients and mix until just combined, being careful not to overmix. Pour the batter into a greased 9-inch round cake pan and bake in a preheated oven at 350°F (175°C) for about 30-35 minutes or until a toothpick inserted in the center comes out clean.
For a richer flavor, consider adding a splash of espresso or coffee to the wet ingredients—this will enhance the chocolate taste even further. Allow the cake to cool completely before frosting it to prevent melting.
Also, you can experiment with various toppings, like fresh berries or a sprinkle of sea salt, to elevate the presentation and flavor profile. If you’d like to layer the cake, double the recipe and bake in two pans for a beautiful layered treat!
Recommended Items
Get ready to whip up some delicious vegan desserts with these fantastic product and equipment recommendations!
Zesty Lemon Blueberry Bars
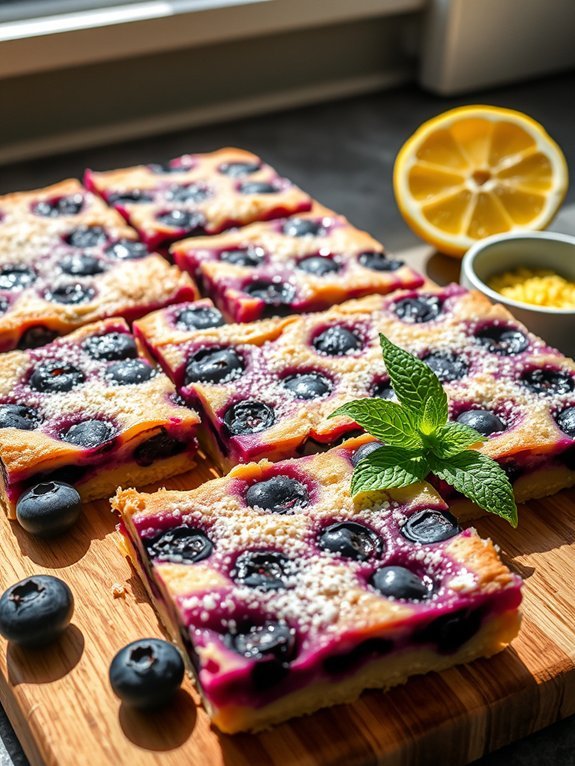
Zesty Lemon Blueberry Bars are a delightful and invigorating vegan treat that combines the bright, tangy flavor of lemon with the sweet burst of blueberries. These bars are perfect for summer gatherings, picnics, or whenever you crave a sweet yet tart dessert. Not only are they easy to prepare, but they also make excellent snacks for those looking for healthier alternatives to traditional desserts.
The base of these bars is made from oats and almond flour, which provides a wholesome, nutty flavor. The filling consists of a zesty lemon curd that’s enhanced with fresh blueberries, creating a beautiful contrast of colors and tastes. These bars aren’t just delicious but also packed with nutrients, making them a guilt-free indulgence that everyone will love.
- 1 cup rolled oats
- 1 cup almond flour
- 1/4 cup coconut oil, melted
- 1/4 cup maple syrup
- 1/4 teaspoon salt
- 1/4 teaspoon baking powder
- Zest of 1 lemon
- 1/2 cup fresh blueberries
- 1/4 cup lemon juice (freshly squeezed)
- 1 tablespoon cornstarch
- 1/4 cup sugar or coconut sugar
Preheat your oven to 350°F (175°C) and line an 8×8-inch baking dish with parchment paper. In a large mixing bowl, combine the rolled oats, almond flour, melted coconut oil, maple syrup, salt, baking powder, and lemon zest until well blended. Press half of this mixture into the bottom of the prepared baking dish to form the crust.
In a separate bowl, mix together the lemon juice, cornstarch, and sugar until smooth, then gently fold in the fresh blueberries. Pour this lemon blueberry filling over the crust, and finally, crumble the remaining oat mixture on top. Bake for 25-30 minutes or until the top is golden brown, then allow it to cool completely before slicing into bars.
For best results, make sure to use fresh blueberries, as they provide the best flavor and texture. If you want a stronger lemon flavor, feel free to increase the amount of lemon zest or juice. Additionally, these bars can be refrigerated to solidify further, making them easier to cut and serving them chilled enhances their invigorating qualities.
Enjoy these tasty treats with a dusting of powdered sugar on top for an extra special touch!
No-Bake Peanut Butter Cookies
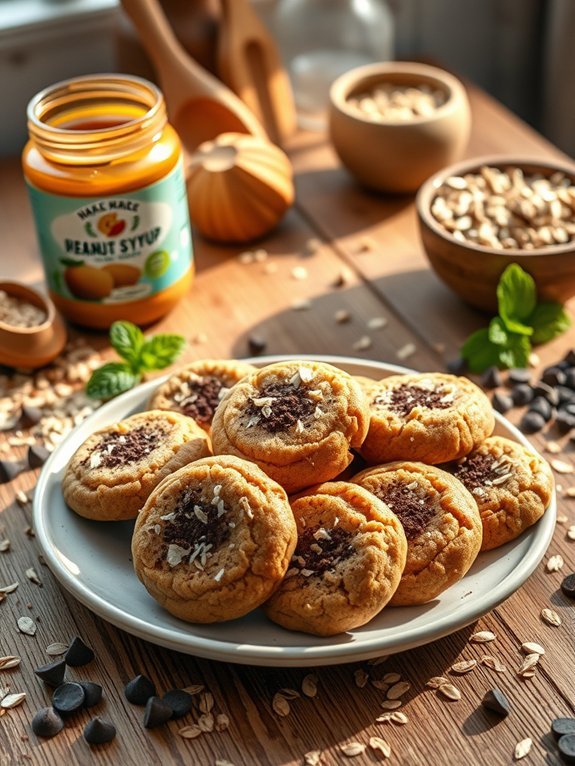
No-bake peanut butter cookies are the perfect treat for those craving a delicious dessert without the hassle of baking. They’re quick and easy to make, requiring minimal ingredients, and are sure to satisfy your sweet tooth.
The rich, creamy flavor of peanut butter combined with the sweetness of maple syrup or agave nectar creates a delightful balance that everyone will love. Plus, these cookies are vegan-friendly, making them suitable for a variety of dietary preferences.
To make these no-bake cookies, all you need is a mixing bowl and a few simple ingredients. The process involves mixing the ingredients together, rolling them into balls, and then chilling them in the refrigerator until firm. They can be enjoyed as a quick snack or dessert and are perfect for parties, potlucks, or casual gatherings.
With their chewy texture and rich flavor, these peanut butter cookies are sure to become a favorite in your household.
Ingredients:
- 1 cup natural peanut butter
- 1/2 cup maple syrup or agave nectar
- 1 cup rolled oats
- 1/2 cup unsweetened cocoa powder (optional)
- 1/2 cup shredded coconut (optional)
- 1 teaspoon vanilla extract
- A pinch of salt
In a large mixing bowl, combine the peanut butter, maple syrup (or agave nectar), vanilla extract, and salt. Mix well until the mixture is smooth.
Gradually add the rolled oats, cocoa powder, and shredded coconut (if using), stirring until all ingredients are fully incorporated. Once the mixture is well combined, scoop out spoonfuls and roll them into balls.
Place the cookie balls on a parchment-lined tray or plate and refrigerate for at least 30 minutes to set.
For an extra touch, consider adding mix-ins such as chocolate chips, chopped nuts, or dried fruit to the cookie dough for added texture and flavor. If the mixture is too sticky, you can add a bit more oats or shredded coconut until you reach your desired consistency.
Store the cookies in an airtight container in the refrigerator for about a week, or freeze them for longer enjoyment. Enjoy your delicious, homemade no-bake peanut butter cookies!
Refreshing Watermelon Sorbet
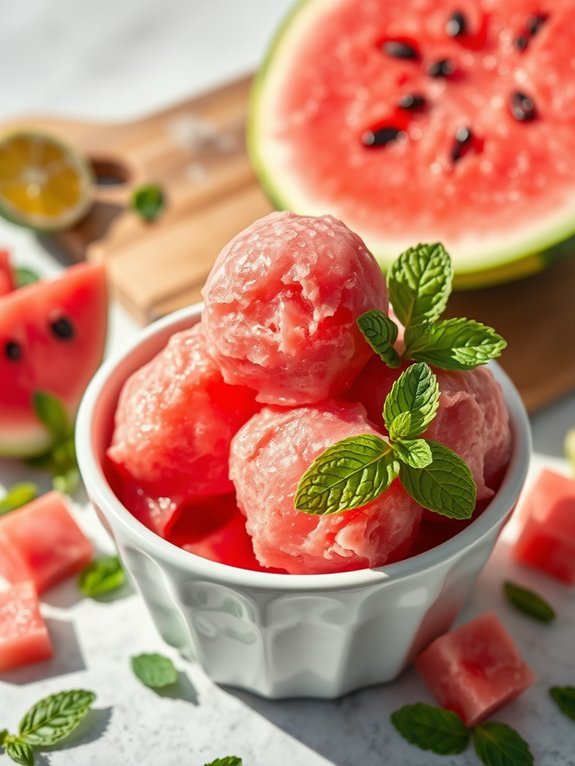
Watermelon sorbet is a delightful and revitalizing vegan dessert that’s perfect for hot summer days or any time you want to indulge in a light, fruity treat. Not only is this sorbet incredibly easy to prepare, but it’s also a healthier alternative to traditional ice cream.
With just a few simple ingredients, you’ll have a vibrant and flavorful dessert that showcases the natural sweetness of fresh watermelon. To make this watermelon sorbet, you’ll want to select a ripe, juicy watermelon to guarantee maximum flavor. The process involves pureeing the watermelon flesh, mixing it with a bit of lime juice for brightness, and then freezing the mixture until it reaches the perfect sorbet texture.
This recipe is so simple that you’ll be tempted to whip it up regularly, making it an excellent choice for gatherings, picnics, or a revitalizing treat for yourself.
- 4 cups of seedless watermelon, cubed and frozen
- 2 tablespoons of lime juice
- 2 tablespoons of agave syrup or maple syrup (optional, adjust according to sweetness)
- Pinch of salt
In a blender or food processor, combine the frozen watermelon cubes, lime juice, sweetener (if using), and a pinch of salt.
Blend until the mixture is smooth and creamy, scraping down the sides as necessary. Once fully blended, transfer the watermelon mixture to a shallow container and spread it evenly. Freeze for at least 2 hours, or until firm. Before serving, let it sit at room temperature for a couple of minutes to soften slightly, then scoop and enjoy!
For an even smoother texture, consider using an ice cream maker if you have one, as it will help aerate the sorbet while freezing. Additionally, feel free to experiment with flavors by adding mint leaves or blending in other fruits like strawberries or lime for a unique twist.
Make sure to store any leftovers in an airtight container in the freezer, and remember to let it sit out for a little while before serving again to achieve the desired consistency.
Step-by-Step Cooking Guide
Chewy Oatmeal Raisin Cookies

Chewy oatmeal raisin cookies are a beloved classic that perfectly balance the nutty flavor of oats with the sweetness of raisins. These cookies aren’t only delicious but also simple to make, allowing you to indulge in a homemade treat without any animal products.
The chewy texture comes from a perfect blend of oats and a few special ingredients that keep the cookies moist while adding a delightful chew. This recipe is ideal for both seasoned bakers and those new to the kitchen. With minimal preparation and time, you can whip up a batch of these delightful cookies to share with friends or savor all by yourself.
Enjoy them fresh from the oven or store them for a quick snack throughout the week—either way, they’re sure to satisfy your sweet tooth.
- 1 cup rolled oats
- 1 cup flour (whole wheat or all-purpose)
- 1/2 teaspoon baking soda
- 1/2 teaspoon cinnamon
- 1/4 teaspoon salt
- 1/2 cup brown sugar, packed
- 1/4 cup coconut oil, melted (or any neutral oil)
- 1/4 cup maple syrup (or agave nectar)
- 1 teaspoon vanilla extract
- 1/2 cup raisins
In a large mixing bowl, combine the rolled oats, flour, baking soda, cinnamon, and salt. In a separate bowl, whisk together the brown sugar, melted coconut oil, maple syrup, and vanilla extract until well combined. Slowly pour the wet ingredients into the dry, stirring until everything is mixed together.
Gently fold in the raisins, making sure they’re evenly distributed throughout the dough. Preheat your oven to 350°F (180°C) and line a baking sheet with parchment paper. Scoop tablespoon-sized amounts of dough onto the baking sheet, spacing them about 2 inches apart. Bake for 10-12 minutes, or until the edges are lightly golden.
Allow the cookies to cool on the baking sheet for a few minutes before transferring to a wire rack. When making these chewy oatmeal raisin cookies, be sure not to overbake them, as they’ll continue to cook slightly on the baking sheet after being removed from the oven.
For extra flavor, try adding chopped nuts like walnuts or pecans or substituting chocolate chips for some of the raisins for a delicious twist. These cookies store well in an airtight container, allowing you to enjoy their deliciousness for several days.
Silky Pumpkin Spice Pudding

Silky pumpkin spice pudding is a delectable vegan dessert that captures the essence of autumn in every spoonful. This creamy treat isn’t only indulgent but also easy to prepare, making it a fantastic option for those looking to impress guests at gatherings or simply enjoy a sweet treat at home.
Rich in flavor with a touch of warmth from the spices, this pudding elevates the humble pumpkin into a delightful dish that satisfies sweet cravings while keeping things plant-based.
The beauty of this recipe lies in its simplicity. Utilizing pumpkin puree as the primary ingredient, you’ll be able to whip up a luscious pudding that’s both satisfying and nourishing.
Perfect for a cozy evening or as a finishing touch to a festive meal, this dish is also versatile enough to allow for a variety of toppings, whether you’re craving a sprinkle of cinnamon, a dollop of coconut whipped cream, or some crunchy granola for texture.
Ingredients:
- 1 cup canned pumpkin puree
- 1 cup coconut milk
- 1/4 cup maple syrup
- 1/4 cup cornstarch
- 1 teaspoon vanilla extract
- 1 teaspoon pumpkin pie spice
- 1/4 teaspoon salt
In a medium saucepan, combine the pumpkin puree, coconut milk, maple syrup, cornstarch, vanilla extract, pumpkin pie spice, and salt. Whisk until smooth and well blended, then place the saucepan over medium heat.
Continuously stir the mixture, allowing it to thicken for about 5-7 minutes until it reaches a pudding-like consistency. Remove from heat and pour the pudding into serving bowls or cups.
Allow it to cool at room temperature before transferring to the refrigerator to chill for at least 1 hour.
When preparing silky pumpkin spice pudding, feel free to adjust the sweetness and spice level to your liking. You can add more maple syrup for extra sweetness or increase the amount of pumpkin pie spice for additional flavor.
Additionally, if you prefer a sweeter topping, opt for a coconut whipped cream or a sprinkle of coconut sugar to elevate the dessert further. This pudding stores well in the refrigerator for up to three days, making it a convenient make-ahead option for your dessert needs.
Fruity Chia Seed Pudding
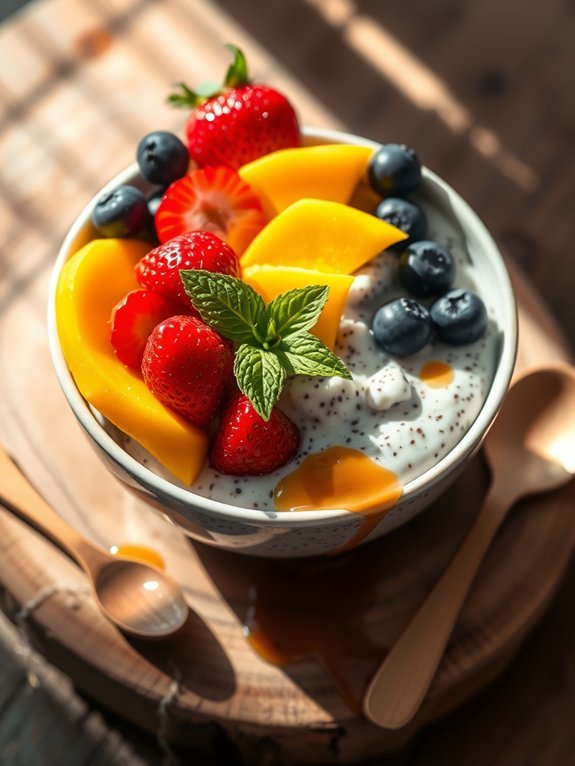
Fruity chia seed pudding is a delightful and nutritious dessert that isn’t only vegan but also incredibly easy to make. This creamy pudding is packed with fiber, omega-3 fatty acids, and antioxidants, making it an ideal guilt-free treat.
The beauty of chia seed pudding lies in its versatility; you can customize it with your favorite fruits, nut butters, or sweeteners to create a dish that suits your taste buds perfectly.
To prepare this lovely pudding, you’ll only need a handful of ingredients. The chia seeds are the stars of the show as they absorb liquid and expand, creating a pudding-like texture. When combined with plant milk and your choice of sweetener, along with fresh fruits, you have a wholesome dessert that can be enjoyed any time of the day.
Plus, this dish can be made ahead of time, making it perfect for meal prep or entertaining guests.
- 1/4 cup chia seeds
- 1 cup coconut milk (or any plant milk of your choice)
- 2 tablespoons maple syrup (or sweetener of choice)
- 1/2 teaspoon vanilla extract
- 1/2 cup fresh fruits (such as berries, banana slices, or mango)
In a mixing bowl, combine the chia seeds, plant milk, maple syrup, and vanilla extract. Whisk together until all the ingredients are well incorporated.
Allow the mixture to sit for about 10 minutes, then whisk again to break up any clumps of chia seeds. Cover the bowl and refrigerate for at least 2 hours or overnight until the pudding has thickened.
Once set, layer your chia pudding with fresh fruits in a serving cup or bowl and enjoy!
For best results, remember to give your chia seed mixture a good stir after the initial 10-minute wait to avoid any clumps. Feel free to experiment with different plant-based milks and sweeteners to discover your favorite combination.
You can also add toppings like granola, nuts, or a sprinkle of cinnamon for added flavor and texture. This recipe is quite forgiving, so have fun and get creative with your favorite fruits!
Indulgent Almond Joy Energy Bites
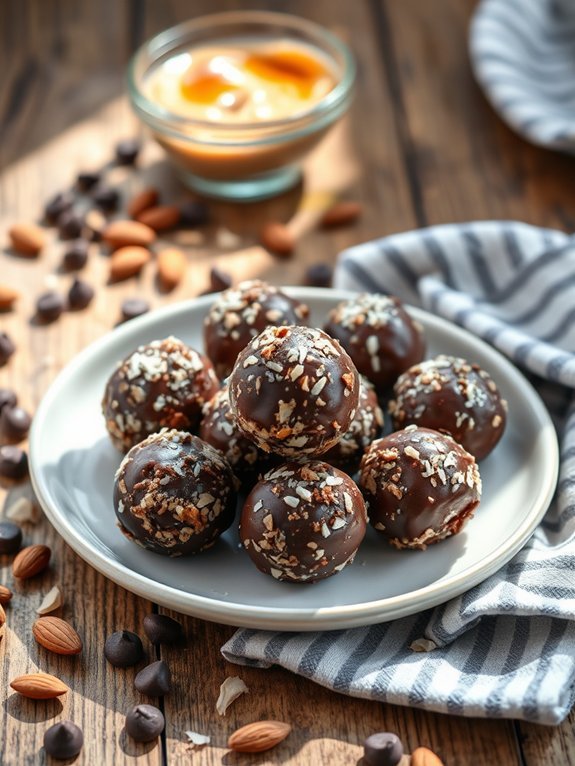
Indulgent Almond Joy Energy Bites are a delectable and nutritious treat that combines the classic flavors of chocolate, coconut, and almonds. These no-bake energy bites are perfect for satisfying your sweet tooth without the guilt. Packed with wholesome ingredients, they provide a boost of energy and are perfect for a quick snack, post-workout refuel, or even a delightful dessert option.
Making these bites is incredibly simple and requires no special cooking skills, making it a fun activity for the whole family. In just a matter of minutes, you can whip up a batch of these tasty energy bites. The combination of almond butter and shredded coconut creates a creamy base that resembles the traditional Almond Joy candy bar, while the dark chocolate chips add a rich, indulgent touch.
These energy bites aren’t only vegan and gluten-free, but they can also be easily customized to suit your personal taste preferences. So, gather your ingredients, and let’s get started on making these delightful snacks!
- 1 cup almond butter
- 1/2 cup maple syrup
- 1 cup shredded unsweetened coconut
- 1 cup rolled oats
- 1/2 cup dark chocolate chips (vegan)
- 1/2 cup chopped almonds
- 1 teaspoon vanilla extract
- A pinch of salt
In a large mixing bowl, combine the almond butter, maple syrup, and vanilla extract. Mix until smooth.
Then, add in the shredded coconut, rolled oats, dark chocolate chips, chopped almonds, and a pinch of salt. Stir the mixture until all ingredients are well combined. Once the mixture is ready, use your hands to roll portions into bite-sized balls, approximately 1 inch in diameter.
Place the energy bites on a lined baking sheet and refrigerate for at least 30 minutes to firm up before serving.
When creating these energy bites, feel free to experiment with different add-ins like your favorite nuts, seeds, or dried fruits for a unique twist. If you find the mixture is a bit dry, you can add a splash of plant-based milk or an extra drizzle of maple syrup to help it hold together.
Store your energy bites in an airtight container in the refrigerator, where they can last for up to 1 week—if they last that long, that is! Enjoy your indulgent yet health-conscious treat!


