This post may contain affiliate links. Please read our policy page.
When you’re in the mood for delicious dips, these 12 recipes will elevate your chips, veggies, and snacks! From classic guacamole and creamy spinach artichoke dip to tangy ranch and spicy salsa roja, you’ll find something for every craving. Don’t forget the roasted red pepper hummus and flavor-packed warm cheese and chorizo dip that are crowd-pleasers. Try the black bean dip and sweet potato maple dip for a tasty twist. There’s plenty more to explore!
Classic Guacamole
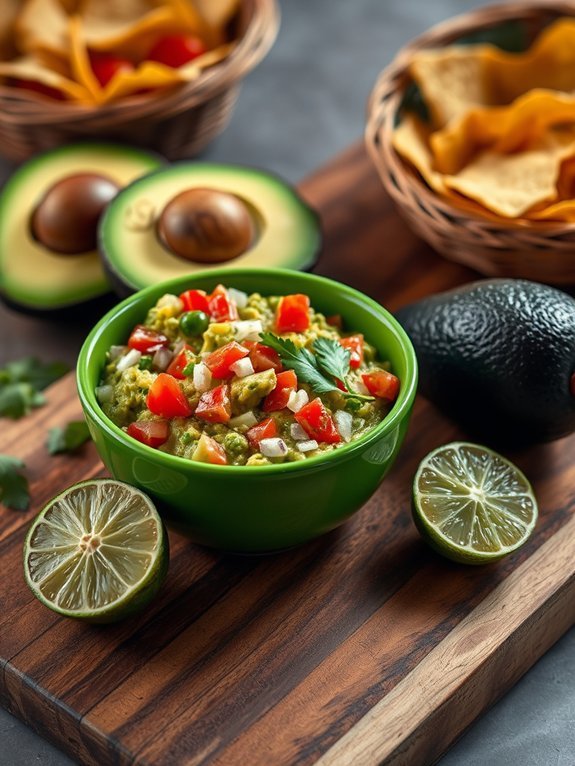
Classic guacamole is a staple in Mexican cuisine and a beloved dip that brings a burst of flavor to any gathering. With its creamy texture and zesty taste, guacamole is perfect for pairing with tortilla chips, adding to tacos, or simply serving as a revitalizing side dish. The beauty of guacamole lies in its simplicity, allowing the fresh ingredients to shine through with every bite.
To create a truly authentic guacamole, it’s important to use ripe avocados, which provide the rich, buttery base for the dip. Pairing them with fresh ingredients like lime juice, cilantro, and diced tomatoes enhances the flavor profile, making the final product a bright and vibrant indulgence. Whether you’re hosting a fiesta or just craving a flavorful snack, this classic guacamole recipe is sure to be a crowd-pleaser.
Ingredients:
- 2 ripe avocados
- 1 small onion, finely chopped
- 1 ripe tomato, diced
- 1 lime (juiced)
- 1 clove garlic, minced
- 1/4 cup fresh cilantro, chopped
- Salt to taste
- Pepper to taste
To make the guacamole, start by cutting the avocados in half and removing the pit. Scoop the flesh into a mixing bowl and mash it with a fork until you achieve your desired level of creaminess. Add the chopped onion, diced tomato, lime juice, minced garlic, and chopped cilantro to the bowl. Season with salt and pepper, then stir gently to combine all the ingredients evenly.
Taste and adjust the seasoning as needed before serving. For the best flavor, allow your guacamole to sit for about 10-15 minutes before serving, as this will give the ingredients time to meld together. If you want to prevent the guacamole from browning, press plastic wrap directly onto the surface of the dip or store it in an airtight container.
Additionally, feel free to customize your guacamole by adding ingredients like jalapeños for heat or diced mango for a sweet twist!
Creamy Spinach and Artichoke Dip

Creamy Spinach and Artichoke Dip is a classic appetizer that never fails to impress. This savory and velvety dip is the perfect blend of creamy cheese, tender spinach, and luscious artichokes, making it a crowd-pleaser for any gathering. Whether you’re hosting a game night or a family get-together, this dip is sure to be the highlight of your appetizer table. Serve it warm with tortilla chips, fresh vegetables, or toasted bread for dippable goodness.
This recipe requires just a few simple ingredients that come together to create a rich, flavorful dip. The combination of cream cheese and sour cream gives it that luxurious texture, while garlic and parmesan elevate the taste. It’s an incredibly versatile dish that can be made ahead of time and baked just before serving, making it a fantastic option for busy hosts.
- 1 (10 oz) package frozen chopped spinach, thawed and drained
- 1 (14 oz) can artichoke hearts, drained and chopped
- 1 cup cream cheese, softened
- ½ cup sour cream
- ½ cup mayonnaise
- 1 cup shredded mozzarella cheese
- ½ cup grated Parmesan cheese
- 2 cloves garlic, minced
- ½ teaspoon salt
- ¼ teaspoon black pepper
- ¼ teaspoon red pepper flakes (optional)
Preheat your oven to 350°F (175°C). In a mixing bowl, combine the softened cream cheese, sour cream, and mayonnaise until smooth. Stir in the drained spinach, artichoke hearts, mozzarella cheese, Parmesan cheese, minced garlic, salt, black pepper, and red pepper flakes, mixing until well combined.
Transfer the mixture to a baking dish and spread it evenly. Bake for 25-30 minutes or until the dip is bubbling and golden on top. Serve warm.
For an extra touch, consider customizing your Creamy Spinach and Artichoke Dip by adding different cheeses like fontina or gouda for a smoky flavor. Additionally, feel free to include other ingredients such as sundried tomatoes or cooked bacon for added depth.
This dip keeps well in the refrigerator and can be reheated easily, so make extra for leftovers, and enjoy it anytime you crave something cheesy and delicious!
Spicy Salsa Roja
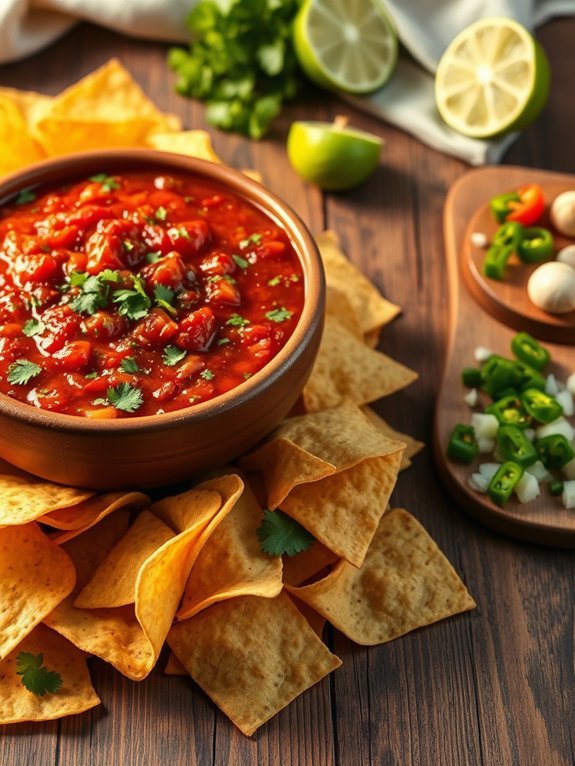
Spicy Salsa Roja is a vibrant and flavorful dip that brings a burst of heat and tang to any gathering. This delicious salsa is perfect for pairing with tortilla chips, topping tacos, or as a zesty addition to grilled meats. The combination of fresh tomatoes, spicy chilies, and aromatic herbs will elevate your snacking experience and keep your taste buds dancing.
Making Salsa Roja isn’t only easy but also fun. It’s a great opportunity to explore the classic flavor profile of Mexican cuisine right in your kitchen. With just a few simple ingredients and a quick blend, you can whip up a fresh batch in no time.
Whether you prefer it mild or fiery, you can adjust the level of heat by adding or reducing the number of chilies to suit your palate.
- 6 ripe tomatoes
- 2-3 jalapeño or serrano chilies (adjust according to heat preference)
- 1 small onion, chopped
- 3 cloves garlic, minced
- 1/4 cup fresh cilantro, chopped
- Juice of 1 lime
- Salt to taste
Start by roasting the tomatoes and chilies on a hot skillet or grill until they’re charred and blistered. Once they’ve cooled slightly, peel the tomatoes and stem the chilies.
In a blender or food processor, combine the roasted tomatoes, chilies, chopped onion, minced garlic, cilantro, lime juice, and salt. Blend until you reach your desired consistency, whether chunky or smooth, then taste and adjust the seasoning if needed.
For an extra flavor punch, consider adding a touch of cumin or a pinch of smoked paprika to your salsa. Additionally, let your salsa sit for at least 30 minutes before serving, as this will allow the flavors to meld beautifully.
Remember that fresh ingredients make all the difference, so choose ripe tomatoes and fresh herbs for the best taste. Enjoy your Spicy Salsa Roja and don’t be afraid to experiment with different types of chilies to find your perfect balance of heat!
Roasted Red Pepper Hummus
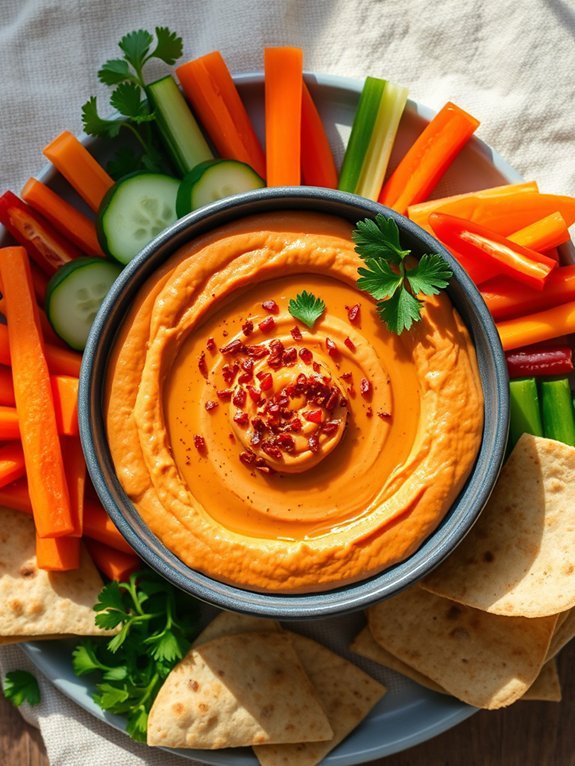
Roasted Red Pepper Hummus is a vibrant and flavorful dip that’s perfect for parties, gatherings, or just a simple snack at home. This creamy and tangy spread combines the rich flavors of roasted red peppers with earthy chickpeas and a touch of garlic, making it a delightful addition to your appetizer spread. Not only is it delicious, but it also packs a nutritious punch, offering a great source of protein and fiber.
Making Roasted Red Pepper Hummus at home is easier than you might think, and it allows you to control the flavors to suit your taste. You can use store-bought roasted red peppers, or you can roast your own for a deeper flavor. This dip is versatile and can be served with pita chips, fresh vegetables, or spread on sandwiches and wraps, making it a crowd-pleaser that works in many ways.
- 1 can (15 oz) chickpeas, drained and rinsed
- 1 cup roasted red peppers, chopped
- 2 tablespoons tahini
- 2 tablespoons lemon juice
- 1 clove garlic, minced
- 2 tablespoons olive oil
- 1 teaspoon ground cumin
- Salt, to taste
- Optional: red pepper flakes for garnish
In a food processor, combine chickpeas, roasted red peppers, tahini, lemon juice, minced garlic, olive oil, ground cumin, and salt. Blend until the mixture is smooth and creamy, scraping down the sides of the bowl as necessary. If the hummus is too thick, you can add a tablespoon of water at a time until you reach the desired consistency.
Taste and adjust seasonings as necessary before transferring to a serving bowl. For extra flavor, consider adding a splash of smoked paprika or using fresh herbs like parsley or cilantro. If you prefer a smoother texture, you can peel the chickpeas before blending, although this step is optional.
Allow the hummus to chill in the refrigerator for at least 30 minutes before serving to let the flavors meld together. Additionally, garnish with a drizzle of olive oil and a sprinkle of red pepper flakes for a vibrant presentation. Enjoy!
Recommended Items
Get ready to elevate your snack game with our top picks for dip-making essentials!
Products
Tangy Ranch Dip

Tangy Ranch Dip is a classic crowd-pleaser that adds a delightful zest to any gathering. Perfect as a snack for game day or as a companion for fresh vegetables and chips, this dip is bursting with flavors that everyone will love.
Whether you’re hosting a party or just looking for a quick and easy appetizer, this ranch dip comes together effortlessly and can be made ahead of time for added convenience.
The beauty of Tangy Ranch Dip lies in its simplicity and the balance of flavors. You’ll find the creamy texture complemented by tangy buttermilk and an array of herbs that infuse every bite with freshness.
With just a few ingredients, you can whip up this dip in no time and watch it disappear as guests go back for more!
Ingredients:
- 1 cup sour cream
- 1/2 cup mayonnaise
- 1/4 cup buttermilk
- 1 tablespoon onion powder
- 1 tablespoon garlic powder
- 1 tablespoon dried dill weed
- 1 teaspoon dried parsley
- 1 teaspoon dried chives
- 1 teaspoon salt
- 1/2 teaspoon black pepper
- 1 teaspoon lemon juice (optional)
In a mixing bowl, combine the sour cream, mayonnaise, and buttermilk. Stir until smooth, then add in the onion powder, garlic powder, dill weed, parsley, chives, salt, black pepper, and lemon juice if using.
Mix everything together until well incorporated, then cover the bowl with plastic wrap or a lid and refrigerate for at least 30 minutes to allow the flavors to meld together.
For best results, prepare your Tangy Ranch Dip a few hours or even the day before serving to enhance the flavors. Remember to taste the dip before serving; you may want to adjust the seasoning or add a dash of hot sauce for an extra kick if desired.
Served chilled, it’s a great pairing not just for veggies and chips but also for drizzling over grilled meats or as a spread for sandwiches. Enjoy your flavorful creation!
Dip Recipe Overview
Tzatziki Sauce
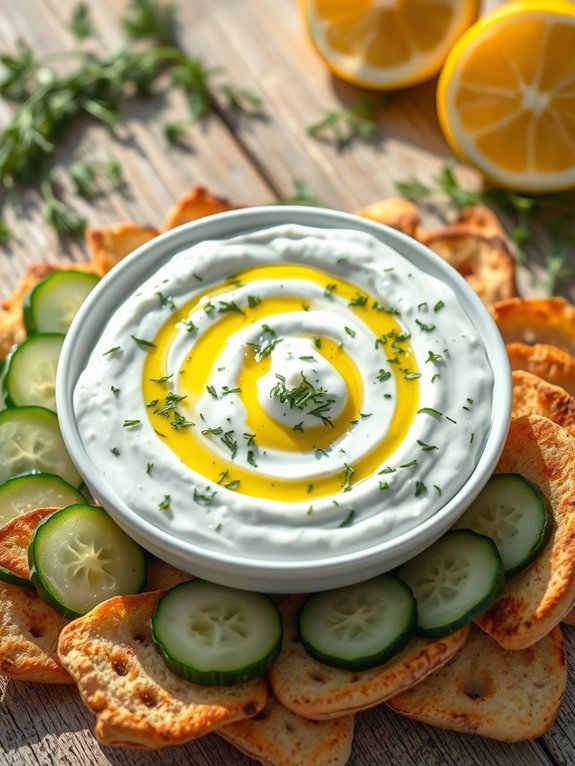
Tzatziki sauce is a revitalizing Greek dip that’s perfect for summer gatherings or as a condiment for various dishes. This yogurt-based sauce combines creamy Greek yogurt with crunchy cucumbers and aromatic garlic, creating a delightful blend of flavors.
Traditionally served alongside grilled meats or pita bread, tzatziki isn’t only versatile but also healthy, making it an excellent choice for those looking to add a delicious yet nourishing element to their meals.
Making tzatziki sauce is simple and requires minimal ingredients. The key to a great tzatziki is to use high-quality Greek yogurt and properly prepared cucumbers. By removing excess moisture from the cucumbers, you guarantee that the sauce doesn’t become watery.
Whether served as a dip or a sauce, tzatziki is bound to impress family and guests alike with its cool, tangy, and garlicky flavor.
- 1 cup Greek yogurt
- 1 medium cucumber, grated and drained
- 2 cloves garlic, minced
- 1 tablespoon olive oil
- 2 tablespoons fresh dill, chopped (or 1 tablespoon dried dill)
- 1 tablespoon white wine vinegar or lemon juice
- Salt and pepper to taste
In a mixing bowl, combine the Greek yogurt, grated and drained cucumber, minced garlic, olive oil, dill, and white wine vinegar or lemon juice. Stir the mixture until all ingredients are well combined.
Season with salt and pepper to taste, adjusting the flavors as needed. Once well-mixed, cover the tzatziki sauce and refrigerate for at least one hour to allow the flavors to meld together before serving.
When making tzatziki, consider using a box grater to finely grate the cucumber and then press it with a clean towel or cheesecloth to extract as much moisture as possible. This step is essential to avoid a watery dip.
Additionally, you can experiment with herbs like mint for a slightly different flavor profile or add a touch of cayenne pepper for some heat. Tzatziki can be made ahead of time and stored in the refrigerator for up to three days, making it a convenient option for entertaining.
Buffalo Chicken Dip

Buffalo chicken dip is a crowd-pleasing appetizer that combines the bold flavors of spicy buffalo sauce and creamy cheese, making it an irresistible hit at parties or game day gatherings. This dish is perfect for dipping with tortilla chips, celery sticks, or even crackers, allowing your guests to enjoy the smoky, savory flavor with a kick.
With its gooey texture and zesty profile, buffalo chicken dip is guaranteed to be the star of any appetizer table. Making this dip is incredibly easy and requires minimal cook time, which means you can whip it up quickly and have more time to socialize with your guests.
Whether you’re using shredded rotisserie chicken for convenience or cooking your chicken from scratch, this dip is versatile and customizable. You can adjust the level of heat by varying the amount of buffalo sauce used, making it suitable for both spice lovers and those who prefer a milder flavor.
- 2 cups shredded cooked chicken
- 1 cup cream cheese, softened
- 1/2 cup ranch dressing
- 1/2 cup buffalo sauce
- 1 cup shredded cheddar cheese
- 1/2 cup crumbled blue cheese (optional)
- 1/4 cup sliced green onions (for garnish)
In a mixing bowl, combine the shredded cooked chicken, softened cream cheese, ranch dressing, and buffalo sauce until well blended. Transfer the mixture to a baking dish, spreading it evenly, and then sprinkle the shredded cheddar cheese on top.
Bake in a preheated oven at 350°F (175°C) for about 20-25 minutes, or until the dip is hot and bubbly. If you like a crispy topping, broil it for an additional 2-3 minutes until the cheese is golden and slightly crisp.
When preparing buffalo chicken dip, feel free to customize it to your liking by adding extra spices, or by adjusting the ratio of ranch to buffalo sauce to achieve your perfect flavor. You can also use different types of cheese or even add some vegetables like chopped bell peppers or jalapeños for an extra crunch.
For leftovers, store in an airtight container in the refrigerator and reheat in the oven or microwave when ready to serve again. Enjoy!
French Onion Dip

French onion dip is a classic crowd-pleaser that’s perfect for parties, game days, or just an afternoon snack. Rich and creamy, this dip is made by blending caramelized onions with sour cream and mayonnaise to create a luscious, savory spread. The deep, sweet flavors of the onions meld beautifully with the tanginess of the sour cream, making every bite a delightful experience.
Served chilled with your favorite chips, veggies, or crackers, this dip always leaves guests asking for the recipe.
Making French onion dip at home is simple and requires just a few ingredients. While it can easily be found in stores, the homemade version stands out with its freshness and depth of flavor. Caramelizing the onions takes a bit of time, but the resulting dip is worth the effort as it brings out the natural sweetness of the onions, creating a rich base.
This dip can be made ahead of time, making it a convenient option for gatherings.
- 2 large onions, thinly sliced
- 2 tablespoons butter
- 1 tablespoon olive oil
- Salt to taste
- 1 cup sour cream
- 1 cup mayonnaise
- 1 teaspoon garlic powder
- 1 teaspoon onion powder
- 1 tablespoon fresh chives or parsley (optional, for garnish)
In a large skillet over medium heat, melt the butter and olive oil together. Add the sliced onions and a pinch of salt, stirring well. Cook the onions slowly for 20-30 minutes, stirring occasionally until they’re deeply caramelized and golden brown.
Once the onions are cooked, let them cool slightly. In a bowl, combine the cooled onions with sour cream, mayonnaise, garlic powder, and onion powder. Mix well until everything is evenly combined. Refrigerate for at least an hour before serving to allow the flavors to meld.
For best results, opt for slow-cooking the onions to achieve that deep, caramel color and richness. If you’re short on time, you can caramelize them over higher heat but be mindful to stir frequently to prevent burning.
Consider adding a splash of Worcestershire sauce or a pinch of smoked paprika for a different flavor profile. This dip can also be stored in an airtight container in the refrigerator for up to a week, making it a convenient make-ahead option for your next gathering.
Black Bean Dip
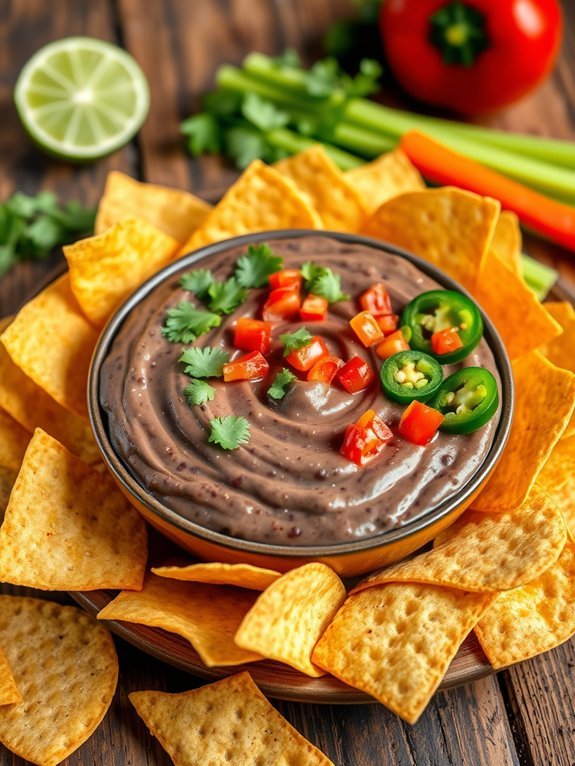
Black Bean Dip is a delicious and nutritious appetizer that packs a flavorful punch. Made mainly from black beans, this dip isn’t only rich in protein and fiber but also incredibly versatile, making it suitable for a variety of occasions.
Whether you’re hosting a casual gathering, preparing game-day snacks, or needing a quick bite during the week, Black Bean Dip perfectly complements tortilla chips, fresh vegetables, or can even be spread on a sandwich.
The beauty of this dish lies in its simplicity. With just a handful of ingredients and a few minutes of prep time, you can create a vibrant and satisfying dip that everyone will love.
Experiment with the seasoning to find your perfect flavor profile, and feel free to customize it with extras like diced tomatoes, jalapeños, or avocado for added texture and taste.
- 1 can (15 oz) black beans, rinsed and drained
- 1 tablespoon olive oil
- 1 clove garlic, minced
- 1 teaspoon ground cumin
- 1 teaspoon chili powder
- Juice of 1 lime
- Salt and pepper to taste
- Optional toppings: chopped cilantro, diced tomatoes, or sliced jalapeños
In a blender or food processor, combine the black beans, olive oil, garlic, cumin, chili powder, lime juice, salt, and pepper.
Blend until smooth and creamy, scraping down the sides as needed. If you prefer a chunkier texture, pulse a few times until you reach your desired consistency.
Taste and adjust the seasoning as needed before serving in a bowl.
Remember that Black Bean Dip not only tastes great fresh but also improves in flavor after sitting for a while.
Preparing it a few hours in advance allows the flavors to meld beautifully.
Additionally, feel free to refrigerate any leftovers in an airtight container; it can last for up to a week.
Pair your dip with a variety of sides and enjoy experimenting with add-ins to create your unique twist on this classic dish!
Avocado Feta Dip

Avocado Feta Dip is a deliciously creamy and tangy dip that’s perfect for any gathering or casual snacking. Combining the rich, buttery flavor of ripe avocados with the salty, crumbly texture of feta cheese, this dip isn’t only easy to make, but it also packs a punch of flavor.
Whether you serve it with fresh vegetables, pita chips, or spread it on sandwiches, this dip is sure to be a crowd-pleaser. Making this dip is a straightforward process that requires minimal effort and time, making it a favorite for busy hosts.
The fresh herbs and lemon juice elevate the dish, giving it a zesty finish that complements the ingredients beautifully. Once you’ve prepared this Avocado Feta Dip, you might find it hard to resist diving into the bowl before it even makes it to the table!
- 2 ripe avocados
- 1 cup feta cheese, crumbled
- 1 tablespoon olive oil
- 1 tablespoon lemon juice
- 1 clove garlic, minced
- 2 tablespoons fresh parsley, chopped
- Salt and pepper to taste
Start by cutting the avocados in half, removing the pit, and scooping the flesh into a mixing bowl. Add the crumbled feta cheese, olive oil, lemon juice, minced garlic, and chopped parsley. Mash the ingredients together with a fork or a potato masher to your desired consistency, whether smooth and creamy or a bit chunky.
Season with salt and pepper to taste, and serve immediately or refrigerate until ready to enjoy. When preparing Avocado Feta Dip, it’s important to use ripe avocados for the best flavor and texture.
To maintain freshness, prepare the dip just before serving, but if you need to make it in advance, cover the surface with plastic wrap to minimize browning. For added flair, consider topping the dip with extra crumbled feta or a sprinkle of chili flakes for a touch of heat. Enjoy this invigorating dip with your favorite snacks or as a spread in sandwiches and wraps!
Warm Cheese and Chorizo Dip

Warm cheese and chorizo dip is the perfect addition to any gathering, effortlessly blending the spicy, smoky flavors of chorizo with rich, creamy cheese. This dip not only packs a flavorful punch but also comes together quickly, making it an ideal choice for last-minute entertaining. Paired with tortilla chips, crusty bread, or fresh vegetables, this savory dip will have everyone reaching for more.
To make this dish even more delightful, consider adding some sautéed onions or fresh herbs like cilantro or green onions for an extra layer of flavor. Whether hosting a game day party, a casual get-together, or simply enjoying a cozy night in, warm cheese and chorizo dip is bound to impress your guests and elevate your snack game to a whole new level.
- 1 cup chorizo, casing removed and crumbled
- 1 cup cream cheese, softened
- 1 cup shredded cheddar cheese
- 1 cup shredded Monterey Jack cheese
- 1/2 cup diced tomatoes with green chilies, drained
- 1 teaspoon garlic powder
- 1 teaspoon onion powder
- 1 tablespoon fresh cilantro, chopped (optional)
- Tortilla chips, for serving
In a medium skillet over medium heat, cook the crumbled chorizo until browned and cooked through, about 5-7 minutes. Reduce the heat to low and add the cream cheese, stirring until melted and combined.
Gradually mix in the cheddar and Monterey Jack cheeses until fully melted and smooth. Finally, incorporate the diced tomatoes, garlic powder, onion powder, and cilantro, cooking for an additional 2-3 minutes until everything is heated through.
For the best results, guarantee you stir the dip constantly during cooking to prevent it from sticking to the bottom of the pan and to achieve a smooth consistency. You can also customize the dip by experimenting with different types of cheese or adding ingredients like jalapeños for an extra kick.
If you have leftovers, store them in an airtight container in the fridge and reheat gently in the microwave or on the stove, adding a splash of milk if it thickens too much.
Sweet Potato and Maple Dip

Sweet Potato and Maple Dip is a wonderfully creamy and sweet appetizer that makes for an irresistible snack or party treat. This dip combines the earthy flavor of sweet potatoes with the rich sweetness of maple syrup, resulting in a delightful blend that pairs perfectly with an array of dippers, from apple slices to pretzels and even crackers.
It’s not only delicious but also packed with nutrients, making it a guilt-free indulgence.
Making Sweet Potato and Maple Dip is easy and requires minimal preparation. The vibrant orange hue of the sweet potatoes adds visual appeal to your platter, and the combination of flavors will leave everyone wanting more. Serve it warm or cold, and watch as your guests are impressed by this unique twist on traditional dips.
Perfect for fall gatherings or any occasion that calls for a touch of sweetness, this dip is sure to become a favorite.
- 2 medium sweet potatoes
- 1/4 cup maple syrup
- 1/4 cup cream cheese, softened
- 1 tablespoon lemon juice
- 1 teaspoon cinnamon
- 1/4 teaspoon salt
- Optional: chopped pecans or walnuts for topping
Start by preheating your oven to 400°F (200°C).
Peel and cube the sweet potatoes, then place them on a baking sheet lined with parchment paper. Roast the sweet potatoes for about 25-30 minutes or until they’re fork-tender. Once cooked, allow them to cool slightly, then add to a mixing bowl along with the maple syrup, cream cheese, lemon juice, cinnamon, and salt.
Blend everything together using a hand mixer or blender until smooth and creamy, adjusting the sweetness to taste. Serve immediately or refrigerate before serving.
When preparing Sweet Potato and Maple Dip, it’s important to use fresh sweet potatoes for the best flavor and texture.
If you prefer a richer taste, try using mascarpone cheese instead of cream cheese. For extra depth, consider adding a dash of nutmeg or ginger alongside the cinnamon.
This dip can also be made in advance; simply store it in an airtight container in the refrigerator for up to three days, allowing the flavors to meld even further.
Enjoy your delicious dip with your favorite dippers!


