This post may contain affiliate links. Please read our policy page.
When you need energy, high-protein snacks are a game-changer. Greek yogurt with nuts and berries offers rich flavors, while hard-boiled eggs provide convenience. Cottage cheese and pineapple make a tasty pairing, and tuna salad lettuce wraps are both nutritious and low-carb. Don’t forget protein bars, quinoa salad, chia seed pudding, and peanut butter rice cakes for variety. Ultimately, turkey and cheese roll-ups are perfect for quick bites. Discover even more options to keep you fueled throughout your day.
Greek Yogurt With Nuts and Berries
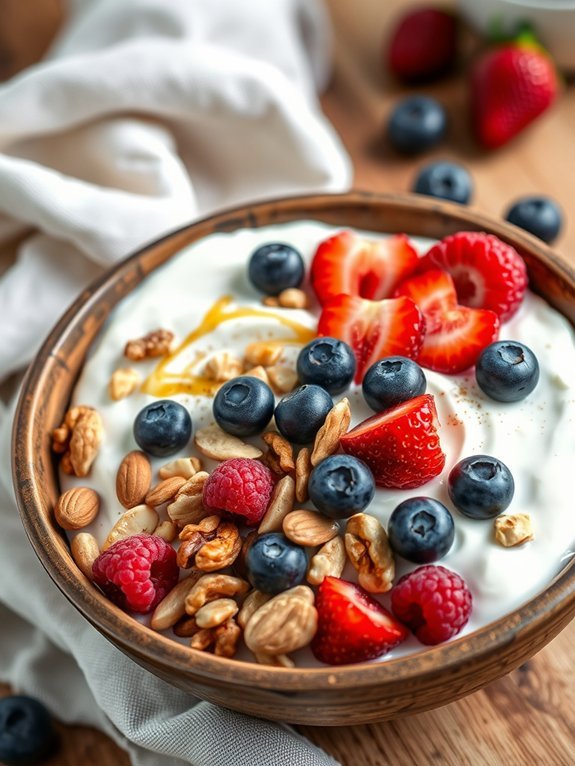
Greek yogurt with nuts and berries is a delightful and nutritious snack that packs a powerful protein punch. This versatile dish isn’t only delicious but also very easy to prepare, making it an ideal choice for a quick breakfast, an energizing mid-day snack, or a healthy dessert.
Greek yogurt serves as the creamy base enriched with protein, while the nuts add a lovely crunch, and the berries provide a splash of sweetness and color. Choosing high-quality ingredients can elevate this simple snack to a satisfying meal.
Opt for plain Greek yogurt to avoid added sugars, and feel free to mix and match your favorite nuts and berries. Almonds and walnuts are popular choices for their texture and flavor, while strawberries, blueberries, and raspberries can offer revitalizing juiciness. Together, they create a delightful combination that tantalizes the taste buds and nourishes the body.
- 1 cup plain Greek yogurt
- 1/4 cup mixed nuts (almonds, walnuts, or your choice)
- 1/2 cup mixed berries (strawberries, blueberries, raspberries)
- 1 tablespoon honey or maple syrup (optional)
- A sprinkle of cinnamon (optional)
In a medium-sized bowl, scoop out the Greek yogurt and smooth it into an even layer. Top the yogurt with the mixed nuts and berries, ensuring a nice distribution across the surface. If desired, drizzle with honey or maple syrup and lightly sprinkle with cinnamon for added flavor.
Serve immediately and enjoy this colorful and nutrient-dense snack. For added versatility, you can customize this recipe to suit your taste preferences or dietary needs.
Consider incorporating seeds like chia or flax for an extra boost of omega-3 fatty acids, or swap out the nuts for granola for a more textured approach. If you’re prepping this ahead of time, keep the nuts and berries separate until you’re ready to serve to maintain the crunchiness of the nuts and the freshness of the berries.
Hard-Boiled Eggs
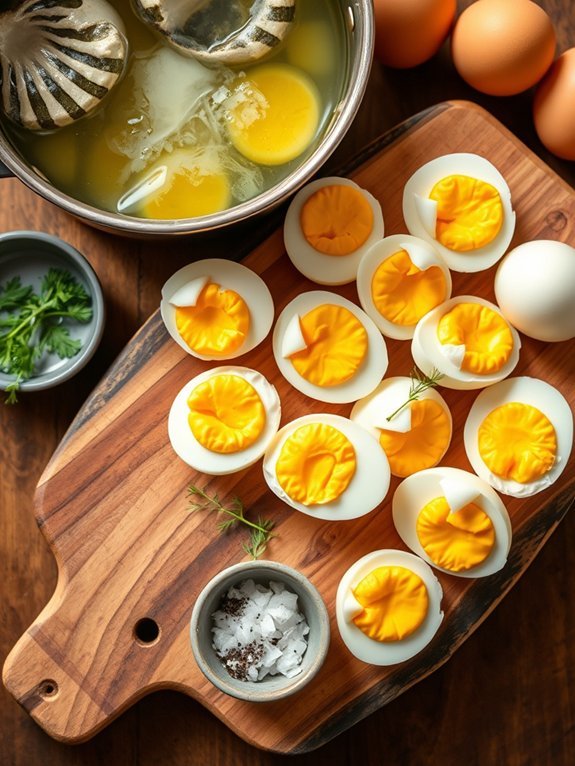
Hard-boiled eggs are an excellent high-protein snack that can be enjoyed at any time of the day. They aren’t only versatile but also incredibly easy to prepare. Boiling eggs provides a creamy yolk and a satisfying texture, making them a popular choice for those looking for a healthy snack option.
Whether you’re on the go, looking for a post-workout boost, or simply wanting something nutritious, hard-boiled eggs are a perfect solution.
To achieve the ideal hard-boiled egg, starting with fresh eggs is vital. This helps guarantee a smooth peeling experience later on. The key to boiling eggs is to control the cooking time carefully, as overcooking can lead to a green ring around the yolk and a rubbery texture.
With some simple steps, you can create perfectly hard-boiled eggs that are delicious on their own or can be transformed into a variety of dishes—like salads or deviled eggs.
- Fresh eggs
- Water
- Ice (for ice bath)
Place the eggs in a single layer in a pot, and add enough water to cover them by about an inch. Bring the water to a rolling boil over medium-high heat.
Once boiling, cover the pot and turn the heat off; let the eggs sit in the hot water for about 9-12 minutes, depending on your preferred level of doneness. Afterward, transfer the eggs to a bowl of ice water to halt the cooking process, then cool completely before peeling.
For easy peeling, it helps to let the hard-boiled eggs cool completely in the ice bath for a minimum of 5 minutes. If you find peeling difficult, you can gently tap the egg on a hard surface to create cracks before rolling it back and forth to loosen the shell.
For even easier peeling, consider buying slightly older eggs as they tend to peel more easily than fresh ones. Additionally, you can try adding a splash of vinegar or baking soda to the boiling water, which may help separate the membrane from the shell.
Cottage Cheese and Pineapple
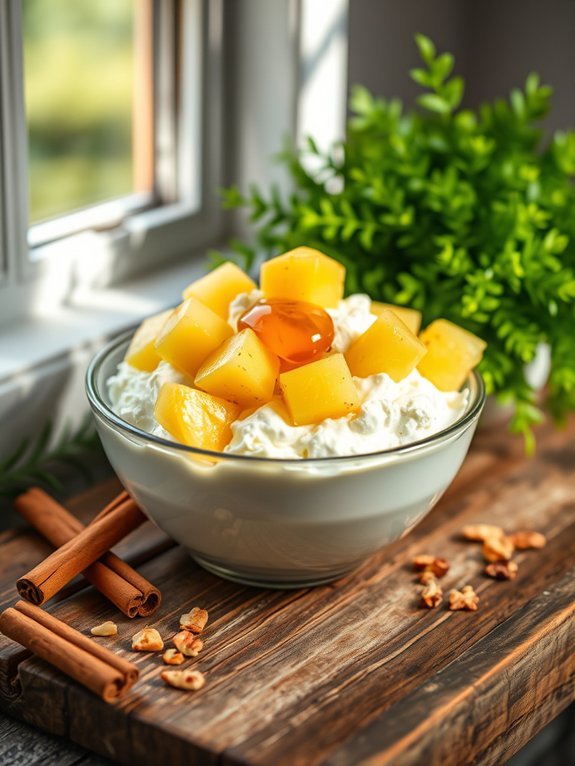
Cottage cheese and pineapple is a delightful combination that marries creamy texture with sweet, juicy flavor, making it an ideal high-protein snack. This dish isn’t only simple to prepare but also incredibly versatile. You can enjoy it as a quick breakfast, a post-workout snack, or even as a light dessert. By blending the richness of cottage cheese with the tropical sweetness of pineapple, you create a revitalizing treat that satisfies your taste buds while packing a nutritional punch.
To prepare this dish, you’ll want to use fresh or canned pineapple, depending on what’s available. If fresh, choose a ripe pineapple for the best taste; if canned, opt for versions packed in juice or water to keep the dish light and healthy. Cottage cheese, a great source of protein, pairs perfectly with pineapple for a snack that fuels your body while keeping your cravings at bay.
- 1 cup cottage cheese
- 1 cup pineapple chunks (fresh or canned)
- 1 tablespoon honey or maple syrup (optional)
- A sprinkle of cinnamon or chopped nuts for garnish (optional)
In a medium-sized bowl, combine the cottage cheese and pineapple chunks. If you like a hint of sweetness, drizzle the honey or maple syrup over the mixture and gently fold to combine. After mixing, you can either serve it immediately or chill in the refrigerator for a rejuvenating cool snack.
For added texture and flavor, consider tossing in a handful of chopped nuts or sprinkling some cinnamon on top before serving. If using canned pineapple, remember to drain the juice to avoid extra moisture that can make the dish watery.
Additionally, feel free to experiment with different flavors by adding a dash of vanilla extract or mixing in other fruits like berries or peaches to create your own signature variation of this nutritious snack.
Tuna Salad Lettuce Wraps
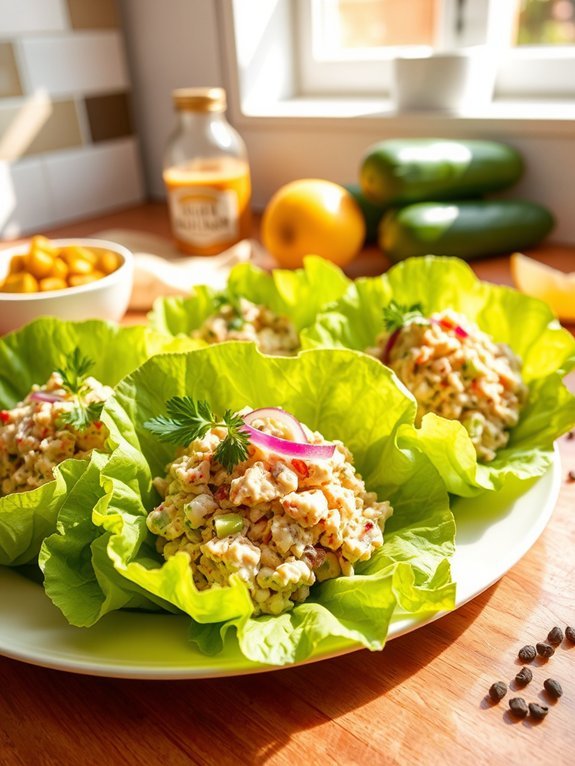
Tuna Salad Lettuce Wraps are a perfect high-protein snack that’s not only delicious but also light and invigorating.
These wraps combine the nutritious benefits of tuna with the crispness of lettuce, creating a hand-held treat that’s great for quick lunches, snacks, or a healthy appetizer. This recipe is incredibly versatile, making it easy for you to customize the flavors to suit your palate.
Using canned tuna as the base, you can incorporate various ingredients like crunchy vegetables, creamy dressing, and zesty spices. The invigorating lettuce wraps provide a perfect vehicle for the savory tuna mixture, allowing you to enjoy all the flavors while keeping the dish low in carbs.
With minimal preparation time, Tuna Salad Lettuce Wraps are an excellent choice for meal prep, healthy snacking, or even for serving at gatherings.
Ingredients:
- 1 can of tuna (drained)
- ¼ cup mayonnaise (or Greek yogurt)
- 1 tablespoon Dijon mustard
- 1 celery stalk (finely chopped)
- 2 tablespoons red onion (finely chopped)
- 1 tablespoon fresh parsley (chopped)
- Salt and pepper (to taste)
- 8 large lettuce leaves (such as romaine or butter lettuce)
- Optional: diced pickles, capers, or chopped hard-boiled egg
In a mixing bowl, combine the drained tuna, mayonnaise (or Greek yogurt), and Dijon mustard. Stir in the chopped celery, red onion, and parsley until everything is evenly mixed. Season with salt and pepper to taste.
To serve, spoon the tuna mixture onto the center of each lettuce leaf, folding them into wraps.
For an extra flavor kick, don’t hesitate to add your favorite herbs or spices to the tuna mixture. Consider mixing in a dash of lemon juice or hot sauce for a invigorating zing.
Also, make sure to choose large, sturdy lettuce leaves to prevent tearing when you wrap your tuna salad. These wraps are best served fresh, so prepare the mixture just before serving or store the filling and the leaves separately in the refrigerator to maintain their crispness.
Protein Bars

When hunger strikes between meals, there’s no better solution than a protein-packed snack that can keep you energized and satisfied. Homemade protein bars aren’t only delicious but also customizable to fit your dietary needs and taste preferences. By making them at home, you can control the ingredients and avoid added sugars and preservatives often found in store-bought versions.
Plus, they’re perfect for a quick breakfast, a post-workout boost, or even as a sweet treat!
These protein bars come together quickly, making them a convenient option for anyone with a busy lifestyle. You can enjoy a delightful balance of flavors and textures with nutty, chewy, and slightly sweet notes. Whether you prefer chocolate, peanut butter, or fruit, you can easily adjust the ingredients to create your ideal snack while ensuring you’re getting a substantial amount of protein in every bite.
- 1 cup rolled oats
- 1 cup protein powder (any flavor)
- 1/2 cup nut butter (peanut, almond, or cashew)
- 1/4 cup honey or maple syrup
- 1/2 cup dark chocolate chips (optional)
- 1/4 cup chopped nuts or seeds (optional)
- 1/4 cup dried fruits (optional)
- 1/2 teaspoon vanilla extract
- Pinch of salt
In a large mixing bowl, combine the rolled oats and protein powder. In a separate bowl, mix the nut butter, honey (or maple syrup), vanilla extract, and a pinch of salt until smooth.
Pour the wet mixture into the dry ingredients and stir until everything is well combined. If desired, fold in the chocolate chips, nuts or seeds, and dried fruits. Once blended, transfer the mixture into a parchment-lined baking dish, press it down evenly, and refrigerate for at least two hours until firm.
Once chilled, cut into bars and store them in an airtight container.
When preparing your protein bars, feel free to experiment with different flavor combinations and additions. You can substitute the nut butter with tahini or sunbutter for a nut-free version, and switch up your protein powder to suit your dietary preferences.
Consider adding spices like cinnamon or cocoa powder for an extra flavor boost. These bars can also be frozen for longer storage, allowing you to make a larger batch and enjoy them over time. Just be sure to wrap each bar individually to keep them fresh!
Recommended Items
Discover our favorite products and tools to elevate your snacking game—enjoy exploring!
Products
Edamame
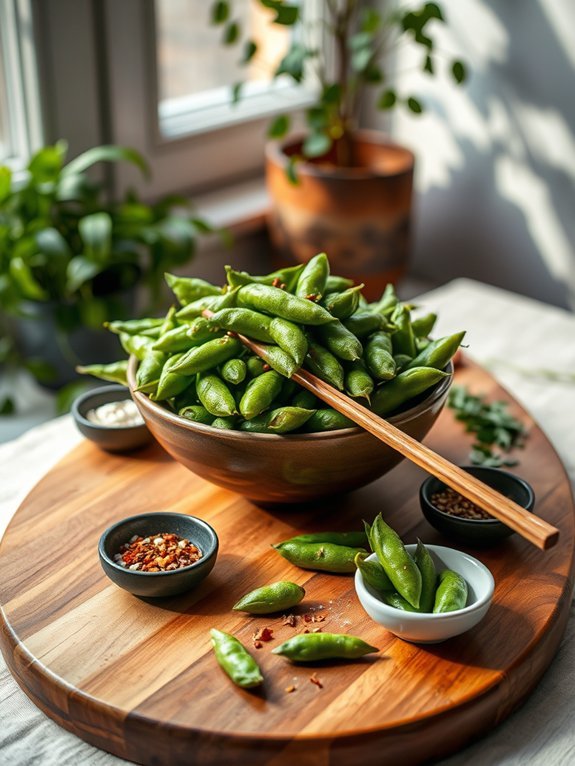
Edamame, young soybeans harvested before they mature, isn’t only delicious but also packed with protein and essential nutrients, making it a popular snack among health enthusiasts. These vibrant green pods can be enjoyed in various ways, but a simple preparation method brings out their natural flavors while retaining their health benefits.
Whether you serve them warm or cold, edamame provides a satisfying crunch that can hold its own as a snack or be included in larger dishes. Cooking edamame is quick and easy, making it a convenient option for those busy days when you’re craving a healthy snack. Each bite isn’t only savory but also satisfying, as the combination of legumes and a sprinkle of salt creates a perfect balance. You can enjoy edamame plain, or mix it with different seasonings for added flavor.
Here’s a simple recipe to prepare edamame in just a few steps.
- 1 cup shelled or podded edamame
- 1 tablespoon sea salt (for boiling)
- 1 teaspoon sesame oil (optional, for added flavor)
- Additional salt or seasoning (to taste)
In a medium pot, bring salted water to a boil and add the edamame pods. Cook for about 4-5 minutes, or until the pods turn bright green and are tender but still slightly firm. If you’re using shelled edamame, the cooking time will be reduced to about 2-3 minutes.
Once cooked, drain the edamame and, if desired, toss with a splash of sesame oil and an extra pinch of salt for enhanced flavor. When cooking edamame, it’s important not to overcook them, as they can become mushy and lose their delightful texture.
If you’re new to edamame, you may also want to experiment with different seasonings such as chili flakes, garlic powder, or even a drizzle of soy sauce after cooking. Don’t hesitate to serve your edamame in unique ways, such as adding them to salads or blending them into dips, to enjoy their versatility!
Jerky (Beef, Turkey, or Plant-Based)
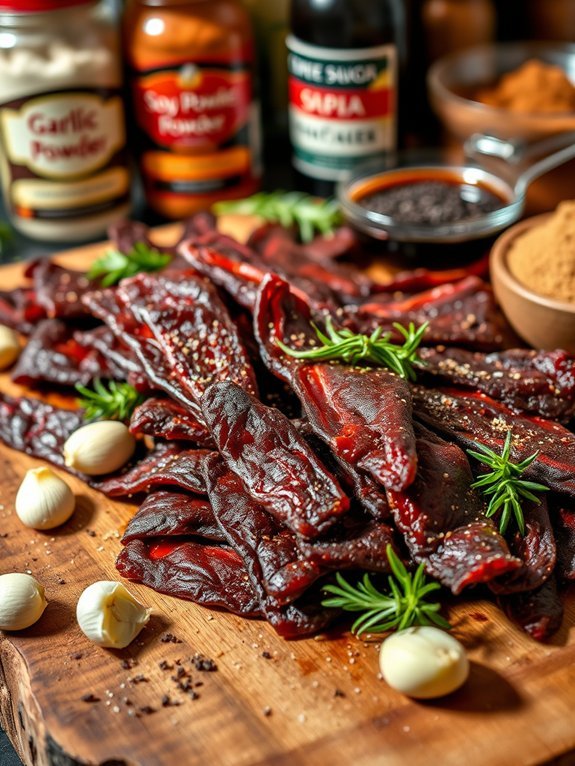
Jerky is a timeless high-protein snack that has gained immense popularity for its convenience and portability. Whether you choose beef, turkey, or a plant-based alternative, the satisfying chew and burst of flavor make jerky a perfect companion for hiking, road trips, or just a quick midday pick-me-up.
Making jerky at home allows you to control the ingredients, guaranteeing a healthy treat tailored to your taste preferences. Plus, it’s a great way to explore different marinades and spices, resulting in unique flavors that store-bought options can’t always match.
Creating your own jerky might seem intimidating at first, but with a little patience and the right techniques, you’ll be able to master the art of jerky-making. The process involves marinating your chosen protein, slicing it into thin strips for ideal drying, and using either an oven or a dehydrator to remove moisture while preserving the rich flavors. This recipe focuses on creating mouthwatering beef jerky, but the same method can be applied to turkey or plant-based sources, allowing everyone to enjoy this savory snack.
Ingredients:
- 1 pound of beef (flank steak, sirloin, or brisket)
- 1/4 cup soy sauce
- 2 tablespoons Worcestershire sauce
- 1 tablespoon liquid smoke (optional)
- 1 tablespoon brown sugar
- 1 teaspoon garlic powder
- 1 teaspoon onion powder
- 1 teaspoon black pepper
- 1/2 teaspoon salt
- 1/2 teaspoon red pepper flakes (optional)
Slice the beef against the grain into thin strips, about 1/8 inch thick. In a bowl, combine the soy sauce, Worcestershire sauce, liquid smoke, brown sugar, garlic powder, onion powder, black pepper, salt, and red pepper flakes. Mix well and add the beef strips to the marinade, making sure they’re fully coated.
Cover and refrigerate for at least 4 hours, or overnight for maximum flavor. Once marinated, arrange the strips on a dehydrator tray or a wire rack set on a baking sheet. If using an oven, preheat it to 160°F (70°C) and dry the beef for 4-6 hours, making sure the meat is firm and darkened but not brittle.
When making jerky at home, it’s important to slice the meat as uniformly as possible to guarantee even drying. You can slightly freeze the beef before slicing, as this makes it easier to cut. For added flavor, feel free to experiment with different spices and sugars in your marinade. Always use fresh ingredients, as they’ll contribute considerably to the final taste.
Finally, once your jerky is ready, store it in an airtight container in a cool, dry place for maximum shelf life.
Hummus With Veggie Sticks
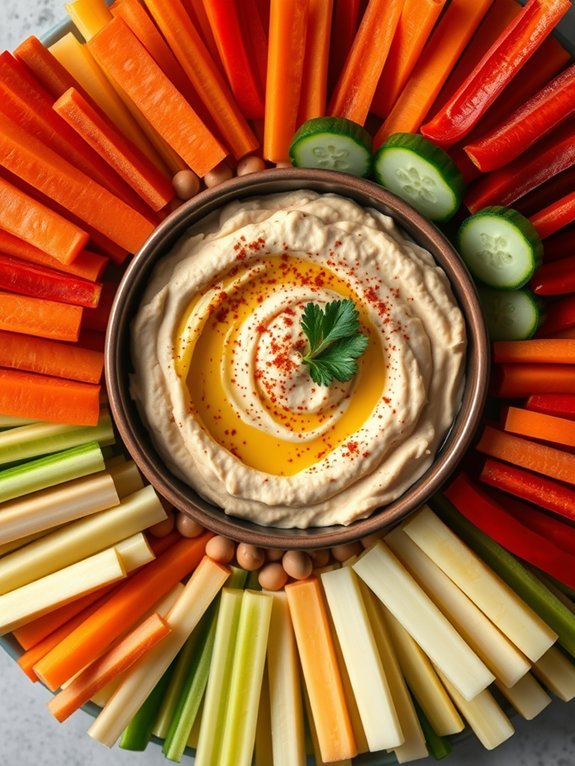
Hummus with veggie sticks isn’t only an exceptional source of protein, but it’s also a delicious and nutritious snack that can suit various dietary preferences. This Middle Eastern dip, made primarily from chickpeas, tahini, olive oil, garlic, and lemon juice, pairs perfectly with a medley of fresh vegetable sticks. From crunchy carrots to crisp cucumber and invigorating bell pepper, this snack provides a satisfying crunch and a wealth of flavors, making it an excellent choice for any time of day.
Making your own hummus at home is simple, and it allows you to customize the flavors to your liking. You can adjust the garlic for a milder taste or add spices like paprika or cumin for an additional kick.
Serving this vibrant dip with a variety of colorful veggie sticks not only enhances the presentation but also encourages healthy eating habits. This vibrant snack is ideal for parties, lunchboxes, or a mid-afternoon pick-me-up!
Ingredients:
- 1 can (15 ounces) chickpeas, drained and rinsed
- ¼ cup tahini
- 2 tablespoons olive oil
- 1-2 cloves garlic, minced
- Juice of 1 lemon
- Salt, to taste
- Water, as needed for consistency
- Fresh vegetables (carrots, cucumbers, bell peppers, celery) cut into sticks
In a food processor, combine the chickpeas, tahini, olive oil, minced garlic, lemon juice, and a pinch of salt. Blend until smooth, adding water as needed to reach your desired consistency.
Taste and adjust seasoning as necessary. Once the hummus is creamy and flavorful, transfer it to a serving bowl. Arrange the prepared veggie sticks around the hummus for an appealing presentation and serve immediately.
For a twist on traditional hummus, consider experimenting with different flavorings such as roasted red peppers, sun-dried tomatoes, or even a dash of cumin to add warmth and depth.
If you’re preparing the hummus ahead of time, store it in an airtight container in the refrigerator for up to a week. To keep your veggie sticks crisp, you can soak them in ice water for a few minutes before serving; this helps enhance their crunchiness and freshness.
Proposed Recipe
Quinoa Salad

Quinoa salad is a delightful and nutritious dish that serves as a perfect high-protein snack. Packed with essential amino acids, fiber, and a variety of vitamins, quinoa is a superfood foundation for a revitalizing salad. This dish is incredibly versatile; you can tailor it to your taste preferences by adding a mix of colorful vegetables, beans, nuts, or even fruits.
It’s the ideal option for a healthy lunch, a side dish, or a light dinner. Making quinoa salad isn’t only easy but also quick, making it perfect for busy schedules.
Start by cooking the quinoa to fluffy perfection, and while it’s still warm, let it absorb all the flavors from the accompanying ingredients. The harmonious blend of textures and tastes will leave you satisfied and nourished.
Ingredients:
- 1 cup quinoa
- 2 cups water or vegetable broth
- 1 cup cherry tomatoes, halved
- 1 cucumber, diced
- 1 bell pepper, diced (any color)
- 1/2 red onion, finely chopped
- 1 cup black beans (canned and rinsed)
- 1/4 cup fresh parsley, chopped
- 1/4 cup feta cheese, crumbled (optional)
- Juice of 1 lemon
- 3 tablespoons olive oil
- Salt and pepper to taste
Rinse the quinoa under cold water, then combine it with the water or vegetable broth in a saucepan. Bring to a boil, then reduce the heat to low and cover, allowing it to simmer for about 15 minutes or until the liquid is absorbed.
Once cooked, fluff the quinoa with a fork and let it cool slightly before mixing it with the remaining ingredients in a large bowl. Drizzle with lemon juice and olive oil, season with salt and pepper, and toss everything together until well combined.
For extra flavor, consider roasting the vegetables before adding them to the salad for an enhanced taste profile. You can also experiment by adding different proteins like grilled chicken, shrimp, or chickpeas for an added boost.
Additionally, this salad can be stored in the fridge for a few days, making it a great make-ahead option. Adjust the seasonings according to your preference, and don’t hesitate to get creative with herbs or spices that you enjoy!
Chia Seed Pudding
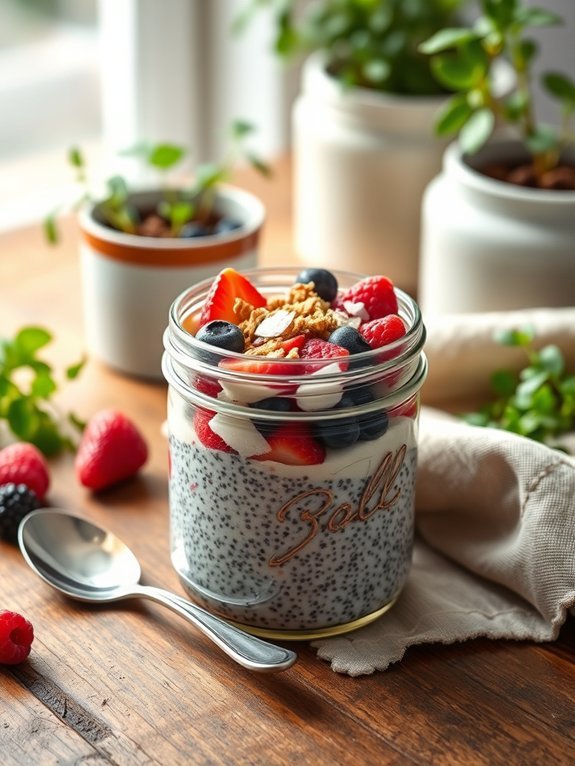
Chia seed pudding is a delightful and nutritious high-protein snack that’s incredibly easy to make. Chia seeds are tiny nutritional powerhouses packed with fiber, protein, and omega-3 fatty acids. When soaked in liquid, they develop a jelly-like texture that creates a satisfying, creamy dessert when combined with milk or plant-based alternatives.
This versatile recipe allows you to customize your pudding with various flavors and toppings, making it suitable for breakfast, a snack, or a healthy dessert. Making chia seed pudding is a simple process that requires minimal ingredients and little effort. Ideally, you should prepare the pudding a few hours ahead of time or overnight, allowing the seeds to fully absorb the liquid and reach their pudding-like consistency.
Enjoy the deliciousness and health benefits of this quick dish and experiment with different add-ins to elevate your chia seed pudding experience!
- 1/4 cup chia seeds
- 1 cup milk (dairy or plant-based)
- 1 tablespoon sweetener (honey, maple syrup, or agave)
- 1 teaspoon vanilla extract
- Pinch of salt
- Toppings (fresh fruit, nuts, granola, or coconut flakes)
In a mixing bowl, whisk together the chia seeds, milk, sweetener, vanilla extract, and salt until well combined. Allow the mixture to sit for about 5 minutes, then whisk again to prevent clumping.
Transfer the mixture to a jar or a bowl, cover, and refrigerate for at least 2 hours or overnight. Once fully set, stir the pudding, add your favorite toppings, and enjoy!
For best results, make certain to use a ratio of 1 part chia seeds to 4 parts liquid; this will guarantee the pudding has the perfect consistency. You can also experiment with different types of milk to find your favorite flavor profile. If you prefer a sweeter pudding, add more sweetener to taste.
Finally, homemade chia seed pudding can last up to five days in the refrigerator, so feel free to make a larger batch at the beginning of the week for easy snacking throughout!
Peanut Butter Rice Cakes

Peanut butter rice cakes are a simple yet satisfying high-protein snack that can easily fit into any busy lifestyle. With their delightful crunch and nutty flavor, these rice cakes serve as an excellent base for various toppings, making them both customizable and versatile.
Whether you’re preparing for a workout, need a mid-afternoon energy boost, or just want something tasty, peanut butter rice cakes can hit the spot and keep you energized throughout the day.
The beauty of this snack lies not only in its delicious taste but also in its nutritional benefits. Peanut butter is a rich source of protein and healthy fats, providing sustained energy without the crash. Combined with rice cakes, which are low in calories and gluten-free, this snack can easily be tailored to your taste preferences by adding fruits, seeds, or a drizzle of honey for added flavor.
- Rice cakes
- Natural peanut butter (crunchy or smooth)
- Banana (sliced)
- Honey (optional)
- Chia seeds or flaxseeds (optional)
- Cinnamon (optional)
To prepare peanut butter rice cakes, simply spread a generous layer of natural peanut butter on top of each rice cake. Layer with banana slices, then drizzle with honey if desired. Finish by sprinkling chia seeds or flaxseeds and a dash of cinnamon for added flavor and nutrition.
When making peanut butter rice cakes, feel free to get creative with your toppings. Other delicious options include sliced strawberries, blueberries, or even a sprinkle of chocolate chips for a touch of sweetness.
Also, remember to choose natural peanut butter that contains no added sugars or oils for the healthiest option. These rice cakes can be prepped in advance for a quick grab-and-go snack during a busy day!
Turkey and Cheese Roll-Ups
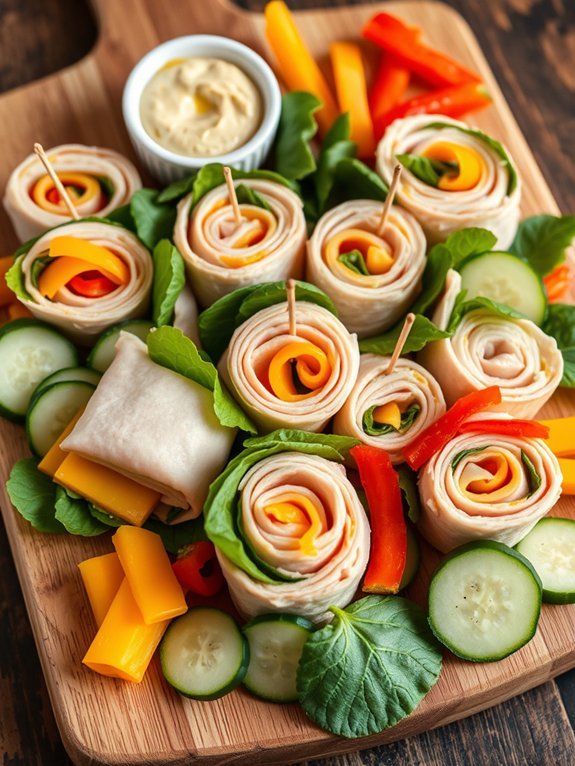
Turkey and cheese roll-ups are a simple, delicious, and protein-packed snack that can be made in minutes. Perfect for busy days, these roll-ups aren’t only nutritious but also very satisfying. The combination of turkey, cheese, and optional vegetables creates a snack that will keep you energized without weighing you down. Kids and adults alike can enjoy these, making them a versatile option for families and meal prepping.
These roll-ups can be easily customized based on your preference or dietary needs. You can add additional ingredients like avocado or cucumber for extra crunch and flavor, or use different types of cheese such as cheddar or pepper jack to spice things up. Serve them with a side of mustard or hummus for dipping, and you’ve got a delicious and wholesome snack or even a light meal.
- Sliced turkey breast
- Sliced cheese (cheddar, Swiss, or your choice)
- Cream cheese (optional)
- Leafy greens (spinach or lettuce, optional)
- Bell peppers or cucumbers (optional, thinly sliced)
- Toothpicks or small skewers (for securing)
Start by laying a slice of turkey on a clean surface, then spread a thin layer of cream cheese over it if desired. Place a slice of cheese on top, followed by any additional veggies you choose to use, such as leafy greens or thin cucumber slices.
Carefully roll the turkey slice tightly around the cheese and veggies, ensuring all ingredients are enclosed. Secure the roll with toothpicks or small skewers, and repeat the process for the remaining ingredients.
To enhance the flavor of your turkey and cheese roll-ups, consider seasoning the cream cheese with herbs or spices like garlic powder, dill, or smoked paprika before spreading it. You can also experiment with different types of tortillas or wraps in place of turkey if you prefer a different texture.
For added convenience, these roll-ups can be prepared ahead of time and stored in the refrigerator, making them an ideal grab-and-go snack for those busy days.

