This post may contain affiliate links. Please read our policy page.
Homemade ice cream is an absolute joy, offering endless flavor possibilities. You can whip up classic favorites like Vanilla and Rich Chocolate, or try fruity delights like Strawberry and Mango Coconut Sorbet. Craving something fun? Go for Cookies and Cream or Mint Chocolate Chip. For coffee lovers, Coffee Ice Cream is a must. Add delicious mix-ins with Chocolate Chip Cookie Dough and Nutty Banana. Explore these delightful recipes to create your own cool and creamy treats!
Classic Vanilla Ice Cream

Making classic vanilla ice cream at home is a delightful and rewarding process. With just a few simple ingredients, you can create a creamy, rich treat that’s perfect for hot summer days or as a sweet end to any meal. This timeless flavor is a favorite among ice cream lovers and pairs wonderfully with a variety of toppings, fruits, or desserts.
The beauty of homemade ice cream lies in its freshness and the ability to control the ingredients. By using real vanilla beans or high-quality vanilla extract, you’ll enhance the flavor and give your ice cream that authentic taste that store-bought varieties often lack.
Whether you have an ice cream maker or you prefer to make it the old-fashioned way, this recipe offers a straightforward approach to crafting your own classic vanilla ice cream.
- 2 cups heavy cream
- 1 cup whole milk
- 3/4 cup granulated sugar
- 1 tablespoon pure vanilla extract
- 1 teaspoon vanilla bean paste (optional)
- A pinch of salt
In a medium mixing bowl, whisk together the heavy cream, whole milk, granulated sugar, vanilla extract, and salt until the sugar is fully dissolved. If you’re using vanilla bean paste, add it in at this point for an extra depth of flavor.
If you have an ice cream maker, pour the mixture into the machine and follow the manufacturer’s instructions. If you don’t have an ice cream maker, pour the mixture into a freezer-safe container and place it in the freezer. Every 30 minutes, stir the mixture with a fork until it reaches a smooth, creamy consistency, which usually takes about 3-4 hours.
When making classic vanilla ice cream, patience is key. Allowing the ice cream to chill in the freezer overnight will enhance the flavors and improve the texture before serving.
If you find that the ice cream is too hard after freezing, let it sit at room temperature for a few minutes before scooping. Experiment with mix-ins like chocolate chips or crushed cookies, and don’t hesitate to get creative with toppings like sprinkles, fresh fruit, or whipped cream!
Recommended Items
Get ready to whip up some delicious homemade ice cream with these must-have ingredients and tools!
Rich Chocolate Ice Cream
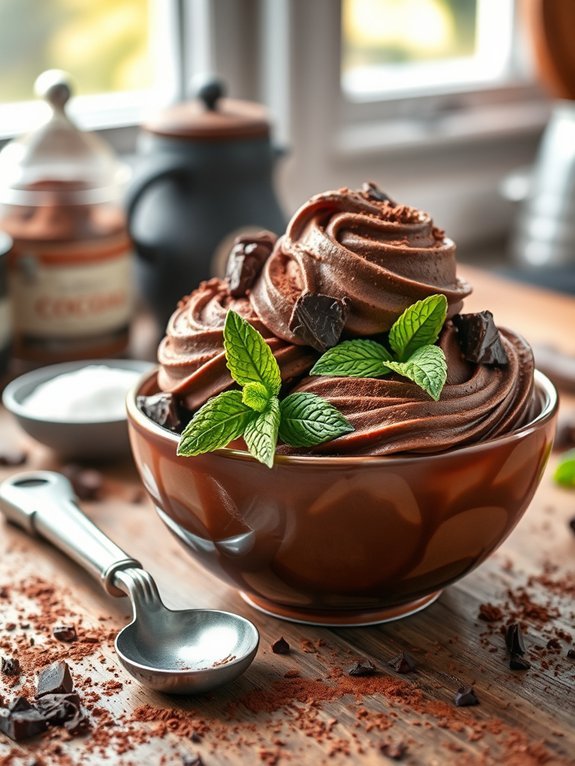
If you have a serious chocolate craving, nothing satisfies quite like homemade rich chocolate ice cream. This creamy delight not only provides that intense, luxurious chocolate flavor, but it also allows you to adjust the sweetness and richness to your liking.
The beauty of making ice cream at home is that you can use high-quality cocoa powder and chocolate to create a treat that’s uniquely yours.
Creating rich chocolate ice cream is a straightforward process that requires a few basic ingredients. The result is a decadent dessert that can be enjoyed on its own or with your favorite toppings.
With just a little bit of patience and an ice cream maker, you can whip up this delightful dessert in no time, perfect for warm sunny days or cozy nights in.
- 2 cups heavy cream
- 1 cup whole milk
- 3/4 cup granulated sugar
- 1/2 cup unsweetened cocoa powder
- 4 oz semi-sweet chocolate, chopped
- 1 tsp vanilla extract
- A pinch of salt
- Optional: chocolate shavings or chunks for garnish
In a medium saucepan, combine the heavy cream, whole milk, and granulated sugar, heating over medium heat until hot but not boiling, stirring constantly.
Remove from heat and add the chopped semi-sweet chocolate, cocoa powder, vanilla extract, and salt, whisking until completely smooth and well combined.
Let the mixture cool to room temperature, then refrigerate for at least 4 hours or overnight.
Once chilled, churn the mixture in your ice cream maker according to the manufacturer’s instructions.
Transfer to an airtight container and freeze for a couple of hours until firm before serving.
While making rich chocolate ice cream is relatively easy, there are a few tips to guarantee the best results.
Make sure all your ingredients are cold before churning to guarantee a creamy texture.
If you’re looking for an even richer flavor, you can experiment with using different types of chocolate or adding a hint of espresso powder to enhance the chocolate profile.
Remember to let the ice cream sit out for a few minutes before scooping to make serving easier. Enjoy your homemade treat!
Strawberry Sorbet
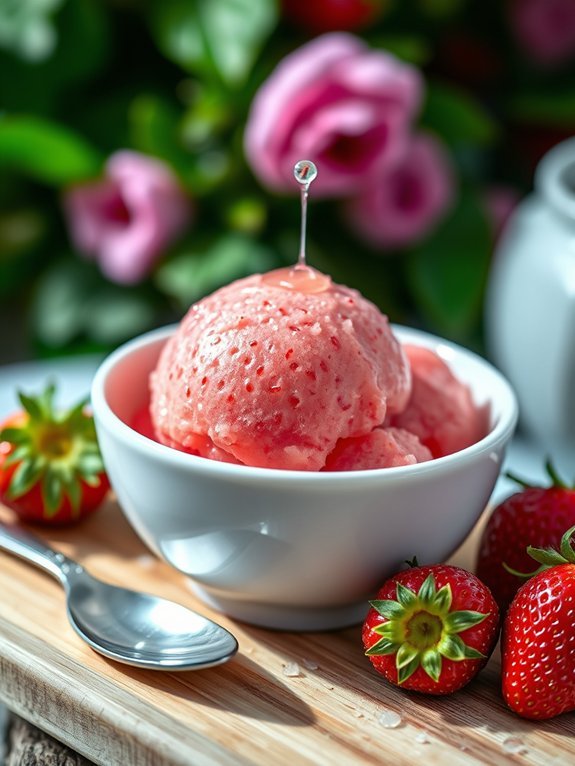
Strawberry sorbet is a revitalizing and fruity dessert that captures the essence of ripe strawberries in every spoonful. It’s an excellent choice for a light treat on a hot day or as a palate cleanser between courses. The beauty of this sorbet lies in its simplicity and the vibrant flavor of fresh strawberries. You don’t need an ice cream maker to enjoy homemade sorbet; however, having one will make the process smoother and quicker.
To make the perfect strawberry sorbet, it’s important to select the ripest, sweetest strawberries you can find. The quality of your sorbet will greatly depend on the berries used, so look for those that are bright red and fragrant.
Using fresh lemon juice will enhance the flavor profile and add a hint of tartness, perfectly balancing the sweetness of the strawberries. This delightful treat can be enjoyed solely on its own or served alongside other desserts for an elegant finish.
Ingredients:
- 2 pounds fresh strawberries, hulled and halved
- 1 cup granulated sugar
- 1/4 cup fresh lemon juice
- 1 cup water
- A pinch of salt
To prepare the strawberry sorbet, begin by placing the hulled strawberries in a blender or food processor. Add the sugar, fresh lemon juice, water, and a pinch of salt, then blend until smooth.
Strain the mixture through a fine-mesh sieve to remove any seeds for a silky texture. Pour the strained mixture into a shallow dish and freeze for about 2 hours or until partially solid. After that, scrape the mixture with a fork to create a fluffy texture, return to the freezer for another 2-4 hours, and serve once it reaches your desired consistency.
When making strawberry sorbet, be mindful not to over-process the mixture after freezing, as doing so can lead to a grainy texture. If you prefer a smoother sorbet and have an ice cream maker, churn the mixture in it according to the manufacturer’s instructions.
For the best flavor, always taste your mixture before freezing, as the sweetness of strawberries can vary considerably. If needed, feel free to adjust the sugar or lemon juice to achieve your ideal balance of flavors. Enjoy!
Cookies and Cream Ice Cream

Indulging in a creamy and delicious homemade cookies and cream ice cream is a delightful way to elevate any dessert experience. This irresistible concoction combines the rich flavors of vanilla ice cream with crumbled chocolate sandwich cookies, creating a treat that’s both nostalgic and satisfying.
Making it from scratch allows you to control the texture and flavor, ensuring your ice cream is as decadent as you like. To create a smooth and velvety ice cream base, it’s crucial to start with quality ingredients. Using fresh heavy cream and whole milk will provide that rich creaminess, while bringing in crushed chocolate sandwich cookies introduces a delightful crunch and familiar flavor.
Whether enjoyed in a bowl or a cone, this cookies and cream ice cream is bound to be a hit among friends and family.
- 2 cups heavy cream
- 1 cup whole milk
- 3/4 cup granulated sugar
- 1 tablespoon pure vanilla extract
- 1 cup chocolate sandwich cookies, crushed (plus extra for topping if desired)
- Pinch of salt
In a large mixing bowl, whisk together the heavy cream, whole milk, granulated sugar, vanilla extract, and salt until the sugar is fully dissolved and the mixture is smooth.
Pour the mixture into an ice cream maker and churn according to the manufacturer’s instructions, usually around 20-25 minutes. When the ice cream is nearly done churning, add the crushed chocolate sandwich cookies and continue to churn until evenly distributed.
Transfer the ice cream to an airtight container and freeze for 4 hours or until firm.
When making cookies and cream ice cream, feel free to experiment with the amount of cookie pieces you add for a more intense flavor. For a varied texture, consider chopping the cookies into different sizes before mixing them in.
If you don’t have an ice cream maker, you can still make this treat by placing the mixture in a shallow container and stirring it every 30 minutes until it reaches the desired consistency. Enjoy your homemade treat!
Mint Chocolate Chip Ice Cream
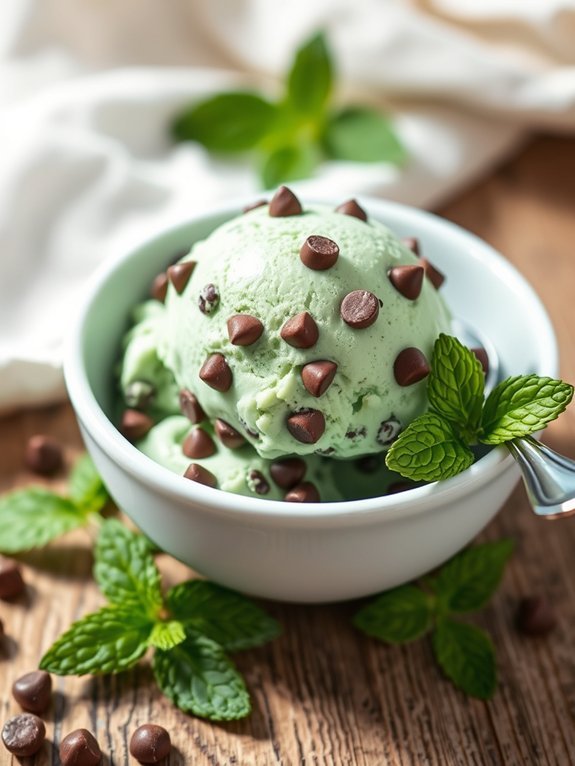
Mint chocolate chip ice cream is a rejuvenating and indulgent treat that perfectly balances creamy, sweet, and minty flavors. The bright green color not only adds a festive touch to the dessert but also signals the delightful mint flavor awaiting to tickle your taste buds.
With just a handful of ingredients, making this ice cream at home is a delightful way to cool off during the hot summer months or to enjoy any time of the year. In addition to satisfying your sweet cravings, homemade mint chocolate chip ice cream is incredibly easy to make.
Whether you have an ice cream maker or prefer a no-churn method, this recipe provides a delightful experience that brings the classic ice cream shop flavor to your kitchen. Get ready to scoop up some creamy goodness that’s simple to prepare, allowing you to impress family and friends with your homemade skills.
Ingredients:
- 2 cups heavy cream
- 1 cup whole milk
- 3/4 cup granulated sugar
- 1 teaspoon pure peppermint extract
- 1/2 teaspoon green food coloring (optional)
- 1 cup mini chocolate chips
- Pinch of salt
In a large mixing bowl, whisk together the heavy cream, whole milk, granulated sugar, peppermint extract, and a pinch of salt until the sugar is dissolved. If you want the ice cream to have a vibrant green hue, add the green food coloring and mix until you achieve your desired color.
Next, stir in the mini chocolate chips, ensuring they’re evenly distributed throughout the mixture. Pour the mixture into an ice cream maker and churn according to the manufacturer’s instructions. If you don’t have an ice cream maker, transfer the mixture to a freezer-safe container and freeze it, stirring every 30 minutes until firm, which usually takes around 4-6 hours.
For the best texture and flavor, let the ice cream sit at room temperature for a few minutes before serving so it can soften slightly. If you want to enhance the mint flavor further, consider steeping fresh mint leaves in the milk and cream mixture before straining them out, giving it an extra burst of rejuvenation.
Don’t hesitate to experiment with different types of chocolate chips, such as dark or even white chocolate, to put your own twist on this classic treat!
Peanut Butter Cup Ice Cream
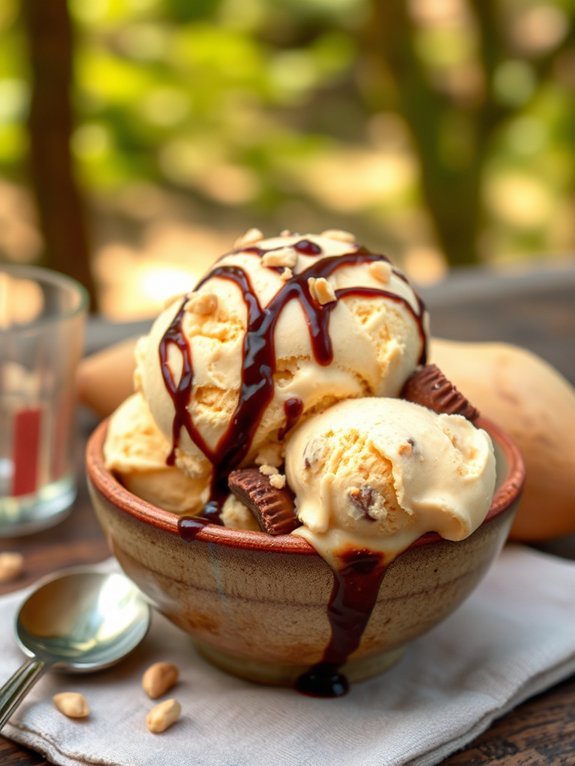
If you’re a fan of the sweet and salty combination that peanut butter and chocolate offer, then Peanut Butter Cup Ice Cream is bound to become your new favorite indulgence. This creamy and delightful treat isn’t only easy to make but also delivers an intense flavor that will have you coming back for more.
Perfect for hot summer days or as a decadent dessert to impress your guests, this homemade ice cream recipe will bring a taste of nostalgia with every scoop, reminiscent of your favorite candy bars.
To make the most of this recipe, you can choose to make your own peanut butter or use store-bought. Either way, ensuring that you have creamy peanut butter will create a smoother texture, while the addition of crushed peanut butter cups will provide those delightful chunks you love.
Get ready to savor every bite as this ice cream melts in your mouth, showcasing the unbeatable combo of peanut butter and chocolate.
Ingredients:
- 2 cups heavy cream
- 1 cup whole milk
- 3/4 cup granulated sugar
- 1 cup creamy peanut butter
- 1 teaspoon vanilla extract
- 1 cup crushed peanut butter cups (plus extra for topping)
- Pinch of salt
In a mixing bowl, whisk together the heavy cream, whole milk, granulated sugar, and peanut butter until fully combined, ensuring there are no lumps.
Stir in the vanilla extract and salt. Pour the mixture into your ice cream maker and churn according to the manufacturer’s instructions, usually about 20-25 minutes. In the final few minutes of churning, fold in the crushed peanut butter cups.
Once churned, transfer the ice cream to an airtight container and freeze for at least 4 hours to allow it to firm up.
For best results, consider chilling the base mixture in the refrigerator for at least 1 hour before churning. This helps to create a creamier texture by ensuring that the mixture is cold when placed into the ice cream maker.
If you don’t have an ice cream maker, you can still make this treat by pouring the mixture into a shallow dish and freezing it, stirring every 30 minutes to break up any ice crystals until it reaches a smooth consistency.
Finally, don’t hesitate to experiment with toppings, as drizzling chocolate sauce or adding more crushed peanut butter cups can take this ice cream to the next level!
Mango Coconut Sorbet

Mango Coconut Sorbet is a invigorating treat perfect for hot summer days or whenever you’re craving a tropical escape. This delightful dessert combines the luscious sweetness of ripe mangoes with the creamy texture of coconut milk, resulting in a sorbet that’s both indulgent and light. With only a few simple ingredients and minimal preparation, you can whip up this frozen delight in no time.
Making your own mango coconut sorbet at home isn’t only a fun activity but also a great way to enjoy the natural flavors of seasonal fruits. The best part is that you can customize the sweetness according to your taste by adjusting the amount of sugar. Additionally, this sorbet is vegan-friendly and free from artificial additives, allowing you to indulge guilt-free.
- 3 ripe mangoes, peeled and diced
- 1 cup coconut milk (canned or refrigerated)
- 1/2 cup sugar (adjust to taste)
- 1 tablespoon lime juice
- A pinch of salt
In a blender or food processor, combine the diced mangoes, coconut milk, sugar, lime juice, and salt until smooth. Taste the mixture and adjust the sweetness if desired.
Pour the blended mixture into a shallow dish or ice cream maker, and freeze for about 4-6 hours, stirring every hour if using a dish, or follow the manufacturer’s instructions if using an ice cream maker.
When making mango coconut sorbet, choose the ripest mangoes for the sweetest flavor possible. You can also experiment with additional ingredients such as fresh mint or a splash of rum for an adult twist.
If you prefer a smoother texture, consider using an ice cream maker, which helps incorporate air into the sorbet for a creamier consistency. Remember to let it sit at room temperature for a few minutes before scooping to make serving easier. Enjoy your tropical delight!
Proposed Recipe
Coffee Ice Cream

Coffee ice cream is a delightful treat that combines the rich, bold flavors of coffee with the creamy texture of traditional ice cream. Perfect for coffee enthusiasts, this homemade version can be customized to your taste, whether you prefer it sweet, strong, or creamy. With just a few simple ingredients, you can create a luxurious dessert that will impress friends, family, or even satisfy your late-night cravings.
What sets this coffee ice cream apart from store-bought options is the freshness and quality of the ingredients. Using real brewed coffee gives the ice cream a deep, authentic flavor that you simply can’t replicate with artificial flavorings. By making this treat at home, you also have full control over sweetness and creaminess, allowing you to make it as indulgent or as light as you desire.
- 2 cups heavy cream
- 1 cup whole milk
- 3/4 cup granulated sugar
- 1 cup freshly brewed coffee (cooled)
- 1 teaspoon vanilla extract
- Pinch of salt
- Optional: chocolate chips or espresso beans for added texture
In a mixing bowl, whisk together the heavy cream, whole milk, and granulated sugar until the sugar is completely dissolved. Stir in the cooled coffee, vanilla extract, and a pinch of salt until well combined.
Pour the mixture into an ice cream maker and churn according to the manufacturer’s instructions until it reaches a soft-serve consistency. Transfer the ice cream to a lidded container and freeze for at least 4 hours or until firm.
For the best results, consider using high-quality coffee beans to brew your coffee, as this will greatly enhance the flavor of your ice cream. If you don’t have an ice cream maker, you can still make this recipe by pouring the mixture into a shallow dish and placing it in the freezer. Stir every 30 minutes for the first few hours to help achieve a smooth texture.
Feel free to experiment with mix-ins, like chopped chocolate or toasted nuts, for added flavor and texture.
Chocolate Chip Cookie Dough Ice Cream

There’s something irresistibly charming about the combination of creamy ice cream and the classic flavor of chocolate chip cookie dough. This Chocolate Chip Cookie Dough Ice Cream recipe is perfect for those who crave the decadent taste of cookie dough in a smooth and luscious frozen treat. It brings the best of both worlds together, offering a satisfying crunch from the cookie dough pieces that are mixed into a velvety ice cream base, making it an excellent choice for summer afternoons or any gathering with family and friends.
Making your own ice cream at home not only allows you to control the ingredients but also gives you the opportunity to customize the flavors to suit your own preferences. This recipe is simple and straightforward, even for beginners. With just a few ingredients and some patience, you can create a delightful dessert that rivals any store-bought version. Your loved ones will be begging for seconds!
Ingredients:
- 2 cups heavy cream
- 1 cup whole milk
- 3/4 cup granulated sugar
- 1 teaspoon vanilla extract
- 1/2 cup mini chocolate chips
- 1 cup cookie dough (store-bought or homemade, without eggs)
In a large mixing bowl, whisk together the heavy cream, whole milk, sugar, and vanilla extract until the sugar is fully dissolved. You can use a hand mixer for a more frothy texture, but mixing by hand works just fine.
Once combined, fold in the mini chocolate chips and prepared cookie dough until evenly distributed. Transfer the mixture to an ice cream maker and churn according to the manufacturer’s instructions until it reaches a soft-serve consistency. Place the ice cream in an airtight container and freeze for at least four hours or until firm.
When making Chocolate Chip Cookie Dough Ice Cream, consider chilling your mixing bowl and whisking utensils prior to use to help enhance the creaminess of your base. Additionally, feel free to get creative by adding different mix-ins, such as nuts or flavored extracts, to personalize your ice cream.
Finally, if you prefer a more indulgent treat, you can lightly bake the cookie dough pieces to achieve a slightly crispy texture before mixing them into the ice cream. Enjoy your homemade sweet delight!
Nutty Banana Ice Cream
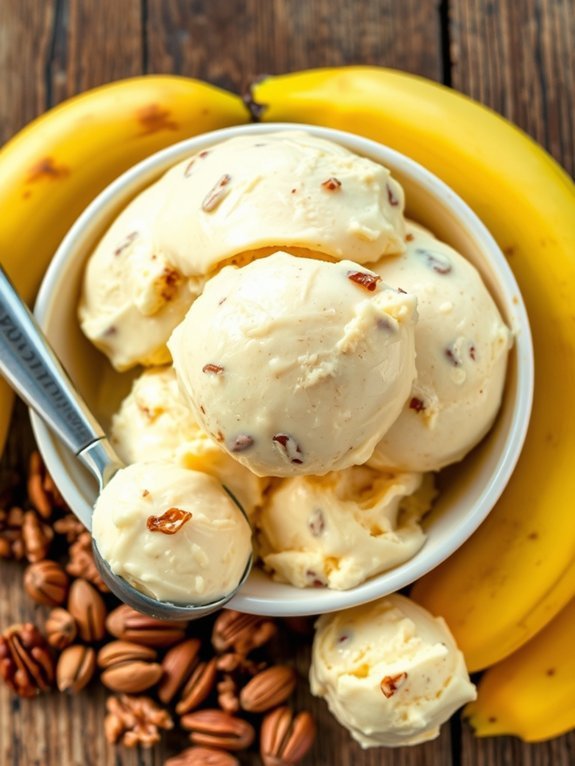
Making Nutty Banana Ice Cream is a delightful way to enjoy the rich flavors and creamy texture of bananas combined with the crunch of nuts. This recipe isn’t only simple but also allows you to indulge in a frozen treat that’s both delicious and healthier than typical ice cream. It’s perfect for hot summer days or as a sweet snack any time of the year.
To begin, this creamy concoction will satisfy your sweet tooth while incorporating the natural sweetness of ripe bananas. The addition of nuts provides a wonderful contrast in texture and enhances the overall flavor profile. You can use your choice of nuts like walnuts, almonds, or pecans, making this recipe versatile based on your preferences. Get ready to whip up this homemade dessert that everyone will love!
- 4 ripe bananas
- 1 cup heavy cream
- 1/2 cup sweetened condensed milk
- 1 teaspoon vanilla extract
- 1/2 cup chopped nuts (walnuts, almonds, or pecans)
- A pinch of salt
Start by peeling and slicing the ripe bananas, then place them in a blender along with the heavy cream, sweetened condensed milk, vanilla extract, and salt. Blend the mixture until it’s smooth and creamy, being careful not to overmix.
Pour the mixture into a bowl, then fold in the chopped nuts. Transfer the mixture into an airtight container and freeze for at least 4 hours or until sufficiently firm.
For best results, allow the ice cream to sit at room temperature for a few minutes before serving to soften slightly. Additionally, feel free to experiment with different nuts or add chocolate chips for extra flavor.
This Nutty Banana Ice Cream can also be stored in the freezer for up to two weeks, but it’s so delicious that it mightn’t last that long! Enjoy this creamy, nutty treat with friends and family for a crowd-pleasing dessert.


