This post may contain affiliate links. Please read our policy page.
To impress your guests, try these standout party appetizers. Caprese skewers blend fresh mozzarella and basil, while creamy spinach and artichoke dip warms hearts. Bacon-wrapped jalapeño poppers add a spicy twist, and mini meatballs with marinara are always a hit. Don’t forget stuffed mushrooms or flaky puff pastry bites! Hummus with pita chips, a fruit and nut cheese ball, and chocolate-covered pretzels round out the feast beautifully. You’ll discover even more delicious ideas that’ll wow your guests!
Caprese Skewers
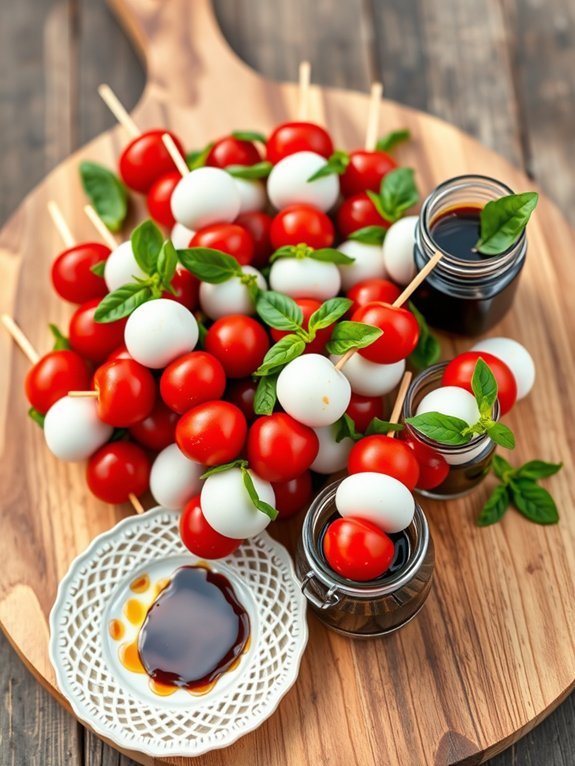
Caprese skewers are a delightful and visually appealing appetizer that combine the classic Italian flavors of fresh mozzarella, ripe tomatoes, and fragrant basil. These colorful bites aren’t only easy to assemble but also incredibly revitalizing, making them a perfect choice for gatherings, parties, or even a light snack. The simplicity of ingredients allows their freshness to shine through, providing a burst of flavor with every bite.
These skewers can be served as a stand-alone appetizer or as part of a larger platter that highlights an assortment of savory bites. With just a few minutes of prep time and no cooking required, Caprese skewers are an effortless treat that can be made in advance.
Whether enjoyed at a summer barbecue or a festive holiday party, these skewers will elevate your appetizer game and leave your guests wanting more.
- Cherry tomatoes
- Fresh mozzarella balls (bocconcini)
- Fresh basil leaves
- Extra virgin olive oil
- Balsamic vinegar
- Salt
- Pepper
- Skewers or toothpicks
To assemble the skewers, simply thread a cherry tomato, a fresh basil leaf, and a mozzarella ball onto a skewer. Repeat the process until all ingredients are used, typically creating 3-4 sets of each ingredient per skewer.
Once assembled, drizzle with olive oil and balsamic vinegar, and sprinkle with salt and pepper to taste.
When creating Caprese skewers, feel free to get creative with the arrangement or presentation. You can alternate layers or even add other ingredients like slices of prosciutto or avocado for a variation on the classic recipe.
Additionally, using a high-quality olive oil and balsamic vinegar will enhance the flavors considerably, so choose the best you can find for a truly gourmet experience. Enjoy these delicious bites chilled or at room temperature for maximum enjoyment.
Spinach and Artichoke Dip
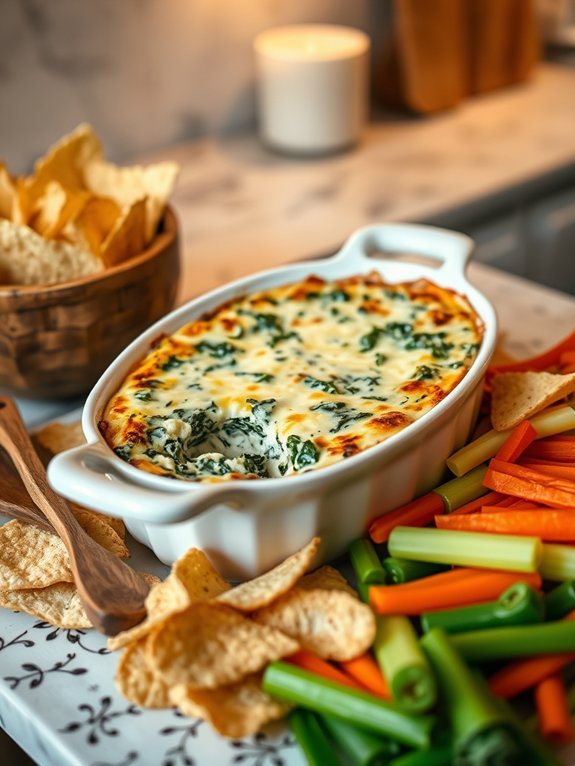
Spinach and Artichoke Dip is a warm, creamy appetizer that has become a staple at parties and gatherings. Its rich combination of flavors, featuring fresh spinach, tangy artichokes, and a blend of cheesy goodness, makes it a crowd-pleaser that pairs perfectly with crispy tortilla chips, toasted bread, or even fresh vegetable sticks.
This dip isn’t only easy to prepare but also versatile, making it suitable for different occasions, from casual family get-togethers to elegant dinner parties. The beauty of this dish lies in its simplicity and the quick cooking time, allowing you to whip it up even at the last minute.
Whether you make it ahead of time or bake it fresh right before your guests arrive, Spinach and Artichoke Dip will have everyone reaching for more. With just a handful of ingredients, you’ll be able to create a luscious dip that showcases the vibrant flavors of spinach and artichokes. Let’s get started!
Ingredients:
- 1 cup frozen spinach, thawed and drained
- 1 cup canned artichoke hearts, drained and chopped
- 1 cup cream cheese, softened
- ½ cup sour cream
- ½ cup mayonnaise
- 1 cup grated Parmesan cheese
- 1 cup shredded mozzarella cheese
- 2 cloves garlic, minced
- 1 teaspoon lemon juice
- Salt and pepper to taste
In a large mixing bowl, combine the softened cream cheese, sour cream, mayonnaise, and lemon juice until smooth. Fold in the drained spinach, chopped artichoke hearts, minced garlic, Parmesan cheese, and half of the mozzarella cheese. Season with salt and pepper to taste.
Transfer the mixture to a baking dish and sprinkle the remaining mozzarella cheese on top. Bake in a preheated oven at 350°F (175°C) for about 25-30 minutes, or until the dip is bubbling and golden brown on top. Serve warm with your favorite dippers.
When making Spinach and Artichoke Dip, it’s important to thoroughly drain the spinach and artichokes to prevent the dip from becoming watery. You can also customize the flavor by adding spices like cayenne pepper for a little kick or mixing in some cooked and crumbled bacon for added richness.
Additionally, feel free to experiment with different types of cheese to suit your taste, such as adding Gouda or cheddar for a unique twist.
Bacon-Wrapped Jalapeño Poppers

Bacon-wrapped jalapeño poppers are a must-have appetizer for any party. The combination of spicy jalapeños, creamy cheese, and crispy bacon creates an irresistible bite that keeps guests coming back for more. Whether you’re hosting a big game day gathering or a casual get-together, these poppers elevate your appetizer game and are sure to impress. Plus, they’re easy to make and can be prepared ahead of time for added convenience.
To make the most flavorful and delightful bacon-wrapped jalapeño poppers, it’s all about balancing the heat of the jalapeños with the creaminess of the filling. You can customize the cheese mixture to your liking by adding different herbs or spices to enhance the flavor profile. The result is a savory bite that perfectly combines spicy, cheesy, and smoky elements, making it an absolute crowd-pleaser.
- 12 fresh jalapeño peppers
- 8 oz cream cheese, softened
- 1 cup shredded cheddar cheese
- 1 tsp garlic powder
- 1 tsp onion powder
- Salt and pepper to taste
- 12 slices of bacon, cut in half
- Toothpicks (optional)
Preheat your oven to 400°F (200°C). Cut the jalapeños in half lengthwise and remove the seeds and membranes for milder poppers, or leave some seeds for extra heat. In a mixing bowl, combine the softened cream cheese, shredded cheddar cheese, garlic powder, onion powder, salt, and pepper.
Fill each jalapeño half with the cheese mixture and wrap each one tightly with a half slice of bacon. Secure with a toothpick if needed, and place them on a baking sheet lined with parchment paper. Bake for about 20-25 minutes or until the bacon is crispy and the jalapeños are tender.
When making bacon-wrapped jalapeño poppers, consider wearing gloves while handling the jalapeños, especially if you’re sensitive to spice, as the oils can cause irritation. Watch the cooking time closely to avoid burning the bacon; every oven is different.
For extra crunch, you can broil them for the last couple of minutes of cooking. Additionally, feel free to experiment with different cheeses or add ingredients like crumbled sausage or herbs for a unique twist. Enjoy your delicious poppers warm from the oven!
Mini Meatballs With Marinara

Mini meatballs with marinara sauce are a delightful appetizer that packs a punch of flavor in each bite. These little savory morsels are perfect for any gathering — whether it’s a birthday party, holiday celebration, or a relaxed get-together with friends. The combination of juicy beef, herbs, and spices creates a tantalizing taste, and when served with a rich marinara sauce, they become irresistible.
Not only are they easy to make, but they also allow your guests to indulge at their own pace, making them a fantastic finger food.
To elevate your mini meatball dish, consider using fresh ingredients for the marinara sauce. While store-bought options can save time, a homemade sauce infused with garlic, onions, and fresh basil will take your meatballs to the next level. Plus, the enticing aroma of the sauce simmering on the stove can fill your kitchen, making everyone keen to dig in when it’s time to serve!
Ingredients:
- 1 pound ground beef
- 1/2 cup breadcrumbs
- 1/4 cup grated Parmesan cheese
- 1/4 cup finely chopped onion
- 2 cloves garlic, minced
- 1 large egg
- 1 tablespoon chopped fresh parsley
- 1 teaspoon salt
- 1/2 teaspoon black pepper
- 1/2 teaspoon dried oregano
- 2 cups marinara sauce (homemade or store-bought)
- Fresh basil leaves (for garnish)
Preheat your oven to 400°F (200°C). In a large bowl, combine the ground beef, breadcrumbs, Parmesan cheese, onion, garlic, egg, parsley, salt, pepper, and oregano.
Mix well until all ingredients are thoroughly combined. Roll the mixture into small balls, about 1 inch in diameter, and place them on a baking sheet lined with parchment paper. Bake the meatballs for 15-20 minutes, or until they’re cooked through and browned.
In a separate saucepan, warm the marinara sauce over medium heat until it’s bubbling, then gently add the cooked meatballs to the sauce and let them simmer for a few minutes before serving.
When preparing mini meatballs, verify that they’re uniform in size for even cooking. Allowing the meatballs to rest for a few minutes before serving can help retain their juiciness and flavor.
You can also experiment with different ground meats, such as turkey or chicken, for a lighter option. Pair these tasty meatballs with toothpicks for easy seating, and consider serving them with a side of extra marinara for dipping to enhance the experience even more!
Stuffed Mushrooms
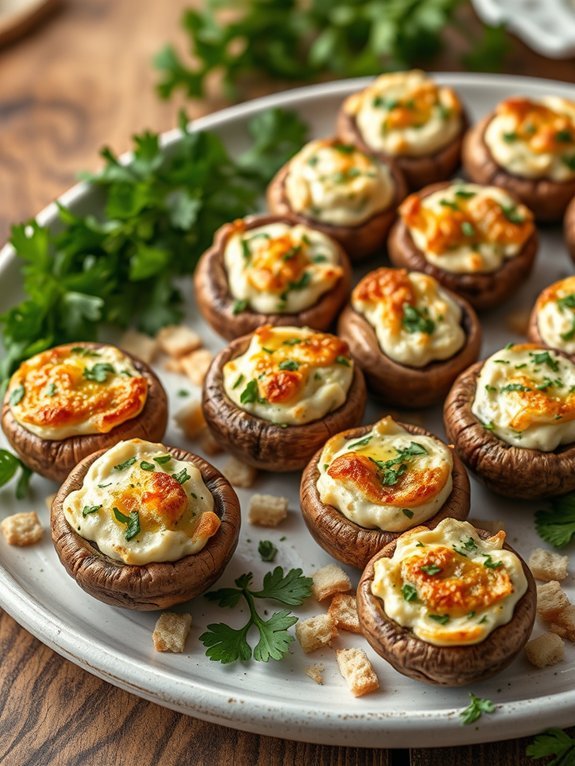
Stuffed mushrooms are a delightful party appetizer that can elevate any gathering. Their versatility is one of the highlights — you can combine various ingredients to create a flavor profile that your guests will love. These little bites aren’t only easy to prepare but also look visually appealing on any platter. They’re perfect for parties, family gatherings, or simply as a cozy treat while enjoying a night in.
To achieve the perfect stuffed mushrooms, it’s essential to select the right type of mushrooms. Button mushrooms are commonly used due to their small size and ability to hold up to different stuffing mixtures. The filling can range from creamy cheeses to savory meats, vegetables, or even grains, allowing for a plethora of delicious combinations.
Once cooked, they become tender yet retain their structure, providing a burst of flavor with each bite.
- 16 large button mushrooms
- 1 cup cream cheese, softened
- 1 cup grated Parmesan cheese
- 1/2 cup breadcrumbs
- 2 cloves garlic, minced
- 1/4 cup fresh parsley, chopped
- Salt and pepper to taste
- 2 tablespoons olive oil
Preheat your oven to 350°F (175°C). Clean the mushrooms and carefully remove the stems. In a bowl, combine the cream cheese, grated Parmesan, breadcrumbs, minced garlic, parsley, salt, and pepper. Mix well until the ingredients are thoroughly combined.
Spoon the mixture into each mushroom cap, packing it lightly, then drizzle with olive oil before placing them on a baking sheet. Bake for about 20-25 minutes, or until the tops are golden brown and the mushrooms are tender.
If you’re looking to add an extra twist to your stuffed mushrooms, consider experimenting with different types of cheese, such as feta or blue cheese, for added depth of flavor. Adding diced sun-dried tomatoes, spinach, or bacon can also enhance the stuffing mix.
For a little heat, incorporate red pepper flakes or chopped jalapeños. Make sure not to overstuff the mushrooms to avoid spillage during baking, and let them cool slightly before serving to fully enjoy their flavor.
Recommended Items
Get ready to impress your guests with these must-have ingredients and tools!
Products
Shrimp Cocktail
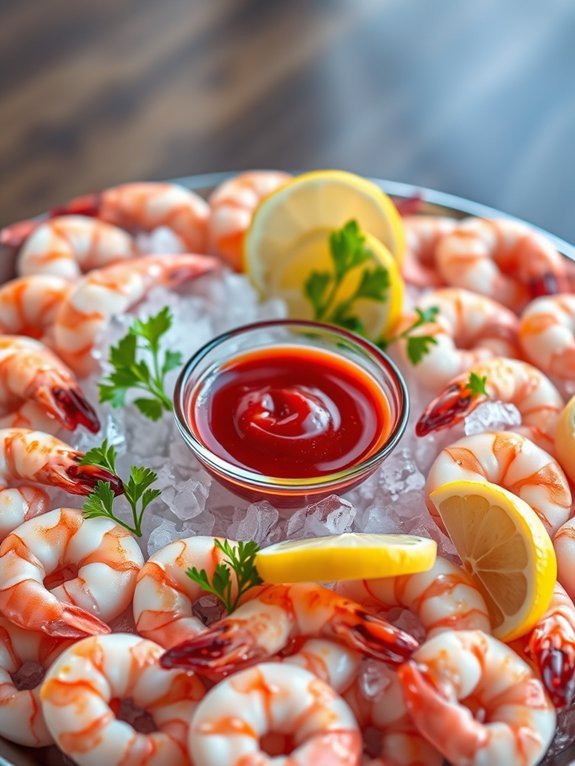
Shrimp cocktail is a classic appetizer that’s always a hit at parties and gatherings. The vibrant pink shrimp, paired with a tangy cocktail sauce, offers a revitalizing start to any meal. This dish not only looks elegant on the serving platter, but it’s also incredibly easy to prepare, making it a great choice for both novice cooks and seasoned chefs.
The secret to a perfect shrimp cocktail lies in cooking the shrimp just right. Overcooked shrimp can be rubbery and unpleasant, so it’s crucial to monitor the cooking time closely. This recipe will guide you through the process, guaranteeing that you serve succulent shrimp that will impress your guests. Whether it’s a holiday celebration or a casual get-together, the shrimp cocktail is sure to be a highlight of the appetizer spread.
- 1 pound large shrimp, peeled and deveined
- 1 lemon, cut into wedges
- 1 tablespoon Old Bay seasoning
- 1 cup cocktail sauce
- Fresh parsley, for garnish
- Ice, for serving
In a large pot of boiling water, add the lemon wedges and Old Bay seasoning, then carefully add the shrimp. Cook for 2-3 minutes or until the shrimp turn pink and opaque. Immediately drain the shrimp, transferring them to a bowl filled with ice water to stop the cooking process.
Once chilled, drain again and arrange the shrimp on a serving platter with cocktail sauce in the center for dipping.
When preparing shrimp cocktail, freshness is key for the best flavor. Opt for the freshest shrimp you can find, preferably from a seafood market. If using frozen shrimp, verify they’re fully thawed and drained before cooking.
Experiment with different flavors by adding a splash of hot sauce or Worcestershire sauce to the cocktail sauce for an extra kick. For a stunning presentation, garnish the dish with fresh lemon wedges and parsley.
Antipasto Platter
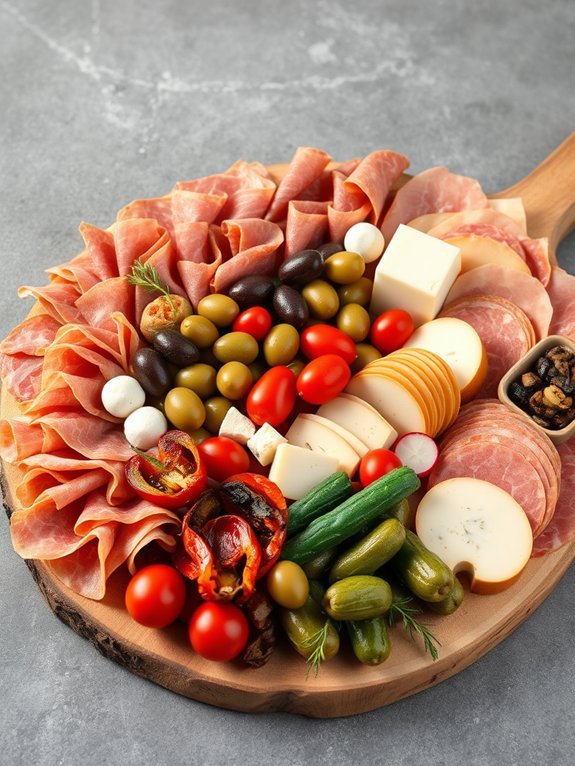
An antipasto platter is a delightful way to begin any gathering or meal, offering a visually stunning assortment of flavors and textures. Originating from Italy, this appetizer typically features a variety of cured meats, cheeses, olives, marinated vegetables, and bread, making it a versatile dish that can cater to different tastes.
The beauty of an antipasto platter lies not only in the ingredients you choose but also in the presentation – vibrant colors and artistic arrangement can elevate your appetizer and entice your guests right from the start.
Creating your antipasto platter is a fun and creative process. There are no strict rules, allowing you to incorporate your personal favorites or seasonal ingredients. This dish can be adapted to suit dietary requirements, making it a perfect choice for a diverse group of guests.
Whether you’re hosting a casual get-together or a more formal affair, an antipasto platter serves as a delicious conversation starter that beckons everyone to indulge in its savory offerings.
Ingredients:
- Assorted cured meats (e.g., prosciutto, salami, mortadella)
- A variety of cheeses (e.g., mozzarella, provolone, parmesan)
- Mixed olives (e.g., Kalamata, green, stuffed)
- Roasted red peppers or marinated artichokes
- Fresh vegetables (e.g., cherry tomatoes, radishes, cucumber)
- Bread (e.g., sliced baguette, breadsticks, focaccia)
- Fresh herbs (e.g., basil, parsley)
- Olive oil and balsamic vinegar for drizzling
Arrange all the components on a large serving board or platter, starting with the cured meats and cheeses laid out in an appealing manner. Follow by filling in the spaces with olives, marinated vegetables, and fresh vegetables. Nestle slices of bread or breadsticks around the edge for easy access, and garnish with fresh herbs.
Consider drizzling a bit of olive oil and balsamic vinegar over the top just before serving.
When creating your antipasto platter, feel free to experiment with flavors and textures. You can add seasonal ingredients such as figs, grapes, or even roasted nuts for a surprising twist. Don’t hesitate to mix up the cheeses or meats based on what you have available or what your guests prefer.
Finally, a beautiful presentation can make all the difference—consider using small bowls for dips or olives and arrange the items in a way that’s both colorful and inviting.
Proposed Recipe
Deviled Eggs
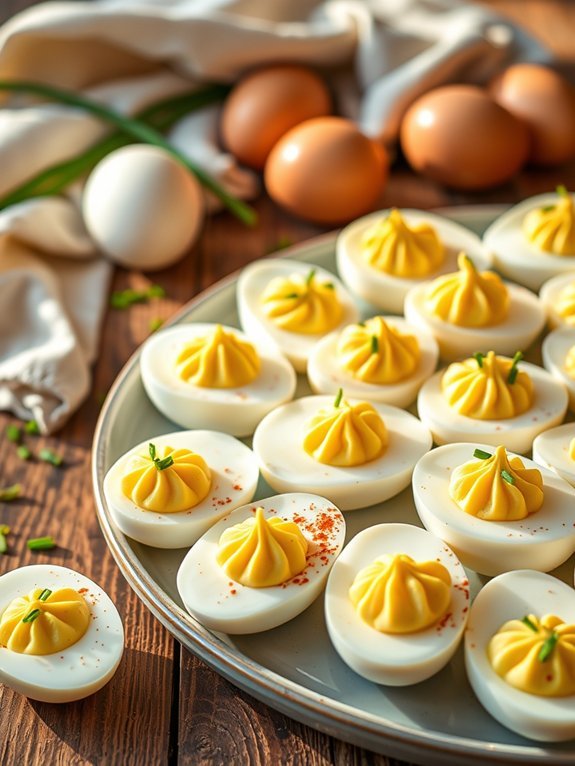
Deviled eggs are a classic party appetizer that never goes out of style. They aren’t only easy to prepare but also versatile, allowing for a variety of flavors and toppings that cater to different tastes. The creamy filling from the egg yolks mixed with mayonnaise and mustard creates a deliciously satisfying bite.
Whether you’re hosting a game night, a family gathering, or bringing a dish to a potluck, deviled eggs are sure to impress your guests. Adding your personal twist can elevate these eggs from tradition to something uniquely yours. You can experiment with ingredients like bacon, herbs, or spice blends to create different versions that reflect your culinary preferences.
The presentation is also key; a sprinkle of paprika or chopped chives can make your deviled eggs look as good as they taste.
- 6 large eggs
- 1/4 cup mayonnaise
- 1 teaspoon Dijon mustard
- 1 teaspoon white vinegar
- Salt, to taste
- Black pepper, to taste
- Paprika, for garnish
- Fresh chives or parsley, finely chopped (optional)
Boil the eggs in a pot of water for about 10-12 minutes until hard-boiled. Once cooked, transfer them to an ice bath to cool. Peel the eggs and slice them in half lengthwise. Remove the yolks and place them in a mixing bowl. Mash the yolks and mix in mayonnaise, mustard, vinegar, salt, and pepper until smooth. Spoon or pipe the mixture back into the egg whites and sprinkle with paprika and fresh herbs for garnish.
When making deviled eggs, it’s important to choose the right eggs for the best results. Use eggs that are a few days old; they’re easier to peel than fresh eggs.
Additionally, consider making them a few hours or even a day in advance. This allows the flavors to meld beautifully and can save you time on the day of your event. Store the eggs in the refrigerator, covered, until ready to serve.
Bruschetta With Tomato and Basil
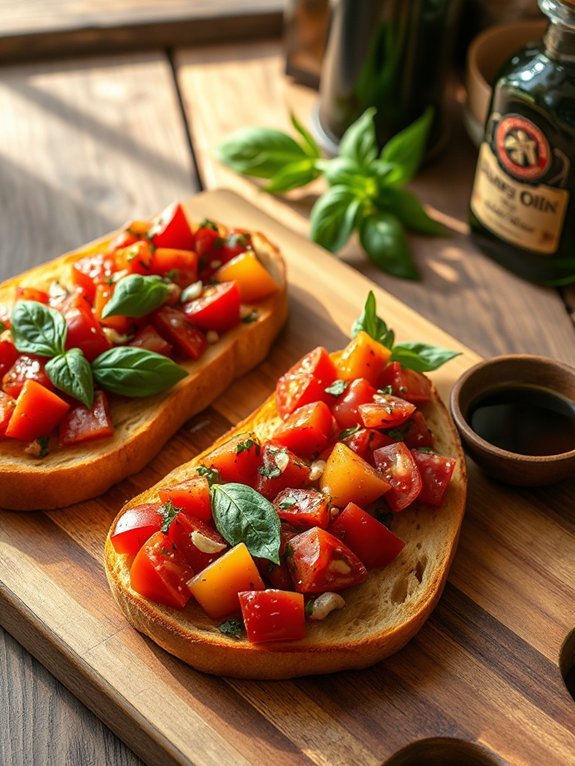
Bruschetta with tomato and basil is a classic Italian appetizer that showcases the bright flavors of fresh ingredients. The simple combination of ripe tomatoes, fragrant basil, and aromatic garlic atop toasted bread creates a delightful experience for the taste buds.
Whether you’re hosting a gathering or just enjoying a cozy night in, bruschetta offers a delicious way to kick off any meal.
To achieve the perfect bruschetta, it’s crucial to use high-quality, fresh ingredients. The type of bread you choose plays a significant role in the overall texture and taste; a rustic Italian bread or a baguette are ideal choices.
You can easily customize your bruschetta by adding different toppings or herbs, making it a versatile appetizer for various occasions.
Ingredients:
- 1 crusty Italian bread or baguette
- 4 ripe tomatoes, diced
- 1 cup fresh basil leaves, chopped
- 2 cloves garlic, minced
- 3 tablespoons extra virgin olive oil
- Salt and freshly ground black pepper to taste
- Balsamic glaze (optional, for drizzling)
To prepare the bruschetta, start by preheating your oven to 400°F (200°C). Slice the bread into thick pieces and arrange them on a baking sheet.
Brush both sides of each slice with olive oil and toast in the oven for about 5-7 minutes, or until they’re golden brown and crispy.
While the bread is toasting, combine the diced tomatoes, chopped basil, minced garlic, extra virgin olive oil, and season with salt and pepper in a bowl.
Once the bread is ready, remove it from the oven and top each slice generously with the tomato mixture.
Finish with a drizzle of balsamic glaze, if desired, and serve immediately.
When making bruschetta, freshness is key. Choose ripe, juicy tomatoes for the best flavor, and consider letting the tomato mixture sit for a few minutes before serving to allow the juices to meld and enhance the overall taste.
Additionally, if you have any leftovers, store the tomato topping separately from the toasted bread to prevent sogginess, allowing you to enjoy every bite the next day.
Cheese and Charcuterie Board
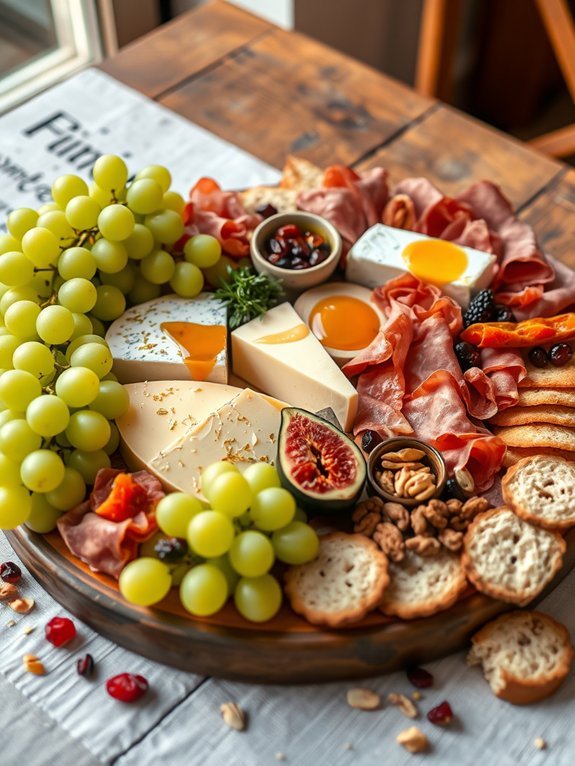
A cheese and charcuterie board is the ultimate appetizer for any gathering, offering a delightful combination of flavors, textures, and visual appeal. It allows you to present an array of cured meats, artisanal cheeses, and charming accompaniments, all on one platter. This dish not only serves as a conversation starter but also caters to a variety of tastes, making it a versatile choice for all types of events.
Creating a stunning cheese and charcuterie board is as simple as selecting your favorite components and arranging them thoughtfully. You don’t have to be a gourmet chef to achieve an impressive spread; just gather quality ingredients and let their natural beauty shine.
Whether it’s a casual get-together or a more formal affair, this board will surely impress your guests, providing an inviting atmosphere that encourages sharing and enjoyment.
- Assorted cheeses (e.g., brie, cheddar, gouda, blue cheese)
- Cured meats (e.g., prosciutto, salami, chorizo)
- Fresh fruits (e.g., grapes, figs, apple slices)
- Dried fruits (e.g., apricots, cranberries)
- Nuts (e.g., almonds, walnuts, pistachios)
- Crackers or bread (e.g., baguette slices, breadsticks)
- Spreads (e.g., honey, fig jam, mustard)
- Olives or pickles
- Fresh herbs (e.g., rosemary, thyme) for garnish
Begin by choosing a large, flat board or platter as your base. Arrange the cheeses first, spacing them out evenly. Next, fold or roll the cured meats and place them beside the cheeses. Fill in the gaps with fresh and dried fruits, nuts, and crackers, ensuring there’s a variety of colors and shapes.
Finally, add small bowls for spreads, olives, or pickles, and use fresh herbs for an attractive garnish.
When preparing your cheese and charcuterie board, select a mix of flavors and textures to keep things interesting. Don’t be afraid to get creative with seasonal ingredients; for instance, the addition of pomegranate seeds in the fall or berries in the summer can elevate your presentation.
Also, consider the dietary preferences of your guests, providing vegetarian or gluten-free options if necessary. Remember to let the cheeses sit at room temperature before serving for peak flavor and texture!
Vegetable Spring Rolls
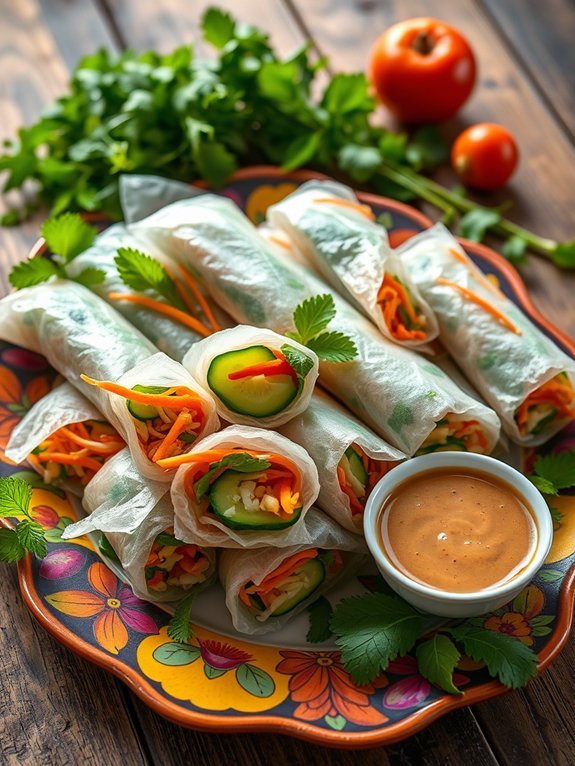
Vegetable spring rolls are a delightful appetizer that can be enjoyed warm or cold, making them a versatile choice for any gathering. Bursting with fresh flavors and a satisfying crunch, these rolls are filled with a colorful mix of vegetables that are both nutritious and delicious.
Whether you’re hosting a party or simply enjoying a cozy night in, vegetable spring rolls are sure to please everyone at the table. The great thing about vegetable spring rolls is that you can customize the filling based on your preferences or what you have on hand.
Common choices often include crisp carrots, invigorating cucumbers, and fragrant herbs like mint or cilantro. Dipped in a tangy soy or peanut sauce, these spring rolls become an irresistible starter that’s both light and satisfying.
Ingredients:
- Rice paper wrappers
- 1 cup shredded carrots
- 1 cup sliced bell peppers (any color)
- 1 cup sliced cucumbers
- 1 cup bean sprouts
- 1 cup shredded cabbage
- 1/4 cup fresh mint leaves
- 1/4 cup fresh cilantro leaves
- Soy sauce or peanut sauce for dipping
To prepare the vegetable spring rolls, start by gathering all your vegetables and herbs in a large bowl. Fill a shallow dish with warm water and dip one rice paper wrapper into the water until it becomes pliable, about 10-15 seconds.
Lay the wrapper flat on a clean surface and place a small amount of each vegetable and herbs in the center. Fold the sides of the wrapper over the filling, then roll it up tightly from the bottom to the top. Repeat this process with the remaining wrappers and filling.
When making vegetable spring rolls, it’s critical to keep the ingredients fresh and to work quickly as the rice paper can dry out. Keep a damp cloth over the rolls that you have already made to prevent them from sticking together.
Additionally, feel free to experiment with your fillings; adding avocado, tofu, or even cooked shrimp can enhance the flavors and textures. Finally, serve your spring rolls chilled or at room temperature alongside your favorite dipping sauce for an invigorating and appetizing treat.
Puff Pastry Bites
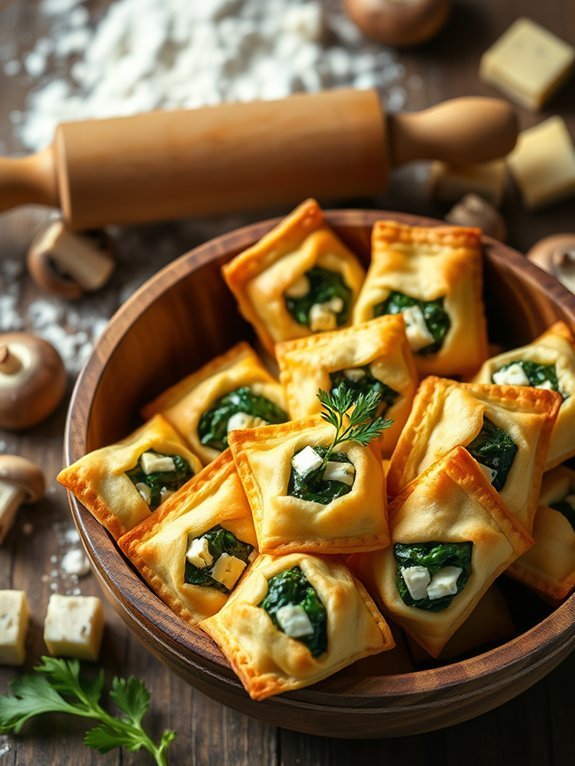
Puff pastry bites are a delightful and versatile party appetizer, perfect for entertaining guests or enjoying a cozy night in. These golden, flaky morsels can be filled with a variety of delicious ingredients, making them a crowd-pleaser.
They’re surprisingly easy to make, which allows both seasoned cooks and novice chefs to impress their friends and family with beautiful creations.
To create these tasty bites, you’ll need store-bought puff pastry, which saves time and effort while delivering that irresistible flaky texture. The fillings can range from savory options like cheese and spinach to sweet choices such as fruit preserves or chocolate. Your guests will love the array of flavors, and you can customize them to fit any occasion!
- 1 package of frozen puff pastry (thawed)
- 1 cup of filling (cheese, spinach, mushrooms, or your choice)
- 1 egg (beaten, for egg wash)
- Salt and pepper (to taste)
- Optional herbs or spices (for seasoning)
Preheat your oven to 400°F (200°C). Roll out the thawed puff pastry on a lightly floured surface to about 1/8 inch thick. Cut the pastry into squares (approximately 3×3 inches).
Place a small spoonful of your chosen filling in the center of each square. Fold the corners of the pastry over the filling to create a pouch, sealing the edges with a fork. Brush the tops with beaten egg for a golden finish, and bake for 15-20 minutes or until puffed and golden brown.
For best results, make certain that your puff pastry is fully thawed but still cold, as this helps in achieving the best rise during baking. Experiment with different fillings and combinations; leftovers can make great additions, and don’t be afraid to add your personal touch with seasonings or herbs.
Additionally, you can prepare these bites ahead of time and freeze them before baking, making it easy to pop them in the oven when guests arrive.
Hummus and Pita Chips
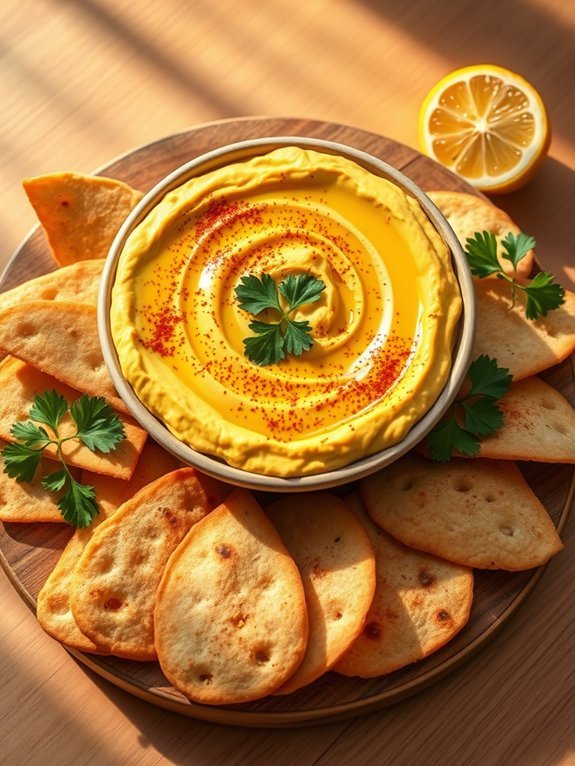
Hummus and pita chips make a delightful and healthy appetizer that’s perfect for parties, casual gatherings, or a simple snack at home. This Middle Eastern classic combines the creamy richness of hummus made from blended chickpeas with the satisfying crunch of baked pita chips. Not only is it quick to prepare, but it’s also packed with flavor and nutrition, making it an irresistible choice for everyone, including those with dietary restrictions.
Making hummus is incredibly easy and allows you to customize the flavor to your taste. You can add ingredients like roasted garlic, lemon juice, or any spices that you love. The pita chips are equally simple and can be seasoned with your choice of herbs and spices before baking. Together, hummus and pita chips create a harmonious blend of textures and tastes, making them a sure hit at any gathering.
Ingredients:
- 1 can (15 oz) chickpeas, drained and rinsed
- 1/4 cup tahini
- 2 tablespoons olive oil
- 2 tablespoons lemon juice
- 1 garlic clove, minced
- 1/2 teaspoon ground cumin
- Salt to taste
- 2 large pita breads
- Olive oil for brushing
- Optional seasonings (paprika, za’atar, or garlic powder)
Blend the chickpeas, tahini, olive oil, lemon juice, minced garlic, ground cumin, and a pinch of salt in a food processor until smooth and creamy. If the mixture is too thick, you can add a little water until the desired consistency is reached.
While the hummus is blending, preheat your oven to 350°F (175°C). Cut the pita breads into triangles, place them on a baking sheet, lightly brush with olive oil, and sprinkle with your chosen seasonings. Bake for about 10-12 minutes or until they’re golden brown and crispy.
Serve the hummus in a bowl with the pita chips arranged around it.
When making hummus, feel free to experiment with different toppings; a drizzle of olive oil, a sprinkle of paprika, or chopped herbs like parsley can elevate the presentation and flavor. If you’re looking for a spicier kick, consider adding a dash of cayenne pepper to the hummus.
To guarantee your pita chips are super crunchy, make sure they’re baked evenly and watch them closely to prevent burning. Enjoy your delicious homemade hummus and pita chips warm or at room temperature!
Fruit and Nut Cheese Ball
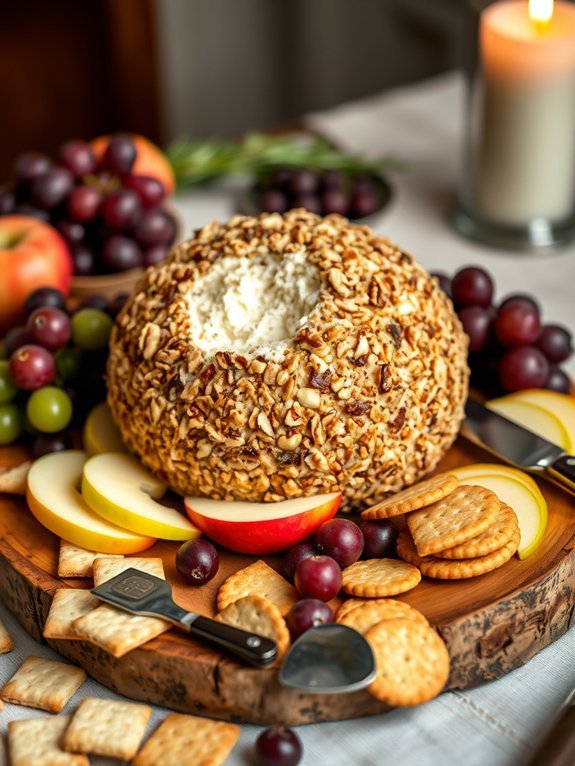
A Fruit and Nut Cheese Ball is the perfect appetizer for any party, combining a delightful mix of sweet and savory flavors that guests will love.
It’s a versatile dish that can be customized with various fruits and nuts according to your preference, making it not only visually appealing but also a great conversation starter.
Whether it’s a holiday gathering, a birthday party, or a casual get-together, this cheese ball is sure to impress.
To make your Fruit and Nut Cheese Ball even more delectable, serving it with an assortment of crackers, sliced apples, or bread is always a hit.
Plus, it’s an easy make-ahead option that allows you to spend more time with your guests and less time in the kitchen.
With just a little preparation, you can create a beautiful centerpiece that tantalizes the taste buds and adds a touch of elegance to your appetizer spread.
Ingredients:
- 8 oz cream cheese, softened
- 1 cup shredded sharp cheddar cheese
- 1/2 cup dried cranberries, chopped
- 1/2 cup walnuts, finely chopped
- 1/4 cup chopped green onions
- 1 tsp garlic powder
- 1 tsp onion powder
- 1/2 tsp salt
- 1/2 tsp black pepper
- Fresh fruit (such as apple slices or grapes) and assorted crackers for serving
In a mixing bowl, combine the softened cream cheese, cheddar cheese, dried cranberries, walnuts, green onions, garlic powder, onion powder, salt, and black pepper.
Mix until all ingredients are well incorporated.
Shape the mixture into a ball and wrap it in plastic wrap.
Refrigerate for at least 2 hours to allow it to firm up and the flavors to meld.
Before serving, roll the cheese ball in additional chopped nuts if desired for an extra crunchy coating.
Serve with fresh fruit and an array of crackers on the side.
For best results, let your cheese ball sit at room temperature for about 15 minutes before serving to soften slightly.
This will make it easier for guests to spread on crackers and enhance the flavors.
You can also personalize your cheese ball by experimenting with different fruits, like apricots or figs, and various nuts like pecans or almonds.
Leftovers can be stored in the fridge for several days, making it a perfect option for meal prep as well.
Chocolate-Covered Pretzels
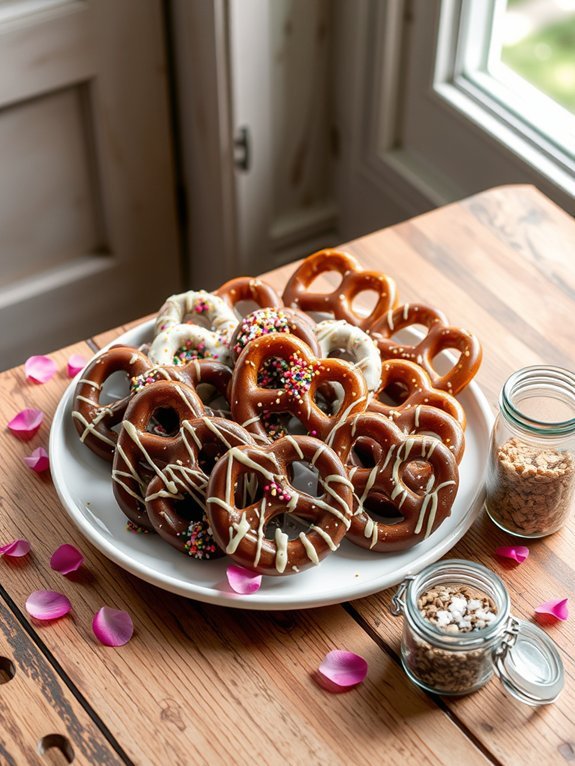
Chocolate-covered pretzels are the perfect sweet and salty snack that will leave your guests craving more. The contrast of crunchy pretzels with rich, velvety chocolate creates a delightful treat that’s sure to impress at any gathering.
Whether you’re hosting a party, celebrating a holiday, or simply indulging yourself, these delectable bites are easy to make and require only a few simple ingredients.
Making chocolate-covered pretzels isn’t only fun but also quite versatile. You can use different types of chocolate—dark, milk, or white—along with various toppings like crushed nuts, sprinkles, or drizzled chocolate. This customizability allows you to cater to various tastes and preferences.
With just a little time and effort, you can create a fabulous appetizer that’s both appealing to the eye and delicious to eat.
Ingredients:
- 2 cups pretzel rods or pretzel twists
- 1 cup chocolate chips (milk, dark, or white)
- 2 teaspoons coconut oil or shortening (optional)
- Assorted toppings (e.g., sprinkles, crushed nuts, sea salt)
Melt the chocolate chips in a microwave-safe bowl in 30-second intervals, stirring after each interval until completely smooth. If desired, stir in coconut oil or shortening for a smoother consistency.
Dip each pretzel into the melted chocolate using a fork, allowing any excess chocolate to drip off. Place the coated pretzels on a parchment-lined baking sheet and sprinkle with your choice of toppings. Repeat until all pretzels are coated, then refrigerate for about 30 minutes, or until the chocolate hardens.
For a more polished presentation, try drizzling contrasting chocolate over the hardened pretzels using a piping bag or a fork. Additionally, consider experimenting with flavored chocolates or adding sea salt on top to enhance the flavors.
Store the completed chocolate-covered pretzels in an airtight container at room temperature for up to a week, making them a convenient treat for future snacking or gatherings.


