This post may contain affiliate links. Please read our policy page.
If you’re craving something sweet, you’ll love these 15 delectable dessert recipes! From rich and fudgy decadent chocolate brownies to light and invigorating lemon sorbet, there’s something for everyone. Treat yourself to classic vanilla cupcakes, luscious carrot cake, or a velvety cheesecake topped with berries. Don’t forget the comforting golden apple pie and indulgent peanut butter cookies! This delightful collection offers a variety of flavors and textures to satisfy your sweet tooth, and there’s even more to discover!
Decadent Chocolate Brownies
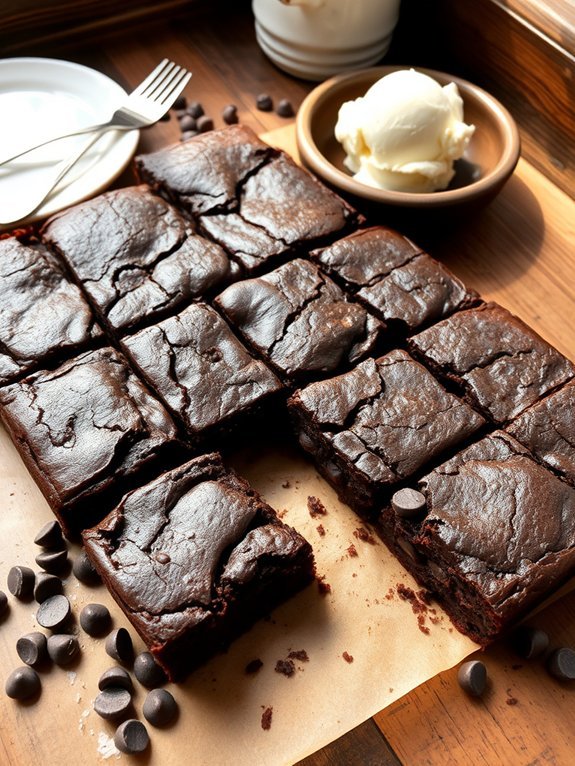
Decadent chocolate brownies are a classic dessert that never fails to satisfy a sweet tooth. Rich, fudgy, and packed with chocolate flavor, these brownies are the perfect treat for any occasion, whether you’re hosting a dinner party or simply craving something sweet at home.
The beauty of this recipe lies not just in its flavor, but also in its simplicity, making it an excellent choice for novice bakers and seasoned chefs alike.
The key to achieving the perfect brownie is balancing the chocolate, butter, and sugar to create a moist and chewy texture. You can customize your brownies by adding nuts, chocolate chips, or even a sprinkle of sea salt on top for an extra burst of flavor. Once you’ve mastered this recipe, you’ll find that it’s not only easy but also incredibly rewarding to indulge in your very own homemade treat.
- 1 cup (225 g) unsalted butter
- 2 cups (400 g) granulated sugar
- 4 large eggs
- 1 teaspoon vanilla extract
- 1 cup (120 g) all-purpose flour
- 1 cup (90 g) unsweetened cocoa powder
- 1/2 teaspoon salt
- 1/2 teaspoon baking powder
- 1 cup (175 g) chocolate chips (optional)
To prepare the brownies, preheat your oven to 350°F (175°C) and grease a 9×13 inch baking pan or line it with parchment paper.
In a medium saucepan, melt the butter over low heat, then remove it from the heat and stir in the sugar until well combined. Add the eggs one at a time, whisking well after each addition, then mix in the vanilla extract.
In a separate bowl, whisk together the flour, cocoa powder, salt, and baking powder. Gradually fold the dry ingredients into the wet mixture until just combined. If using chocolate chips, gently stir them in before transferring the batter to the prepared baking pan.
Bake for 20-25 minutes, or until a toothpick inserted into the center comes out with a few moist crumbs. Allow the brownies to cool before cutting into squares.
When making these decadent chocolate brownies, verify all ingredients are at room temperature, as this helps them blend more smoothly.
If you prefer a more intense chocolate flavor, consider using a mix of dark chocolate and semi-sweet chocolate chips. For an added touch, you can also sprinkle some chopped nuts for texture or serve them warm with a scoop of vanilla ice cream for an indulgent dessert experience.
Enjoy your baking!
Classic Vanilla Cupcakes
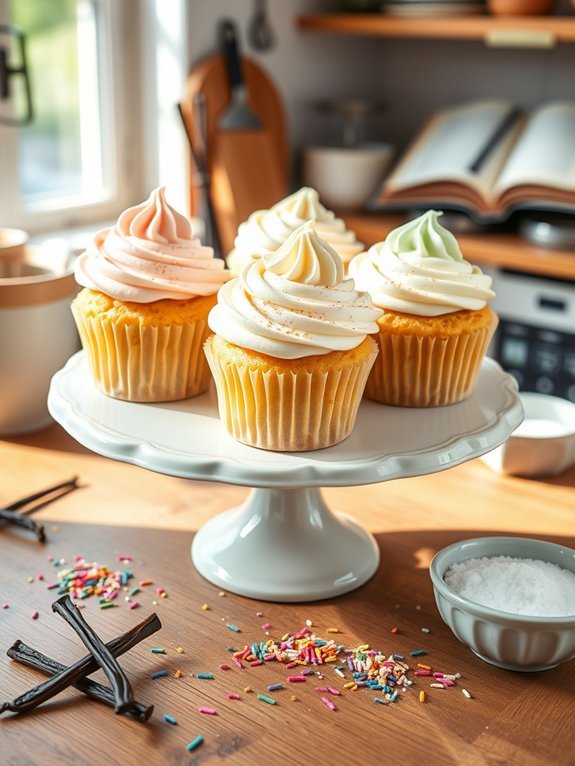
Classic Vanilla Cupcakes are a timeless treat perfect for any occasion. Their light, fluffy texture and rich vanilla flavor make them a favorite among dessert lovers. Whether you’re celebrating a birthday, hosting a tea party, or simply indulging yourself, these cupcakes are guaranteed to bring joy and satisfaction to your taste buds. Topped with a swirl of buttercream frosting or enjoyed plain, classic vanilla cupcakes are a versatile dessert that never goes out of style.
Making these cupcakes is straightforward and can be accomplished with a few staple ingredients commonly found in any baking kitchen. With an easy-to-follow method, these delightful treats can be whipped up in no time, allowing you to enjoy the warm aroma of freshly baked cupcakes filling your home. Grab your mixing bowls, preheat the oven, and let’s get started on this delicious journey of baking classic vanilla cupcakes!
Ingredients:
- 1 ½ cups all-purpose flour
- 1 cup granulated sugar
- 1 ½ teaspoons baking powder
- ½ teaspoon baking soda
- ½ teaspoon salt
- ½ cup unsalted butter, softened
- 2 large eggs
- 1 teaspoon vanilla extract
- ¾ cup whole milk
Begin by preheating your oven to 350°F (175°C) and lining a cupcake tin with paper liners. In a large mixing bowl, combine the flour, sugar, baking powder, baking soda, and salt. In another bowl, cream together the softened butter, eggs, vanilla extract, and milk. Gradually add the dry ingredients to the wet ingredients and mix until just combined. Be careful not to overmix the batter.
Scoop the mixture into the prepared cupcake liners, filling them about two-thirds full. Bake for 15-20 minutes or until a toothpick inserted into the center comes out clean. Allow them to cool completely before frosting, if desired.
For extra richness and flavor, consider using high-quality vanilla extract, or even vanilla bean paste, for an added gourmet touch. Verify all your ingredients are at room temperature before mixing, as this helps create a smoother batter. You can also customize these cupcakes by adding chocolate chips, nuts, or citrus zest for a unique twist.
When frosting, consider using a piping bag for a professional finish, and don’t be shy to experiment with different types of frosting—cream cheese or chocolate ganache work beautifully as alternatives!
Refreshing Lemon Sorbet
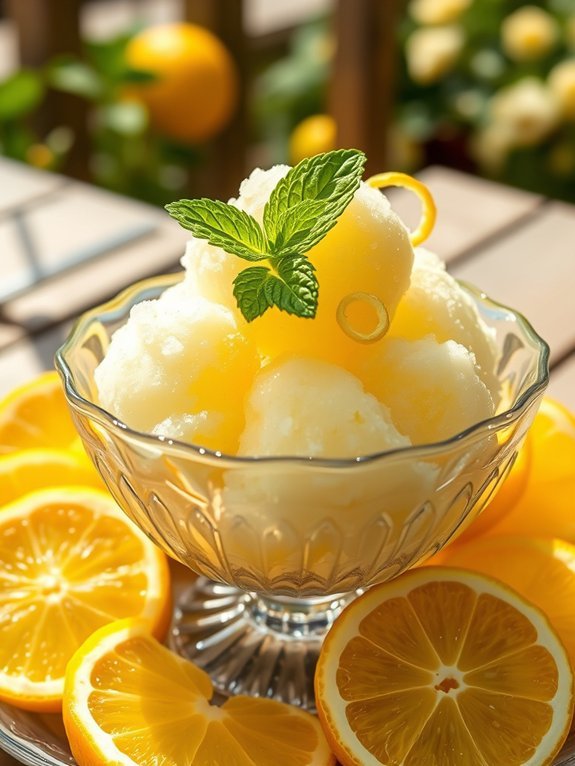
Revitalizing Lemon Sorbet is the perfect treat to cool down on a warm day. With its delightful citrusy flavor and icy texture, this simple dessert isn’t only a crowd-pleaser but also a revitalizing alternative to heavier sweets. The natural tartness of the lemon balances beautifully with the sweetness of sugar, creating a bright and invigorating sorbet that can brighten any occasion.
Making lemon sorbet at home is surprisingly easy and requires minimal ingredients. Unlike ice creams that need to be churned and processed extensively, this sorbet offers a straightforward preparation method that allows you to enjoy a homemade dessert without the fuss. It’s ideal for serving after a rich dinner or simply as a sweet treat on a sunny afternoon.
- 1 cup fresh lemon juice (about 4-6 lemons)
- 1 cup water
- 1 cup granulated sugar
- Zest of 2 lemons
- Pinch of salt
In a medium saucepan, combine the water and sugar over medium heat, stirring until the sugar fully dissolves to create a simple syrup. Once done, remove from heat and add in the fresh lemon juice, lemon zest, and a pinch of salt. Stir to combine and let the mixture cool to room temperature.
Once cooled, pour the mixture into a shallow dish and place it in the freezer. Every 30 minutes, use a fork to scrape and stir the mixture until it’s completely frozen and has a fluffy texture, usually about 3-4 hours.
When making lemon sorbet, sourcing the freshest lemons will enhance the flavor considerably. Consider using organic lemons, as they often have a brighter and more aromatic zest.
Additionally, if you prefer a less tart sorbet, feel free to adjust the amount of sugar according to your taste preferences. For an extra twist, you can add fresh herbs such as mint or basil for an aromatic flair or even a splash of lemon liqueur for depth of flavor.
Rich Cheesecake With Berry Topping
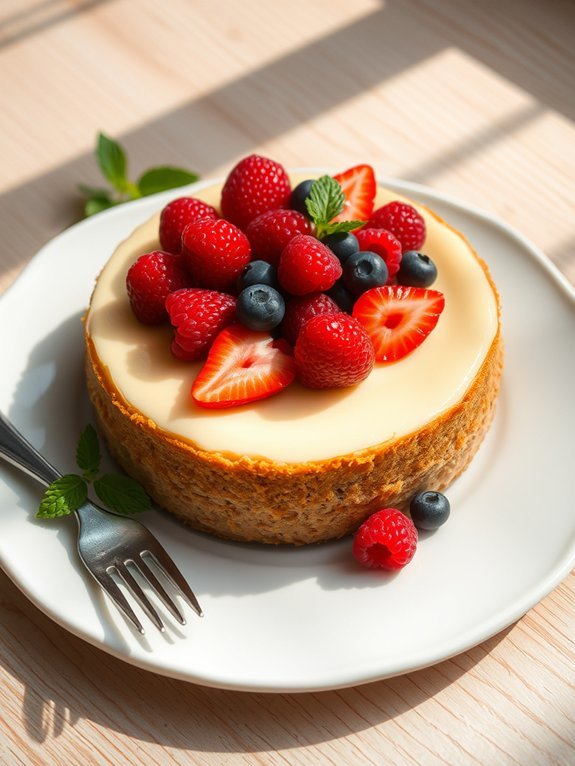
The Rich Cheesecake with Berry Topping is a decadent dessert that’s sure to impress your family and friends. With a creamy and smooth texture, this cheesecake is a delightful treat for any occasion. The combination of tangy cream cheese, sweet sugar, and a hint of vanilla creates a luscious flavor that pairs perfectly with the vibrant and juicy berry topping. This recipe isn’t only simple to follow but also allows for customization depending on your favorite berries or seasonal fruits.
To create this dreamy dessert, start by preparing the graham cracker crust, which provides a crunchy contrast to the velvety cheesecake. Once the crust is baked and cooled, you’ll whip up the cheesecake filling to combine all the rich ingredients into one dreamy batter. After baking, it’s crucial to let the cheesecake set before adding the berry topping, allowing the flavors to meld beautifully and ensuring the best texture when sliced.
Ingredients:
- 2 cups graham cracker crumbs
- 1/2 cup unsalted butter, melted
- 1/4 cup granulated sugar
- 4 (8 oz) packages cream cheese, softened
- 1 cup granulated sugar
- 1 tablespoon vanilla extract
- 4 large eggs
- 1 cup sour cream
- 2 cups mixed berries (strawberries, blueberries, raspberries)
Preheat your oven to 325°F (160°C). In a mixing bowl, combine the graham cracker crumbs, melted butter, and 1/4 cup sugar to form the crust, then press it into the bottom of a springform pan and bake for 10 minutes.
In another bowl, beat the cream cheese until smooth, gradually adding 1 cup of sugar and vanilla until well combined. Incorporate the eggs one at a time, mixing gently, and then fold in the sour cream.
Pour this cheesecake batter over the cooled crust, bake for about 60 minutes, and then turn off the oven, allowing the cheesecake to cool inside for an hour. Once cooled, refrigerate it for at least 4 hours before topping with the mixed berries.
For the best cheesecake experience, make sure to thoroughly chill the cheesecake before serving, as this helps achieve a firmer texture that’s easier to slice. You can also experiment with the berry topping by adding a drizzle of honey or a sprinkle of powdered sugar for extra sweetness.
If you’re looking for an even richer flavor, consider using a flavored extract like almond or lemon in the cheesecake filling. Finally, if the top of your cheesecake cracks during baking, don’t worry; simply cover it up with the berry topping for a beautiful presentation!
Recommended Items
Dive into our delightful recommendations to enhance your dessert-making experience—enjoy the sweetness!
Golden Apple Pie
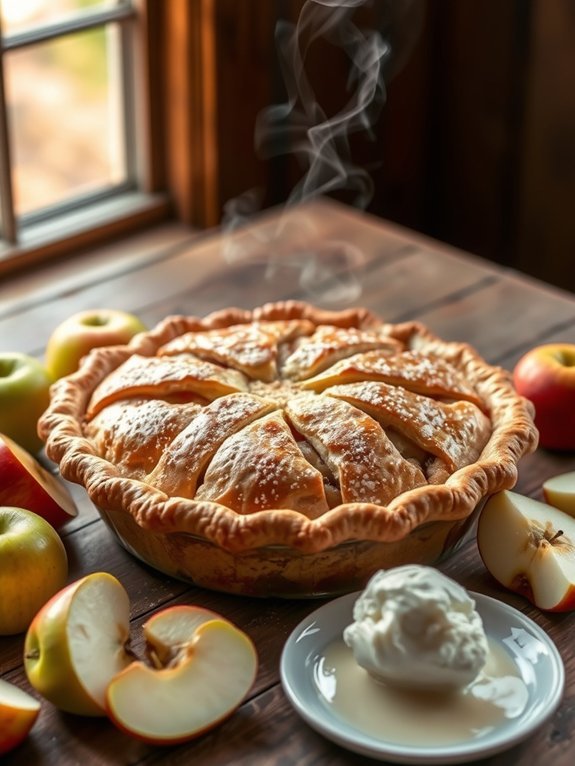
Golden Apple Pie is a classic dessert that combines the tartness of fresh apples with a flaky, buttery crust. This delightful treat is perfect for any occasion and can be enjoyed warm with a scoop of vanilla ice cream or served on its own. The beautiful golden color of the pie crust, coupled with the sweet and spiced apple filling, makes it a crowd-pleaser and a wonderful centerpiece for family gatherings or holiday celebrations.
To make the perfect Golden Apple Pie, it’s important to choose the right type of apples. A mix of tart and sweet varieties, such as Granny Smith and Honeycrisp, works beautifully to create a balanced flavor profile.
Additionally, ensuring that your pie crust is well-chilled before baking will result in a flakier texture. This recipe will guide you through making a delicious apple pie that will leave everyone asking for seconds.
Ingredients:
- 6 to 8 cups of peeled, sliced apples (mix of Granny Smith and Honeycrisp)
- ¾ cup granulated sugar
- ¼ cup brown sugar
- 2 tablespoons lemon juice
- 2 teaspoons ground cinnamon
- ¼ teaspoon ground nutmeg
- 2 tablespoons all-purpose flour
- 1 tablespoon unsalted butter, cut into small pieces
- 1 package of pre-made pie crusts (or homemade if preferred)
- Optional: egg wash (1 egg beaten with 1 tablespoon water) for glazing
Preheat your oven to 425°F (220°C). In a large bowl, toss the sliced apples with granulated sugar, brown sugar, lemon juice, cinnamon, nutmeg, and flour until well combined.
Roll out one pie crust and fit it into a 9-inch pie pan, then fill it with the apple mixture. Dot the top of the apples with small pieces of butter, cover with the second pie crust, and seal the edges. Cut slits in the top crust for steam to escape.
Bake for 15 minutes, then reduce the oven temperature to 350°F (175°C) and continue baking for 35-45 minutes, or until the crust is golden brown and the filling is bubbly.
When making your Golden Apple Pie, it’s beneficial to let it cool for at least an hour before cutting. This allows the juices to set, making it easier to slice and serve.
Additionally, for an extra touch, you can sprinkle a little sugar over the crust before baking for a sweet, sparkly finish. Experimenting with different spices, like ginger or allspice, can also personalize the flavor to your liking. Enjoy your baking!
Step-by-Step Cooking Guide
Silky Chocolate Mousse
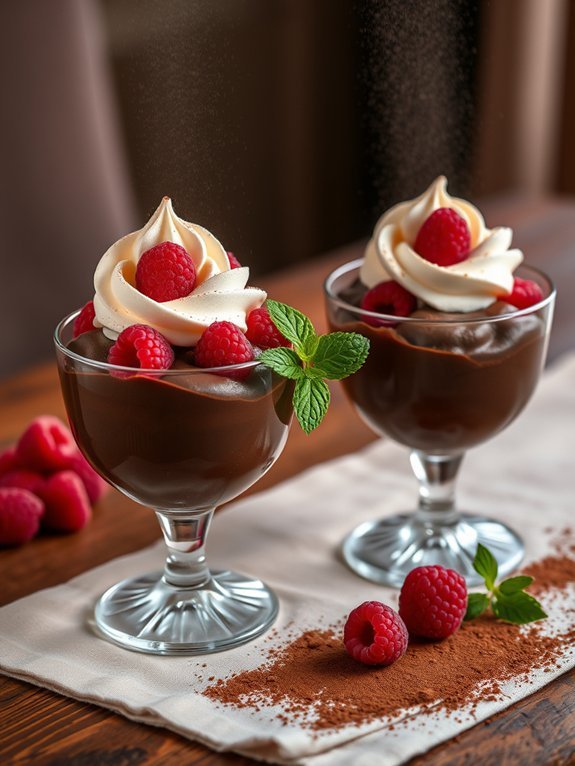
Silky chocolate mousse is a decadent dessert that’s sure to impress anyone fortunate enough to indulge in it. This luxurious treat combines rich chocolate with a light, airy texture that melts in your mouth, making it the perfect finale for any meal.
Although it may seem sophisticated, this mousse recipe is surprisingly easy to prepare, requiring only a handful of ingredients and minimal cooking time. Using high-quality chocolate is essential to achieving that deep, rich flavor, so be sure to choose a chocolate that you love. Whether you opt for dark, milk, or even white chocolate, the result will be a delicate balance of sweetness and decadence.
Serve it in elegant glasses or ramekins, and don’t hesitate to add your favorite toppings, such as whipped cream, fresh berries, or a sprinkle of sea salt for that extra touch of sophistication.
- 1 cup heavy cream
- 8 ounces dark chocolate (70% cocoa), finely chopped
- 3 large eggs, separated
- 1/4 cup granulated sugar
- 1 teaspoon vanilla extract
- Pinch of salt
In a heatproof bowl, melt the chopped chocolate over a pot of simmering water, stirring until smooth. Remove from heat and let it cool slightly.
In a separate bowl, whip the heavy cream until soft peaks form, then fold it into the cooled chocolate gently. In another bowl, whisk the egg whites with a pinch of salt until soft peaks form, gradually adding the sugar until glossy. Fold the egg whites into the chocolate mixture in three additions, being careful not to deflate the mixture.
Spoon the mousse into individual serving dishes and refrigerate for at least 2 hours before serving. To achieve the best texture, make sure your chocolate is slightly cooled before folding in the whipped cream and egg whites, as this prevents separation.
Additionally, for a richer flavor, let your mousse chill overnight, allowing the flavors to meld beautifully. Feel free to experiment with flavor variations by adding a splash of coffee, orange zest, or a hint of almond extract for a unique twist.
Coconut Macaroons
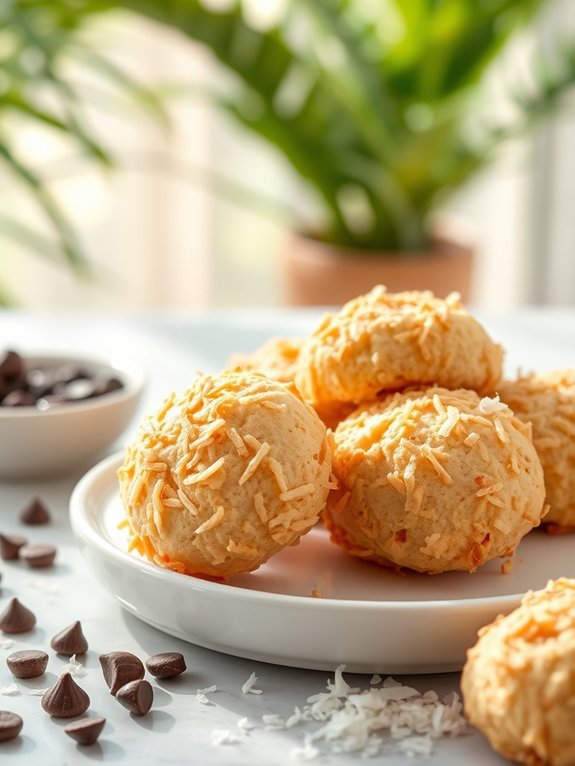
Coconut macaroons are a delightful and chewy treat that offers a burst of tropical flavor in every bite. Made primarily with shredded coconut and sweetened condensed milk, these little morsels are incredibly simple to prepare and require minimal ingredients.
Whether served at a gathering, enjoyed as an afternoon snack, or given as a homemade gift, coconut macaroons are sure to please any sweet tooth.
These delicious cookies aren’t only gluten-free but also incredibly versatile. You can dip them in chocolate for an extra decadent touch, or enjoy them plain with a sprinkle of sea salt for contrast. The coconut provides a wonderful texture and a hint of nuttiness, making them irresistible to anyone who loves coconut.
Let’s delve into this easy coconut macaroon recipe that anyone can master!
- 2 2/3 cups sweetened shredded coconut
- 1/2 cup sweetened condensed milk
- 1/2 teaspoon vanilla extract
- 1/4 teaspoon almond extract (optional)
- 2 large egg whites
- 1/4 teaspoon salt
- 1/4 cup semi-sweet chocolate chips (optional, for dipping)
Preheat your oven to 325°F (163°C) and line a baking sheet with parchment paper. In a mixing bowl, combine shredded coconut, sweetened condensed milk, vanilla extract, and almond extract if using.
In a separate bowl, whip the egg whites and salt until stiff peaks form, then gently fold the egg whites into the coconut mixture until just combined. Use a tablespoon or a cookie scoop to drop mounds of the mixture onto the prepared baking sheet, spacing them about 1 inch apart.
Bake for 20-25 minutes or until golden brown, then allow them to cool completely before serving.
When making coconut macaroons, it’s important not to overmix the egg whites after incorporating them into the coconut mixture—this guarantees the cookies remain light and airy.
If you want to add more flavor, consider incorporating mini chocolate chips or using unsweetened shredded coconut for a slightly different texture. Finally, dipping the cooled macaroons in melted chocolate can elevate their flavor profile and make for an extra special dessert. Enjoy!
Berry Pavlova
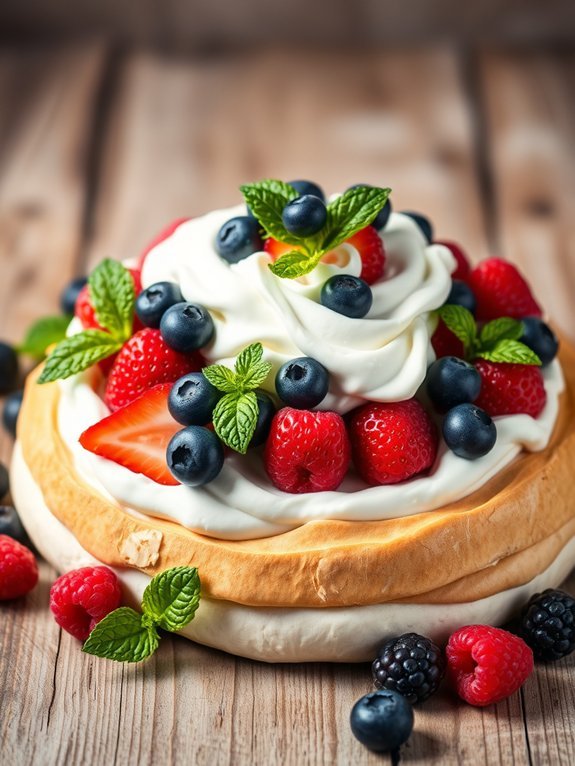
Pavlova is a delightful meringue-based dessert that’s crisp on the outside and soft and marshmallow-like on the inside. Named after the Russian ballerina Anna Pavlova, this elegant dessert is traditionally topped with whipped cream and fresh fruits, making it a stunning centerpiece for any occasion.
The combination of the light and airy meringue with the vibrant, juicy berries creates a harmonious balance that’s hard to resist. For a berry pavlova, you want to verify that your meringue is perfectly whipped to achieve that signature texture.
This recipe incorporates mixed berries, but feel free to use your favorites or seasonal fruits to personalize your dessert. The result will be a show-stopping dessert that’s as pleasing to the taste buds as it’s to the eyes.
- 4 large egg whites
- 1 cup granulated sugar
- 1 teaspoon white vinegar
- 1 teaspoon cornstarch
- 1 teaspoon vanilla extract
- 1 cup heavy whipping cream
- 2 tablespoons powdered sugar
- 2 cups mixed berries (strawberries, blueberries, raspberries, blackberries)
- Fresh mint leaves for garnish (optional)
Preheat your oven to 275°F (135°C) and line a baking sheet with parchment paper. In a large bowl, beat the egg whites with an electric mixer until they form soft peaks. Gradually add the granulated sugar, continuing to beat until the mixture becomes glossy and holds stiff peaks.
Gently fold in the vinegar, cornstarch, and vanilla extract. Spoon the meringue onto the prepared baking sheet, shaping it into a flat circle with slightly raised edges. Bake for 60-75 minutes until the meringue is dry and can easily be lifted off the parchment. Turn off the oven and leave the meringue inside to cool completely.
When assembling your pavlova, make certain your meringue is completely cooled before topping it with whipped cream and berries. Take care when spreading the whipping cream over the meringue to avoid breaking it.
If your fruit is juicy, consider patting it dry before adding it to prevent excess moisture from impacting the meringue’s crispness. Finally, serving the pavlova soon after assembly will verify the meringue remains light and airy, as it can soften if left too long.
Enjoy your beautiful and delicious berry pavlova!
Sticky Toffee Pudding
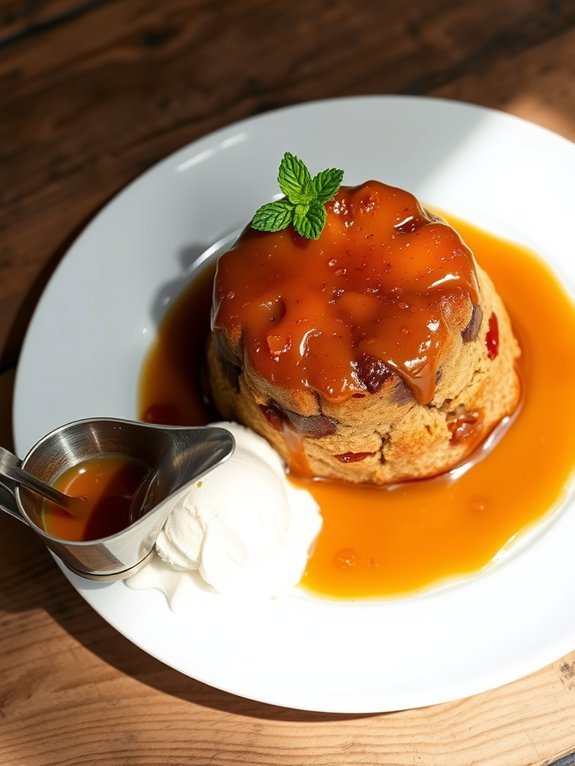
Sticky Toffee Pudding is a quintessential British dessert that embodies the perfect combination of rich flavors and comforting textures. This delightful pudding consists of a moist sponge cake that’s infused with finely chopped dates and drenched in a luscious toffee sauce.
Traditionally served warm and often accompanied by a scoop of vanilla ice cream or a generous dollop of double cream, it’s a dish that warms the soul and satisfies every sweet tooth.
The origin of sticky toffee pudding is somewhat debated, with claims of its inception stretching from the Lake District to various pubs across England. Regardless of its birth, this classic dessert has firmly established itself as a beloved staple in British cuisine.
Preparing sticky toffee pudding at home is a rewarding experience, allowing you to impress friends and family with a delightful treat that feels indulgent yet simple to make.
Ingredients:
- 200g pitted dates, chopped
- 250ml boiling water
- 1 tsp baking soda
- 150g unsalted butter, softened
- 150g dark brown sugar
- 2 large eggs
- 1 tsp vanilla extract
- 200g all-purpose flour
- 1 tsp baking powder
- Pinch of salt
- 200ml heavy cream
- 100g brown sugar (for the sauce)
- 50g unsalted butter (for the sauce)
To make the pudding, start by soaking the chopped dates in boiling water along with the baking soda for about 10 minutes.
Meanwhile, preheat your oven to 180°C (350°F) and grease a baking dish. In a mixing bowl, cream together the softened butter and dark brown sugar until light and fluffy. Beat in the eggs one at a time, mixing well after each addition, followed by the vanilla extract.
Stir in the flour, baking powder, and salt, then fold in the date mixture. Pour the batter into the prepared dish and bake for 30-35 minutes or until a skewer comes out clean.
For the sauce, combine the heavy cream, brown sugar, and butter in a saucepan. Heat it over low heat until the sugar dissolves, and serve warm over slices of the pudding.
For an enhanced flavor experience, consider soaking the dates overnight in a bit of rum or whiskey before adding them to the pudding mixture. This can add an extra depth of flavor to your dessert.
Additionally, make sure to serve the sticky toffee pudding warm, as it brings out the best flavors, and never skip the toffee sauce – it’s the star of the show! Enjoy your delicious creation!
Creamy Tiramisu
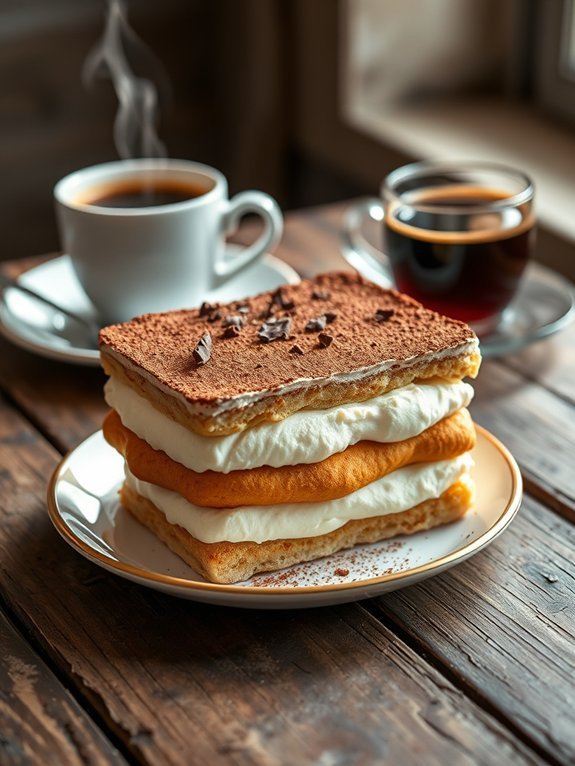
Creamy tiramisu is a classic Italian dessert that delights the palate with its layers of coffee-soaked ladyfingers, velvety mascarpone cheese, and a dusting of cocoa powder. Known for its rich flavor and creamy texture, this beloved treat is perfect for special occasions or a sweet ending to any meal.
With its origins in the Veneto region of Italy, tiramisu translates to “pick me up,” aptly named for the invigorating combination of espresso and cocoa.
The process of making creamy tiramisu is surprisingly simple yet incredibly rewarding. The key to achieving the perfect balance of flavors lies in using high-quality ingredients, especially the espresso and mascarpone cheese.
Allowing the dessert to chill in the refrigerator for several hours enables the flavors to meld beautifully, creating a rich and indulgent experience for all who savor it.
Ingredients:
- 1 cup strong brewed espresso, cooled
- 1/2 cup coffee liqueur (optional)
- 3 large egg yolks
- 1 cup granulated sugar
- 2 cups mascarpone cheese
- 1 cup heavy cream
- 1 teaspoon vanilla extract
- 24-30 ladyfinger cookies
- Unsweetened cocoa powder, for dusting
- Dark chocolate shavings (optional, for garnish)
To prepare the creamy tiramisu, start by combining the cooled espresso and coffee liqueur (if using) in a shallow dish.
In a separate bowl, whisk together the egg yolks and granulated sugar until pale and fluffy. Gently fold in the mascarpone cheese until smooth, followed by the whipped heavy cream and vanilla extract until well combined.
Quickly dip each ladyfinger into the espresso mixture, ensuring they’re soaked but not soggy, and layer them in a 9×13 inch dish.
Spread half of the mascarpone mixture over the layer of ladyfingers. Repeat the process with a second layer of dipped ladyfingers and top with the remaining mascarpone mixture.
Cover and refrigerate for at least 4-6 hours, or overnight for best results.
Before serving, dust the top with cocoa powder and garnish with chocolate shavings if desired.
When making tiramisu, it’s important not to soak the ladyfingers too long in the espresso mixture, as they can become overly soft and lose their structure.
Using fresh, high-quality ingredients will greatly enhance the flavors and creaminess of the dessert. Additionally, feel free to adjust the sweetness or add a touch of cinnamon to the mascarpone mixture for a unique twist.
Letting the tiramisu rest overnight is ideal, as it allows the flavors to develop further, resulting in a truly memorable dessert experience.
Fluffy Pancakes With Maple Syrup
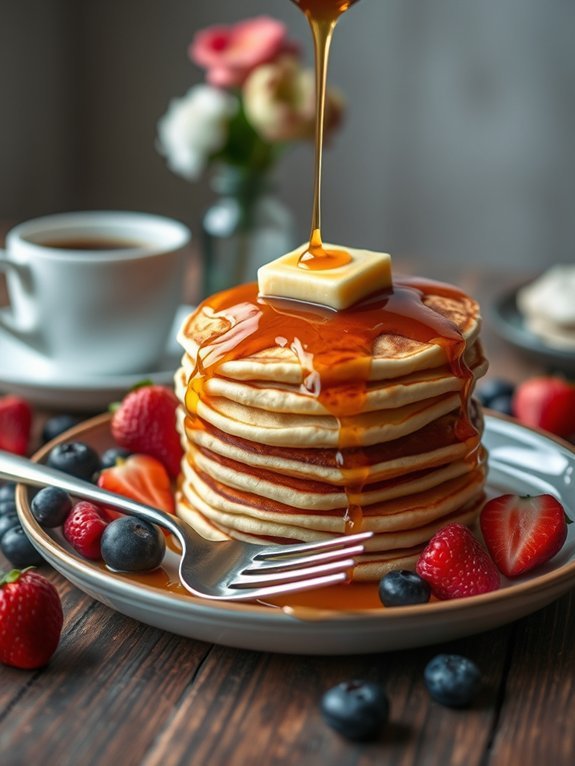
Fluffy pancakes are a breakfast staple that can easily bring a smile to anyone’s face. They’re light as a cloud and can be topped with a variety of delicious options, but nothing beats the classic pairing of fluffy pancakes with warm maple syrup. This recipe will help you attain the perfect pancake texture, making them an ideal choice for a cozy brunch or a special breakfast treat on the weekends.
The key to achieving fluffy pancakes lies in the careful mixing of your dry and wet ingredients, guaranteeing you don’t overmix the batter. Here, you’ll learn how to create a batter that’s both airy and flavorful, along with tips to enhance the texture and taste. With a warm drizzle of syrup and a pat of butter melting on top, these pancakes will soon become a favorite in your household.
- 1 cup all-purpose flour
- 2 tablespoons granulated sugar
- 2 teaspoons baking powder
- ½ teaspoon baking soda
- ¼ teaspoon salt
- 1 cup buttermilk (or milk with a splash of vinegar)
- 1 large egg
- 2 tablespoons unsalted butter, melted
- Extra butter for cooking
- Maple syrup for serving
In a large mixing bowl, combine the flour, sugar, baking powder, baking soda, and salt. In a separate bowl, whisk together the buttermilk, egg, and melted butter until combined. Gradually pour the wet ingredients into the dry ingredients, and gently mix until just combined—it’s okay if there are a few lumps.
Heat a non-stick skillet or griddle over medium heat and add a small amount of butter. Pour about ¼ cup of batter for each pancake onto the skillet and cook until bubbles form on the surface, about 2-3 minutes. Carefully flip the pancakes and cook for an additional 1-2 minutes until golden brown.
To guarantee your fluffy pancakes turn out perfectly, avoid overmixing the batter as this can lead to denser pancakes. Pay attention to the heat of your skillet or griddle; too hot can burn the outside while leaving the inside uncooked.
Additionally, you can keep the cooked pancakes warm in a preheated oven set at 200°F (93°C) while you finish cooking the rest. Feel free to experiment with mix-ins like chocolate chips or fresh fruit for added flavor, and serve with a generous drizzle of maple syrup for the ultimate indulgent breakfast.
Homemade Ice Cream Sandwiches
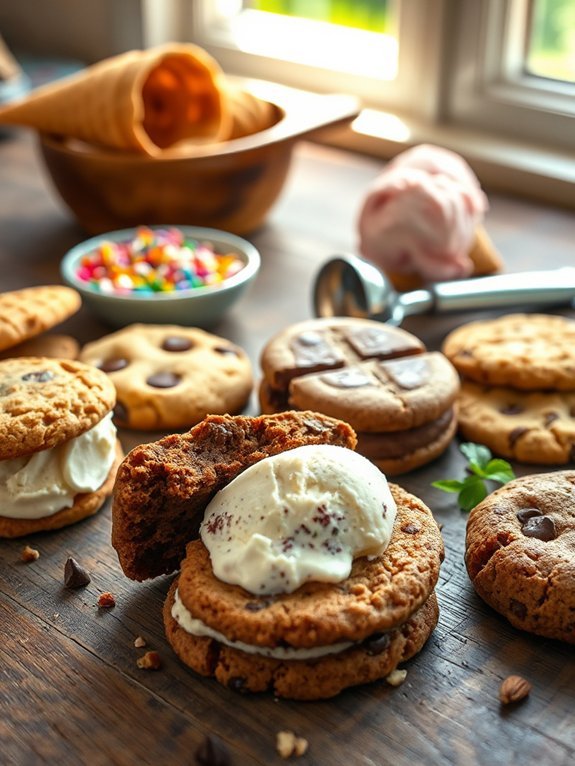
Homemade ice cream sandwiches are a delightful treat that combines the creaminess of ice cream with the soft sweetness of cookies. Perfect for hot summer days or as a special dessert to share with friends and family, these sandwiches can be customized with your favorite flavors and fillings. The best part is that you can vary the types of cookies used—from classic chocolate chip to snickerdoodles or even gluten-free options—so you have a dessert that suits everyone’s tastes.
To assemble your ice cream sandwiches, you’ll begin by baking a batch of your chosen cookies. Once cooled, you’ll layer a scoop of ice cream between two cookies and freeze them until firm. This simple yet satisfying dessert not only provides a revitalizing experience, but it’s also a fun way to get creative in the kitchen.
Whether it’s for a birthday party, a warm evening treat, or an after-dinner indulgence, enjoy the delightful combination of flavors and textures.
Ingredients:
- 1 cup unsalted butter, softened
- 1 cup granulated sugar
- 1 cup brown sugar, packed
- 2 large eggs
- 2 teaspoons vanilla extract
- 3 cups all-purpose flour
- 1 teaspoon baking soda
- ½ teaspoon salt
- 1 cup chocolate chips (or your favorite mix-ins)
- 1 quart of your favorite ice cream
Place your softened butter in a large mixing bowl and cream it together with both sugars until light and fluffy. Add the eggs one at a time, incorporating well after each addition, followed by the vanilla.
In another bowl, mix together the flour, baking soda, and salt, then slowly add these dry ingredients to the wet mixture. Finally, fold in the chocolate chips.
Using a tablespoon, drop dough balls onto a baking sheet lined with parchment paper, ensuring they’re spaced apart. Bake in a preheated oven at 350°F (175°C) for 10-12 minutes or until the edges are golden brown. Let the cookies cool completely before assembling by placing a generous scoop of ice cream between two cookies, then wrap them in plastic wrap and freeze until firm.
When making ice cream sandwiches, you can experiment with different flavors of ice cream or mix-ins in your cookie batter to create unique combinations! Consider rolling the edges of the ice cream sandwiches in sprinkles, crushed nuts, or mini chocolate chips for an added crunch and visual flair.
Additionally, make sure not to overbake the cookies; they should be soft and chewy for the perfect sandwich consistency. Enjoy your delicious homemade ice cream sandwiches!
Luscious Carrot Cake
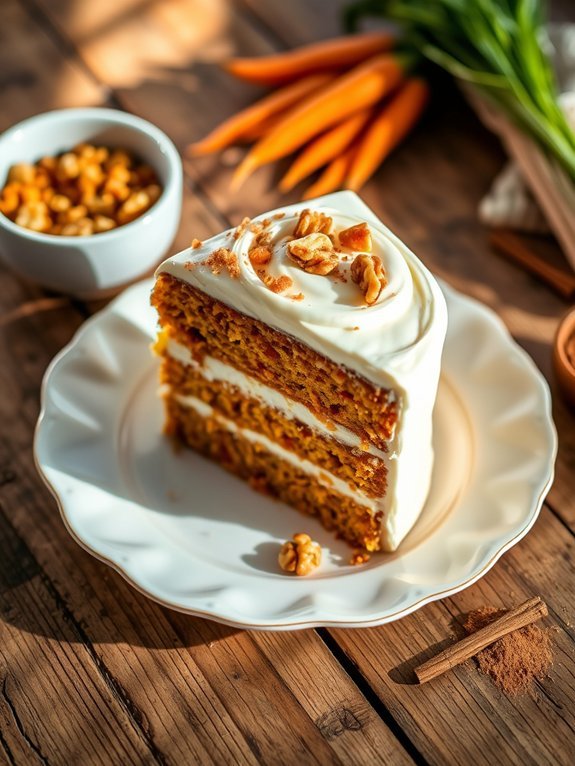
Carrot cake is a timeless dessert that balances the sweetness of carrots with a rich and moist texture, making it a favorite for any occasion. With its delightful blend of spices and its creamy frosting, this luscious cake isn’t only visually appealing with a beautiful orange hue, but it also offers a wonderful depth of flavor that comes from the mix of fresh carrots and aromatic spices. It’s a perfect choice for celebrations or a simple family gathering, and its delightful taste often brings smiles all around the table.
This recipe showcases not only how to bake a delicious carrot cake but also how to elevate it with a delightful cream cheese frosting. The combination of grated carrots, warm spices, and the creamy topping creates a wonderful harmony of flavors that will leave everyone wanting seconds. Whether you’re a seasoned baker or simply looking to indulge in a homemade dessert, this carrot cake is sure to impress.
Ingredients:
- 2 cups all-purpose flour
- 2 cups granulated sugar
- 1 cup vegetable oil
- 4 large eggs
- 3 cups grated carrots
- 1 cup crushed pineapple, drained
- 1 cup chopped walnuts or pecans (optional)
- 2 teaspoons baking soda
- 2 teaspoons baking powder
- 1 teaspoon ground cinnamon
- 1/2 teaspoon ground nutmeg
- 1/2 teaspoon salt
- Cream cheese frosting for topping
Preheat your oven to 350°F (175°C). In a large mixing bowl, combine the sugar, oil, and eggs, beating them together until smooth. Gradually stir in the grated carrots and crushed pineapple.
In a separate bowl, whisk together the flour, baking soda, baking powder, spices, and salt. Slowly incorporate the dry ingredients into the wet mixture until just combined. Fold in the nuts if using, pour the batter into greased cake pans, and bake for approximately 30-35 minutes or until a toothpick comes out clean.
For the best results, make sure your ingredients are at room temperature before you start mixing, as this helps create a homogenous batter. Don’t over-mix the batter to keep the cake tender; fold gently until just combined. Let the cake cool completely before frosting to avoid melting the cream cheese frosting.
Feel free to add raisins or shredded coconut to the mix for an extra touch of flavor and texture!
Peanut Butter Cookies
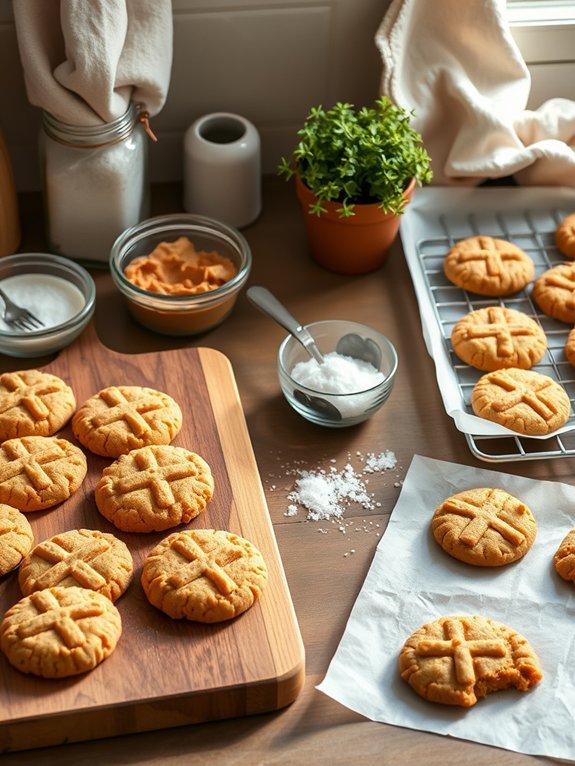
Peanut butter cookies are a delightful treat that merges the rich, nutty flavor of peanut butter with the sweet, comforting essence of a classic cookie. These cookies aren’t only quick to prepare, but they also fill your kitchen with an irresistible aroma that will have everyone excitedly anticipating their first bite.
Whether you’re making them for a family gathering, a cozy night in, or as a special surprise for a loved one, peanut butter cookies are sure to be a hit.
This recipe is incredibly versatile and can be adjusted to suit your preferences. You can play around with add-ins such as chocolate chips, chopped nuts, or even a sprinkle of sea salt on top for a gourmet touch. The simplicity of the ingredients means that you probably already have everything you need in your pantry, making these cookies an easy go-to when your sweet tooth strikes.
Ingredients:
- 1 cup peanut butter
- 1 cup granulated sugar
- 1 large egg
- 1 teaspoon vanilla extract
- 1 teaspoon baking soda
- A pinch of salt
Preheat your oven to 350°F (175°C). In a mixing bowl, combine the peanut butter, granulated sugar, egg, vanilla extract, baking soda, and salt.
Stir everything together until you form a smooth dough. Using a tablespoon or cookie scoop, drop rounded balls of dough onto a baking sheet lined with parchment paper, leaving space between each cookie for spreading. Use a fork to create a crisscross pattern on the top of each cookie, then bake for 10-12 minutes until the edges are lightly golden.
Allow the cookies to cool on the baking sheet for a few minutes before transferring them to a wire rack to cool completely.
For the best peanut butter cookies, verify your peanut butter is well-stirred if it’s natural, and use an appropriate measuring cup to accurately portion your ingredients.
Additionally, you can customize the texture by adjusting baking time, with a shorter time yielding a softer cookie and a longer time resulting in a crispier bite. If you want to make the cookies even more special, consider drizzling melted chocolate over cooled cookies or mixing in chopped chocolate for a delightful surprise!
Elegant Panna Cotta
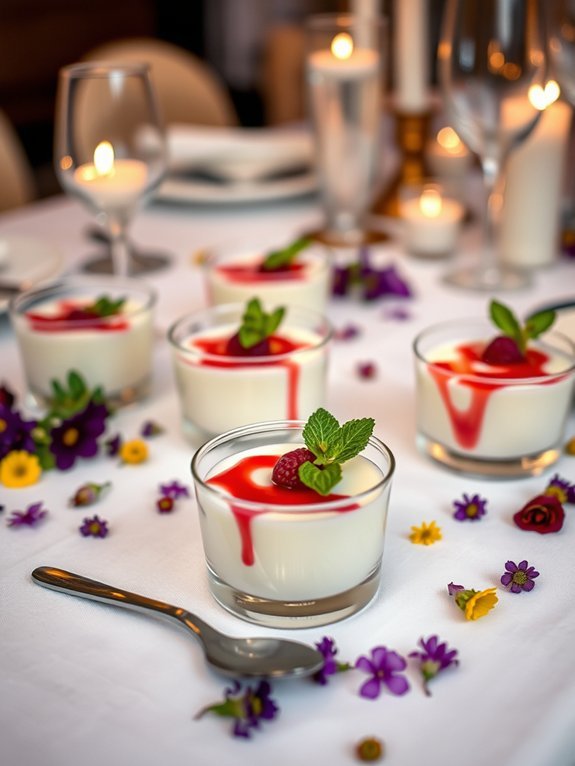
Panna cotta, which translates to “cooked cream” in Italian, is a classic dessert that hails from the northern Italian region of Piedmont. Its irresistibly smooth and creamy texture makes it an elegant addition to any dinner party or special occasion. This dessert may seem fancy and complicated, but it’s surprisingly simple to make, requiring minimal ingredients and effort.
The beauty of panna cotta lies in its versatility; you can infuse various flavors and serve it with a variety of sauces or fresh fruits. To create an elegant panna cotta, you’ll want to start with high-quality ingredients. Authentic vanilla beans or pure extract can greatly enhance the depth of flavor.
Additionally, let your imagination guide you regarding toppings—fruit coulis, chocolate sauce, or a sprinkle of nuts can take your panna cotta to the next level. Serve it in individual ramekins or glasses for a sophisticated presentation, and watch your guests be enamored by its silky texture and rich flavor.
Ingredients:
- 2 cups heavy cream
- 1 cup whole milk
- 1/2 cup granulated sugar
- 1 tablespoon pure vanilla extract or 1 vanilla bean, split and scraped
- 2 1/2 teaspoons gelatin powder
- 3 tablespoons cold water
In a saucepan, combine the heavy cream, whole milk, sugar, and vanilla. Heat over medium heat until warm but not boiling, stirring occasionally.
In a small bowl, sprinkle the gelatin over cold water and let it sit for about 5 minutes until it blooms. Once the cream mixture is warm, remove it from heat, add the bloomed gelatin, and stir until fully dissolved.
Pour the mixture into individual ramekins or glasses and refrigerate for at least 4 hours, or until set. For the best results, make certain to allow the panna cotta to chill thoroughly before serving; this will guarantee a perfectly smooth texture.
When ready to serve, dip the ramekins briefly in hot water to help loosen the panna cotta. To add a personalized touch, consider infusing the cream with additional flavors like citrus zest, fresh herbs, or coffee. Don’t forget to serve with a delightful sauce or fresh fruit on top to enhance the dessert’s visual appeal and flavor profile.


