This post may contain affiliate links. Please read our policy page.
When you’re looking for delicious dairy-free and gluten-free recipes, you’ve got plenty of tasty options! Try a vibrant Quinoa Vegetable Stir-Fry or a invigorating Chickpea Salad with Lemon-Tahini Dressing. Warm up with a hearty Coconut Curry Lentil Soup or enjoy Zucchini Noodles with Avocado Pesto. For something fun, whip up Sweet Potato and Black Bean Tacos or Spaghetti Squash with Marinara Sauce. And don’t forget to treat yourself to Chocolate Chia Seed Pudding or energizing Fruit and Nut Energy Bites. There’s much more to explore!
Quinoa Vegetable Stir-Fry
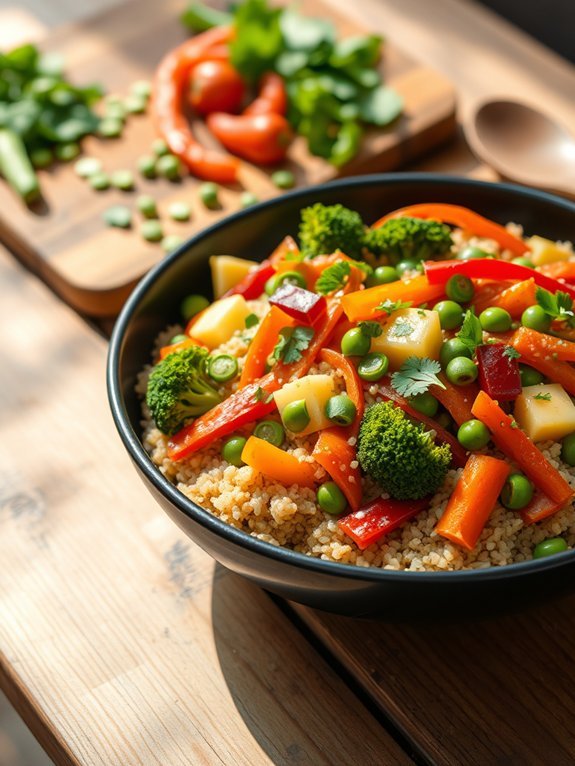
Quinoa vegetable stir-fry is a delightful dish that not only satisfies the taste buds but also provides a nutritious meal option for those following a dairy-free and gluten-free lifestyle. This vibrant stir-fry features protein-packed quinoa paired with an assortment of colorful vegetables, creating a harmony of flavors and textures.
It’s a versatile recipe that can be tailored to whatever veggies you have on hand, making it a perfect choice for weeknight dinners or meal prep. Cooking quinoa is simple and can be done in advance to save time. The key to a successful stir-fry is having all your ingredients prepped and ready to go before you start cooking.
This dish isn’t only healthy and wholesome, but it also comes together quickly, resulting in a satisfying meal that feels light yet filling. With just a few simple steps, you can have a delicious and nutritious quinoa vegetable stir-fry on your table in no time.
Ingredients:
- 1 cup quinoa
- 2 cups vegetable broth or water
- 1 tablespoon olive oil
- 1 cup broccoli florets
- 1 red bell pepper, sliced
- 1 carrot, julienned
- 1 zucchini, sliced
- 1 cup snap peas
- 2 cloves garlic, minced
- 1 tablespoon soy sauce or tamari (gluten-free)
- Salt and pepper, to taste
- Fresh herbs (like cilantro or parsley), for garnish
Cook the quinoa according to the package instructions, using vegetable broth or water.
While the quinoa cooks, heat olive oil in a large skillet or wok over medium-high heat. Add the minced garlic and sauté for about 30 seconds. Next, add the broccoli, bell pepper, carrot, zucchini, and snap peas, stirring frequently for about 5-7 minutes until the vegetables are tender yet crisp.
Once the quinoa is ready, add it to the skillet along with soy sauce or tamari, stirring everything together and seasoning with salt and pepper. Cook for an additional minute, then remove from heat and garnish with fresh herbs.
When preparing quinoa vegetable stir-fry, feel free to experiment with different vegetables based on what’s in season or available in your fridge.
You can also add proteins such as tofu or chickpeas for an extra flavor and nutritional boost. This dish can be served warm, but it also works well as a cold salad, making it a perfect option for leftovers.
Remember to adjust the cooking time depending on the vegetables you choose to guarantee everything retains its vibrant color and crunch.
Chickpea Salad With Lemon-Tahini Dressing

Chickpea Salad with Lemon-Tahini Dressing is a reviving and nutritious dish that’s perfect for a light lunch or a side dish at dinner. The combination of chickpeas, fresh vegetables, and a creamy dressing made from tahini and lemon juice creates a delightful explosion of flavors and textures in every bite.
This salad isn’t only dairy-free and gluten-free, but it also packs a protein punch, making it a satisfying option for everyone.
This dish is incredibly versatile, allowing for modifications based on personal taste or seasonal ingredients. You can add a variety of vegetables like cucumbers, bell peppers, or even avocados to enhance the flavors.
The zesty dressing melds beautifully with the chickpeas, providing a tangy yet nutty element that elevates the overall taste. Enjoy this salad immediately or let it marinate for a while to intensify the flavors!
Ingredients:
- 1 can of chickpeas, drained and rinsed
- 1 cup of cherry tomatoes, halved
- 1 cucumber, diced
- 1 bell pepper, diced
- ¼ red onion, finely chopped
- ⅓ cup tahini
- ¼ cup lemon juice
- 2 tablespoons olive oil
- Salt and pepper to taste
- Fresh parsley or cilantro, chopped (for garnish)
In a large mixing bowl, combine the chickpeas, cherry tomatoes, cucumber, bell pepper, and red onion.
In a separate bowl, whisk together the tahini, lemon juice, olive oil, salt, and pepper until smooth and well combined.
Pour the dressing over the chickpea mixture and toss gently until all the ingredients are evenly coated. Garnish with fresh herbs before serving.
For the best results, let the salad sit for at least 30 minutes before serving to allow the flavors to meld together. This dish can be stored in the refrigerator for up to three days, making it great for meal prep.
Be creative with the vegetables you add – consider including shredded carrots, avocado, or even corn for an extra hit of sweetness and texture!
Coconut Curry Lentil Soup
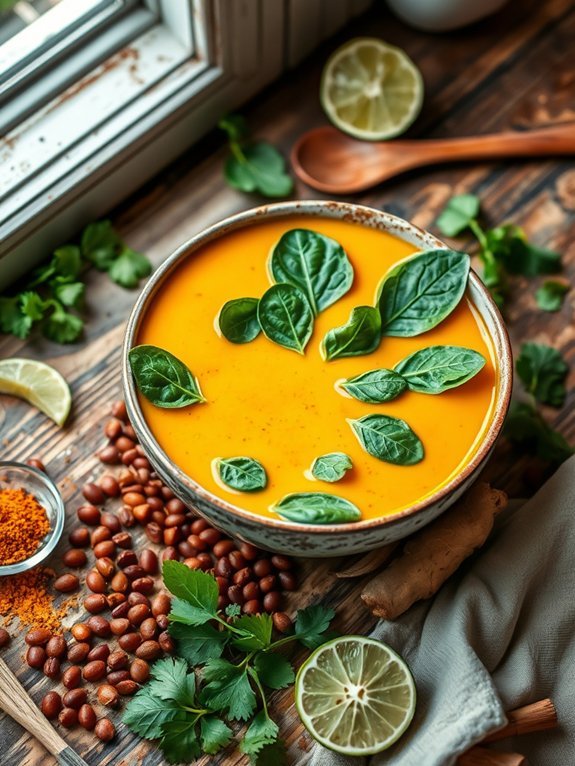
Coconut Curry Lentil Soup is a delightful and hearty dish that combines the earthy flavors of lentils with the aromatic spices of curry and the richness of coconut milk. This soup not only warms the soul but also provides a nourishing plant-based meal that’s entirely dairy-free and gluten-free. The creamy texture and vibrant colors make it an appealing option for everyone, whether they’re adhering to specific dietary restrictions or simply seeking a cozy meal to enjoy at home.
With a blend of spices, vegetables, and lentils, this soup is packed with nutrients and flavor.
Preparing Coconut Curry Lentil Soup is a straightforward process that anyone can master in their own kitchen. This recipe calls for simple ingredients, many of which you may have on hand. The outcome is a deliciously aromatic soup that can be enjoyed on its own or paired with rice or quinoa for a more filling dish.
It’s perfect for meal prep, as it freezes well and tastes even better the next day, allowing the flavors to meld beautifully.
Ingredients:
- 1 tablespoon coconut oil
- 1 onion, diced
- 3 cloves garlic, minced
- 1 tablespoon ginger, grated
- 1 tablespoon curry powder
- 1 teaspoon ground cumin
- 1/2 teaspoon turmeric
- 1 can (14 oz) coconut milk
- 4 cups vegetable broth
- 1 cup red lentils, rinsed
- 1 carrot, diced
- 1 bell pepper, diced
- 2 cups spinach (or kale), chopped
- Salt and pepper to taste
- Fresh cilantro for garnish (optional)
In a large pot over medium heat, melt the coconut oil and add the diced onion. Sauté for about 5 minutes, or until the onion becomes translucent.
Then add the minced garlic, grated ginger, curry powder, cumin, and turmeric, stirring for another minute until fragrant.
Next, pour in the coconut milk and vegetable broth, followed by the lentils, diced carrot, and bell pepper.
Bring the mixture to a boil, then lower the heat and let it simmer for about 20-25 minutes or until the lentils and vegetables are tender.
Stir in the spinach, season with salt and pepper, and allow it to wilt for a couple of minutes before serving.
When cooking this dish, feel free to adjust the spice level according to your preferences by adding more curry powder or even a pinch of cayenne pepper for some heat.
Additionally, you can customize the vegetables based on what’s in season or what you have in your pantry; zucchini, sweet potatoes, or peas can all work well in this soup.
Finally, for an extra creamy texture, blend a portion of the soup before serving or use an immersion blender; this will give you a smooth consistency while still maintaining some chunky lentils and veggies for contrast.
Enjoy this wholesome soup with a squeeze of lime or a sprinkle of fresh cilantro for an added burst of flavor.
Zucchini Noodles With Avocado Pesto

Zucchini noodles, also known as “zoodles,” are a fantastic way to enjoy a low-carb alternative to traditional pasta. These spiralized vegetables aren’t only gluten-free but also packed with vitamins and minerals, making them a healthy option for any meal.
When paired with creamy avocado pesto, they provide a delightful and invigorating twist, perfect for a light lunch or dinner.
This dish is incredibly versatile and can easily be customized. You can add additional vegetables, proteins, or even top it with nuts for an extra crunch.
The avocado pesto is rich and flavorful, making it an excellent topping for the tender zucchini noodles. Together, they create a satisfying dish that feels indulgent without compromising on health.
Ingredients:
- 4 medium zucchini
- 2 ripe avocados
- 1 cup fresh basil leaves
- 1/4 cup pine nuts
- 2 cloves garlic
- 2 tablespoons lemon juice
- Salt and pepper, to taste
- Olive oil (optional for drizzling)
- Cherry tomatoes (optional for garnish)
To prepare the zucchini noodles, spiralize the zucchini using a spiralizer or a julienne peeler.
While you spiralize the zucchinis, prepare the avocado pesto by combining avocados, basil leaves, pine nuts, garlic, lemon juice, salt, and pepper in a food processor.
Blend until smooth and creamy. Toss the zoodles with the avocado pesto until they’re well coated. Serve immediately, garnishing with cherry tomatoes if desired.
For a little extra flavor, consider adding a pinch of red pepper flakes to the avocado pesto for a bit of heat, or swirl in a tablespoon or two of nutritional yeast for a cheesy flavor.
You can also try roasting the zucchini noodles in a pan for a couple of minutes if you prefer them warm. Remember to not overcook them as they can become soggy. Enjoy your flavorful, healthy meal!
Recommended Items
Discover our top picks for ingredients and tools to make your cooking experience delightful and stress-free!
Sweet Potato and Black Bean Tacos
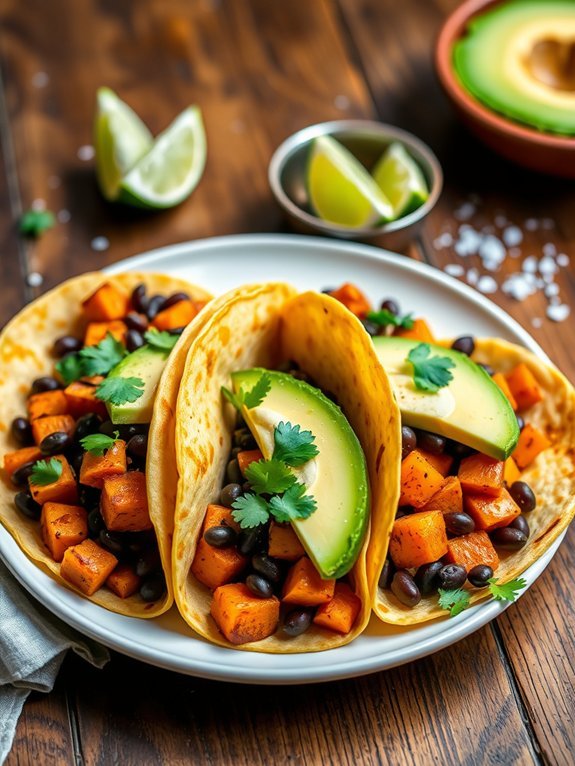
Sweet Potato and Black Bean Tacos are a nourishing and scrumptious option for anyone looking to enjoy a gluten-free and dairy-free meal. These vibrant tacos are packed with flavor from roasted sweet potatoes and seasoned black beans, creating a delightful balance of sweetness and earthiness. Not only are they wholesome, but they’re also incredibly versatile—you can easily adjust the toppings and spices to match your personal preferences or what you have on hand.
This recipe is a fantastic choice for a quick weeknight dinner or a satisfying lunch, providing plant-based protein and fiber while keeping cooking simple and efficient. The combination of the sweet and savory elements, along with your toppings of choice, makes each bite a burst of deliciousness. Serve them in corn tortillas for a perfect gluten-free base that complements the filling wonderfully.
Ingredients:
- 2 medium sweet potatoes, peeled and diced
- 1 can (15 oz) black beans, rinsed and drained
- 1 tablespoon olive oil
- 1 teaspoon chili powder
- 1 teaspoon cumin
- Salt and pepper to taste
- 8 corn tortillas
- Fresh cilantro, chopped (for garnish)
- Avocado, sliced (for topping)
- Lime wedges (for serving)
Preheat your oven to 425°F (220°C). On a baking sheet, toss the diced sweet potatoes with olive oil, chili powder, cumin, salt, and pepper. Spread them out in a single layer and roast for about 20-25 minutes or until they’re tender and slightly caramelized.
In the meantime, warm the black beans on the stovetop until heated through. Once the sweet potatoes are done, assemble the tacos by placing a spoonful of sweet potatoes and black beans onto each corn tortilla. Top with fresh cilantro and avocado slices, and serve with lime wedges for a zesty finish.
When preparing your Sweet Potato and Black Bean Tacos, consider adding some extra toppings or sauces for added flavor and texture. Diced fresh tomatoes, pickled red onions, or a drizzle of dairy-free yogurt can enhance the overall experience.
Additionally, you can adjust the seasoning of the sweet potatoes and beans based on your spice tolerance, and try grilling the tortillas for a few seconds to give them a charred flavor that adds a nice depth to the dish. Enjoy experimenting and make it your own!
Cauliflower Rice Stir-Fried With Vegetables
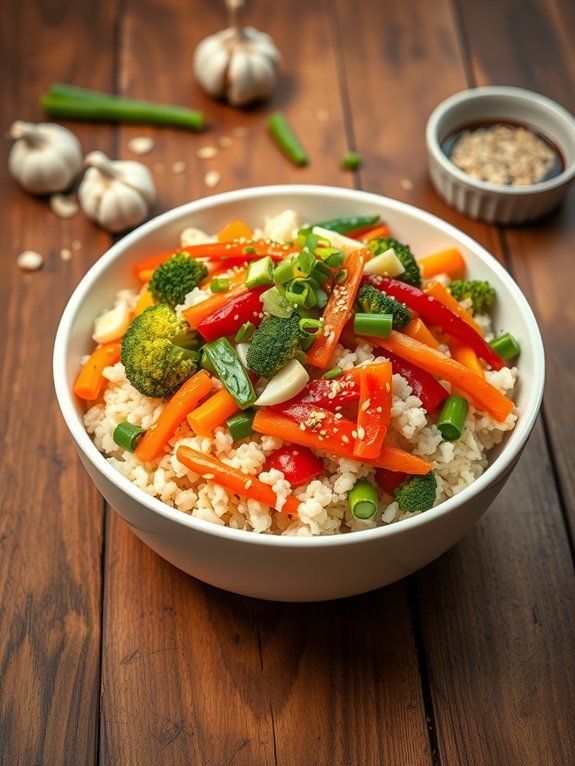
Cauliflower rice stir-fried with vegetables is a delightful and healthy alternative to traditional fried rice. This dish isn’t only dairy-free and gluten-free, but it’s also packed with nutrients from the vegetables while providing a satisfying texture and flavor that will please any palate. The cauliflower rice serves as a fantastic base to incorporate any mix of colorful, fresh vegetables you have on hand, making it a versatile and customizable option.
The quick cooking time and ease of preparation make this stir-fry a perfect choice for busy weeknights. You can whip it up in no time, and it pairs beautifully with your favorite protein or can be enjoyed on its own as a light meal. Its fresh taste and vibrant colors can brighten any dinner table, making this a dish not to be missed.
- 1 medium head of cauliflower (or 4 cups riced cauliflower)
- 2 tablespoons olive oil
- 1 cup bell peppers, chopped (any color)
- 1 cup broccoli florets
- 1 cup carrots, sliced
- 1 cup snap peas or green beans
- 3 cloves garlic, minced
- 2 tablespoons soy sauce or tamari (for gluten-free)
- 1 tablespoon sesame oil
- Salt and pepper to taste
- Optional: green onions and sesame seeds for garnish
Begin by washing the cauliflower and cutting it into florets. Pulse the florets in a food processor until they resemble the texture of rice, or you can purchase pre-riced cauliflower. Heat the olive oil in a large skillet or wok over medium-high heat.
Add the minced garlic and sauté for about 30 seconds until fragrant. Next, toss in the chopped vegetables and stir-fry for about 5-7 minutes, until they’re crisp-tender. Add the riced cauliflower, soy sauce or tamari, and sesame oil, stirring everything together until heated through and well combined. Season with salt and pepper to taste.
When cooking cauliflower rice stir-fry, feel free to mix in any leftover or seasonal vegetables that you have on hand, such as zucchini, spinach, or mushrooms. To add more protein to the dish, consider tossing in some cooked chicken, shrimp, or tofu at the same time as the vegetables.
For an extra layer of flavor, experiment with various spices or fresh herbs, such as ginger or cilantro, reducing the soy sauce or tamari if you’re looking to decrease the salt content. Enjoy your culinary creativity!
Baked Eggplant Parmesan (Dairy-Free)
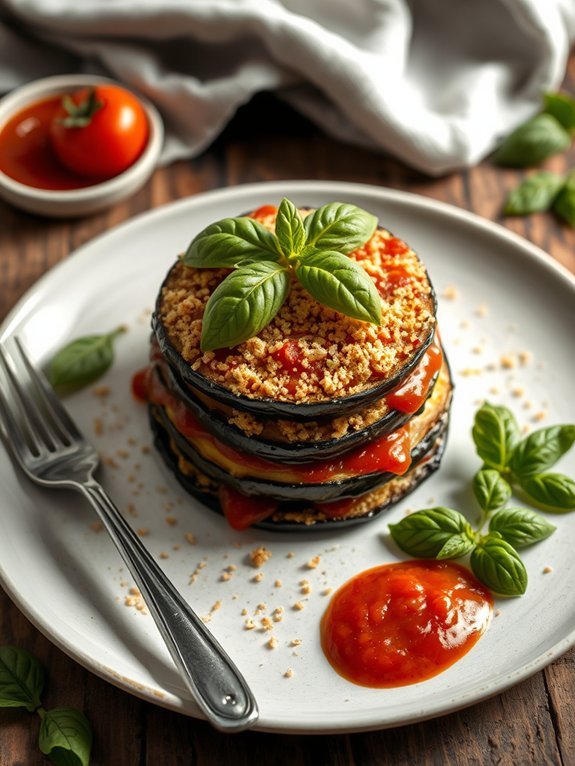
Baked Eggplant Parmesan is a delightful twist on a classic Italian favorite that has been transformed into a dairy-free version without sacrificing flavor. This dish isn’t only a great option for those who are dairy-intolerant or following a vegan diet, but it also makes for a hearty and satisfying meal that everyone can enjoy.
The tender eggplant slices are layered with a robust marinara sauce and topped with a delicious mixture of gluten-free breadcrumbs and nutritional yeast, creating a cheesy, crispy topping that’s sure to delight your taste buds.
Preparing this dish is simple and allows for a variety of modifications based on your personal preferences. The eggplant is first sliced and salted to remove excess moisture and bitterness, then it’s breaded and baked to perfection.
Layering is key as the flavors meld together beautifully during baking, and the end result is a comforting and delicious meal that can be enjoyed alone or served with a side salad or gluten-free pasta.
Ingredients:
- 2 large eggplants
- Salt
- 1 cup gluten-free breadcrumbs
- 1/2 cup nutritional yeast
- 2 teaspoons garlic powder
- 2 teaspoons dried oregano
- 1 jar marinara sauce (about 24 ounces)
- Olive oil spray
- Fresh basil (for garnish)
To prepare the Baked Eggplant Parmesan, start by preheating your oven to 375°F (190°C). Slice the eggplants into 1/2 inch rounds and sprinkle both sides with salt; let them sit for 30 minutes to draw out moisture.
Pat the slices dry, then dip each piece into a mixture of gluten-free breadcrumbs, nutritional yeast, garlic powder, and oregano. Arrange a layer of eggplant in a baking dish, cover with marinara sauce, and continue layering until all ingredients are used, finishing with a layer of sauce on top.
Lightly spray the top with olive oil and bake for 25-30 minutes or until the eggplant is tender and the top is golden brown.
When making Baked Eggplant Parmesan, consider roasting the eggplant slices instead of baking them. This adds an extra depth of flavor and enhances the texture.
Additionally, experimenting with different herbs and spices can personalize the dish to your taste. A sprinkle of fresh basil just before serving adds a fresh note that brightens the entire dish.
Finally, if you have leftovers, they reheat beautifully, making this a fantastic meal prep option for the week ahead!
Step-by-Step Cooking Guide
Almond Flour Pancakes

If you’re ready to whip up a delicious breakfast that’s both dairy-free and gluten-free, almond flour pancakes are a fantastic choice. Made primarily from almond flour, these pancakes are light, fluffy, and offer a delightful nutty flavor. They aren’t only easy to make, but they also require minimal preparation time, making them perfect for busy mornings or leisurely weekend brunches.
Plus, they can be topped with a variety of delicious options, from fresh fruits to maple syrup, allowing for a versatile breakfast experience.
Using almond flour as the base means that these pancakes are packed with healthy fats, protein, and essential nutrients. It’s a great alternative for those who need to avoid gluten or dairy but still want something satisfying and comforting. You don’t need any fancy ingredients; everything can be found in your pantry.
With just a few simple steps, you’ll be ready to serve up a stack of pancake perfection.
- 1 cup almond flour
- 2 large eggs
- 1/4 cup unsweetened almond milk (or any other non-dairy milk)
- 1 tablespoon maple syrup (or honey)
- 1 teaspoon vanilla extract
- 1/2 teaspoon baking powder
- Pinch of salt
- Coconut oil or non-stick spray for cooking
In a medium mixing bowl, combine the almond flour, baking powder, and salt. In another bowl, whisk together the eggs, almond milk, maple syrup, and vanilla extract.
Pour the wet ingredients into the dry ingredients and stir until just combined – the batter will be slightly thick. Heat a non-stick skillet over medium heat and add a bit of coconut oil or cooking spray.
Pour about 1/4 cup of the batter onto the skillet for each pancake. Cook for about 2-3 minutes until small bubbles form on the surface, then flip and cook for an additional 2-3 minutes, or until golden brown. Repeat until all the batter is used.
When making almond flour pancakes, it’s important not to overmix the batter; a few lumps are perfectly fine as they’ll help create a fluffy texture. If the batter seems too thick, you can add a bit more almond milk to reach your desired consistency.
Additionally, for a fun twist, consider adding mix-ins like blueberries, chocolate chips, or chopped nuts directly into the batter before cooking. Enjoy your pancakes fresh off the griddle for the best taste!
Spaghetti Squash With Marinara Sauce
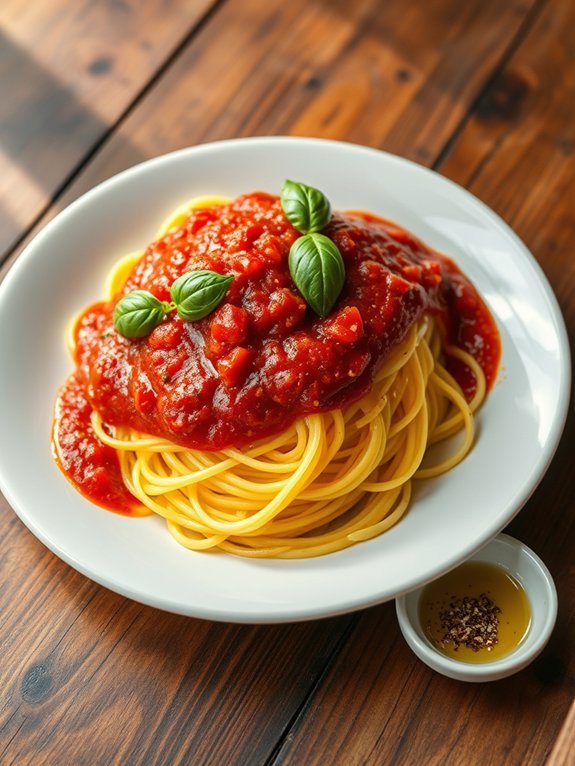
Spaghetti squash is a delicious, versatile vegetable that makes an excellent alternative to traditional pasta, especially for those following a dairy-free and gluten-free diet. When cooked, this unique squash transforms into tender strands that resemble spaghetti, making it perfect for pairing with marinara sauce. Not only is this dish simple to prepare, but it’s also packed with nutrients and offers a new spin on a classic favorite.
To enjoy spaghetti squash with marinara sauce, you’ll first need to prepare the squash. It can be roasted, microwaved, or even pressure cooked to achieve the tender texture needed. Once the squash is cooked, you can effortlessly scrape out the strands and combine them with your favorite marinara sauce, elevating a healthy meal to new heights of flavor.
This dish isn’t only satisfying but also allows you to get creative with toppings and extras to suit your taste.
Ingredients:
- 1 medium spaghetti squash
- 2 cups marinara sauce (dairy-free and gluten-free)
- 2 tablespoons olive oil
- 1 teaspoon salt
- 1/2 teaspoon black pepper
- 1 teaspoon garlic powder (optional)
- Fresh basil for garnish (optional)
To cook the spaghetti squash, preheat your oven to 400°F (200°C). Cut the squash in half lengthwise and remove the seeds. Brush the cut sides with olive oil, and season with salt, pepper, and garlic powder if using.
Place the halves cut-side down on a baking sheet lined with parchment paper and roast for about 30-40 minutes, or until the flesh is tender and can be easily shredded with a fork. Once cooked, use a fork to scrape the strands into a bowl and toss them with warm marinara sauce.
For an extra depth of flavor, consider adding sautéed vegetables like bell peppers or mushrooms to the marinara sauce. You can also experiment with adding protein, such as grilled chicken or turkey meatballs, if you’re looking to enhance the nutritional value.
Remember to select a marinara sauce that’s both dairy-free and gluten-free to maintain the integrity of the dish. Enjoy your spaghetti squash topped with fresh basil for a finishing touch!
Roasted Vegetable and Quinoa Salad
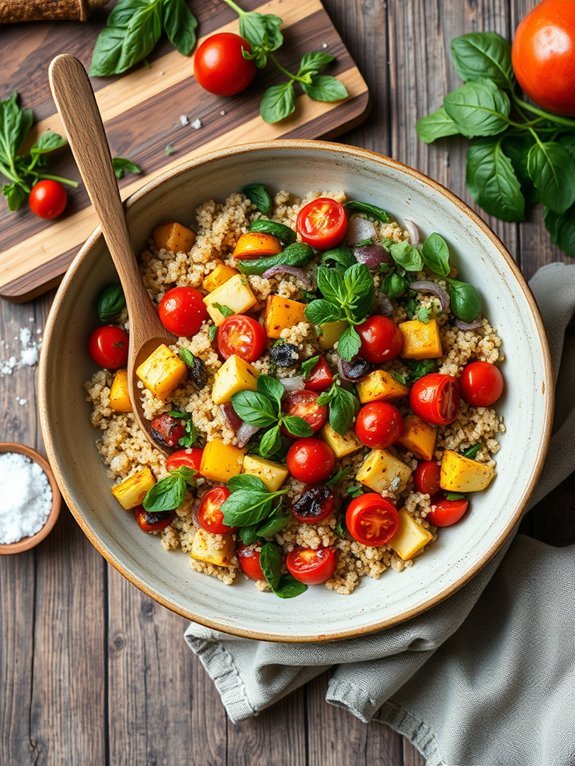
Roasted Vegetable and Quinoa Salad is a delicious and nutritious dish that combines the earthy flavors of roasted vegetables with the wholesome goodness of quinoa. This salad isn’t only dairy-free and gluten-free but also packed with vitamins and minerals, making it the perfect meal for health-conscious individuals.
The roasting process enhances the natural sweetness of the vegetables, while the quinoa adds a rich, nutty flavor and a satisfying texture. This vibrant salad can be enjoyed warm or cold, making it a versatile option for meal prep or as a side dish for gatherings.
With a variety of colorful vegetables to choose from, you can customize this recipe to suit your taste and make use of what you have on hand. Serve it as a standalone meal or pair it with your favorite protein for an even heartier option.
Ingredients:
- 1 cup quinoa
- 2 cups vegetable broth
- 1 red bell pepper, diced
- 1 zucchini, diced
- 1 yellow squash, diced
- 1 cup cherry tomatoes, halved
- 1 red onion, chopped
- 2 cups spinach
- 3 tablespoons olive oil
- 1 teaspoon garlic powder
- 1 teaspoon paprika
- Salt and pepper to taste
- Fresh herbs (such as parsley or basil) for garnish
Preheat your oven to 400°F (200°C). In a large bowl, combine the diced red bell pepper, zucchini, yellow squash, cherry tomatoes, and red onion. Drizzle with 2 tablespoons of olive oil, season with garlic powder, paprika, salt, and pepper, and toss to coat.
Spread the vegetables in a single layer on a baking sheet. Roast in the preheated oven for about 25-30 minutes, until they’re tender and slightly caramelized. Meanwhile, rinse the quinoa under cold water, then cook it in vegetable broth according to package instructions.
Once cooked, fluff the quinoa with a fork and mix in the roasted vegetables and spinach. Drizzle with the remaining tablespoon of olive oil, adjust seasoning as needed, and serve topped with fresh herbs.
When making this roasted vegetable and quinoa salad, feel free to experiment with different vegetables based on the season or your preferences. Root vegetables like carrots or sweet potatoes, or hearty greens like kale, can be great additions.
Also, consider adding a squeeze of lemon or a splash of balsamic vinegar for an extra zing of flavor. This dish can be stored in the fridge for up to three days, making it a fantastic option for meal prep or leftovers!
Chocolate Chia Seed Pudding
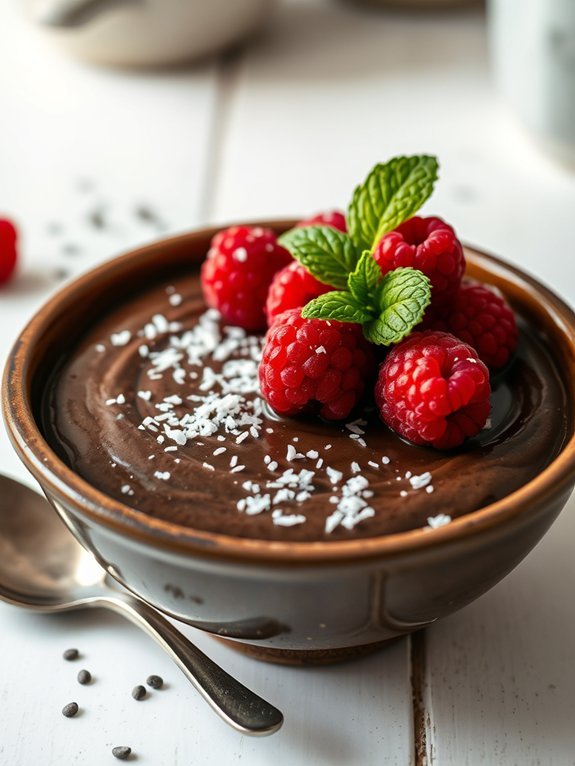
Chocolate Chia Seed Pudding is a delightful and nutritious treat that satisfies your sweet tooth while keeping it healthy. Packed with omega-3 fatty acids, fiber, and antioxidants, chia seeds are a superfood that can easily be turned into a rich and creamy dessert. This pudding isn’t only dairy-free and gluten-free, but it’s also vegan, making it a perfect option for almost everyone.
The decadent chocolate flavor, combined with the unique gel-like texture of the chia seeds, creates a mouthwatering dessert that you’ll want to whip up time and again.
Making Chocolate Chia Seed Pudding is a simple and quick process that doesn’t require any cooking, putting this treat firmly within reach even for the busiest of home cooks. Just let the ingredients mix and sit for a few hours or overnight for the best results. The combination of almond milk, cocoa powder, and maple syrup creates a deliciously sweet base, while the chia seeds add an amazing texture and nutritional boost to your pudding.
Ingredients:
- 1 cup unsweetened almond milk
- 1/4 cup chia seeds
- 2 tablespoons unsweetened cocoa powder
- 2 tablespoons maple syrup (or agave syrup)
- 1 teaspoon vanilla extract
- Pinch of salt
In a medium-sized bowl, whisk together the almond milk, cocoa powder, maple syrup, vanilla extract, and salt until fully combined. Once the mixture is smooth, add in the chia seeds and stir thoroughly to guarantee they’re evenly distributed.
Cover the bowl and refrigerate for at least 2 hours, or preferably overnight, to allow the chia seeds to swell and create a pudding-like consistency. When ready to serve, give it a good stir and enjoy!
For an extra touch, feel free to get creative with toppings! Fresh fruit, nut butter, or shredded coconut can elevate the flavor and presentation of your pudding. If you find the pudding too thick after refrigeration, simply stir in a little more almond milk until you reach your desired consistency. Adjust the level of sweetness to your preference by varying the amount of maple syrup you add. Enjoy this satisfying dessert guilt-free!
Fruit and Nut Energy Bites

Fruit and nut energy bites are a perfect snack for those looking to satisfy their sweet tooth without indulging in added sugars or gluten. These bites are packed with nutrients, making them an excellent choice for a quick pick-me-up during busy days.
They’re versatile and can include a variety of fruits and nuts, ensuring that you can personalize them to your taste preferences. Whether you need a pre-workout boost or a post-lunch snack, fruit and nut energy bites deliver a deliciously chewy texture and an explosion of flavor.
Making these energy bites is a straightforward process involving no cooking. Simply combine whole, natural ingredients that offer both health benefits and a delightful taste.
The best part is that you can keep these bites stored in your refrigerator and grab them on-the-go. With just a few minutes of prep time, you’ll have a wholesome snack ready that everyone can enjoy.
Ingredients:
- 1 cup dates, pitted and chopped
- 1 cup almonds, chopped (or nut of choice)
- ½ cup walnuts, chopped
- ½ cup unsweetened shredded coconut
- ¼ cup chia seeds
- ¼ cup nut butter (almond or peanut)
- 1 teaspoon vanilla extract
- A pinch of sea salt
In a large mixing bowl, combine the dates, nuts, shredded coconut, chia seeds, nut butter, vanilla extract, and sea salt.
Mix everything thoroughly until all ingredients are well combined. You can use your hands to knead the mixture if necessary.
Once mixed, form the mixture into small balls or bites, roughly 1 inch in size.
Place the energy bites on a parchment-lined tray and refrigerate for at least 30 minutes to firm up before serving.
For added variety, feel free to incorporate other ingredients you love, such as dried cranberries, pumpkin seeds, or cocoa powder.
You can also experiment with different nut butters to change the flavor profile. If the mixture feels too dry, add a splash of water or more nut butter until the desired consistency is reached.
These bites can be stored in an airtight container in the fridge for up to a week, allowing you to enjoy them at your convenience.


