This post may contain affiliate links. Please read our policy page.
You can whip up mouthwatering meals in 30 minutes or less! Try the Quick Lemon Garlic Shrimp Pasta for a zesty seafood dish, or enjoy One-Pan Chicken Fajitas bursting with flavor. For lighter options, whip together a 15-Minute Caprese Salad or Speedy Vegetable Stir-Fry. If you’re craving comfort, Easy Beef Tacos and Instant Pot Quinoa and Black Beans are perfect for busy nights. Get creative with a Fridge-Cleaning Omelette or Zucchini Noodles with Pesto for a fresh twist. Discover even more quick culinary delights ahead!
Quick Lemon Garlic Shrimp Pasta
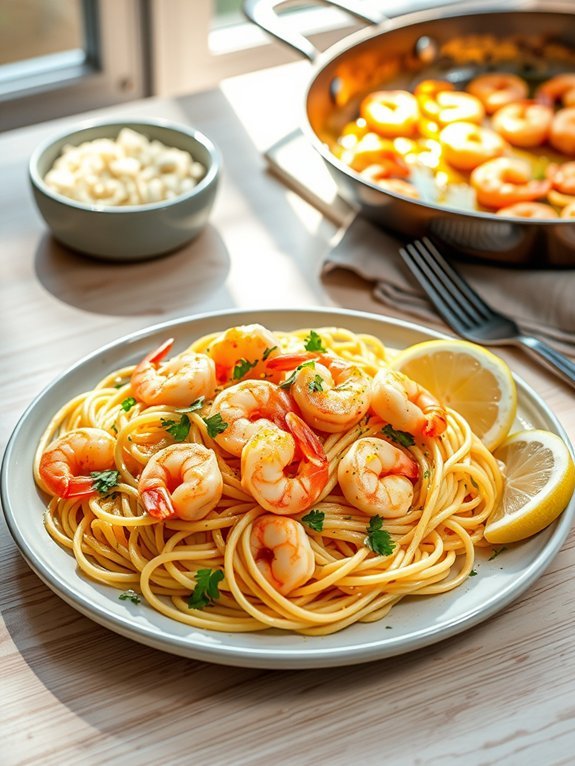
When you’re in need of a quick and satisfying meal, this Quick Lemon Garlic Shrimp Pasta is the perfect solution. Ready in just 30 minutes, it combines the delightful flavors of lemon, garlic, and shrimp over a bed of al dente pasta. This dish is light yet filling, making it ideal for a weeknight dinner, or a special occasion if you’re looking to impress without spending too much time in the kitchen.
The beauty of this recipe lies in its simplicity and speed. With minimal preparation and a handful of ingredients, you can have a delectable dish ready to serve in no time. The zesty lemon and aromatic garlic elevate the shrimp, while the pasta adds a comforting element that ties everything together beautifully.
- 8 oz spaghetti or linguine
- 1 lb shrimp, peeled and deveined
- 3 tablespoons olive oil
- 4 cloves garlic, minced
- 1 lemon (zest and juice)
- Salt and pepper, to taste
- ¼ cup fresh parsley, chopped (optional)
- Grated Parmesan cheese (optional)
To make the dish, start by cooking the spaghetti or linguine according to package instructions until al dente. While the pasta cooks, heat olive oil in a large skillet over medium heat. Add the minced garlic and sauté for about 30 seconds until fragrant, then add the shrimp. Cook for 2-3 minutes, until the shrimp turn pink.
Squeeze in the lemon juice and toss in the lemon zest. Drain the pasta and add it to the skillet, mixing everything gently to combine. Season with salt and pepper, and garnish with parsley and Parmesan cheese if desired.
For an extra burst of flavor, consider marinating the shrimp in lemon juice, garlic, and a pinch of red pepper flakes for about 15 minutes before cooking. This will infuse them with more zest and a hint of spice.
Also, feel free to customize the dish by adding seasonal vegetables such as cherry tomatoes or spinach for added nutrition and color. Enjoy your meal!
Recommended Items
Check out our favorite ingredients and tools to make your cooking experience even easier!
One-Pan Chicken Fajitas
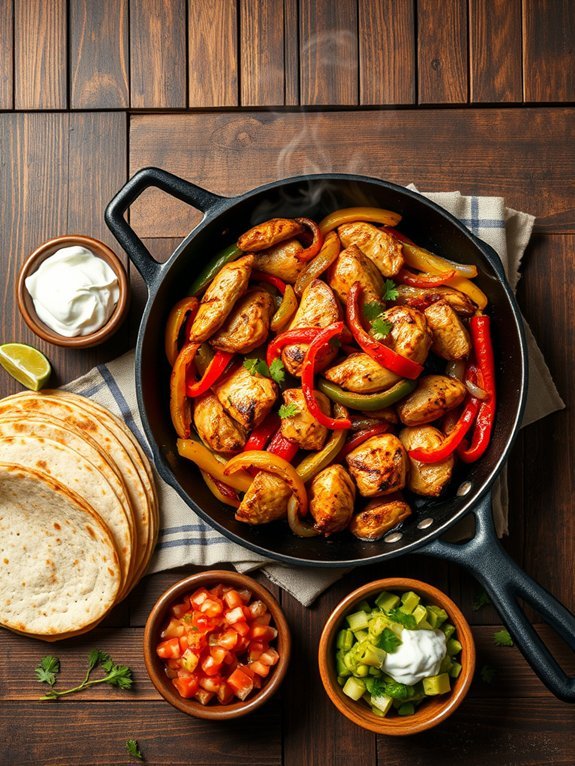
One-Pan Chicken Fajitas are a perfect meal for those busy weeknights when you want something flavorful and satisfying without spending hours in the kitchen. This dish is a delightful combination of tender chicken, vibrant peppers, and fragrant spices, all cooked together in one pan for easy clean-up. With this quick recipe, you can bring the fiesta to your dining table in just 30 minutes!
To make this dish even easier, the ingredients are simple and can typically be found in your pantry or local grocery store. The beauty of One-Pan Chicken Fajitas lies in its versatility; you can customize it with your favorite toppings or side dishes, making it a family-friendly option that everyone will love. Serve them with warm tortillas or over rice for a complete meal.
Ingredients:
- 1 pound boneless, skinless chicken breast, sliced thin
- 1 red bell pepper, sliced
- 1 yellow bell pepper, sliced
- 1 green bell pepper, sliced
- 1 onion, sliced
- 3 tablespoons olive oil
- 2 teaspoons chili powder
- 1 teaspoon cumin
- 1 teaspoon garlic powder
- Salt and pepper to taste
- Tortillas, for serving
- Optional toppings: sour cream, guacamole, salsa, cheese
Heat a large skillet over medium-high heat and add the olive oil. Add the sliced chicken and season with chili powder, cumin, garlic powder, salt, and pepper. Sauté the chicken for about 5-7 minutes until it starts to brown and is cooked through.
Next, add the sliced bell peppers and onion to the pan, cooking for another 5-7 minutes until the vegetables are tender and slightly charred. Once everything is cooked, serve the fajitas warm with tortillas and your choice of toppings.
For best results, slice your chicken and vegetables evenly so they cook at the same rate. You can also marinate the chicken in the spices and oil for a few hours prior to cooking to enhance the flavors.
If you want to make the dish spicier, add some sliced jalapeños or a dash of cayenne pepper to the mix. Don’t hesitate to experiment with different vegetables such as zucchini or mushrooms for a unique twist!
15-Minute Caprese Salad
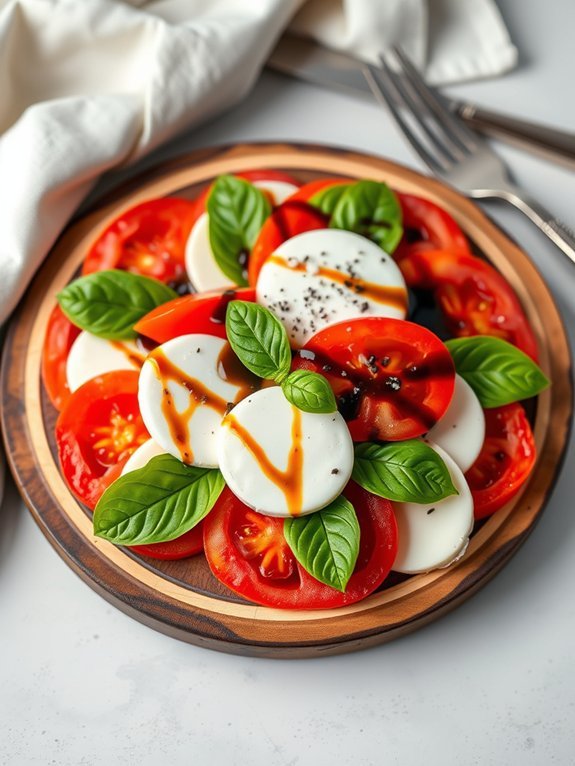
A Minute Caprese Salad is a delightful and revitalizing dish that embodies the essence of fresh, simple ingredients. This classic Italian salad showcases the beautiful combination of juicy ripe tomatoes, creamy mozzarella, and fragrant basil, all drizzled with extra virgin olive oil and balsamic vinegar. Perfect for a quick lunch or as a colorful side dish at dinner, it brings a burst of flavor to the table in just a few minutes.
The beauty of the Minute Caprese Salad lies in its assembly rather than cooking, allowing you to enjoy a delicious meal without the fuss. With minimal ingredients and virtually no prep time, it’s a great option for busy weeknights or unexpected guests. You can easily customize the salad by adding a sprinkle of salt or pepper, or even a hint of garlic for an extra kick. Get ready to impress with this vibrant dish that’s as pleasing to the eye as it’s to the palate!
- 2 ripe tomatoes
- 8 oz fresh mozzarella cheese
- 1 cup fresh basil leaves
- 2 tablespoons extra virgin olive oil
- 1 tablespoon balsamic vinegar
- Salt and pepper to taste
Slice the ripe tomatoes and fresh mozzarella cheese into even rounds. On a large plate, alternate layers of tomato and mozzarella slices, adding fresh basil leaves between each layer. Drizzle olive oil and balsamic vinegar over the assembled salad, and sprinkle with salt and pepper to taste.
When making a Minute Caprese Salad, freshness is key, so be sure to choose the best quality ingredients you can find. If you’re short on time, pre-sliced mozzarella or even store-bought basil pesto can offer a quick alternative.
For a touch of creativity, you can add in slices of avocado or a pinch of crushed red pepper flakes for added flavor. Enjoy this salad immediately for the best tasting experience!
Speedy Vegetable Stir-Fry
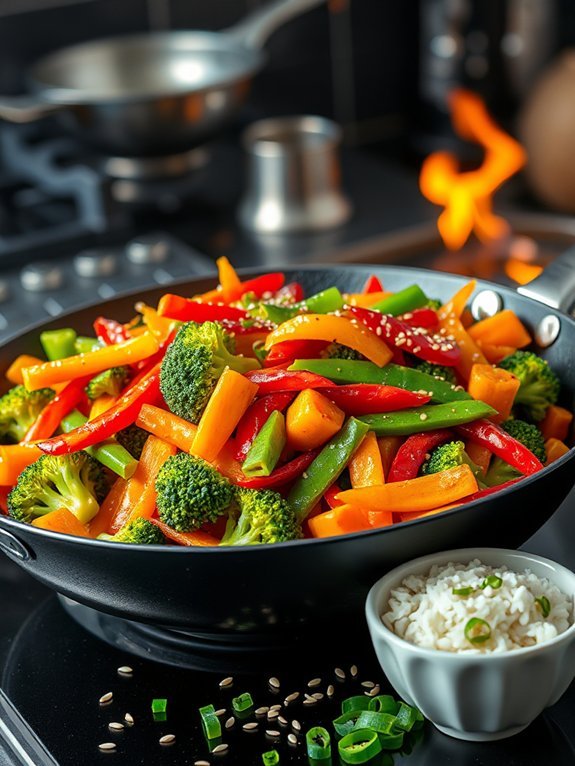
Speedy Vegetable Stir-Fry is the perfect solution for those busy weeknights when you need a wholesome meal that comes together in just minutes. Packed with a colorful array of vegetables and flavored with a savory sauce, this dish not only satisfies your hunger but also nourishes your body.
The beauty of a stir-fry lies in its versatility; you can use whatever vegetables you have on hand, making it an ideal recipe to clean out your fridge or utilize seasonal produce.
To enhance the flavors of your vegetable stir-fry, it’s important to prep all your ingredients in advance. This includes chopping your vegetables into bite-sized pieces and having your sauce ready to go. The quick cooking method of stir-frying allows you to retain the crispness and vibrant colors of the veggies, making every bite delicious and visually appealing.
Grab your wok or a large skillet, and let’s get this fantastic meal on the table in no time!
- 2 cups mixed vegetables (e.g., bell peppers, broccoli, carrots, snap peas)
- 1 tablespoon vegetable oil
- 2 cloves garlic, minced
- 1 tablespoon fresh ginger, grated
- 3 tablespoons soy sauce
- 1 tablespoon sesame oil
- 1 teaspoon rice vinegar
- Cooked rice or noodles, for serving
- Optional: sliced green onions and sesame seeds for garnish
Heat the vegetable oil in a large wok or skillet over medium-high heat. Add the minced garlic and grated ginger, stirring quickly for about 30 seconds until fragrant. Toss in the mixed vegetables and stir-fry for about 5-7 minutes, or until they’re bright in color and tender but still crisp.
Drizzle the soy sauce, sesame oil, and rice vinegar over the veggies, stirring for an additional minute to coat evenly. Serve immediately over cooked rice or noodles and garnish with sliced green onions and sesame seeds, if desired.
For an even quicker dinner, consider pre-chopping your vegetables and storing them in the fridge a day ahead. You can also mix and match your favorite sauces or add protein options like tofu or cooked chicken to the stir-fry for added flavor and nutrition.
Don’t forget, the key to a fantastic stir-fry is ensuring your pan is hot enough to sear the vegetables quickly, so they retain their texture and taste!
Easy Beef Tacos

Beef tacos are a quick and delicious meal that can be prepared in just 30 minutes, making them perfect for busy weeknights or impromptu gatherings. With their flavorful filling and customizable toppings, beef tacos can be enjoyed by everyone at the table.
They’re not only easy to make, but they also provide a great opportunity to get creative with your favorite ingredients.
To create mouthwatering beef tacos, you can use ground beef as your main protein, seasoned with spices that complement the savory flavor. Pairing the beef with fresh toppings like lettuce, tomatoes, cheese, and avocado allows each person to build their own perfect taco.
Plus, serving your tacos with a side of salsa or sour cream adds an extra layer of flavor, making each bite memorable.
Ingredients:
- 1 lb ground beef
- 1 small onion, chopped
- 2 cloves garlic, minced
- 1 packet taco seasoning
- ½ cup water
- 8 taco shells
- 1 cup shredded lettuce
- 1 cup diced tomatoes
- 1 cup shredded cheese (cheddar or Mexican blend)
- 1 avocado, sliced (optional)
- Salsa and sour cream (for serving)
In a large skillet, cook the ground beef, onion, and garlic over medium heat until the beef is browned and the onion is translucent, about 5-7 minutes.
Drain excess fat if necessary, then stir in the taco seasoning and water. Allow the mixture to simmer for another 5 minutes until the sauce thickens slightly.
While the beef is cooking, warm the taco shells according to package instructions.
Fill each shell with the seasoned beef mixture, and top with shredded lettuce, diced tomatoes, cheese, and avocado as desired.
For an extra kick, consider adding some sliced jalapeños or fresh cilantro as toppings.
If you have time, preparing a quick guacamole by mashing ripe avocados with lime juice, salt, and diced onions can enhance the taco experience greatly.
Finally, be sure to serve your tacos with a side of tortilla chips and salsa for an even more festive feel!
Quick and Tasty Recipe Guide
Simple Tomato Basil Soup
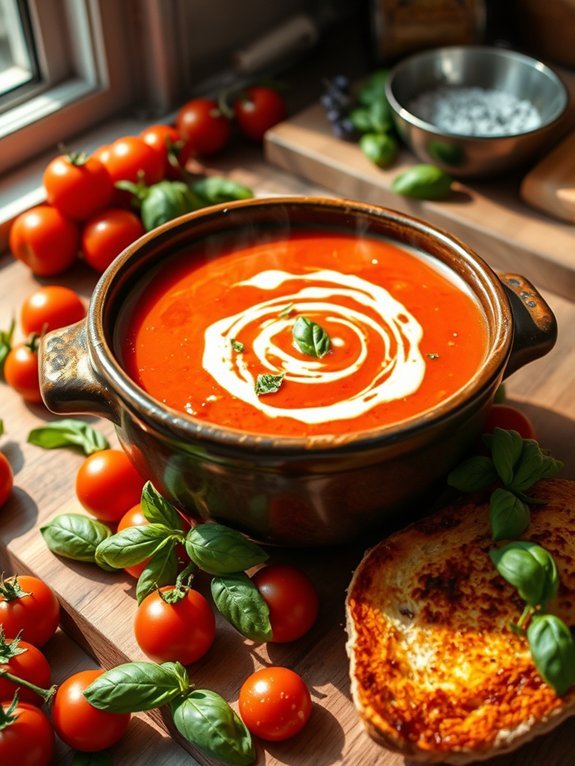
Tomato basil soup is a classic favorite, perfect for any season and incredibly simple to whip up in just 30 minutes.
It’s a comforting dish that brings the flavors of fresh tomatoes and fragrant basil to life, ideal for pairing with a grilled cheese sandwich or a hot crusty baguette. This recipe is especially great for those busy weeknights when you want something satisfying without spending hours in the kitchen.
Using fresh ingredients elevates the taste, but you can easily substitute canned tomatoes if needed—just make sure they’re of good quality for the best flavor. This soup isn’t only delicious but also nutritious, as it’s packed with vitamins and antioxidants.
Homemade tomato basil soup can easily be customized by adding a splash of cream for richness or even a pinch of red pepper flakes for a hint of spice.
Ingredients:
- 2 tablespoons olive oil
- 1 medium onion, chopped
- 2 cloves garlic, minced
- 2 cans (14.5 oz each) diced tomatoes, undrained
- 2 cups vegetable broth
- 1 teaspoon salt
- 1/2 teaspoon black pepper
- 1/4 teaspoon sugar
- 1 cup fresh basil leaves, packed
- 1/2 cup heavy cream (optional)
In a large pot, heat the olive oil over medium heat. Add the chopped onion and cook until it’s soft, about 5 minutes.
Stir in the minced garlic and cook for another minute until fragrant. Then, add the diced tomatoes (with their juice), vegetable broth, salt, pepper, and sugar.
Bring the mixture to a simmer and let it cook for 10 minutes. Remove from heat and stir in the fresh basil leaves. For a creamier soup, blend in heavy cream before serving.
For an extra flavor boost, consider roasting the tomatoes prior to adding them to the pot. This will enhance their natural sweetness.
Additionally, garnishing the soup with a sprinkle of freshly grated Parmesan cheese or a drizzle of olive oil before serving can add a lovely finishing touch.
Always taste your soup before serving; you might want to adjust the seasoning with a bit more salt or a touch of balsamic vinegar for acidity!
Instant Pot Quinoa and Black Beans
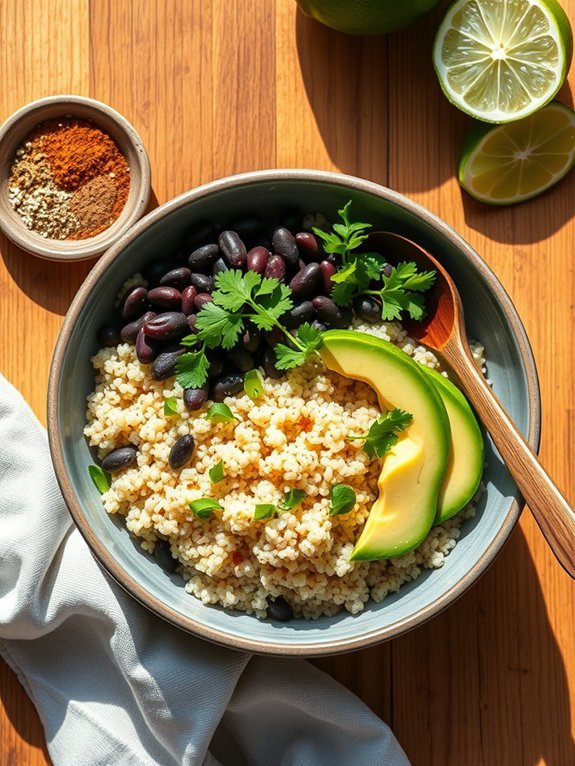
For a nutritious and quick meal, Instant Pot Quinoa and Black Beans is an excellent choice. This dish combines protein-rich quinoa with fiber-filled black beans, making it a perfect vegetarian option that’s both filling and satisfying.
Perfect for busy weeknights, you can have this wholesome meal ready to serve in just about 30 minutes, and it’s ideal for meal prepping or serving as a side dish.
The beauty of this recipe lies in its simplicity and adaptability. You can easily customize it by adding vegetables or spices based on your preferences. Plus, the Instant Pot takes the guesswork out of cooking quinoa perfectly – no more worrying about it being too soggy or undercooked. This dish not only saves time but also brings a healthy punch to your dinner table.
Ingredients:
- 1 cup quinoa, rinsed
- 1 can (15 oz) black beans, drained and rinsed
- 1 cup vegetable broth or water
- 1 teaspoon cumin
- 1 teaspoon garlic powder
- 1 teaspoon onion powder
- 1 tablespoon olive oil
- Salt and pepper to taste
- Optional toppings: chopped cilantro, avocado, lime wedges
In your Instant Pot, add the rinsed quinoa, black beans, vegetable broth, cumin, garlic powder, onion powder, olive oil, salt, and pepper. Stir to combine, then seal the lid and set the pressure valve to “Sealing.”
Cook on high pressure for 1 minute. Once the cooking cycle is complete, let the pressure release naturally for 5 minutes before doing a quick release for any remaining pressure. Fluff the quinoa and black beans with a fork before serving.
When cooking this dish, you can easily add extra flavor by including diced bell peppers, corn, or even diced tomatoes to the mixture before cooking.
If you prefer a spicier kick, consider adding chopped jalapeños or a dash of cayenne pepper. This recipe also pairs wonderfully with a squeeze of fresh lime juice or a sprinkle of fresh herbs like cilantro for an added layer of flavor.
Fridge-Cleaning Omelette

An omelette is a fantastic way to use up leftover vegetables, meats, or cheeses lurking in your fridge. This Fridge-Cleaning Omelette isn’t only a quick meal but also a versatile dish that can be adapted to suit your personal taste or what you have on hand. Whether it’s peppers, spinach, cooked meats, or even cheese, just toss them all in and you’ll have a delicious, filling meal in no time.
Cooking an omelette can seem intimidating, but with a little practice, it becomes an easy and enjoyable process. The key is to have all your ingredients prepped and ready to go before you start cooking. This not only saves time but also allows the omelette to cook evenly.
Enjoy it as a hearty breakfast, a quick lunch, or a light dinner option; it’s all about making the best use of what you have at home.
Ingredients:
- 3 large eggs
- Salt and pepper, to taste
- 1 tablespoon olive oil or butter
- 1/2 cup diced vegetables (bell peppers, onions, spinach, etc.)
- 1/2 cup cooked meat (ham, bacon, chicken, etc. – optional)
- 1/4 cup shredded cheese (cheddar, feta, mozzarella, etc.)
- Fresh herbs (parsley, chives, etc. – optional)
In a bowl, whisk together the eggs, salt, and pepper until well combined. Heat the olive oil or butter in a non-stick skillet over medium heat. Pour the egg mixture into the pan, then quickly add the diced vegetables, cooked meat (if using), and cheese on one half of the omelette.
Allow it to cook for about 2-3 minutes until the edges begin to set, then fold the omelette in half and cook for another 1-2 minutes until fully cooked through.
As you cook your omelette, don’t be afraid to experiment with different ingredients based on what you have in your fridge. You can also try adding spices or a splash of hot sauce for an extra kick. The key to a perfect omelette is to not overcrowd it with fillings—too many ingredients can lead to a soggy texture.
Finally, make sure your skillet is properly preheated so your omelette cooks evenly. Enjoy your creation!
Zucchini Noodles With Pesto
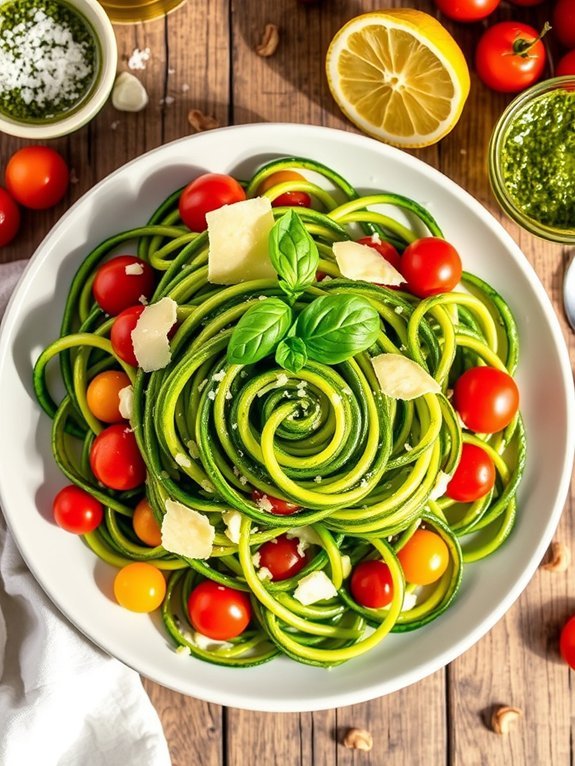
Zucchini noodles, or “zoodles,” are a fantastic alternative to traditional pasta. Not only do they provide a healthy and low-carb option, but they also pair beautifully with vibrant and flavorful pesto. Making zucchini noodles is an easy and fun process, and when topped with fresh pesto, they create a delicious meal ready in just 30 minutes. This dish is perfect for a quick weeknight dinner or a light lunch that won’t leave you feeling heavy.
To create the perfect combination of flavors, simply select your favorite pesto—store-bought or homemade—and prepare the zucchini noodles. The light and rejuvenating taste of the zucchini complements the rich, herby goodness of the pesto, resulting in a delightful dish that’s satisfying without being overwhelming. You’ll love how this recipe showcases the delicious nuances of both the zoodles and the pesto, making it a go-to in your rotation.
- 2 medium zucchinis
- 1 cup pesto (store-bought or homemade)
- 1 tablespoon olive oil
- Salt and pepper to taste
- Optional toppings: cherry tomatoes, grated Parmesan cheese, pine nuts, or fresh basil
Using a spiralizer or a julienne peeler, create noodles from the zucchinis. In a large skillet, heat the olive oil over medium heat, add the zucchini noodles, and sauté for 2-3 minutes until just tender. Remove from heat, stir in the pesto, and season with salt and pepper. If desired, top with cherry tomatoes, grated Parmesan, pine nuts, or fresh basil for added flavor and texture.
When cooking zucchini noodles, be mindful of not overcooking them, as they can become mushy quickly. Since zucchini has a high water content, if you find the dish too watery, you can drain off some excess moisture before serving.
To enhance the flavor, adding a squeeze of fresh lemon juice or red pepper flakes can give your zoodles an extra zing. Enjoy this speedy dish as a healthy meal option that’s both satisfying and delicious!
30-Minute Mediterranean Chickpea Bowl
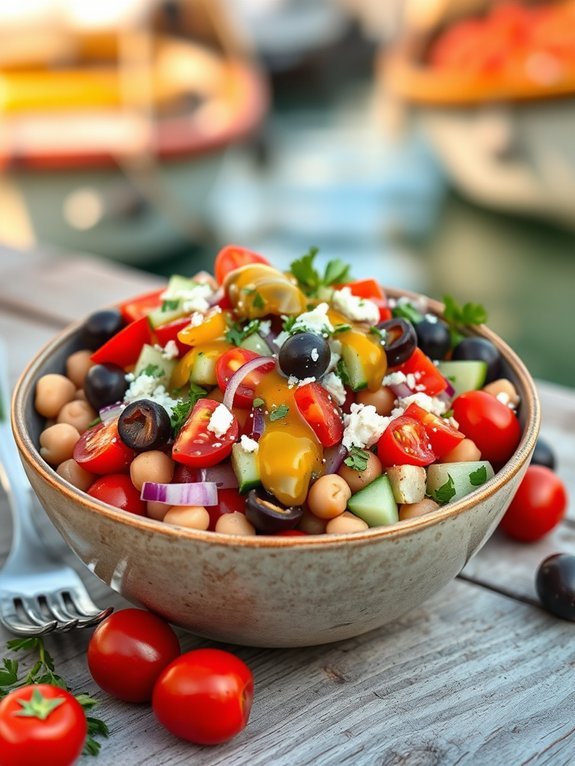
The Minute Mediterranean Chickpea Bowl is a vibrant and nutritious meal that brings together the flavors of the Mediterranean in just 30 minutes. This dish features chickpeas as the star ingredient, packed with protein and fiber, making it perfect for a quick lunch or a light dinner. With fresh vegetables, aromatic herbs, and a tangy dressing, this bowl isn’t only nourishing but also bursting with flavor.
To prepare this dish, you can use canned chickpeas to save time, ensuring that your cooking experience remains efficient and hassle-free. The combination of ingredients allows for customization, as you can add your favorite vegetables or adjust the spices according to your taste preferences. This bowl can easily be enjoyed warm or cold, making it an ideal meal prep option for busy weeks.
Ingredients:
- 1 (15 oz) can chickpeas, drained and rinsed
- 1 cup cherry tomatoes, halved
- 1 cucumber, diced
- 1/2 red onion, finely chopped
- 1/4 cup Kalamata olives, pitted and sliced
- 1/4 cup feta cheese, crumbled (optional)
- 2 tablespoons olive oil
- 1 tablespoon red wine vinegar
- 1 teaspoon dried oregano
- Salt and pepper to taste
- Fresh parsley, chopped (for garnish)
Start by combining the chickpeas, cherry tomatoes, cucumber, red onion, and Kalamata olives in a large mixing bowl. In a separate small bowl, whisk together the olive oil, red wine vinegar, dried oregano, salt, and pepper. Drizzle the dressing over the chickpea mixture and toss until everything is evenly coated. Top with feta cheese if desired, and serve immediately or let it chill in the fridge for a bit to allow the flavors to meld.
When preparing the Minute Mediterranean Chickpea Bowl, feel free to experiment with different vegetables or add proteins such as grilled chicken or quinoa for additional nutrients. This recipe is versatile, so don’t hesitate to swap out ingredients based on what you have on hand.
Make sure to taste and adjust the seasoning as you go; sometimes a little extra seasoning can elevate the dish even more. Enjoy your colorful and delicious bowl!


