This post may contain affiliate links. Please read our policy page.
When you’re hit with cravings, try whipping up some Greek yogurt with honey and berries, or crunch on apple slices with almond butter. Hummus paired with veggie sticks gives you a nutritious boost, while homemade trail mix satisfies your sweet and salty side. Don’t forget about easy options like avocado toast and mini quesadillas for savory lovers. Hard-boiled eggs and edamame with sea salt are perfect for protein-packed bites. Explore even more tasty ideas to satisfy your snacking needs!
Greek Yogurt With Honey and Berries

Greek yogurt with honey and berries is a delightful and nutritious snack that can be whipped up in just a few minutes. This simple yet satisfying dish combines the creamy texture of Greek yogurt with the natural sweetness of honey and the vibrancy of berries, making it both a delicious and healthy option for any time of the day. Packed with protein from the yogurt and loaded with vitamins from the berries, it’s perfect for breakfast, a mid-afternoon snack, or even a light dessert.
The beauty of this recipe lies in its versatility. You can mix and match your favorite berries, whether you prefer strawberries, blueberries, raspberries, or blackberries. Additionally, the sweetness of the honey can be adjusted to your liking, making this a customizable treat that caters to your palate. So, gather your ingredients and prepare to enjoy this invigorating and energizing snack!
- 1 cup of Greek yogurt (plain or flavored)
- 1-2 tablespoons of honey (adjust according to taste)
- 1/2 cup of mixed berries (strawberries, blueberries, raspberries, etc.)
- Optional: a sprinkle of granola or nuts for added crunch
In a bowl, scoop out the Greek yogurt and smooth it into an even layer. Drizzle the honey over the yogurt, adjusting the amount based on your desired sweetness. Top the yogurt and honey mixture with your choice of mixed berries, and if you like, sprinkle some granola or nuts on top for an extra crunch.
For the best flavor and texture, consider using fresh, in-season berries, as they’ll be sweeter and more flavorful. You can also experiment with different types of yogurt, such as coconut or almond, if you want a dairy-free option.
Prepare your snack right before serving to guarantee the berries maintain their freshness, and feel free to make a larger batch for easy grab-and-go snacks throughout the week. Enjoy experimenting with this healthy and delicious treat!
Apple Slices With Almond Butter

Apple slices with almond butter are a delicious and nutritious snack that combines crisp, juicy fruit with creamy, nutty flavor. Not only are these ingredients readily available, but they’re also packed with health benefits.
Apples are a great source of dietary fiber, vitamin C, and antioxidants, while almond butter provides healthy fats, protein, and essential vitamins and minerals. Together, they create a satisfying treat that can curb your sweet cravings while keeping you energized throughout the day.
This snack is incredibly easy to prepare, making it perfect for both quick bites on busy days and casual gatherings. Whether you’re at home, at the office, or on a picnic, apple slices with almond butter can be enjoyed anytime.
Feel free to customize your snack by adding toppings such as a sprinkle of cinnamon or a drizzle of honey for an extra touch of flavor.
- 1 medium apple (any variety to your preference)
- 2 tablespoons almond butter
- Optional toppings (e.g., cinnamon, honey, raisins, or granola)
To prepare the snack, start by washing the apple thoroughly under running water. Next, core the apple and cut it into even slices to create bite-sized portions.
Arrange the apple slices on a plate and serve with almond butter in a small bowl for dipping. If you like, you can also drizzle some honey or sprinkle cinnamon on top for added taste.
For a bit of variety, try experimenting with different apple varieties as they can offer a range of flavors from tart to sweet. Additionally, if you’re prepping snacks for the week, consider squeezing a bit of lemon juice on the apple slices to prevent them from browning too quickly.
This way, you can enjoy fresh and flavorful snacks whenever you need them!
Recommended Items
Check out our top picks for products and equipment that make snacking a breeze!
Hummus and Veggie Sticks
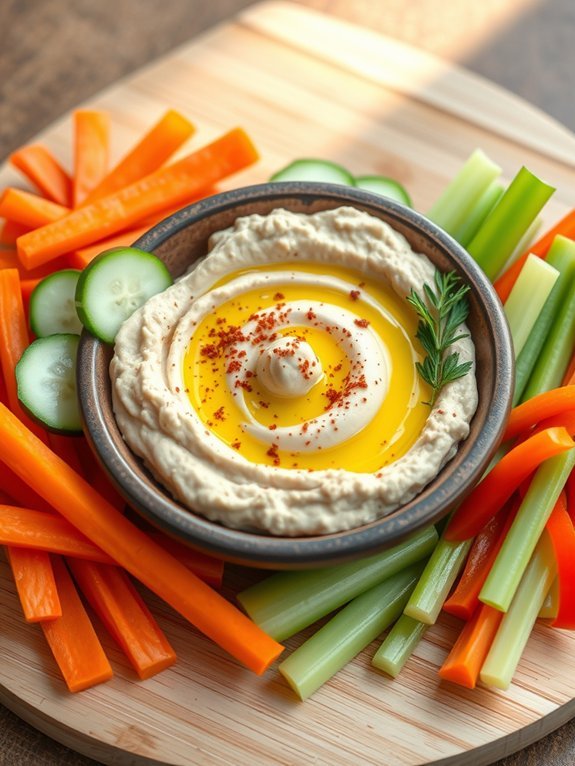
Hummus and veggie sticks make for a perfect snack or appetizer, combining the creamy goodness of hummus with the crunch of fresh vegetables. This delightful dish isn’t only simple to prepare but also packs a healthy punch, making it a favorite for both kids and adults. The creamy chickpea-based dip is rich in protein and fiber, while the colorful vegetable sticks offer essential vitamins and minerals, making it an ideal choice for nutritious snacking.
Making hummus at home is a straightforward process that allows you to customize flavors to your liking. You can easily adjust the seasoning, add different herbs, or even infuse your hummus with roasted garlic or spices for an extra kick.
Paired with a variety of colorful vegetable sticks—like carrots, cucumbers, bell peppers, and celery—this dish is as visually appealing as it’s delicious.
Ingredients:
- 1 can (15 oz) chickpeas, drained and rinsed
- 2 tablespoons tahini
- 2 tablespoons olive oil
- 1 clove garlic, minced
- 2 tablespoons lemon juice
- Salt to taste
- Water (as needed for consistency)
- Carrots, cut into sticks
- Cucumber, cut into sticks
- Bell peppers, cut into sticks
- Celery, cut into sticks
To prepare the hummus, combine the chickpeas, tahini, olive oil, minced garlic, lemon juice, and a pinch of salt in a food processor. Blend until smooth, adding water gradually until you achieve your desired creamy consistency.
Serve the hummus in a bowl, surrounded by a variety of vegetable sticks for dipping.
When preparing your veggie sticks, feel free to mix and match your favorites to add variety in flavor and crunch. For an even more nutritious option, consider lightly steaming your vegetables before serving, which can enhance their flavor and make them easier to digest.
You can also experiment with different hummus toppings, such as a drizzle of olive oil, a sprinkle of paprika, or chopped herbs for an added burst of flavor.
Homemade Trail Mix

Homemade trail mix is a versatile and nutritious snack that’s perfect for on-the-go munching. It allows you to mix and match various ingredients, catering to your taste preferences and dietary needs. Whether you’re looking for a post-workout boost, a mid-afternoon pick-me-up, or a quick snack before heading out, making your own trail mix enables you to control the ingredients and avoid unnecessary additives often found in store-bought versions.
With endless combinations possible, you can create a trail mix that’s sweet, salty, or both! Using nuts, seeds, dried fruits, and a touch of chocolate, your homemade trail mix can be as simple or as decadent as you like. This recipe serves as a guideline, and feel free to customize your mix based on what you have on hand or your favorite flavors.
- 1 cup raw almonds
- 1 cup walnuts
- 1 cup dried cranberries
- 1 cup sunflower seeds
- 1 cup dark chocolate chips
- 1 cup dried apricots, chopped
- 1 teaspoon cinnamon (optional)
- A pinch of sea salt (optional)
In a large mixing bowl, combine all the ingredients, ensuring that the nuts, seeds, dried fruits, and chocolate are evenly distributed. If you’re using cinnamon and sea salt, sprinkle those in as well and mix thoroughly.
Once well combined, transfer the trail mix into an airtight container or individual snack bags for easy access.
To take your trail mix to the next level, consider toasting the nuts for added flavor and crunch. Simply spread them on a baking sheet and toast in the oven at 350°F (175°C) for about 10 minutes, stirring occasionally to prevent burning. Keep an eye on them, as nuts can go from toasted to burnt quickly!
Additionally, feel free to experiment with different ingredients, such as coconut flakes, banana chips, or even savory elements like cheese crisps, to create a personalized trail mix that suits your taste buds perfectly.
Avocado Toast
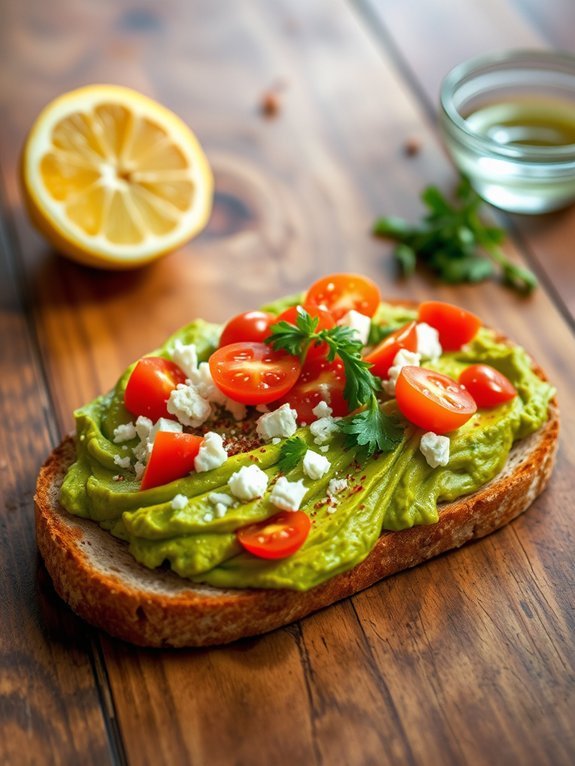
Avocado toast is a simple yet delicious snack that has taken the culinary world by storm. It’s not only versatile but also a nutritious option that can be enjoyed at any time of day. The creamy texture of ripe avocados paired with the crunch of toasted bread makes for a satisfying combination, while the potential toppings allow for endless creativity.
Whether you prefer a classic version or something more adventurous, avocado toast can effortlessly cater to your personal taste.
To create the perfect avocado toast, you’ll want to start with the best quality ingredients. Fresh, ripe avocados are essential to achieve that rich, buttery flavor, while your choice of bread will provide the foundation for your snack. You can get creative with toppings, adding everything from red pepper flakes and lemon juice to poached eggs and cherry tomatoes, which can elevate your toast from a simple snack to a gourmet treat.
- 2 ripe avocados
- 4 slices of bread (whole grain, sourdough, or your choice)
- 1 lemon (juiced)
- Salt and pepper, to taste
- Optional toppings: red pepper flakes, cherry tomatoes, radishes, feta cheese, or poached egg
Begin by toasting the slices of bread to your desired level of crispiness. While the bread is toasting, cut the avocados in half, remove the pit, and scoop the flesh into a bowl. Mash the avocado with a fork until it reaches your preferred consistency, then stir in the lemon juice, salt, and pepper.
Once the bread is ready, spread a generous layer of the mashed avocado on each slice and add any toppings you desire.
To make your avocado toast even more exciting, don’t hesitate to experiment with different flavors and textures. For instance, a sprinkle of smoked paprika can add a smoky depth, while fresh herbs like cilantro or basil can add brightness.
Also, confirm your avocados are perfectly ripe for the best flavor—look for ones that yield slightly to pressure, but don’t be afraid to use a little extra lemon juice to prevent browning and enhance freshness. Enjoy your healthy snack!
Rice Cakes With Peanut Butter
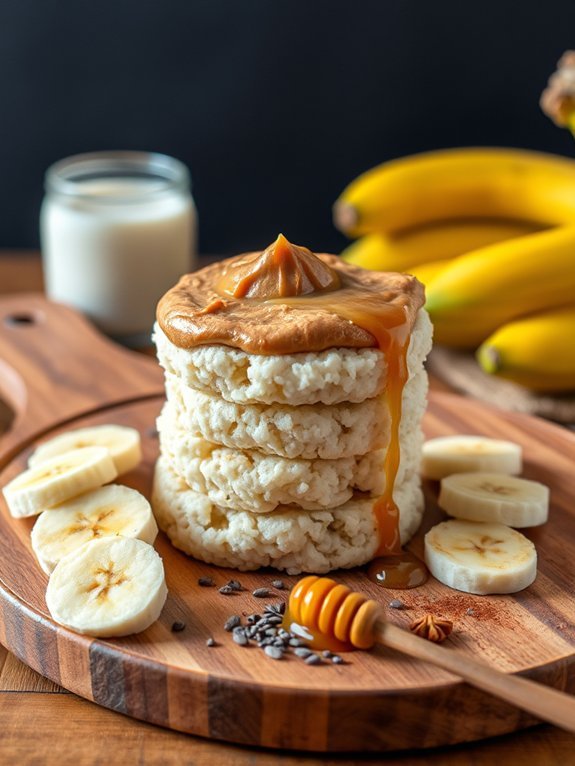
Rice cakes with peanut butter are a quick and delightful snack that can be enjoyed any time of the day. With their crunchy texture and the creamy richness of peanut butter, they make for a perfect combination of taste and nutrition. This snack isn’t only satisfying but also customizable, allowing you to switch up the toppings to suit your preference.
Whether you need a mid-afternoon pick-me-up or a post-workout energy boost, rice cakes with peanut butter can do the trick.
Making rice cakes with peanut butter is incredibly simple, requiring only a few minutes. This snack isn’t only convenient but also packed with energy and healthy fats, thanks to the peanut butter. It’s an excellent choice for anyone looking to whip up something quick and nutritious to satisfy their hunger without the fuss of complicated cooking techniques.
Ingredients:
- Rice cakes (plain or flavored)
- Peanut butter (smooth or crunchy)
- Optional toppings: sliced banana, honey, chia seeds, or cinnamon
Spread a generous layer of peanut butter on top of each rice cake to your liking. If you’re using additional toppings, arrange them on top of the peanut butter to enhance flavor and presentation.
To elevate this dish, experiment with different types of peanut butter, such as almond or cashew butter, for a unique flavor twist. Additionally, consider using toppings like fruit, honey, or seeds for added nutrition and taste.
Finally, you can store any leftover rice cakes in an airtight container to keep them fresh for your next snack craving. Enjoy exploring all the creative variations you can come up with!
Cottage Cheese With Pineapple
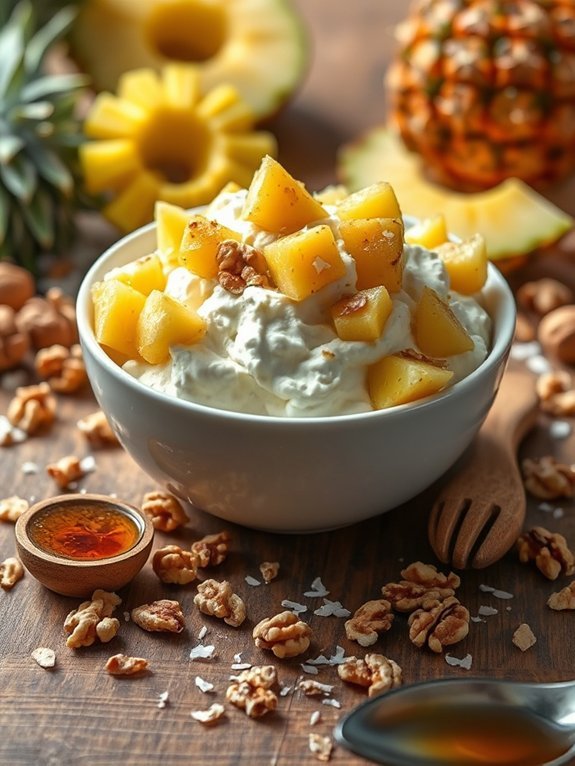
Cottage cheese with pineapple is a delightful snack that combines the creamy texture of cottage cheese with the sweet, tropical flavor of pineapple. This easy-to-make dish isn’t only a great source of protein but also packs a punch of vitamins and minerals.
Perfect for a quick breakfast, a revitalizing afternoon snack, or even a light dessert, cottage cheese with pineapple offers a nutritious option that can satisfy your sweet tooth.
The versatility of this dish makes it even more appealing. You can use fresh pineapple, canned pineapple, or even frozen chunks depending on what you have on hand.
While this recipe is simple, it allows for creativity – you can add nuts, seeds, or other fruits to elevate the taste and nutrition level, making it suitable for various dietary preferences.
Ingredients:
- 1 cup of cottage cheese
- 1 cup of pineapple chunks (fresh, canned, or frozen)
- Optional: honey or maple syrup for sweetness
- Optional: chopped nuts (such as walnuts or almonds) for added crunch
- Optional: shredded coconut for garnish
To prepare cottage cheese with pineapple, start by placing the cottage cheese in a serving bowl.
Add the pineapple chunks, stirring gently to combine both ingredients. If desired, drizzle honey or maple syrup over the mixture for added sweetness and toss in any optional ingredients, such as nuts or shredded coconut, to enhance the flavor and texture.
For the best flavor, consider letting the dish sit in the refrigerator for about 15 minutes before serving.
This allows the flavors to meld together beautifully. Additionally, using fresh pineapple will provide a more vibrant taste, while canned pineapple in juice (not syrup) can be an easy alternative.
When served, this light snack can be enjoyed as is or paired with whole grain crackers for added crunch.
Dark Chocolate Covered Almonds
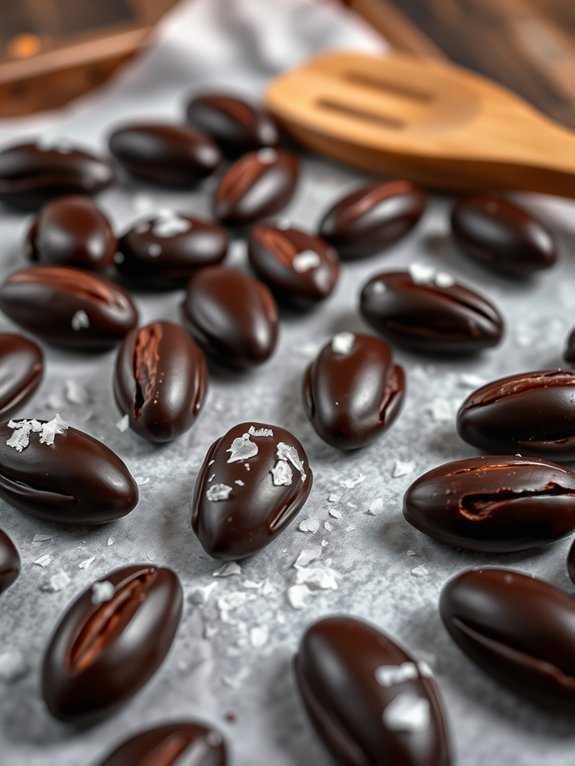
Dark chocolate covered almonds are a delightful and nutritious snack that’s perfect for satisfying your sweet cravings while also providing a healthy crunch. Almonds are packed with vitamins, minerals, and antioxidants, making them a smart choice for a guilt-free treat. When dipped in rich dark chocolate, they become an indulgent yet wholesome snack that can be enjoyed at any time of the day—be it as an afternoon pick-me-up or a movie night delight.
Making dark chocolate covered almonds is surprisingly easy, and you can customize the recipe to fit your taste. You can adjust the ratio of chocolate to almonds based on how decadent you want them to be, and feel free to add toppings like sea salt, coconut flakes, or even a sprinkle of cinnamon for an elevated taste. This recipe isn’t just simple; it requires minimal ingredients, making it a perfect go-to when you’re in the mood to create something sweet without any fuss.
- 1 cup raw almonds
- 8 oz dark chocolate (at least 70% cocoa)
- Sea salt (optional)
- Coconut flakes (optional)
Start by gently toasting the raw almonds in a dry skillet over medium heat for about 5-7 minutes, stirring occasionally until they’re fragrant and slightly golden.
Meanwhile, chop the dark chocolate into small pieces and melt it in a microwave-safe bowl in 30-second increments, stirring in between until smooth.
Remove the melted chocolate from the microwave and add the toasted almonds; toss until they’re coated evenly. Use a fork to lift the almonds out of the chocolate, allowing excess chocolate to drip off, and place them on a parchment-lined baking sheet.
If desired, sprinkle a little sea salt or coconut flakes on top before allowing them to cool and set completely.
For the best results, verify that your almonds are completely dry before coating them in chocolate; any moisture can cause the chocolate to seize.
Additionally, consider letting the chocolate-covered almonds cool in the refrigerator for a firmer texture and enhanced crunch.
You can store them in an airtight container to keep them fresh for longer; they’ll make a great snack option ready to be enjoyed whenever you desire a quick, delicious treat!
Popcorn Seasoned With Nutritional Yeast
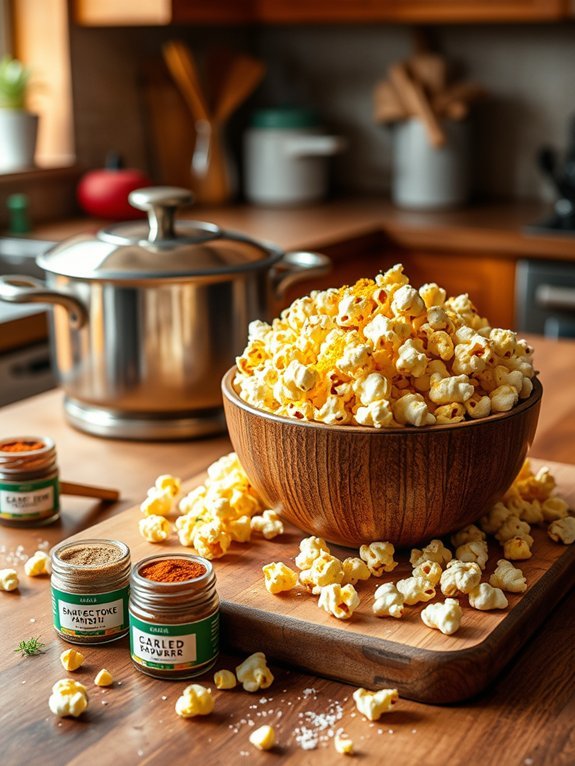
Popcorn seasoned with nutritional yeast is a flavorful, nutritious twist on a classic snack. Nutritional yeast, renowned for its cheesy, umami flavor, is packed with vitamins and minerals, particularly B vitamins, making it an excellent choice for those seeking a plant-based, healthy alternative to traditional buttered popcorn.
This recipe isn’t only simple to follow but also perfectly customizable—add spices or herbs according to your taste preference for an extra kick.
Making popcorn at home allows you to control the ingredients and avoid any unnecessary additives found in pre-packaged popcorn. Whether you’re hosting a movie night or just craving a quick snack, this popcorn recipe is sure to satisfy your craving while providing nutritional benefits. Let’s jump in and make a batch!
- 1/2 cup popcorn kernels
- 1 tablespoon coconut oil or vegetable oil
- 1/4 cup nutritional yeast
- 1/2 teaspoon salt (or to taste)
- Optional: spices such as garlic powder, smoked paprika, or chili powder
In a large pot, heat the coconut or vegetable oil over medium heat. When the oil is hot, add the popcorn kernels and cover the pot with a lid. Shake the pot occasionally until the popping slows down, about 3-4 minutes.
Once the popping has slowed markedly, remove the pot from the heat and let it sit for a minute before removing the lid. Transfer the popcorn to a large bowl and immediately sprinkle on the nutritional yeast and salt, tossing gently to coat the popcorn evenly.
For an extra burst of flavor, don’t be afraid to experiment with different spice combinations that suit your palate. If you like your popcorn spicy, add a dash of cayenne pepper or chili powder. You can also try incorporating some finely grated nutritional yeast and salt mixtures for an even more unique taste.
Finally, serving the popcorn fresh out of the pot is ideal, as it retains that delightful crunch. Enjoy!
Cheese and Whole Grain Crackers
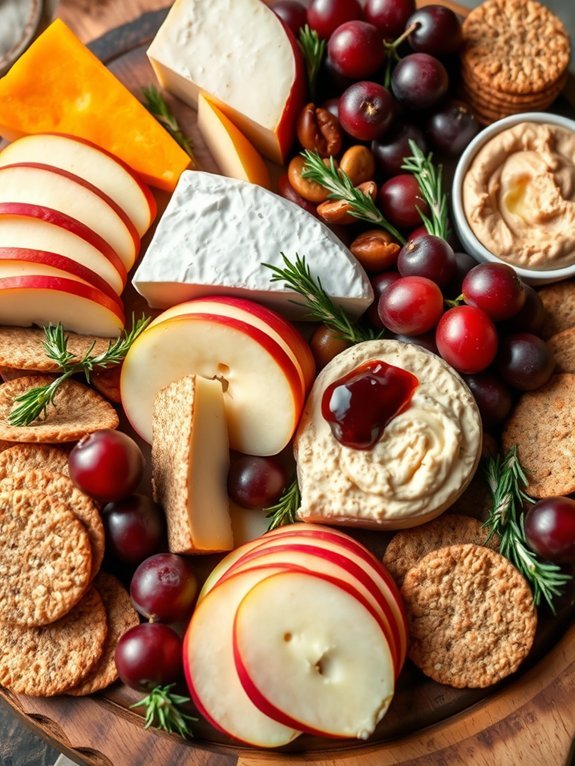
Cheese and whole grain crackers make for a deliciously simple snack that’s both satisfying and nutritious. The combination of creamy cheese and the crisp texture of whole grain crackers not only pleases the palate but also provides a good source of energy. Whether you’re entertaining guests, packing a lunch, or just looking for a quick bite, this snack is sure to hit the spot.
To elevate this snack, consider selecting a variety of cheeses and add-ons that can enhance the flavor profile. For instance, aged cheddar or creamy brie can create a delightful contrast with the nutty taste of whole grain crackers. You might also want to include some fresh fruits, like apple slices or grapes, for a revitalizing complement, or a spread such as hummus or a savory jam to add an unexpected twist.
- Whole grain crackers
- Assorted cheese (e.g., cheddar, brie, gouda)
- Optional: apple slices, grapes, hummus, or savory jam
To prepare this delightful snack, simply arrange the whole grain crackers on a serving plate. Slice the cheese into manageable pieces and place them next to or on top of the crackers for easy access. If you’re using fruits or spreads, add them alongside the crackers and cheese to create a well-rounded platter.
When assembling your cheese and whole grain cracker snack, don’t be afraid to mix and match flavors and textures. Experimenting with different cheeses and toppings can lead to unexpected and delicious combinations.
Additionally, consider presenting the snacks in a visually appealing way by layering the items or adding garnishes like sprigs of fresh herbs for a touch of elegance. Enjoy the process of creating a customized snack that caters to your taste preferences!
Banana With Nutella

Banana with Nutella is a delightful and easy-to-make snack that combines the natural sweetness of bananas with the rich, chocolate-hazelnut flavor of Nutella. This simple treat is perfect for any time of day, whether you’re looking for a quick breakfast, a midday snack, or a satisfying dessert.
With just a few ingredients, you can whip up a delicious dish that’s both indulgent and healthy thanks to the nutritious benefits of bananas.
To make your Banana with Nutella experience even more exciting, you can customize it with various toppings or variations. Adding a sprinkle of sea salt can enhance the flavors, while a dusting of powdered sugar creates a lovely presentation.
Whether you choose to enjoy this snack on its own or with added flair, you’re sure to love the ease and taste of this treat.
Ingredients:
- Ripe bananas
- Nutella
- Optional toppings: sea salt, chopped nuts, shredded coconut, or strawberries
Cut the bananas in half lengthwise to create two long slices. Spread a generous amount of Nutella on the cut side of each banana half. You can add any additional toppings at this stage.
Arrange the banana halves on a plate and serve immediately, either as is or with a scoop of ice cream on the side for a more decadent treat.
When preparing this snack, it’s important to use ripe bananas for the best flavor and texture. A perfectly ripe banana is slightly soft and has a few brown spots on the skin, indicating sweetness.
Feel free to get creative with your toppings and presentation; you can even serve these banana halves on a toasted slice of bread for a delightful variation. Enjoy this speedy snack with family or friends – it’s sure to be a hit!
Mini Quesadillas

Mini quesadillas are a delightful and versatile snack that can be easily prepared in a matter of minutes. Perfect for gatherings, lunchboxes, or a quick weekday snack, these bite-sized treats aren’t only delicious but also customizable to suit your taste. Whether you prefer cheese-packed quesadillas or want to load them up with veggies or proteins, the possibilities are endless. Their crispy exterior and gooey interior make them a favorite among both kids and adults alike.
To make mini quesadillas, you don’t have to be a culinary expert. With just a few ingredients and simple steps, you can whip up these tasty snacks using tortillas, cheese, and your choice of fillings. They can be cooked on a stovetop or in the oven, making this dish as convenient as it’s tasty. Get creative with your fillings, and you can even turn mini quesadillas into a wholesome meal by adding beans, chicken, or sautéed vegetables.
- Flour or corn tortillas
- Shredded cheese (cheddar, Monterey Jack, or mozzarella)
- Cooked proteins (chicken, beef, or beans, optional)
- Fresh vegetables (bell peppers, onions, or spinach, optional)
- Olive oil or cooking spray
- Salsa or sour cream (for dipping)
To cook the mini quesadillas, heat a non-stick skillet over medium heat and lightly coat it with olive oil or cooking spray. Place one tortilla in the skillet and sprinkle a generous amount of shredded cheese on one half, adding any additional fillings if desired.
Fold the tortilla in half and cook for about 2-3 minutes on each side, or until the cheese is melted and the tortilla is golden brown and crispy. Once cooked, remove from the skillet and cut into wedges before serving.
For added flavor, consider seasoning your cheese or protein with spices like cumin, paprika, or chili powder before adding them to the quesadilla. If cooking multiple batches, keep finished quesadillas warm in an oven set to low heat while you prepare the rest.
Finally, don’t hesitate to experiment with different types of cheese or add fresh herbs, such as cilantro, for an extra layer of flavor!
Snack Preparation Guide
Smoothie With Spinach and Fruit
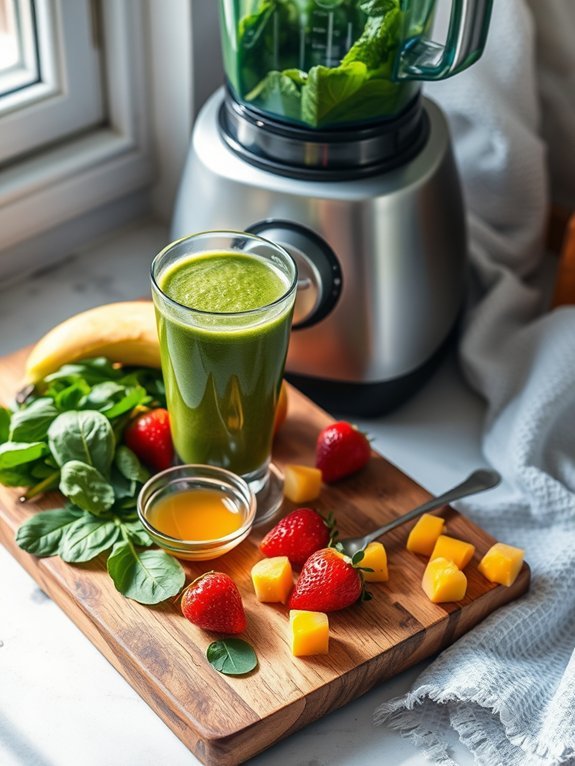
Smoothies are a delightful and invigorating way to pack a nutritious punch into your snack routine, and they’re incredibly versatile. One delightful combination is the smoothie with spinach and fruit. This drink not only brings a vivid green color but also incorporates the health benefits of spinach, which is loaded with vitamins and minerals.
When paired with fruits such as bananas and berries, you’ll find the earthy flavor of spinach perfectly complements the sweetness of the fruit, creating a deliciously creamy treat that you won’t be able to resist.
Making a spinach and fruit smoothie is quick and easy – perfect for a snack or a quick breakfast on busy mornings. You can customize it to fit your flavor profile by adjusting the fruits and even adding extras like yogurt or nut butter. The vibrant green hue will brighten up your day and help you feel great!
- 1 cup fresh spinach
- 1 ripe banana
- 1/2 cup frozen strawberries
- 1/2 cup frozen mango
- 1 cup almond milk (or any preferred milk)
- 1 tablespoon honey or maple syrup (optional)
- Ice cubes (optional for a thicker consistency)
In a blender, combine the fresh spinach, banana, frozen strawberries, frozen mango, and almond milk. Blend until smooth and creamy, adjusting the consistency by adding more milk, honey, or ice as desired.
Once blended, taste and add more sweetener if needed. Pour into a glass and enjoy!
For an extra boost of nutrition, consider adding a scoop of protein powder or a tablespoon of chia seeds to your smoothie. You can also experiment with different greens, like kale or arugula, if you’re looking for a change.
If you want a colder drink, freeze your fruits beforehand, and for a tropical twist, try adding a splash of coconut water instead of almond milk. Remember to wash your spinach thoroughly before using and feel free to mix in other fruits based on your preference!
Hard-Boiled Eggs
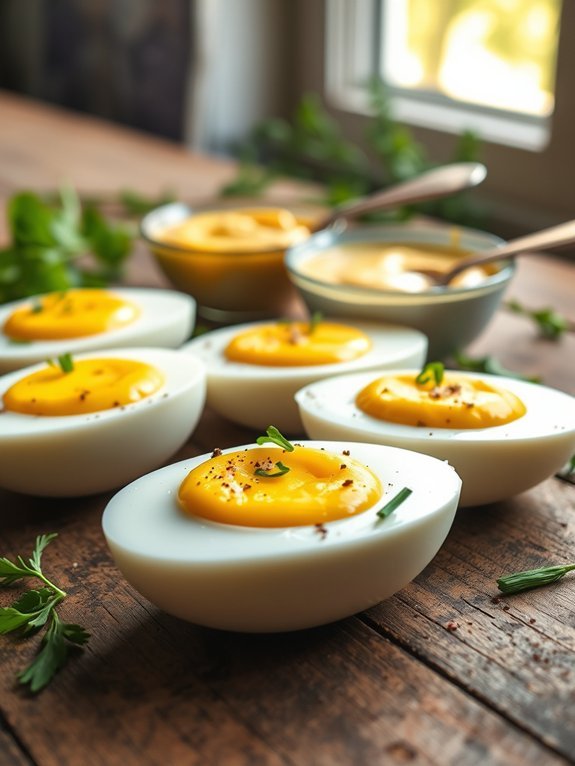
Hard-boiled eggs are a simple yet nutritious snack option that can be enjoyed at any time of the day. They’re packed with protein, making them an ideal choice for those looking to refuel after a workout or satisfy hunger between meals.
The beauty of hard-boiled eggs lies not just in their nutritional benefits but also in their versatility; they can be eaten plain, seasoned with salt and pepper, or used as an ingredient in various dishes such as salads, sandwiches, and deviled eggs.
Making hard-boiled eggs is an easy process that requires minimal ingredients and equipment. All you need are fresh eggs, water, and a source of heat. Whether you prefer them soft-boiled or hard-boiled, adjusting the cooking time will give you the desired firmness.
In just a matter of minutes, you can have perfectly cooked eggs ready to enjoy for your next snack or meal preparation.
- Fresh eggs
- Water
- Ice (for an ice bath)
Place the eggs in a saucepan and cover them with cold water, ensuring the water level is about an inch above the eggs. Bring the water to a rolling boil over medium-high heat, then immediately reduce the heat to low, cover the saucepan, and let it simmer for about 9 to 12 minutes, depending on how hard you like your yolks.
After the timer goes off, transfer the eggs to an ice bath to cool for at least 5 minutes before peeling.
When hard-boiling eggs, fresh eggs can be a bit tricky to peel, so if you have older eggs, they tend to come off the shell more easily. Additionally, to prevent cracking, you can prick a small hole in the rounded end of each egg with a pin before boiling.
This allows steam to escape during cooking, resulting in fewer cracks. Finally, be sure not to overcrowd the pan, as that can lead to uneven cooking; if you’re making a large batch, consider using multiple pans.
Edamame With Sea Salt

Edamame with sea salt is a delicious and nutritious snack that’s both satisfying and easy to prepare. These young soybeans aren’t only rich in protein but also loaded with essential vitamins and minerals, making them a perfect choice for a healthy nibble.
With their vibrant green color and slightly nutty flavor, edamame can add a pop of vitality to any snack platter or serve as a hearty side dish.
Preparing edamame is a straightforward process that can be completed in less than 20 minutes. This snack can be enjoyed warm or cold, making it versatile for any occasion.
Whether you’re entertaining guests or simply looking for a wholesome snack to enjoy while unwinding after a long day, edamame sprinkled with sea salt is sure to satisfy your cravings.
- Fresh edamame pods (in their shells)
- Sea salt
- Water
To cook edamame, start by bringing a large pot of salted water to a rolling boil. Once boiling, add the fresh edamame pods and cook for about 3-5 minutes, or until they become bright green and tender.
Drain the cooked edamame and sprinkle them generously with sea salt, tossing gently to promote an even distribution.
When preparing edamame, it’s important to avoid overcooking, as this can lead to a mushy texture. If you prefer a bit of extra flavor, you could try adding a dash of garlic powder or red pepper flakes along with the sea salt for some heat.
For an even more revitalizing twist, serve the edamame with a squeeze of fresh lemon juice or lime on top. Enjoy your healthy snack!

