Blog

  • 10 Quick Pasta Recipes for Easy Weeknight Dinners

    Looking for quick pasta recipes to make weeknight dinners a breeze? Try one-pan garlic parmesan pasta for an easy cleanup, or whip up creamy spinach and mushroom fettuccine for a comforting meal. Lemon basil shrimp linguine adds a rejuvenating touch, while spicy sausage rigatoni packs in flavor. Don't miss out on quick vegetable stir-fry noodles or comforting tomato and ricotta pasta bake. There's a variety to suit everyone's taste, so keep exploring for more delicious ideas!

    One-Pan Garlic Parmesan Pasta

    quick and easy pasta

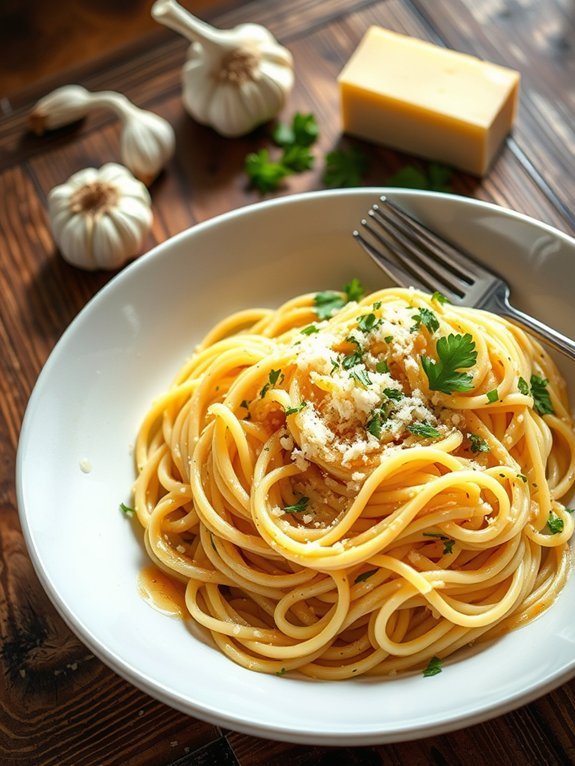
    One-Pan Garlic Parmesan Pasta is a quick and flavorful dish that brings the irresistible combination of garlic and Parmesan cheese to your dinner table without much fuss. Perfect for weeknight meals and busy schedules, this recipe allows everything to be cooked in a single pan, which means less cleanup and more time to enjoy your meal.

    The creamy sauce, combined with al dente pasta, creates a comforting dish that everyone will love. This one-pan wonder isn't only simple but also customizable. Feel free to add your favorite vegetables, proteins such as chicken or shrimp, or even some red pepper flakes for a spicy kick. The beauty of this recipe lies in its versatility; you can adapt it to suit your taste preferences and dietary needs while still keeping it delicious and satisfying.

    Ingredients:

    • 8 ounces spaghetti or your pasta of choice
    • 4 cups vegetable or chicken broth
    • 4 tablespoons unsalted butter
    • 4 cloves garlic, minced
    • 1 teaspoon Italian seasoning
    • 1 cup grated Parmesan cheese
    • Salt and pepper, to taste
    • Fresh parsley, chopped (for garnish)

    In a large skillet, combine the spaghetti, broth, butter, minced garlic, and Italian seasoning. Bring to a boil over medium-high heat, then reduce the heat and let it simmer, stirring occasionally, until the pasta is cooked al dente and the liquid has reduced to a creamy sauce, about 10-12 minutes.

    Once the pasta has cooked, remove from heat and stir in the grated Parmesan cheese, mixing until melted and creamy. Season with salt and pepper to taste, and garnish with fresh parsley before serving.

    For an extra burst of flavor, consider adding a splash of lemon juice before serving to brighten the dish. You can also experiment with different types of cheese, such as Pecorino Romano or a blend of cheeses.

    If you prefer a thicker sauce, let the pasta simmer a little longer to allow it to absorb more of the broth. Additionally, to make this dish even more hearty, toss in some spinach or peas in the last few minutes of cooking for added nutrition and color. Enjoy your quick and delicious meal!

    Creamy Spinach and Mushroom Fettuccine

    delicious creamy pasta dish

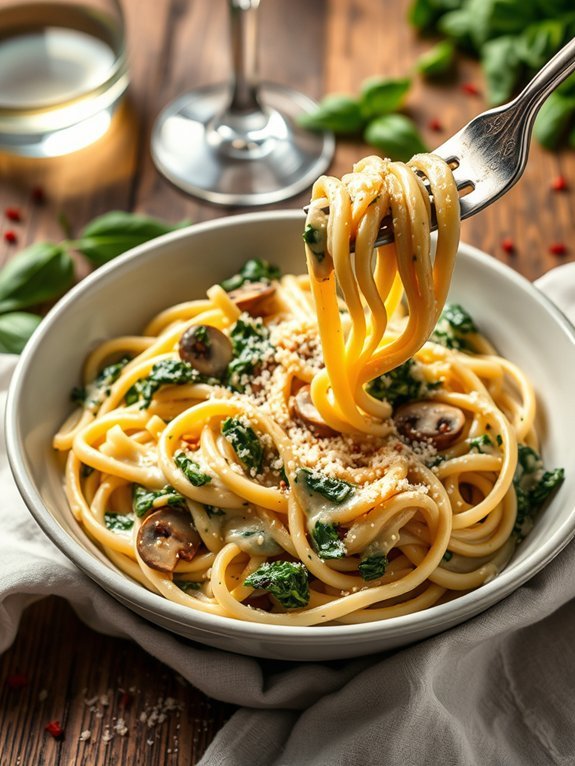
    Creamy Spinach and Mushroom Fettuccine is a delightful dish that combines the earthy flavors of mushrooms with the fresh, vibrant taste of spinach. This pasta isn't only quick to prepare but also incredibly satisfying, making it perfect for busy weeknights or a cozy weekend dinner. The richness of the cream and the aromatic garlic elevate the dish, creating a comforting meal that can be enjoyed by everyone.

    With just a few simple ingredients, this creamy pasta dish can be a wholesome meal on its own or served as a side dish alongside grilled chicken or a light salad. The beauty of this recipe lies in its adaptability; you can easily swap out ingredients based on your preferences or what's available in your pantry. So, gather your ingredients and get ready to whip up a delicious bowl of Creamy Spinach and Mushroom Fettuccine!

    • 8 oz fettuccine pasta
    • 2 tbsp olive oil
    • 1 cup mushrooms, sliced
    • 2 cloves garlic, minced
    • 4 cups fresh spinach
    • 1 cup heavy cream
    • 1/2 cup grated Parmesan cheese
    • Salt and pepper to taste
    • Optional: red pepper flakes for garnish

    In a large pot, cook the fettuccine according to package instructions until al dente. While the pasta cooks, heat olive oil in a skillet over medium heat. Add the sliced mushrooms and sauté for about 5 minutes until they're golden and tender.

    Stir in the minced garlic and cook for another 30 seconds before adding the fresh spinach. Once the spinach has wilted, pour in the heavy cream, add the Parmesan cheese, and season with salt and pepper. Cook until the sauce thickens slightly, then toss the cooked fettuccine in the skillet until evenly coated.

    To enhance the flavor of your Creamy Spinach and Mushroom Fettuccine, consider adding a splash of white wine to the sauce for added depth, or some fresh herbs like basil or parsley for a bright finish.

    If you're in the mood for a bit of spice, red pepper flakes can add just the right kick. Additionally, don't hesitate to experiment with different types of pasta or add proteins like grilled chicken or shrimp for a heartier meal. Enjoy your cooking!

    Lemon Basil Shrimp Linguine

    shrimp pasta with lemon

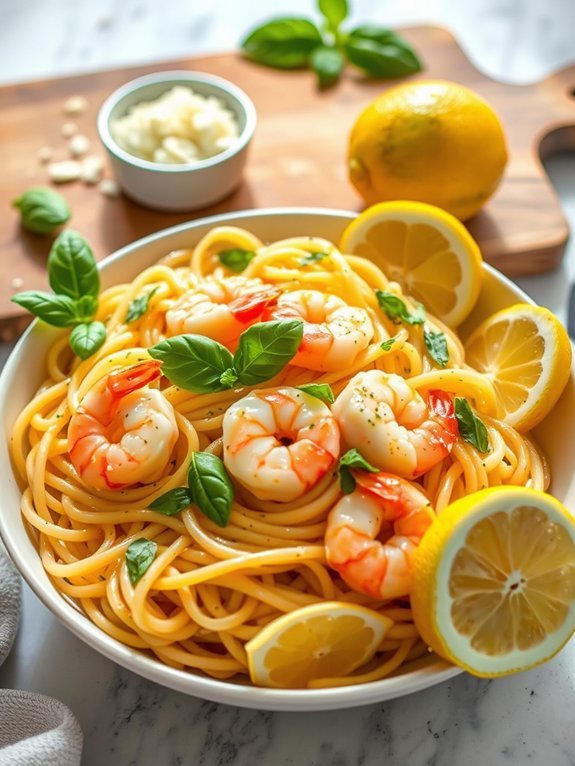
    Lemon Basil Shrimp Linguine is a delightful dish that captures the essence of fresh ingredients and quick cooking. With succulent shrimp, zesty lemon, and aromatic basil, this recipe combines all the elements of a gourmet meal without the fuss. Perfect for a weeknight dinner or a special gathering, this linguine will leave you and your guests feeling satisfied and impressed with your culinary skills.

    The simplicity of this dish is what makes it so appealing. The vibrant flavors of lemon and fresh basil pair beautifully with the tender shrimp, wrapping both the pasta and the ingredients in a light, revitalizing sauce. Additionally, the recipe can be easily adapted by adding seasonal vegetables or substituting the shrimp for chicken or another protein, allowing for versatility based on your preferences.

    Ingredients:

    • 12 oz linguine
    • 1 lb shrimp, peeled and deveined
    • 3 tablespoons olive oil
    • 4 cloves garlic, minced
    • 1 lemon, zested and juiced
    • 1 cup fresh basil, chopped
    • Salt and pepper to taste
    • Grated Parmesan cheese (for serving)

    Cook the linguine according to package instructions until al dente. Meanwhile, heat olive oil in a large skillet over medium heat. Add garlic and sauté until fragrant, then add the shrimp and cook until they turn pink. Stir in the lemon juice, zest, and fresh basil, mixing everything well.

    Once the pasta is done, drain and toss it into the skillet, making sure everything is evenly coated. Season with salt and pepper, then serve topped with grated Parmesan cheese.

    For an extra kick, consider adding a pinch of red pepper flakes for heat or sautéing some cherry tomatoes along with the garlic for added sweetness and color. Always verify your shrimp are cooked just until they turn pink to retain their tenderness.

    Fresh basil is key to this dish; I recommend adding it at the last minute to preserve its flavor and vibrant color. Enjoy your meal!

    Pesto Pasta Salad With Cherry Tomatoes

    pasta salad with pesto

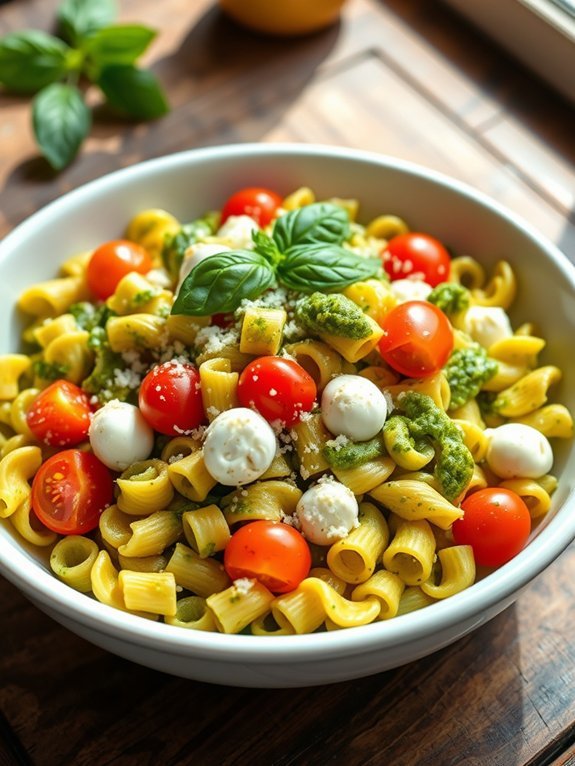
    Pesto pasta salad with cherry tomatoes is a revitalizing and vibrant dish that takes minimal time to prepare while delivering maximum flavor. The combination of al dente pasta, zesty pesto, and sweet cherry tomatoes creates a mouthwatering salad that's perfect for warm days, picnics, potlucks, or even a quick lunch at home. This dish can be served cold or at room temperature, making it incredibly versatile and a crowd-pleaser.

    Making a pesto pasta salad is an excellent way to highlight the fresh flavors of seasonal ingredients. The bright green of the basil in the pesto pairs beautifully with the red and yellow hues of the cherry tomatoes, contributing to a visually appealing dish.

    Once you get the hang of this quick recipe, feel free to experiment with hot or roasted vegetables, cheese, or even nuts to add new textures and flavors.

    Ingredients:

    • 8 oz (about 2 cups) pasta (such as fusilli, penne, or farfalle)
    • 1 cup cherry tomatoes, halved
    • 1 cup pesto (store-bought or homemade)
    • 1/2 cup mozzarella balls (optional)
    • 1/4 cup grated Parmesan cheese
    • Salt and pepper to taste
    • Fresh basil leaves for garnish (optional)

    Cook the pasta according to package instructions in a large pot of salted boiling water until al dente. Drain and rinse under cold water to stop the cooking process.

    In a large bowl, combine the cooled pasta, cherry tomatoes, pesto, mozzarella balls (if using), and Parmesan cheese. Toss everything together until evenly coated and season with salt and pepper to taste. Serve immediately or chill in the refrigerator for about 30 minutes before serving.

    When making pesto pasta salad, never underestimate the importance of using high-quality olive oil and fresh basil if making your own pesto. Additionally, you can add extra ingredients like olives, grilled chicken, or arugula to enhance the flavor and nutritional profile of the salad.

    Enjoy this dish fresh, and don't forget to store any leftovers in an airtight container in the refrigerator for up to three days.

    Spicy Sausage Rigatoni

    spicy sausage pasta dish

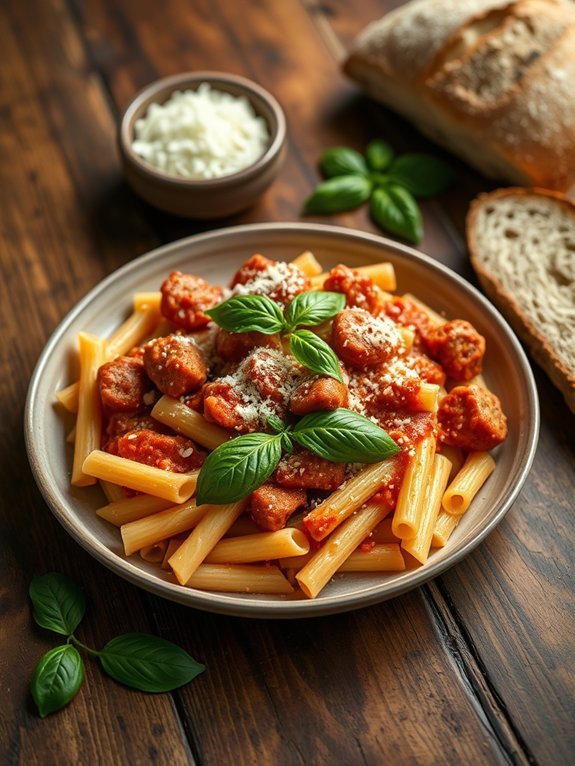
    Spicy Sausage Rigatoni is a hearty and satisfying dish that combines the bold flavors of Italian sausage with the comfort of pasta. This recipe is perfect for a weeknight dinner or when you want to impress guests without spending hours in the kitchen. The rigatoni pasta, with its ridged surface, is excellent for holding onto the rich, spicy sauce, ensuring each bite is full of flavor.

    With just a few ingredients, you can whip up this delicious meal in no time. The spiciness of the sausage can be adjusted based on your preference, and the addition of herbs and spices enhances the overall flavor profile. Pair this dish with a simple salad and some crusty bread for a complete meal that everyone will love.

    • 12 oz rigatoni pasta
    • 1 lb spicy Italian sausage
    • 1 medium onion, chopped
    • 3 cloves garlic, minced
    • 1 can (15 oz) crushed tomatoes
    • 1 cup heavy cream
    • 1 tsp red pepper flakes (adjust to taste)
    • Salt and pepper, to taste
    • Fresh basil, for garnish
    • Grated Parmesan cheese, for serving

    Cook the rigatoni according to the package directions until al dente; drain and set aside. In a large skillet over medium heat, add the spicy Italian sausage, breaking it up with a spatula as it cooks. Once browned, add the chopped onion and minced garlic, cooking until the onion is translucent.

    Stir in the crushed tomatoes, heavy cream, red pepper flakes, salt, and pepper. Let the sauce simmer for about 5-7 minutes, then add the cooked rigatoni and toss to combine. Cook for an additional few minutes to heat through and meld the flavors.

    When preparing Spicy Sausage Rigatoni, feel free to customize ingredients to suit your taste. If you prefer a milder dish, use sweet Italian sausage instead and reduce red pepper flakes. You can also add vegetables like spinach or bell peppers for added nutrition and texture.

    This dish can be made ahead of time and reheated for leftovers, making it a great option for meal prep.

    Caprese Pasta With Fresh Mozzarella

    fresh mozzarella caprese pasta

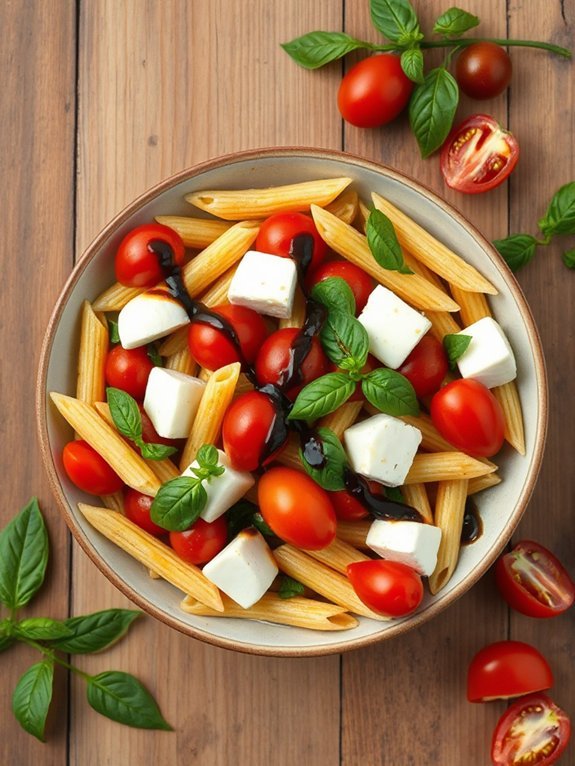
    Caprese Pasta with Fresh Mozzarella is a delightful and vibrant dish that combines the classic flavors of the traditional Caprese salad with the comforting nature of pasta. This easy-to-make recipe is perfect for a quick weeknight dinner or a lovely weekend lunch. The fresh ingredients guarantee a burst of flavor in every bite, and the addition of pasta adds a satisfying texture to the overall dish.

    To elevate this meal, you can use al dente pasta of your choice, such as penne, fusilli, or spaghetti, which will beautifully trap the sauce and ingredients. The combination of fresh tomatoes, basil, and creamy mozzarella not only makes this dish delicious but also visually appealing, showcasing the colors of the Italian flag.

    With just a few simple steps, you can bring the taste of summertime into your kitchen all year round.

    Ingredients:

    • 8 ounces pasta (penne, fusilli, or spaghetti)
    • 2 cups cherry tomatoes, halved
    • 8 ounces fresh mozzarella, diced
    • 1 cup fresh basil leaves, chopped
    • 3 tablespoons olive oil
    • 2 cloves garlic, minced
    • Salt and pepper, to taste
    • Balsamic glaze (optional, for drizzling)

    Cook the pasta according to the package instructions until al dente, drain, and set aside. In a large mixing bowl, combine the cherry tomatoes, mozzarella, basil, olive oil, and minced garlic.

    Add the cooked pasta to the bowl and toss gently to combine. Season with salt and pepper to taste. If desired, drizzle with balsamic glaze for added flavor before serving.

    For the best results, use the freshest ingredients you can find, especially the mozzarella and basil, as they'll greatly enhance the flavor of the dish.

    Feel free to customize your Caprese Pasta by adding grilled chicken or sautéed vegetables for some added protein or extra nutrients. Additionally, leaving the pasta just slightly undercooked can help it better absorb the flavors of the sauce when tossed together.

    Enjoy your delicious meal!

    Quick Vegetable Stir-Fry Noodles

    vegetable stir fry noodle recipe

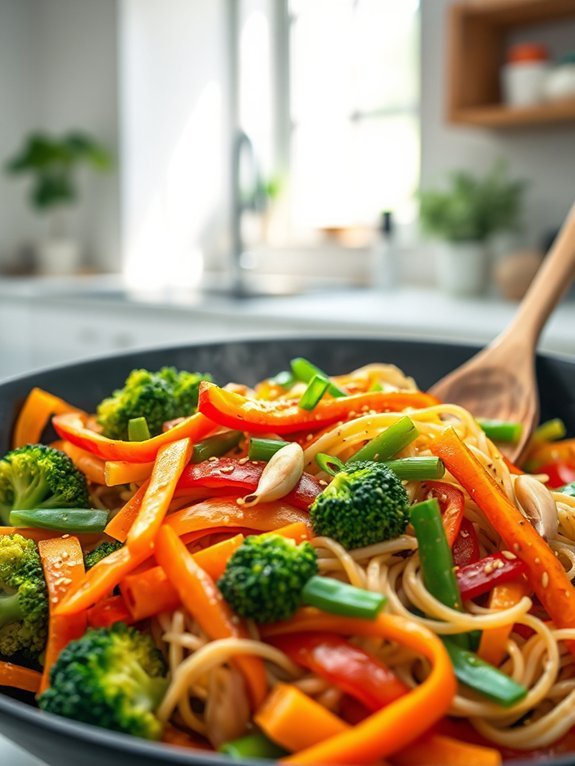
    If you're looking for a swift and satisfying meal, Quick Vegetable Stir-Fry Noodles are the perfect solution. This colorful dish is packed with a variety of crisp vegetables and flavored with a savory sauce, making it not only a nutritious choice but also a delight for the taste buds. With minimal prep time and a quick cooking process, you can enjoy this hearty meal any day of the week, even on the busiest of nights.

    To get started, you'll want to gather your favorite vegetables. Bell peppers, carrots, broccoli, and snap peas are fantastic options to include. These vibrant veggies provide both flavor and texture, ensuring your stir-fry is as delicious as it's visually appealing. Toss in some cooked noodles, and you'll have a complete meal that's both filling and invigorating in no time.

    • 8 oz noodles (e.g., udon, rice noodles, or spaghetti)
    • 2 tbsp vegetable oil
    • 1 cup bell peppers, sliced
    • 1 cup carrots, julienned
    • 1 cup broccoli florets
    • 1 cup snap peas
    • 3 cloves garlic, minced
    • 2 tbsp soy sauce
    • 1 tbsp oyster sauce (or vegetarian alternative)
    • 1 tsp sesame oil
    • Salt and pepper to taste
    • Optional: sesame seeds and sliced green onions for garnish

    Cook the noodles according to package instructions, then drain and set aside. In a large skillet or wok, heat vegetable oil over medium-high heat. Add the minced garlic and stir for about 30 seconds until fragrant.

    Then, add the sliced vegetables and stir-fry for 3-5 minutes until they're just tender but still vibrant. Stir in the cooked noodles, soy sauce, oyster sauce, and sesame oil, mixing everything well until heated through. Season with salt and pepper to taste, and serve hot, garnished with sesame seeds and sliced green onions if desired.

    When preparing Quick Vegetable Stir-Fry Noodles, feel free to customize the vegetables based on what you have on hand or what's in season. This recipe is versatile, so don't hesitate to toss in some mushrooms, baby corn, or even leafy greens like spinach.

    For added protein, consider incorporating tofu, shrimp, or chicken. To maximize flavor, allow the vegetables to caramelize slightly in the pan, which adds a wonderful depth to the dish. Enjoy your meal!

    Tomato and Ricotta Pasta Bake

    cheesy tomato pasta bake

    Tomato and Ricotta Pasta Bake is a delicious and comforting dish that's perfect for families or gatherings. Rich in flavor, it combines the brightness of tomatoes with the creaminess of ricotta cheese, all enveloped in pasta and baked to perfection. This recipe isn't only easy to prepare but also allows for variations, so you can customize it to suit your taste or what you have on hand.

    To make this hearty bake, you can use any short pasta shape, such as penne or rigatoni. The combination of tangy tomato sauce and the smooth, creamy ricotta creates a delightful contrast, while the baked cheese on top gives the dish an irresistible golden crust. Serving this pasta bake with a side of crusty bread or a light salad can help round out a satisfying meal.

    • 300g penne or rigatoni pasta
    • 400g canned chopped tomatoes
    • 200g ricotta cheese
    • 150g mozzarella cheese, shredded
    • 50g grated Parmesan cheese
    • 2 cloves garlic, minced
    • 1 teaspoon dried oregano
    • Salt and pepper to taste
    • Fresh basil leaves for garnish (optional)

    Preheat your oven to 200°C (400°F). Cook the pasta in a large pot of salted boiling water until al dente, then drain and set aside. In a large mixing bowl, combine the chopped tomatoes, ricotta cheese, minced garlic, oregano, salt, and pepper.

    Add the cooked pasta to the tomato mixture and stir to combine. Transfer the mixture to a baking dish, sprinkle the mozzarella and Parmesan cheeses on top, and bake in the oven for 25-30 minutes or until the cheese is bubbly and golden.

    For a little extra flavor, consider adding sautéed vegetables such as spinach, bell peppers, or zucchini to the pasta mixture before baking. If you prefer a spicier kick, you can also add some red pepper flakes.

    Leftovers store well in the refrigerator and can be enjoyed the next day; simply reheat them in the oven until warmed through. Experimenting with different cheeses like goat cheese or feta can also enhance the dish, making it versatile and exciting!

    Carbonara With Peas and Bacon

    pasta dish with bacon

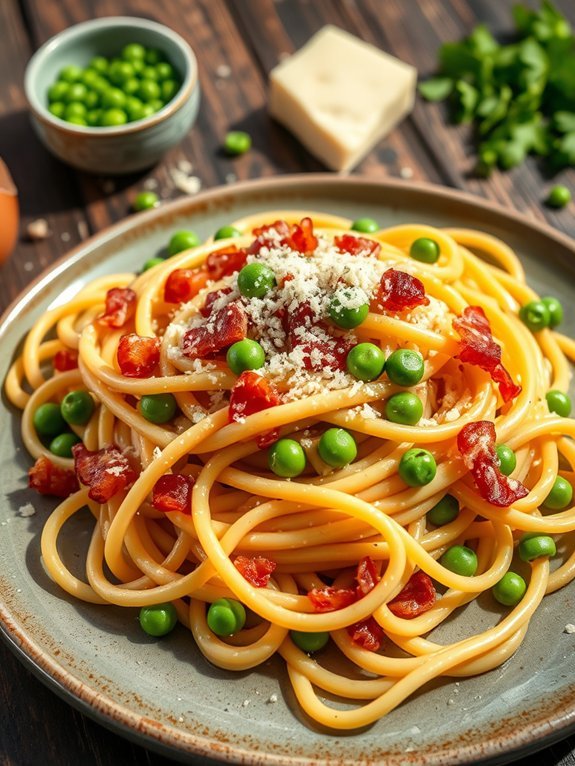
    Carbonara with Peas and Bacon is a delightful twist on the classic Italian dish, marrying the rich creaminess of the sauce with the sweetness of peas and the smoky flavor of crispy bacon. This quick and simple recipe is perfect for busy weeknights or when you're craving comfort food that doesn't take hours to prepare. With just a few key ingredients, you can whip up a satisfying meal in less than 30 minutes.

    The combination of eggs, cheese, and pasta creates a luxurious sauce that clings beautifully to every strand of spaghetti. The addition of peas adds a pop of color and a burst of sweetness, while the bacon provides a satisfying crunch. It's a dish that not only tantalizes the taste buds but also brings warmth and hominess to your dining table.

    • 200g spaghetti
    • 100g frozen peas
    • 150g bacon, diced
    • 2 large eggs
    • 50g grated Parmesan cheese
    • Salt and black pepper to taste
    • Fresh parsley, chopped (for garnish)

    Start by boiling a large pot of salted water and cook the spaghetti according to package instructions until al dente. In the final 2-3 minutes of cooking, add the frozen peas to the pot.

    While the pasta cooks, sauté the diced bacon in a frying pan over medium heat until crispy. In a bowl, whisk together the eggs and grated Parmesan cheese, seasoning with salt and pepper.

    When the pasta is cooked, reserve some pasta water, then drain and add it to the skillet with the bacon. Remove from heat, pour in the egg and cheese mixture, stirring quickly to coat the pasta with the creamy sauce. If the sauce is too thick, add a little reserved pasta water to reach your desired consistency.

    For the best result, it's essential to work quickly when combining the hot pasta with the egg mixture to achieve a creamy texture without scrambling the eggs.

    Feel free to adjust the amount of cheese to suit your tastes, and consider adding more vegetables, such as spinach or mushrooms, for additional flavor and nutrients. Finally, always garnish your pasta with a sprinkle of fresh parsley for an added layer of flavor and an appealing finish.

    Broccoli and Chicken Alfredo Pasta

    creamy chicken broccoli pasta

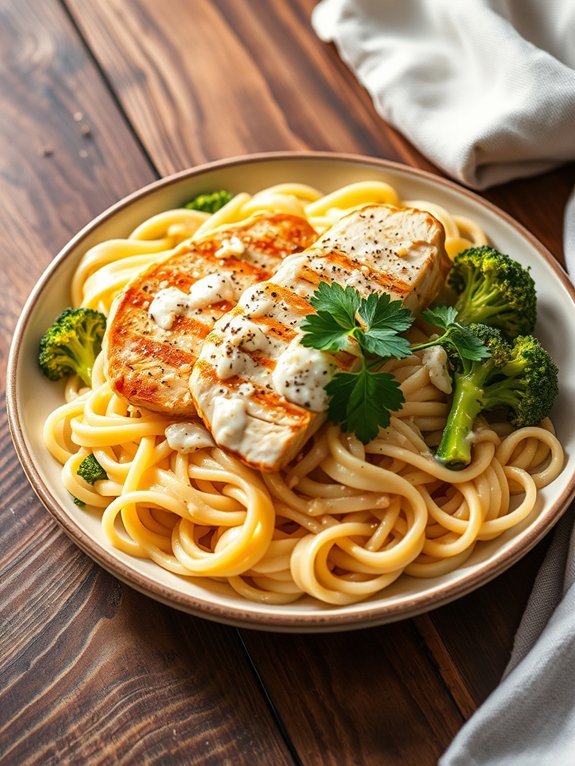
    Broccoli and Chicken Alfredo Pasta is a creamy, hearty dish that combines tender chicken and vibrant green broccoli enveloped in a rich Alfredo sauce. This comforting pasta dish isn't only quick to prepare but also makes for a satisfying meal perfect for busy weeknights or a relaxed weekend gathering.

    The combination of the al dente pasta, succulent chicken, and nutritious broccoli creates a well-balanced profile while offering a delightful taste experience. To make this dish even more enjoyable, consider using fresh ingredients. Fresh broccoli florets and grilled chicken breast bring out the best flavors in the Alfredo sauce.

    Additionally, you can customize the dish by adding your favorite pasta type, whether it be fettuccine, penne, or even whole grain options. The creamy texture of the Alfredo sauce pairs perfectly with the pasta, making it a luxurious dish that doesn't require extensive culinary skills to prepare.

    • 8 ounces fettuccine pasta
    • 1 cup broccoli florets
    • 1 pound boneless, skinless chicken breasts
    • 2 tablespoons olive oil
    • Salt and pepper to taste
    • 1 cup heavy cream
    • 1 cup grated Parmesan cheese
    • 2 cloves garlic, minced
    • 1 teaspoon Italian seasoning
    • Fresh parsley for garnish (optional)

    Begin by cooking the fettuccine according to package instructions until al dente. In the final 3 minutes of cooking, add the broccoli florets to the boiling water.

    Meanwhile, heat olive oil in a large skillet over medium heat and season the chicken breasts with salt and pepper. Cook the chicken for approximately 6-7 minutes on each side or until cooked through and golden brown. Once done, remove the chicken from the skillet, slice it, and set aside.

    In the same skillet, add garlic and sauté for about 30 seconds before pouring in the heavy cream, stirring in the Parmesan cheese and Italian seasoning until the sauce thickens. Ultimately, toss the cooked pasta and broccoli with the chicken in the Alfredo sauce, ensuring everything is well-coated.

    For a richer flavor, consider adding a pinch of nutmeg to the Alfredo sauce or incorporating cooked mushrooms for extra texture. To keep the dish lighter, you can replace heavy cream with half-and-half or low-fat milk, but remember that the creamy texture may be slightly altered.

    Additionally, cooking the pasta and broccoli together not only saves time but also maximizes flavor. Finally, serve with a sprinkle of freshly cracked pepper and parsley to brighten up the dish.

  • 12 Vegan Soup Recipes That Are Packed With Flavor

    If you crave vibrant flavors and nutritious meals, you'll love these 12 vegan soup recipes. Enjoy the creamy goodness of Tomato Basil Soup, or plunge into the spicy depth of Coconut Curry Soup. Roasted Butternut Squash provides a comforting touch, while Hearty Lentil Vegetable Soup packs in protein. Curried Carrot and Ginger Soup is a warming delight, and Creamy Mushroom and Wild Rice Soup adds earthy richness. Each recipe is designed to wow your taste buds and nourish your body—there's plenty more to inspire your cooking!

    Creamy Tomato Basil Soup

    delicious creamy tomato soup

    Creamy Tomato Basil Soup is a delightful and comforting dish that's perfect for any occasion. Its rich and creamy texture paired with the fresher taste of basil creates a wonderful balance of flavors. This vegan version uses plant-based ingredients to achieve a creaminess that rivals traditional recipes while staying completely dairy-free. The combination of ripe tomatoes, aromatic herbs, and cashews lends depth to this comforting bowl of goodness.

    This soup isn't only delicious but also highly nutritious. Tomatoes are known for their rich antioxidants, particularly lycopene, which is great for heart health. When combined with the fresh taste of basil, garlic, and onion, this creamy tomato basil soup becomes a meal that warms both the body and soul.

    Whether served as a starter or as a main dish with a side of crusty bread, this recipe is sure to become a family favorite.

    Ingredients:

    • 1 tablespoon olive oil
    • 1 medium onion, diced
    • 3 cloves garlic, minced
    • 1 can (28 ounces) crushed tomatoes
    • 3 cups vegetable broth
    • 1 cup raw cashews, soaked in water for 4 hours
    • 1/2 cup fresh basil leaves, packed
    • 1 tablespoon balsamic vinegar
    • Salt and pepper to taste

    In a large pot, heat the olive oil over medium heat. Add the diced onion and sauté until translucent, about 5 minutes. Then, add the minced garlic and cook for another minute until fragrant. Stir in the crushed tomatoes and vegetable broth, and bring to a simmer. Reduce the heat and let it cook for 15 minutes.

    While the soup simmers, drain the soaked cashews and combine them with the fresh basil, balsamic vinegar, a pinch of salt, and about a cup of the tomato soup mixture in a blender. Blend until smooth and creamy. Pour the blended mixture back into the pot, stir well, and heat through for another 5 minutes. Adjust seasoning with salt and pepper before serving.

    To enhance the flavor of your creamy tomato basil soup, consider roasting your tomatoes and garlic beforehand for added depth. You can also add a pinch of red pepper flakes for a little heat or top the soup with a drizzle of olive oil and a sprinkle of nutritional yeast for a cheesy flavor.

    This soup also keeps well, so feel free to make a larger batch and store leftovers in the fridge or freezer for quick meals later.

    Spicy Coconut Curry Soup

    flavorful coconut curry soup

    Spicy Coconut Curry Soup is a vibrant and hearty dish that captures the essence of both comfort and bold flavors. This vegan-friendly soup combines the creaminess of coconut milk with a delightful array of spices and fresh vegetables, making it a perfect meal for chilly days or when you're looking for something light yet satisfying.

    With its warm and inviting flavors, this soup is an excellent way to introduce new ingredients and spices to your kitchen repertoire. The beauty of this recipe lies in its versatility. You can easily tailor the spiciness to your liking by adjusting the amount of chili or curry paste used.

    Add some of your favorite vegetables, such as spinach, bell peppers, or sweet potatoes, to make the soup even more nutritious. This Spicy Coconut Curry Soup isn't only comforting and easy to make, but also a great dish for impressing guests at dinner parties or cozy gatherings.

    Ingredients:

    • 1 tablespoon coconut oil
    • 1 medium onion, chopped
    • 3 cloves garlic, minced
    • 1 tablespoon fresh ginger, minced
    • 2 tablespoons red curry paste
    • 4 cups vegetable broth
    • 1 can (14 oz) coconut milk
    • 1 tablespoon soy sauce or tamari
    • 1 teaspoon lime juice
    • 1 cup cherry tomatoes, halved
    • 1 cup green beans, trimmed
    • 1 cup chickpeas, drained and rinsed
    • Fresh cilantro, for garnish
    • Salt and pepper, to taste

    In a large pot, heat the coconut oil over medium heat. Add the chopped onion, garlic, and ginger, and sauté until the onion becomes translucent. Stir in the red curry paste, cooking for another minute until fragrant.

    Pour in the vegetable broth and coconut milk, then bring the mixture to a simmer. Add in the soy sauce, lime juice, cherry tomatoes, green beans, and chickpeas, cooking for about 15-20 minutes until the vegetables are tender. Adjust the seasoning with salt and pepper to taste.

    For a richer flavor, consider allowing the soup to sit for a few minutes after cooking; this can help the flavors meld together beautifully. If you prefer a thicker soup, you can blend a portion of it with an immersion blender.

    Additionally, serving the soup with a side of crusty bread or over a bed of rice can make it even more satisfying. Don't forget to garnish with fresh cilantro before serving for an extra burst of flavor!

    Roasted Butternut Squash Soup

    creamy roasted squash soup

    Roasted butternut squash soup is a soothing and nutritious dish that encapsulates the essence of fall. The sweet, nutty flavor of the roasted squash pairs beautifully with savory spices, creating a comforting blend perfect for chilly evenings.

    This vegan soup isn't only easy to prepare, but it's also packed with vitamins and minerals, making it a delightful choice for anyone looking to indulge in a healthy meal.

    Using simple, wholesome ingredients means you can whip up this delicious soup in no time. The roasting process enhances the flavor profile of the butternut squash, allowing it to caramelize and develop a rich taste that contrasts beautifully with creamy coconut milk. Serve it warm with a crusty bread on the side for a truly satisfying experience.

    Ingredients:

    • 1 large butternut squash, peeled, seeded, and cubed
    • 1 tablespoon olive oil
    • 1 onion, chopped
    • 2 cloves garlic, minced
    • 1 teaspoon ground cumin
    • 1 teaspoon chili powder
    • 1 can (14 oz) coconut milk
    • 3 cups vegetable broth
    • Salt and pepper to taste
    • Fresh parsley or cilantro for garnish (optional)

    Preheat your oven to 400°F (200°C). Toss the cubed butternut squash with olive oil, salt, and pepper, then spread on a baking sheet. Roast for about 25-30 minutes or until the squash is tender and caramelized.

    In a large pot, sauté the onion and garlic over medium heat until they're translucent. Stir in the roasted butternut squash, cumin, and chili powder. Add the vegetable broth and coconut milk, then bring the mixture to a boil before reducing the heat to low.

    Let it simmer for 10-15 minutes, then use an immersion blender to puree the soup to your desired consistency.

    For a more robust flavor, consider adding a splash of apple cider or a pinch of nutmeg while cooking. If you want a bit of heat, try including a diced jalapeño or a dash of cayenne pepper along with the spices. Additionally, you can experiment with different garnishes, such as a swirl of coconut cream or toasted pumpkin seeds, to add texture and enhance the presentation of your soup.

    Hearty Lentil Vegetable Soup

    nutritious lentil vegetable soup

    Hearty lentil vegetable soup is a comforting and nutritious dish that's perfect for chilly days or when you're in need of some wholesome goodness. Packed with protein, fiber, and an array of vitamins from the vegetables, this soup isn't only filling but also easy to customize based on what you have in your pantry. The combination of hearty lentils, fresh produce, and aromatic herbs creates a delightful flavor profile that warms the soul.

    Making this soup is also incredibly straightforward. With minimal preparation time and a short cooking duration, you can have a delicious meal on the table in no time. Whether you serve it alongside crusty bread or on its own, this hearty lentil vegetable soup is bound to become a staple in your meal rotation.

    Ingredients:

    • 1 cup green or brown lentils, rinsed
    • 1 tablespoon olive oil
    • 1 onion, chopped
    • 2 carrots, diced
    • 2 celery stalks, diced
    • 3 cloves garlic, minced
    • 1 bell pepper, diced
    • 1 zucchini, diced
    • 1 can (14.5 ounces) diced tomatoes
    • 6 cups vegetable broth
    • 1 teaspoon dried thyme
    • 1 teaspoon dried oregano
    • Salt and pepper, to taste
    • Fresh parsley, chopped (for garnish)

    In a large pot, heat the olive oil over medium heat. Add the chopped onion, carrots, and celery, sautéing until the vegetables are soft, about 5-7 minutes. Stir in the garlic and bell pepper, cooking for an additional minute before adding the zucchini, lentils, diced tomatoes, vegetable broth, thyme, and oregano.

    Bring the soup to a boil, reduce heat, and let it simmer for about 30-35 minutes, or until the lentils are tender. Season with salt and pepper to taste, and garnish with fresh parsley before serving.

    To enhance the flavor of your soup, consider adding a splash of lemon juice just before serving for a brighter taste. You can also experiment with different vegetables according to the season or your personal preference; leafy greens such as spinach or kale can be added in the last few minutes of cooking.

    For added richness, blend a portion of the soup for a creamier texture or serve it with a dollop of vegan yogurt. Enjoy every spoonful of this hearty and satisfying lentil vegetable soup!

    Curried Carrot and Ginger Soup

    curried carrot ginger soup

    Curried Carrot and Ginger Soup is a wonderfully vibrant and flavorful dish that warms the soul and tantalizes the taste buds. Combining the earthiness of carrots with the warming spice of curry and the zing of fresh ginger, this soup isn't only delicious but also packed with nutrients.

    Ideal for a chilly day or as a light starter for a gathering, it can be easily whipped up using simple ingredients. The preparation of this soup is straightforward, making it perfect for both seasoned cooks and beginners alike. A few basic steps involving sautéing, simmering, and blending will transform your ingredients into a silky, creamy soup that's both satisfying and nourishing.

    Serve it with a sprinkle of fresh herbs or a drizzle of coconut milk for an extra touch of flavor.

    Ingredients:

    • 1 tablespoon coconut oil
    • 1 onion, chopped
    • 2 cloves garlic, minced
    • 1 tablespoon fresh ginger, grated
    • 1 teaspoon curry powder
    • 1 pound carrots, peeled and chopped
    • 4 cups vegetable broth
    • 1 can (13.5 oz) coconut milk
    • Salt and pepper to taste
    • Fresh cilantro for garnish (optional)

    In a large pot, heat the coconut oil over medium heat. Add the chopped onion and sauté until it becomes translucent. Stir in the garlic, ginger, and curry powder, cooking for another minute until fragrant.

    Add the chopped carrots and vegetable broth, bringing the mixture to a boil. Reduce the heat and let it simmer for about 20 minutes, until the carrots are tender. Remove from heat, then stir in the coconut milk before blending the soup until smooth. Season with salt and pepper, and serve hot, garnished with fresh cilantro if desired.

    For an enhanced flavor profile, consider roasting the carrots before adding them to the soup, as this adds a delicious caramelization. Also, feel free to adjust the level of curry used according to your spice preference; you can add a pinch of cayenne pepper or a dash of chili powder for an extra kick.

    Pair this soup with crusty bread or a fresh salad for a complete meal that will leave you feeling satisfied.

    Zesty Black Bean Soup

    spicy black bean delight

    Zesty black bean soup is a deliciously vibrant dish that brings a burst of flavor to your table. This hearty soup not only provides a satisfying meal but also packs a nutritional punch with its abundance of protein and fiber from the black beans. Perfect for a cozy dinner or a quick lunch, this recipe is easy to prepare and can be enjoyed by vegans and non-vegans alike.

    Incorporating zesty lime juice and fresh herbs, this black bean soup has a revitalizing twist that enhances the earthy flavors of the beans. It's also highly versatile—feel free to modify it by adding your favorite vegetables or adjusting the spices to suit your palate. Served with crusty bread or a side of avocado, this soup is sure to become a new favorite in your recipe collection.

    Ingredients:

    • 2 cans (15 oz each) black beans, rinsed and drained
    • 1 medium onion, chopped
    • 3 cloves garlic, minced
    • 1 red bell pepper, chopped
    • 2 carrots, diced
    • 1 teaspoon cumin
    • 1 teaspoon chili powder
    • 4 cups vegetable broth
    • 1 can (14 oz) diced tomatoes with green chilies
    • Juice of 1 lime
    • Fresh cilantro, chopped (for garnish)
    • Salt and pepper to taste
    • Olive oil (for sautéing)

    In a large pot, heat a drizzle of olive oil over medium heat. Add the chopped onion, garlic, red bell pepper, and carrots, sautéing until the vegetables are tender, about 5-7 minutes. Stir in the cumin and chili powder, cooking for an additional minute until the spices are fragrant.

    Next, add the rinsed black beans, vegetable broth, and diced tomatoes. Bring to a boil, then reduce heat and let simmer for about 20 minutes, allowing the flavors to meld. Finally, stir in the lime juice, and season with salt and pepper to taste.

    For added depth of flavor, consider letting the soup chill in the fridge for a few hours or overnight before serving; this allows the spices to deepen and become more pronounced. You can also blend a portion of the soup for a creamier texture or top each bowl with avocado slices, tortilla strips, or a dollop of vegan sour cream.

    Thai Peanut Soup

    creamy thai peanut soup

    Thai Peanut Soup is a delightful and creamy vegan dish that brings together the rich flavors of Thai cuisine in a warm, comforting bowl. The combination of coconut milk, peanut butter, and aromatic spices creates a luscious base that perfectly complements the fresh vegetables and herbs.

    Whether you're looking to warm up on a chilly evening or impress your guests with a unique meal, this soup is sure to satisfy.

    This vibrant soup not only tantalizes your taste buds but also provides a nourishing meal that's bursting with protein and healthy fats. The addition of lime juice and fresh cilantro adds an invigorating zing, making every spoonful a delicious explosion of flavor.

    Perfectly paired with crusty bread or served alongside a simple salad, this Thai Peanut Soup is a versatile and wholesome option for any occasion.

    • 1 tablespoon coconut oil
    • 1 onion, diced
    • 3 garlic cloves, minced
    • 1-inch piece of ginger, grated
    • 2 carrots, sliced
    • 1 red bell pepper, diced
    • 4 cups vegetable broth
    • 1 can (13.5 oz) coconut milk
    • 1/3 cup peanut butter
    • 2 tablespoons soy sauce or tamari
    • 2 tablespoons lime juice
    • 1 teaspoon curry powder
    • 1 teaspoon red pepper flakes (optional)
    • Fresh cilantro, for garnish
    • Peanuts, for garnish

    Heat the coconut oil in a large pot over medium heat. Add the diced onion, minced garlic, and grated ginger, sautéing until the onion is translucent.

    Stir in the sliced carrots and diced red bell pepper, cooking for an additional few minutes until they begin to soften. Pour in the vegetable broth and coconut milk, then stir in the peanut butter, soy sauce, lime juice, curry powder, and red pepper flakes, if using.

    Let the soup simmer for 15-20 minutes, allowing the flavors to meld together. Serve hot, garnished with fresh cilantro and crushed peanuts.

    When preparing Thai Peanut Soup, feel free to customize it by adding your favorite vegetables or even some tofu for extra protein.

    Adjust the level of spice according to your preference by increasing or decreasing the red pepper flakes. This soup can also be easily made ahead of time and reheated, making it a convenient option for busy weeknights.

    For an added kick, serve with lime wedges on the side for a zesty finish.

    Miso and Tofu Soup

    savory miso tofu soup

    Miso and Tofu Soup is a delightful and nourishing dish that combines the umami flavor of miso paste with the soft texture of tofu. This soup isn't only vegan but also incredibly versatile, allowing you to add seasonal vegetables to enhance its nutritional value and taste.

    It's perfect for a calming meal on a chilly day or as a light starter for any gathering. The beauty of this soup lies in its simplicity and the ease of preparation.

    Miso, a fermented soybean paste, adds depth to the broth while bringing probiotic benefits. Tofu provides a protein-rich component, making the soup satisfying without the need for animal products. Whether served as a quick lunch or a comforting dinner option, Miso and Tofu Soup is sure to become a favorite in your vegan recipe collection.

    • 4 cups vegetable broth
    • 3 tablespoons miso paste (white or yellow)
    • 1 block (14 oz) firm tofu, drained and cubed
    • 2 green onions, finely chopped
    • 1 cup seaweed (wakame or nori)
    • 1 cup mushrooms (shiitake or button), sliced
    • 1 cup baby spinach or bok choy
    • 1 tablespoon sesame oil
    • Optional: 1 teaspoon soy sauce for added flavor

    Start by heating the vegetable broth in a pot over medium heat. Once the broth is warm, whisk in the miso paste until it's fully dissolved. Add the cubed tofu, chopped green onions, sliced mushrooms, and seaweed to the broth.

    Simmer for about 5-7 minutes until the mushrooms are tender. Stir in the spinach or bok choy and sesame oil, letting it simmer for an additional 2 minutes before removing from heat.

    For best results, always use fresh ingredients, especially the tofu and vegetables, to enhance the flavors of your soup. If you're looking for a more substantial meal, consider adding noodles or grains like quinoa or rice.

    Additionally, miso can vary in saltiness, so adjust the seasoning according to your taste preference. Lastly, keep in mind that miso shouldn't be boiled for long, as high heat can kill the beneficial probiotics, so add it after the soup has reached the desired temperature.

    Creamy Mushroom and Wild Rice Soup

    mushroom and rice soup

    Creamy Mushroom and Wild Rice Soup is a comforting and hearty dish that brings together the earthy flavors of mushrooms and the nutty richness of wild rice. This vegan soup isn't only delicious but also nutrient-dense, making it an excellent choice for a cozy dinner or lunch.

    The creaminess comes from the incorporation of coconut milk or cashew cream, making it indulgent without any dairy, while the addition of various herbs and spices elevates the overall flavor profile.

    To prepare this soup, you'll need both fresh and dried mushrooms, which will deepen the umami notes. The wild rice adds a wonderful texture and heartiness to the soup, perfect for those chilly days when you want something warm and inviting.

    Pair this soup with a slice of crusty bread or a fresh salad for a complete meal that will satisfy your taste buds and nourish your body.

    • 1 cup wild rice, rinsed and drained
    • 8 ounces fresh mushrooms (cremini, shiitake, or button), sliced
    • 1/2 cup dried mushrooms (such as porcini), soaked and chopped
    • 1 medium onion, diced
    • 3 cloves garlic, minced
    • 4 cups vegetable broth
    • 1 can (13.5 ounces) coconut milk
    • 2 tablespoons olive oil
    • 2 teaspoons dried thyme
    • 1 teaspoon salt (adjust to taste)
    • 1/2 teaspoon black pepper
    • Fresh parsley for garnish

    In a large pot, heat olive oil over medium heat, then add the diced onion and cook until translucent. Add the garlic and fresh mushrooms, cooking until browned.

    Stir in the dried mushrooms, wild rice, vegetable broth, thyme, salt, and pepper, bringing the mixture to a boil. Once boiling, reduce the heat to low and simmer for about 40-45 minutes, or until the wild rice is tender.

    Stir in the coconut milk, letting it heat through before serving. Garnish with fresh parsley and enjoy!

    For a variation, feel free to incorporate other vegetables like carrots, celery, or spinach for added nutrition and color.

    You can also adjust the creaminess level by adding more or less coconut milk based on your preferences. If you want to enhance the flavor even further, consider adding a splash of lemon juice or a dash of nutmeg just before serving for an extra depth of flavor.

    This soup is easy to customize to suit your taste while still staying vegan!

    Italian Potato and Kale Soup

    hearty italian vegetable soup

    Italian Potato and Kale Soup is a delightful and hearty dish that combines the earthy flavors of potatoes and kale with aromatic herbs and spices. It's perfect for warming up on a chilly day or serving as a nutritious addition to any meal. This soup isn't only vegan but also packed with vitamins and minerals, thanks to the nutritious greens and the comforting starch of the potatoes.

    Creating this soup is a great way to enjoy a delicious meal while providing your body with essential nutrients. The combination of garlic, onion, and vegetable broth creates a rich and flavorful base, while the addition of kale adds a lovely texture and vibrant color. This Italian-inspired dish is simple to prepare and can easily be adjusted according to your taste preferences or seasonal vegetable availability.

    Ingredients:

    • 3 medium potatoes, peeled and diced
    • 2 cups kale, stems removed and chopped
    • 1 onion, chopped
    • 3 cloves garlic, minced
    • 4 cups vegetable broth
    • 1 teaspoon dried thyme
    • 1 teaspoon dried oregano
    • 2 tablespoons olive oil
    • Salt and pepper to taste
    • Optional: Nutritional yeast for added flavor

    In a large pot, heat the olive oil over medium heat. Add the chopped onion and garlic, sautéing until the onion is translucent. Stir in the diced potatoes and cook for a few more minutes before adding the vegetable broth, dried thyme, and oregano.

    Bring the mixture to a boil, then reduce the heat and let it simmer until the potatoes are tender, about 15-20 minutes. Finally, stir in the chopped kale and cook for an additional 5 minutes until the kale is wilted and tender. Season with salt and pepper to taste before serving.

    To enhance the flavor of your Italian Potato and Kale Soup, consider adding a splash of lemon juice or a sprinkle of red pepper flakes for a bit of heat. If you want to make the soup heartier, you can also add cannellini beans or other legumes for protein.

    This soup can be easily stored in the refrigerator for leftovers, and the flavors tend to develop even more as it sits, making it a perfect dish for meal prep or batch cooking. Enjoy!

    Moroccan Spiced Chickpea Soup

    chickpea soup with moroccan spices

    Moroccan Spiced Chickpea Soup is a delightful, flavorful dish that brings the warm spices of North Africa into your kitchen. This vegan soup isn't only hearty and filling but also packed with protein and nutrients, making it a perfect meal for any time of the year. The combination of spices like cumin, coriander, and cinnamon, along with the freshness of herbs like cilantro, creates a rich and aromatic experience that will transport your taste buds.

    Chickpeas serve as the star of this dish, contributing a creamy texture that complements the broth beautifully. This soup is ideal for a cozy night in or as an impressive starter for a dinner party. It's easy to prepare and can be made in large batches, perfect for meal prepping or feeding a crowd. Pair it with crusty bread or a side salad for a complete, satisfying meal.

    • 1 can (15 oz) chickpeas, drained and rinsed
    • 1 medium onion, diced
    • 2 cloves garlic, minced
    • 1 carrot, diced
    • 1 red bell pepper, chopped
    • 1 can (14 oz) diced tomatoes
    • 4 cups vegetable broth
    • 1 tsp ground cumin
    • 1 tsp ground coriander
    • 1/2 tsp ground cinnamon
    • 1/2 tsp smoked paprika
    • Salt and pepper, to taste
    • 2 cups fresh spinach or kale, chopped
    • 2 tbsp olive oil
    • Fresh cilantro, for garnish

    In a large pot, heat the olive oil over medium heat. Add the diced onion, carrot, and red bell pepper, sautéing until the vegetables are soft, about 5-7 minutes. Stir in the garlic, cumin, coriander, cinnamon, and smoked paprika, cooking for another minute until fragrant.

    Add the diced tomatoes and chickpeas, followed by the vegetable broth. Bring to a boil, then reduce the heat and let simmer for 15-20 minutes. In the last few minutes of cooking, stir in the chopped spinach or kale until just wilted. Adjust seasoning with salt and pepper, and serve hot, garnished with fresh cilantro.

    When cooking Moroccan Spiced Chickpea Soup, feel free to customize the recipe to suit your taste preferences. You can experiment with different vegetables such as zucchini or sweet potatoes, or try adding a touch of heat with some chili powder or red pepper flakes.

    Additionally, this soup can be stored in the refrigerator for up to four days or frozen for longer storage, making it a great option for meal prep. Enjoy the warmth and richness of this hearty soup as a cozy comfort food whenever you need it!

    Smoky Paprika and Corn Chowder

    smoky paprika corn chowder

    If you're looking for a comforting and flavorful vegan soup to warm you up on a chilly day, Smoky Paprika and Corn Chowder is the perfect choice. This creamy, dreamy chowder combines the sweetness of corn with the depth of smoky paprika and the richness of a coconut milk base, creating a satisfying dish that's both nourishing and indulgent.

    Whether served as a quick weeknight dinner or a hearty starter for a gathering, this soup is sure to impress.

    To make this chowder, you'll only need a handful of ingredients that come together quickly. You can easily customize the recipe to suit your taste by adding extra vegetables or spices if you desire. With its vibrant flavors and appealing texture, this dish not only delights the palate but also brings a burst of color to your dining table.

    • 1 tablespoon olive oil
    • 1 medium onion, diced
    • 2 cloves garlic, minced
    • 1 red bell pepper, diced
    • 1 teaspoon smoked paprika
    • 1/2 teaspoon ground cumin
    • 4 cups vegetable broth
    • 3 cups fresh or frozen corn (about 4 cups kernels)
    • 1 can (13.5 oz) coconut milk
    • Salt and pepper to taste
    • Fresh cilantro or parsley for garnish

    In a large pot over medium heat, add the olive oil, then sauté the onion and garlic until they become translucent, about 3-4 minutes. Add the red bell pepper, smoked paprika, and cumin, stirring for another minute until fragrant.

    Pour in the vegetable broth and corn, bringing the mixture to a gentle boil. Reduce the heat and let it simmer for about 15 minutes. Finally, stir in the coconut milk, season with salt and pepper to taste, and let it heat through before serving.

    For an extra creamy texture, you can blend a portion of the chowder using an immersion blender, or blend it in batches in a countertop blender. If you want to enhance the smokiness, consider adding a few dashes of liquid smoke to the soup before serving.

    This chowder pairs wonderfully with crusty bread or a fresh garden salad, making it a versatile dish that's perfect for any occasion.

  • 10 Smoothie Bowl Recipes That Are as Tasty as They Are Beautiful

    If you're looking for smoothie bowl recipes that are both delicious and visually stunning, you're in for a treat! Try the Tropical Mango Paradise Bowl for a burst of tropical flavors or the Berry Bliss Bowl packed with vibrant berries. The Green Goddess Smoothie Bowl offers a nutritious green boost, while the Peanut Butter Banana Delight combines creamy sweetness. Don't miss the Chocolate Avocado Dream Bowl for a decadent treat. There's so much more waiting for you to explore!

    Tropical Mango Paradise Bowl

    mango filled tropical delight

    Start your day on a sunny note with a Tropical Mango Paradise Bowl that transports you straight to a beachside paradise! This rejuvenating and vibrant smoothie bowl blends the luscious flavors of ripe mangoes with creamy coconut and a hint of lime, making it a perfect breakfast or snack. Packed with vitamins and nutrients, this bowl isn't only visually stunning but also a delicious way to boost your energy levels.

    Preparing a Tropical Mango Paradise Bowl is quick and simple, allowing you to enjoy a healthy treat in just a matter of minutes. Feel free to customize your toppings based on your preferences or what you have on hand. The combination of textures from crunchy toppings and the smooth, creamy smoothie base creates a delightful experience that everyone in the family will love.

    • 2 ripe mangoes, peeled and diced
    • 1 banana, sliced
    • 1 cup coconut milk (or any plant-based milk)
    • 1 tablespoon lime juice
    • 1 tablespoon honey or maple syrup (optional, for sweetness)
    • Toppings: granola, shredded coconut, sliced kiwi, chia seeds, fresh berries

    In a blender, combine the diced mangoes, banana, coconut milk, lime juice, and honey or maple syrup if using. Blend until smooth and creamy, adjusting the consistency with more coconut milk if needed. Pour the smoothie mixture into a bowl and artfully arrange your favorite toppings to create a beautiful and inviting presentation.

    For an extra touch of flair, consider freezing your mangoes and banana beforehand for a thicker, creamier texture. You can also experiment by adding spinach or kale for a nutrient boost without sacrificing flavor. If you like a more tart taste, adding a squeeze of fresh lime juice enhances the tropical vibe.

    Customize your toppings to include seasonal fruits or nuts for added crunch and flavor, making each Tropical Mango Paradise Bowl unique!

    Berry Bliss Bowl

    delicious berry filled breakfast bowl

    Start your day on a vibrant note with a Berry Bliss Bowl, a delightful smoothie bowl bursting with the fresh flavors of mixed berries. This bowl not only satisfies your taste buds but also packs a nutritious punch. With a creamy base that complements the sweetness of the fruit and a colorful array of toppings, it's a fantastic way to enjoy breakfast or an energizing snack.

    Blending a variety of berries together creates a rejuvenating flavor profile that will invigorate your senses. Whether you opt for strawberries, blueberries, or raspberries, the combination is both aesthetically pleasing and healthful. Garnished with fresh fruits, nuts, or seeds, the Berry Bliss Bowl invites you to get creative and customize it to your liking. Immerse yourself into this berry-filled treat for a delicious and wholesome meal!

    • 1 cup frozen mixed berries (strawberries, blueberries, raspberries)
    • 1 banana (fresh or frozen)
    • 1/2 cup almond or coconut milk (or any preferred milk alternative)
    • 1 tablespoon honey or maple syrup (optional, for sweetness)
    • Toppings: sliced banana, fresh berries, granola, chia seeds, nuts, coconut flakes

    In a blender, combine the frozen mixed berries, banana, almond/coconut milk, and honey or maple syrup if desired. Blend until smooth and creamy, adjusting the thickness by adding more milk as necessary.

    Pour the smoothie mixture into a bowl and layer your favorite toppings on top for added texture and flavor.

    For an extra touch of indulgence, consider adding nut butter or yogurt for creaminess. Feel free to swap out the berries based on what's in season or your personal preferences. Adding a scoop of protein powder or spinach can boost the nutritional value, making this bowl even more satisfying.

    Enjoy your Berry Bliss Bowl as a deliciously wholesome start to your day!

    Green Goddess Smoothie Bowl

    healthy green smoothie bowl

    The Green Goddess Smoothie Bowl is a vibrant and nutritious way to kick-start your day or refresh your afternoon. Packed with leafy greens, fruits, and a perfect blend of creamy textures, this smoothie bowl isn't only delicious but also a feast for the eyes. The combination of spinach, avocado, and banana provides a rich source of vitamins, minerals, and healthy fats, making it an excellent choice for those looking to enhance their wellbeing while enjoying a flavorful treat.

    Creating a smoothie bowl is an art that allows for personalization, and the Green Goddess variety is no exception. The magic lies in the toppings, where you can mix and match your favorite fruits, seeds, and nuts to achieve the perfect crunch and burst of flavor. Whether you choose to sprinkle chia seeds for added protein or sliced kiwi for a tart contrast, this bowl will inspire you to get creative in the kitchen while nourishing your body.

    • 1 cup fresh spinach
    • 1 ripe banana
    • 1/2 avocado
    • 1/2 cup unsweetened almond milk (or any milk of choice)
    • 1 tablespoon honey or maple syrup (optional)
    • 1/2 teaspoon vanilla extract
    • Toppings: sliced kiwi, granola, coconut flakes, chia seeds, nuts, or fresh berries

    In a blender, combine the spinach, banana, avocado, almond milk, honey (if using), and vanilla extract. Blend until smooth and creamy. Pour the mixture into a bowl and get ready to decorate with your chosen toppings.

    When preparing your Green Goddess Smoothie Bowl, feel free to adjust the consistency by adding more or less almond milk to suit your preference. If you're looking to amp up the nutritional value, consider adding a scoop of protein powder or a tablespoon of nut butter.

    For a more vibrant green color, increase the amount of spinach or add a handful of kale. Remember, this bowl is a canvas—experiment with different toppings to find your ultimate combination!

    Peanut Butter Banana Delight

    creamy banana peanut spread

    Peanut Butter Banana Delight is a delectable, nutritious treat that combines the creamy goodness of peanut butter with the natural sweetness of bananas. This smoothie bowl isn't only visually appealing with its vibrant toppings, but it also packs a powerful punch regarding flavor and health benefits.

    Perfect for breakfast or a midday snack, the dish is rich in protein and healthy fats thanks to the peanut butter, while bananas provide essential vitamins and minerals.

    Creating a Peanut Butter Banana Delight is quick and effortless, allowing you to enjoy a delicious, nourishing bowl in no time at all. You can customize the toppings to your liking, whether you prefer crunchy granola, fresh fruits, or a sprinkling of seeds for added texture.

    With its rich flavor and satisfying texture, this smoothie bowl will become a staple in your healthy eating repertoire.

    • 2 ripe bananas
    • 1 cup almond milk (or your preferred milk)
    • 3 tablespoons peanut butter
    • 1 tablespoon honey (or maple syrup)
    • 1/2 cup Greek yogurt (optional for extra creaminess)
    • Toppings: granola, sliced bananas, chia seeds, nuts, or berries

    In a blender, combine the ripe bananas, almond milk, peanut butter, honey, and Greek yogurt. Blend on high until the mixture is smooth and creamy. If the smoothie is too thick, add more almond milk to reach your desired consistency.

    Pour the smoothie into a bowl and add your favorite toppings. For best results, use ripe bananas as they provide the perfect level of sweetness.

    If you're a fan of different nut butters, feel free to substitute peanut butter with almond or cashew butter for a unique twist. Additionally, you can freeze your bananas beforehand for a chillier, thicker smoothie that acts more like ice cream.

    Enjoy experimenting with various toppings to find your ideal combination!

    Chocolate Avocado Dream Bowl

    decadent healthy chocolate bowl

    Indulge in the rich and creamy goodness of the Chocolate Avocado Dream Bowl, a delightful treat that's both healthy and satisfying. This smoothie bowl combines the luscious texture of ripe avocados with the decadent flavor of chocolate, creating a dessert-like experience that's still packed with nutrients.

    Perfect for a breakfast option or a mid-afternoon snack, this bowl isn't only visually appealing but also incredibly easy to make.

    Getting the consistency just right is key to this recipe; it should be thick enough to eat with a spoon yet smooth enough to enjoy every bite. The combination of cacao powder and natural sweeteners, along with the creamy avocado, guarantees that you're getting a protein boost while also pleasing your taste buds.

    Top your bowl with your favorite fruits, nuts, or seeds to add texture and additional flavors, making this dish as customizable as you like.

    Ingredients:

    • 1 ripe avocado
    • 2 ripe bananas
    • 2 tablespoons cacao powder
    • 1 tablespoon honey or agave syrup (to taste)
    • 1 cup almond milk (or any milk of your choice)
    • A pinch of sea salt
    • Toppings: sliced bananas, berries, granola, shredded coconut, and cacao nibs

    Blend the avocado, bananas, cacao powder, honey (or agave), almond milk, and sea salt in a high-speed blender until smooth and creamy. If the mixture is too thick, you can add a bit more milk to reach your desired consistency.

    Pour the smoothie into a bowl and arrange your favorite toppings beautifully on top for a visually stunning presentation.

    For an extra creamy texture, be sure to use very ripe avocados and frozen bananas, which won't only chill your smoothie but also enhance the creaminess. You can also experiment with different milk alternatives or sweeteners to suit your dietary needs or preferences.

    Don't hesitate to get creative with your toppings, as they can greatly enhance both the flavor and the nutrient profile of your Chocolate Avocado Dream Bowl.

    Exotic Acai Bowl

    tropical fruit smoothie bowl

    The Exotic Acai Bowl is a rejuvenating and vibrant dish that brings a taste of the tropics right to your kitchen. Rich in antioxidants and packed with nutrients, this smoothie bowl combines the unique flavor of acai berries with a variety of fruits, creating a delicious and visually appealing breakfast or snack option. You can play with the toppings to suit your preference, making each bowl unique and satisfying.

    To prepare an Exotic Acai Bowl, you'll need to freeze some of your favorite fruits along with acai puree, which is often available in many grocery stores. The key to achieving the perfect consistency is blending the mixture until it's smooth yet thick enough to hold toppings. This dish not only tastes good but can also be a fun family activity, allowing each person to customize their bowl with different ingredients.

    • 2 packets of frozen acai puree
    • 1 banana (frozen)
    • 1/2 cup of almond milk (or any milk of your choice)
    • 1/2 cup of frozen mango
    • 1/2 cup of granola
    • 1/4 cup of fresh berries (strawberries, blueberries, or raspberries)
    • 1 tablespoon of coconut flakes
    • Honey or maple syrup (optional for drizzling)
    • Fresh mint leaves for garnish (optional)

    Blend the frozen acai puree, frozen banana, almond milk, and frozen mango in a blender until completely smooth. Pour the mixture into a bowl and top it with granola, fresh berries, coconut flakes, and a drizzle of honey or maple syrup for added sweetness. Finish with fresh mint leaves for a touch of freshness.

    When preparing the Exotic Acai Bowl, feel free to experiment with different toppings based on your liking or what you have on hand. You can add chia seeds, sliced kiwi, nuts, or yogurt to enhance flavor and nutrition.

    Also, remember that the consistency of your bowl can be adjusted by changing the amount of liquid you add, depending on how thick you prefer it. Enjoy the creativity of making this dish!

    Matcha Mint Medley

    refreshing herbal tea blend

    Setting out on a culinary adventure with the Matcha Mint Medley smoothie bowl isn't only revitalizing but also power-packed with nutrients. Matcha, a fine powdered green tea, is renowned for its invigorating properties and vibrant color, making it a perfect base for a vibrant bowl. Pairing it with fresh mint leaves adds a touch of lively freshness that truly elevates the flavor profile. This combination not only tantalizes the taste buds but also gives a burst of energy to kickstart your day.

    Creating a smoothie bowl that features this delightful duo is simple and fun. You can load it with your favorite toppings to add texture and additional nutrients. Feel free to play around with different fruits, nuts, or seeds to find your ideal blend. Whether for breakfast, brunch, or a healthy dessert, the Matcha Mint Medley is a delightful option that's both visually appealing and deliciously satisfying.

    Ingredients:

    • 1 ripe banana, frozen
    • 1 cup spinach
    • 1 tablespoon matcha powder
    • 1/2 cup almond milk (or any milk of choice)
    • 1 tablespoon honey or maple syrup (optional)
    • A handful of fresh mint leaves
    • Toppings: sliced fruits (like kiwi or strawberries), granola, chia seeds, coconut flakes, or nuts

    Blend the frozen banana, spinach, matcha powder, almond milk, honey (if using), and mint leaves until smooth and creamy. Pour into a bowl and top with your desired toppings such as fresh fruit, granola, and seeds for a customizable finish.

    When making the Matcha Mint Medley, keep in mind that the quality of matcha can greatly influence the flavor of your smoothie bowl. Opt for high-grade culinary matcha for the best results.

    Additionally, experiment with the consistency by adjusting the amount of liquid; if you prefer a thicker bowl, use less liquid, and for a thinner texture, add a splash more.

    Enjoy the process, and don't hesitate to let your creativity shine with toppings!

    Pumpkin Spice Autumn Smoothie Bowl

    autumnal pumpkin spice smoothie

    As the leaves turn golden and the air grows crisp, nothing captures the essence of autumn quite like a Pumpkin Spice Autumn Smoothie Bowl. This delightful dish combines the warm, cozy flavors of pumpkin, cinnamon, and nutmeg, creating a nutritious breakfast or snack that sustains you through the cooler months. Not only is it rich in seasonal flavors, but it also boasts a creamy texture and vibrant appearance that are sure to brighten your day.

    Preparing this smoothie bowl is a breeze, making it perfect for busy mornings or leisurely brunches. By blending together simple ingredients, you'll create a delicious base that can be topped with your favorite nuts, seeds, and fruits. Whether you enjoy it in the morning or as an afternoon treat, this smoothie bowl is a delightful way to indulge in the seasonal taste of pumpkin spice while keeping things healthy.

    • 1 cup pumpkin puree (canned or freshly cooked)
    • 1 banana, frozen
    • 1 cup almond milk (or milk of choice)
    • 1 teaspoon pumpkin spice
    • 1 tablespoon maple syrup (optional, for extra sweetness)
    • 1/2 teaspoon vanilla extract
    • Toppings: granola, sliced bananas, chia seeds, coconut flakes, and nuts of choice

    In a blender, combine the pumpkin puree, frozen banana, almond milk, pumpkin spice, maple syrup (if using), and vanilla extract. Blend on high until smooth and creamy, then pour the mixture into a bowl. Arrange your desired toppings attractively on top of the smoothie base for a beautiful presentation.

    For an added flare, feel free to customize your smoothie bowl with seasonal toppings. Consider adding roasted pecans or walnuts for a delightful crunch, and perhaps a sprinkle of extra cinnamon for enhanced flavor. You can also prep your toppings ahead of time to make assembly a breeze.

    Serving it in a colorful bowl can enhance the visual appeal, making your pumpkin spice smoothie bowl not only delicious but also Instagram-worthy!

    Citrus Sunrise Bowl

    citrus flavored breakfast bowl

    The Citrus Sunrise Bowl is a revitalizing and vibrant way to start your day. Bursting with the zesty flavors of oranges and grapefruits, this smoothie bowl isn't only delicious but also packed with vitamins and antioxidants. The bright colors of the fruits create a stunning presentation that will surely entice your taste buds and uplift your mood.

    Combining creamy yogurt with citrus juices and a hint of sweetness, this bowl provides a creamy texture complemented by crunchy toppings. Perfect for breakfast or a light snack, the Citrus Sunrise Bowl can be customized with your favorite nuts, seeds, and granola. It's a dish that celebrates the joys of fresh, wholesome ingredients, making it a fantastic choice for health-conscious eaters.

    • 1 cup orange juice
    • 1 cup grapefruit juice
    • 1 banana, frozen
    • 1/2 cup Greek yogurt (or dairy-free alternative)
    • 1 tablespoon honey or maple syrup (optional)
    • 1/4 cup granola
    • 1/4 cup sliced almonds
    • Fresh mint leaves for garnish

    In a blender, combine the orange juice, grapefruit juice, frozen banana, Greek yogurt, and honey or maple syrup if desired. Blend until smooth and creamy. Pour the mixture into a bowl and let it settle for a couple of minutes to thicken slightly.

    To enhance your Citrus Sunrise Bowl experience, consider adding a variety of toppings to create texture and flavor contrasts. Fresh berries, chia seeds, or shredded coconut can add extra nutrients and vibrancy.

    You can also experiment with the consistency of your smoothie by adjusting the amount of juice or using additional frozen fruits for a thicker texture. Finally, remember to chill your bowl or plates before serving to keep your smoothie bowl cold and revitalizing.

    Nutty Granola Berry Bowl

    nutty berry granola bowl

    Indulge in a Nutty Granola Berry Bowl that's not only delightful to the taste buds but also bursting with nutrients. This smoothie bowl is the perfect way to start your day or a revitalizing snack for any time. The combination of creamy bananas, strawberries, and yogurt provides a base that's both satisfying and wholesome, while the nutty granola adds a satisfying crunch. The fresh berries on top not only bring vibrant color to your bowl but also a natural sweetness that complements the other ingredients beautifully.

    Creating your Nutty Granola Berry Bowl is simple and can be customized to your liking. Whether you prefer almonds, walnuts, or pecans, the nuts can be mixed with your favorite granola for that extra texture and flavor. Don't forget to sprinkle some chia seeds or coconut flakes for added nutrition, making this smoothie bowl not just tasty but also a powerhouse of health benefits.

    Ingredients:

    • 1 ripe banana
    • 1/2 cup strawberries (fresh or frozen)
    • 1/2 cup Greek yogurt (or a dairy-free alternative)
    • 1/2 cup almond milk (or your choice of milk)
    • 1/2 cup granola
    • 1/4 cup mixed nuts (almonds, walnuts, or pecans)
    • Fresh berries for topping (blueberries, raspberries)
    • 1 tablespoon chia seeds (optional)
    • Honey or maple syrup (optional, for sweetness)

    Start by blending the banana, strawberries, Greek yogurt, and almond milk in a blender until smooth and creamy. Once combined, pour the smoothie mixture into a bowl and sprinkle the granola and mixed nuts on top. Finish off your bowl by adding fresh berries, chia seeds, and a drizzle of honey or maple syrup if desired for some extra sweetness.

    When crafting your Nutty Granola Berry Bowl, feel free to experiment with different fruits and toppings to suit your preference. For a creamier texture, you can substitute the Greek yogurt with a plant-based yogurt or add a handful of spinach for some extra greens—just blend it well.

    Additionally, homemade granola can elevate the flavor and health benefits of your bowl, allowing you to control the sweetness and ingredients. Enjoy your custom creation and remember, the beauty of smoothie bowls lies in their versatility!

  • 15 Best Smoothie Recipes for a Refreshing Boost

    When you're in need of a rejuvenating boost, smoothies are your best friend! Try the Tropical Mango Bliss for a creamy, tropical taste or the Berry Banana Protein Smoothie for a post-workout treat. If you're looking for greens, the Creamy Avocado Spinach Smoothie or Revitalizing Green Detox Smoothie are excellent options. Don't miss the Peanut Butter Banana Delight for a protein punch and the Almond Joy Smoothie for a sweet twist. There's so much more to explore!

    Tropical Mango Bliss Smoothie

    mango smoothie tropical delight

    Indulge in a revitalizing Tropical Mango Bliss Smoothie that transports your taste buds straight to a sun-soaked tropical paradise. This vibrant and fruity smoothie isn't only delicious but also packed with essential vitamins and nutrients. The star of this recipe is ripe, juicy mangoes, which are known for their sweetness and creamy texture. Paired with coconut milk and a hint of lime, this smoothie is a perfect choice for a nourishing breakfast, a midday snack, or a delightful treat on a hot day.

    Creating this Tropical Mango Bliss Smoothie is quick and easy, making it a fantastic addition to your recipe repertoire. It's an excellent way to incorporate fresh fruit into your diet while enjoying the rich flavors of the tropics. Whether you use fresh or frozen mango, this smoothie is bound to brighten your day and satiate your cravings for something fruity and delicious.

    Gather your ingredients, follow the simple steps, and in no time, you'll have a delightful smoothie ready to sip on.

    • 1 ripe mango, peeled and diced
    • 1 banana
    • 1 cup coconut milk
    • 1/2 cup Greek yogurt
    • 1 tablespoon honey (optional)
    • Juice of 1 lime
    • Ice cubes (optional)

    In a blender, combine the diced mango, banana, coconut milk, Greek yogurt, honey (if using), and lime juice. Blend on high speed until the mixture is smooth and creamy. If you prefer a colder smoothie, add a few ice cubes and blend again until the desired consistency is reached.

    Pour the smoothie into a glass and enjoy immediately.

    For an extra burst of flavor, consider garnishing your smoothie with fresh mint leaves or a slice of lime on the rim of the glass. Additionally, feel free to customize the smoothie by incorporating other fruits like pineapple or papaya, or adding superfoods such as chia seeds or spinach for added nutrition.

    Experiment with the ingredients to find your preferred blend, and enjoy the blissful tropical vibes!

    Berry Banana Protein Smoothie

    berry banana protein smoothie

    Indulging in a Berry Banana Protein Smoothie is a delightful way to kick-start your day or refuel after a workout. This smoothie combines the vibrant flavors of mixed berries and banana with the added benefit of protein, making it not only delicious but also nutritious.

    Whether you're trying to increase your protein intake or simply crave a revitalizing beverage, this smoothie is a fantastic option that's easy to prepare.

    What sets this Berry Banana Protein Smoothie apart is its versatility. You can easily customize it by swapping out ingredients based on your preferences or dietary restrictions.

    For instance, you can opt for a plant-based protein powder if you follow a vegan lifestyle, or add spinach for an extra nutrient boost. This smoothie is perfect for busy mornings or as a quick snack, allowing you to enjoy a healthy option without compromising on taste.

    • 1 cup frozen mixed berries (strawberries, blueberries, raspberries)
    • 1 ripe banana
    • 1 cup almond milk (or any milk of choice)
    • 1 scoop protein powder (whey or plant-based)
    • 1 tablespoon honey or maple syrup (optional)
    • 1 tablespoon chia seeds (optional)

    In a blender, combine the frozen mixed berries, ripe banana, almond milk, protein powder, and honey or maple syrup if desired. Blend on high until smooth and creamy, ensuring there are no lumps.

    If the smoothie is too thick, you can add a bit more almond milk to reach your desired consistency. Once blended, pour the smoothie into a glass and enjoy!

    For the best flavor and texture, use frozen berries and a chilled banana to enhance the creaminess of your smoothie. You can also adjust the sweetness level by tasting and adding more honey or sweetener as needed.

    Experiment with adding other ingredients like spinach, nut butter, or oats for an extra nutritional boost. To make it a meal, consider adding more protein from sources like Greek yogurt or a handful of nuts on top.

    Creamy Avocado Spinach Smoothie

    healthy green smoothie recipe

    The Creamy Avocado Spinach Smoothie is a delightful blend of nutrient-rich ingredients that not only nourishes the body but also tantalizes the taste buds. Combining the rich, velvety texture of avocado with the vibrant green goodness of spinach, this smoothie is perfect for a quick breakfast or a rejuvenating post-workout snack.

    The natural creaminess from the avocado means you can enjoy a satisfying drink without the need for dairy, making it a great option for those who are lactose intolerant or vegan.

    This smoothie is jam-packed with health benefits as well. Spinach is loaded with antioxidants and essential vitamins, which can help boost your immune system, while avocados provide healthy fats that promote heart health. With just a few simple ingredients and a quick blend, you can whip up a nutrient-dense drink that will keep you full and energized throughout your day.

    • 1 ripe avocado
    • 2 cups fresh spinach
    • 1 banana
    • 1 cup almond milk (or any milk of choice)
    • 1 tablespoon honey or maple syrup (optional)
    • 1 tablespoon chia seeds (optional)
    • Ice cubes (optional, for extra chill)

    To prepare the smoothie, cut the avocado in half and remove the pit. Scoop the flesh into a blender, then add the fresh spinach, banana, almond milk, and any optional sweeteners or chia seeds.

    If you like your smoothie cold, add a handful of ice cubes. Blend until smooth and creamy, adjusting the consistency by adding more almond milk if needed.

    For an added nutritional boost, consider adding a scoop of protein powder or a tablespoon of nut butter for creaminess and flavor. You can also experiment with different fruits, such as a handful of berries or a slice of pineapple, to give your smoothie a fruity twist.

    Always taste your smoothie before serving and adjust sweetness or thickness as desired to meet your preference!

    Refreshing Cucumber Mint Smoothie

    cool and revitalizing smoothie

    If you're looking for a revitalizing drink to cool you down on a hot day, the Invigorating Cucumber Mint Smoothie is your go-to recipe.

    This delightful blend combines the crisp taste of fresh cucumber with the coolness of mint, making it not only hydrating but also incredibly invigorating. Perfect for breakfast, a midday snack, or a post-workout treat, it's an energizing way to incorporate more vegetables into your diet while enjoying a sweet and tasty beverage.

    To make things even better, this smoothie is easy to whip up and requires just a few simple ingredients. It's a versatile recipe, so feel free to adjust it according to your taste.

    Whether you prefer a thicker or thinner consistency, or want to add a little sweetness with honey or a banana, you can customize it as you like. Get ready to blend your way to a perfect smoothie!

    • 1 medium cucumber, peeled and diced
    • 1/2 cup fresh mint leaves
    • 1 cup plain yogurt (Greek or regular)
    • 1/2 cup water or coconut water
    • 1 tablespoon honey or agave nectar (optional)
    • Ice cubes (as needed)

    In a blender, combine the diced cucumber, fresh mint leaves, yogurt, water or coconut water, and honey or agave nectar if you're using it.

    Add a handful of ice cubes for a frostier texture. Blend on high speed until the mixture is smooth and creamy, scraping down the sides if necessary to confirm everything is well incorporated.

    Pour into glasses and garnish with a few mint leaves or a cucumber slice before serving.

    For the best results, use fresh and high-quality ingredients. If you want an extra cooling effect, chilling the cucumber in the refrigerator for a few hours before blending can enhance the invigorating nature of the smoothie.

    Additionally, considering the flavor intensity of mint, feel free to adjust the amount based on your preference. You can also substitute the yogurt with a dairy-free alternative if desired, and for a fun twist, try adding a splash of lime juice for an extra zing!

    Peanut Butter Banana Delight

    creamy banana peanut treat

    Looking for a creamy and delicious way to kickstart your day? The Peanut Butter Banana Delight smoothie is the perfect blend of flavors and nutrients that will keep you energized. Rich in protein and packed with potassium, this smoothie combines the classic flavors of peanut butter and banana, creating a delicious treat that can be enjoyed for breakfast or as a midday snack.

    It's not only easy to make, but it also requires minimal ingredients, making it an ideal choice for those busy mornings.

    To make your Peanut Butter Banana Delight, you'll need ripe bananas for natural sweetness and creaminess, along with peanut butter for that indulgent nutty flavor. This delightful combination is further enhanced by the addition of milk, giving you a smooth texture and a satisfying consistency.

    You can customize it by adding other ingredients like spinach for an extra nutrient boost or a dash of honey if you prefer it sweeter. The best part? It's all thrown together in a blender, making clean-up a breeze!

    • 2 ripe bananas
    • 2 tablespoons peanut butter
    • 1 cup milk (or plant-based milk)
    • 1 tablespoon honey (optional)
    • ½ teaspoon vanilla extract (optional)
    • Ice cubes (optional)

    In a blender, combine the ripe bananas, peanut butter, milk, honey, and vanilla extract, if using. Blend until smooth and creamy. If you prefer a chilled smoothie, add a few ice cubes to the blender and blend again until the desired consistency is achieved.

    For the best flavor, use very ripe bananas, as they provide natural sweetness and an incredibly creamy texture. You can also try substituting regular peanut butter with a flavored variety like chocolate or cinnamon peanut butter for a fun twist.

    If you want a thicker smoothie, reduce the amount of milk or add some Greek yogurt. Experiment with toppings like granola, chia seeds, or sliced bananas for added texture and nutrition!

    Nutty Chocolate Green Smoothie

    nutty chocolate green smoothie

    If you're looking for a delicious and nutritious way to boost your day, the Nutty Chocolate Green Smoothie is a perfect choice. This delightful blend combines the richness of chocolate with the creaminess of nut butter and the freshness of greens, making it an indulgent yet healthy treat. Whether you're enjoying it as a breakfast option or a post-workout snack, this smoothie is sure to satisfy your cravings while providing essential nutrients.

    Packed with vitamins and minerals, this smoothie uses spinach or kale as its base, ensuring you get a dose of greens without compromising on taste. The addition of nut butter not only adds a creamy texture but also contributes healthy fats and protein, making your smoothie more filling. With a hint of chocolate flavor, this smoothie is a great way to sneak in those greens into your diet while feeling like you're indulging in a dessert.

    • 1 cup fresh spinach or kale
    • 1 ripe banana
    • 2 tablespoons natural almond or peanut butter
    • 1 tablespoon cocoa powder
    • 1 cup unsweetened almond milk (or any milk of your choice)
    • 1 tablespoon honey or maple syrup (optional)
    • A handful of ice cubes

    In a blender, add the spinach or kale, banana, nut butter, cocoa powder, almond milk, and ice cubes. Blend on high until smooth and creamy. If desired, taste and add honey or maple syrup for additional sweetness. Pour into a glass and enjoy immediately.

    For the best results, use ripe bananas as they provide natural sweetness that complements the chocolate flavor. You can also customize the thickness of your smoothie by adjusting the amount of almond milk or ice you add.

    For an extra protein boost, consider incorporating a scoop of your favorite protein powder. Don't hesitate to blend in other superfoods like chia seeds or flaxseeds for added nutrition!

    Exotic Pineapple Coconut Smoothie

    tropical pineapple coconut blend

    Indulge in the tropical delight of an Exotic Pineapple Coconut Smoothie, a revitalizing treat that transports your taste buds to a sun-kissed beach with every sip. This smoothie blends the juicy sweetness of ripe pineapple with the creamy richness of coconut, resulting in a luscious drink that's perfect for a hot summer day or any time you crave a taste of paradise.

    It's easy to make, and its vibrant colors and enticing flavors will impress anyone you serve it to. Not only is the Exotic Pineapple Coconut Smoothie a delicious choice, but it's also packed with essential vitamins and minerals. Pineapples are loaded with vitamin C and bromelain, while coconut offers healthy fats and hydrating properties.

    Plus, this smoothie can be tailored to your dietary preferences, from vegan to dairy-free options. So grab your blender and get ready to whip up a delightful concoction that's sure to brighten your day!

    • 1 cup fresh or frozen pineapple chunks
    • 1/2 cup coconut milk (or coconut yogurt for a thicker texture)
    • 1/2 banana (fresh or frozen)
    • 1 tablespoon honey or maple syrup (optional for added sweetness)
    • 1/2 cup ice cubes (if using fresh pineapple)
    • A sprinkle of shredded coconut for garnish (optional)

    In a blender, combine the pineapple chunks, coconut milk, banana, honey or maple syrup, and ice cubes. Blend on high until smooth and creamy, adding more coconut milk if needed for your desired consistency.

    Pour the smoothie into a glass and garnish with a sprinkle of shredded coconut for an extra touch of flavor and visual appeal. When making your Exotic Pineapple Coconut Smoothie, consider experimenting with additional ingredients like a handful of spinach for a nutrient boost or a tablespoon of flaxseed for added fiber.

    You can also substitute low-fat yogurt for a creamier texture or add a splash of lime juice to enhance the tropical flavor. Enjoy this smoothie fresh, as it's best consumed right after blending to enjoy the vibrant flavors and peak freshness!

    Strawberry Oatmeal Energy Smoothie

    strawberry oatmeal energy drink

    Starting your day with a delicious and nutritious smoothie can set a positive tone for the rest of your day. The Strawberry Oatmeal Energy Smoothie isn't only packed with flavors but also loaded with healthy ingredients that will give you a boost of energy. It combines the sweetness of ripe strawberries with the hearty goodness of oats, making it an ideal breakfast choice or a midday snack.

    This smoothie is quick to prepare, and its creamy texture will satisfy your cravings while keeping you full and energized. This recipe is incredibly versatile, allowing you to customize it to fit your taste preferences and dietary needs. You can easily substitute different fruits or add additional ingredients like protein powder or nut butter.

    The strawberries bring a rejuvenating flavor, while the oats provide a fiber boost that helps stabilize blood sugar levels, making this smoothie a great way to fuel your day.

    • 1 cup fresh or frozen strawberries
    • ½ cup rolled oats
    • 1 banana
    • 1 cup unsweetened almond milk (or any milk of your choice)
    • 1 tablespoon honey or maple syrup (optional)
    • 1 tablespoon chia seeds (optional)
    • Ice cubes (optional)

    In a blender, combine the strawberries, oats, banana, almond milk, and any optional ingredients such as honey and chia seeds. Blend on high until smooth and creamy, adding ice cubes if you prefer a chilled texture. Once blended to your desired consistency, pour the smoothie into a glass and enjoy immediately.

    For an extra nutritious boost, consider adding a scoop of protein powder or a handful of spinach to your smoothie. If you want to enhance the flavor, you can also experiment with a dash of vanilla extract or cinnamon.

    Additionally, for those who like a thicker smoothie, adjust the amount of oats or use frozen fruits, which can provide a creamier texture. Enjoy exploring different combinations to find your perfect smoothie!

    Spicy Ginger Carrot Smoothie

    ginger infused carrot smoothie recipe

    The Spicy Ginger Carrot Smoothie is a revitalizing and zesty beverage that combines the natural sweetness of carrots with the invigorating kick of ginger. This smoothie isn't only delicious but also packed full of nutrients, making it a perfect addition to your morning routine or an energizing afternoon snack.

    The vibrant orange color of the smoothie is appealing and enticing, signaling a healthy choice that will invigorate your taste buds and provide your body with essential vitamins and minerals.

    To make this delightful drink, you'll need to gather fresh ingredients that complement each other beautifully. The use of fresh ginger adds a bold, spicy flavor that counters the sweetness of the carrots, while a dab of honey or maple syrup enhances the overall taste.

    You can also customize the recipe by adding your favorite fruits or even a splash of citrus juice for extra zing! Whether you're a ginger lover or just looking to try something new, this Spicy Ginger Carrot Smoothie is sure to bring a smile to your face.

    • 2 medium carrots, peeled and chopped
    • 1-inch piece of fresh ginger, peeled and grated
    • 1 banana
    • 1 cup of orange juice (freshly squeezed, if possible)
    • 1 tablespoon of honey or maple syrup (optional)
    • 1/2 cup of Greek yogurt (for creaminess)
    • Ice cubes (as needed, for a chilled smoothie)

    In a blender, combine the chopped carrots, grated ginger, banana, orange juice, honey or maple syrup, and Greek yogurt. Blend on high until smooth and creamy, adding ice cubes if you prefer a colder consistency.

    Taste and adjust sweetness if necessary before pouring into glasses to serve.

    When preparing this smoothie, freshness is key. Make sure to use fresh ginger for the best flavor, as dried ginger can be too overpowering. If the smoothie is too thick for your liking, feel free to add more orange juice or a splash of water to achieve your desired consistency.

    Additionally, for extra nutrition, consider tossing in a handful of spinach or kale before blending—this will give you an added boost without compromising the flavor!

    Chocolate Cherry Recovery Smoothie

    delicious chocolate cherry smoothie

    Indulge in the rich and delicious Chocolate Cherry Recovery Smoothie, a perfect treat to replenish your energy and satisfy your sweet cravings post-workout. This decadent smoothie combines the tartness of cherries with the luxurious flavor of cocoa, offering a delightful balance that can help ease muscle soreness. Packed with antioxidants and protein, it's an ideal blend for anyone needing a nutritious and tasty recovery option after strenuous physical activity.

    Making this smoothie is both quick and easy, allowing you to whip it up right in the comfort of your kitchen. The rich flavors of chocolate and cherry not only make it a delicious option but also provide an array of essential nutrients.

    Whether you're an athlete looking to refuel or just someone who enjoys a wholesome and indulgent drink, this Chocolate Cherry Recovery Smoothie is sure to please your palate while delivering the nutritional benefits your body needs.

    • 1 cup frozen cherries
    • 1 banana
    • 1 tablespoon unsweetened cocoa powder
    • 1 cup almond milk (or milk of choice)
    • 1 scoop protein powder (optional)
    • 1 tablespoon honey or maple syrup (optional, for added sweetness)
    • Ice cubes (optional, for a thicker texture)

    Combine all the ingredients in a blender and blend on high until smooth and creamy. If you prefer a thicker texture, add a handful of ice cubes and blend again until your desired consistency is reached.

    For the best experience, always use frozen cherries for a thicker and creamier texture, and feel free to adjust the sweetness according to your taste preferences. If you're using fresh cherries, toss in a few extra ice cubes to guarantee that your smoothie is invigoratingly cool.

    Experiment with different types of protein powders or even add a scoop of nut butter to enhance the flavor and nutritional value of your recovery drink. Enjoy your smoothie immediately for maximum flavor and health benefits!

    Citrus Sunrise Smoothie

    refreshing citrus breakfast blend

    The Citrus Sunrise Smoothie is a rejuvenating and vibrant drink that perfectly blends the zesty flavors of various fruits, bringing a burst of sunshine to your morning routine. This smoothie isn't only delicious but also packed with vitamins and antioxidants, making it an ideal choice for a quick breakfast or a midday snack.

    With the combination of citrus fruits, yogurt, and a touch of honey, each sip is a delightful way to energize your day and support your overall health.

    Making this smoothie is quick and simple, requiring just a handful of ingredients that you likely have on hand. The bright flavors of oranges and lemons complement the creamy texture of yogurt, while the addition of spinach provides a subtle earthiness without overpowering the citrus notes.

    Blend these ingredients together, and you'll have a smooth and rejuvenating beverage that's both tasty and visually appealing.

    • 1 orange, peeled and segmented
    • 1 lemon, juiced
    • 1/2 banana, sliced
    • 1 cup fresh spinach
    • 1/2 cup plain yogurt (or dairy-free yogurt)
    • 1 tablespoon honey (or maple syrup for a vegan option)
    • 1/2 cup water or ice (for desired consistency)

    In a blender, combine the orange segments, lemon juice, banana slices, fresh spinach, yogurt, honey, and water or ice. Blend on high speed until smooth and creamy, adding more water or ice as necessary to reach your desired consistency.

    Pour the smoothie into a glass and enjoy the vibrant flavors of this rejuvenating drink.

    When making the Citrus Sunrise Smoothie, feel free to experiment with different fruits or greens according to your taste. You can add a bit of ginger for an extra zing or substitute the yogurt with your favorite plant-based alternative.

    For a more filling option, consider adding a scoop of protein powder or a tablespoon of chia seeds. This flexibility allows you to customize the smoothie to best suit your dietary preferences and nutritional needs.

    Refreshing Green Detox Smoothie

    healthy green smoothie recipe

    If you're looking for an invigorating and nutritious way to cleanse your system, a Green Detox Smoothie is the perfect solution. This vibrant drink is packed with essential vitamins, minerals, and antioxidants, making it an excellent choice for anyone seeking to boost their overall health. The combination of greens, fruits, and healthy fats creates a delightful flavor profile that's both satisfying and revitalizing — perfect for any time of the day.

    To prepare this smoothie, you'll be blending a variety of fresh ingredients that not only taste great but also help detoxify your body. Spinach or kale serves as the base, followed by bananas for natural sweetness and creamy texture. Adding cucumbers and lemon juice adds an invigorating zing, while chia seeds provide a boost of omega-3 fatty acids and fiber. This smoothie isn't just a treat for your taste buds; it's also a powerful way to fuel your body with natural goodness.

    • 1 cup spinach or kale
    • 1 ripe banana
    • 1/2 cucumber, peeled and chopped
    • 1 tablespoon chia seeds
    • Juice of 1/2 lemon
    • 1 cup coconut water or filtered water
    • Optional: a handful of ice cubes for a chill

    In a blender, combine the spinach or kale, banana, cucumber, chia seeds, lemon juice, and coconut water (or water). Blend on high until smooth and creamy, adding ice cubes if desired for a chilled effect. Taste and adjust the flavors to your liking, adding more lemon juice for acidity or additional banana for sweetness if needed. Pour into a glass and enjoy!

    For the best results, make sure to use fresh, organic ingredients whenever possible to maximize the nutritional benefits. If you find the smoothie too green for your liking, feel free to add a splash of fresh fruit juice or even a slice of avocado for a richer texture.

    Additionally, you can prepare extra portions and store them in the refrigerator for up to 24 hours; just give it a good shake before consuming.

    Almond Joy Smoothie

    coconut chocolate almond blend

    Indulge in the creamy goodness of an Almond Joy Smoothie, a delightful blend that captures the essence of your favorite chocolate and coconut candy bar. This gluten-free and dairy-free smoothie not only satisfies your sweet tooth but also provides a nutritious, energy-boosting treat. Perfect for breakfast or an afternoon snack, it's loaded with healthy fats and protein that will keep you feeling full and satisfied.

    Making this smoothie is a breeze, allowing you to enjoy a delicious and nutritious drink without the fuss. With a rich combination of almond, coconut, and chocolate flavors, you'll feel like you're sipping a dessert while nourishing your body. Customize it to your taste by adjusting the sweetness or adding more coconut for an extra tropical flair!

    • 1 cup almond milk (or any milk of your choice)
    • 1 ripe banana
    • 2 tablespoons almond butter
    • 1 tablespoon unsweetened cocoa powder
    • 1 tablespoon shredded unsweetened coconut
    • 1 tablespoon honey or maple syrup (optional)
    • ½ teaspoon vanilla extract
    • A pinch of sea salt
    • Ice cubes (as desired)

    In a blender, combine the almond milk, ripe banana, almond butter, cocoa powder, shredded coconut, honey or maple syrup (if using), vanilla extract, and sea salt. Blend on high until smooth and creamy, adding ice cubes as desired to reach your preferred consistency.

    If you like a thicker smoothie, simply reduce the amount of almond milk, or for a thinner texture, add a little more.

    For the best results, consider freezing your bananas ahead of time to create a frosty base without needing too much ice. You can also add a handful of spinach for an extra nutritional boost without altering the taste remarkably.

    Feel free to experiment with toppings such as chopped almonds, additional shredded coconut, or even a drizzle of dark chocolate syrup to take this smoothie to the next level of indulgence!

    Berry Chia Seed Smoothie

    berry chia seed smoothie

    A Berry Chia Seed Smoothie is the perfect blend of nutrition and flavor that can kickstart your day or serve as a revitalizing snack. Combining the natural sweetness of berries with the health benefits of chia seeds, this smoothie provides a delightful treat for the taste buds while also fueling your body with fiber, antioxidants, and omega-3 fatty acids. Perfect for breakfast or an afternoon boost, it's incredibly easy to make and can be customized to suit personal preferences.

    The key to a great smoothie lies in the quality of the ingredients, so opt for fresh or frozen berries, and use a base liquid that complements the flavors. Whether you prefer almond milk for a nutty essence or coconut water for additional hydration, the choice of liquid can elevate your smoothie to new heights. Additionally, chia seeds not only add a unique texture but also thicken the mixture, making for a satisfying drink that keeps you full and energized.

    • 1 cup mixed berries (strawberries, blueberries, raspberries)
    • 1 tablespoon chia seeds
    • 1 cup almond milk (or any preferred milk)
    • 1 teaspoon honey or maple syrup (optional)
    • ½ banana (fresh or frozen)
    • Ice cubes (optional, for a thicker consistency)

    In a blender, combine the mixed berries, chia seeds, almond milk, banana, and honey or maple syrup if desired. Blend until smooth, adjusting the thickness by adding more almond milk or ice cubes to reach your preferred consistency. Once everything is well-blended, give it a taste and add more sweetener if needed before serving.

    For the best results, let the smoothie sit for about 5-10 minutes after blending. This allows the chia seeds to absorb liquid and expand, creating a thicker consistency that enhances the smoothie's texture.

    You can also experiment by adding other ingredients such as spinach for extra nutrients, or a scoop of protein powder for a more filling option. Enjoy your Berry Chia Seed Smoothie immediately for peak freshness, but it can also be stored in the refrigerator for a short period if needed.

    Creamy Pumpkin Spice Smoothie

    pumpkin spice flavored smoothie

    The Creamy Pumpkin Spice Smoothie is an autumn-inspired delight that blends the flavors of pumpkin, spices, and creaminess into a satisfying drink. Perfect for breakfast or as a midday snack, this smoothie captures the essence of fall in a glass.

    With the rich and nutritious profile of pumpkin, it's not only delicious but also packed with vitamins and minerals, making it a guilt-free choice. The smooth texture is achieved by combining pumpkin puree with yogurt and milk, while warm spices like cinnamon and nutmeg elevate the flavor to new heights.

    This recipe is easy to whip up in just a few minutes, making it an excellent option for those on-the-go or anyone looking to indulge in a seasonal treat without a lot of fuss.

    • 1 cup pumpkin puree
    • 1 banana, frozen
    • 1 cup Greek yogurt
    • 1 cup milk (dairy or non-dairy)
    • 2 tablespoons honey or maple syrup
    • 1 teaspoon cinnamon
    • 1/2 teaspoon nutmeg
    • 1/2 teaspoon vanilla extract
    • Ice cubes (optional)

    In a blender, combine the pumpkin puree, frozen banana, Greek yogurt, milk, honey or maple syrup, cinnamon, nutmeg, and vanilla extract. Blend on high speed until smooth and creamy.

    If you prefer a colder drink, add a handful of ice cubes and blend again until desired consistency is reached. Once blended, pour the smoothie into a glass and enjoy immediately.

    For an extra touch, consider topping your smoothie with whipped cream and a sprinkle of cinnamon for a beautiful presentation.

    You can also customize this recipe by adding your favorite nut butter for added richness or substituting the Greek yogurt with a dairy-free alternative if you're avoiding dairy. Be sure to taste and adjust the sweetness to your liking, as pumpkin can vary in flavor, and your preferences might change!

  • 10 Ground Beef Recipes for Budget-Friendly Dinners

    Ground beef is a fantastic choice for budget-friendly dinners, offering flavor and versatility. You can whip up classic beef tacos, cheesy beef casserole, or hearty spaghetti Bolognese with ease. Try beef and bean chili for a warming meal, or enjoy stuffed bell peppers for a colorful presentation. One-pan beef and rice keeps cleanup simple, while shepherd's pie is perfect for comforting evenings. Each dish is easy to customize, and you'll discover even more scrumptious options ahead.

    Classic Beef Tacos

    delicious traditional beef tacos

    Classic beef tacos are a beloved staple in many households, offering a quick yet satisfying way to enjoy the flavors of Mexico. This dish isn't only easy to prepare but also allows for a variety of personal touches based on your preferred toppings and spice levels.

    With seasoned ground beef enveloped in crunchy taco shells and accompanied by fresh vegetables and zesty condiments, it creates a vibrant meal that's perfect for family dinners, gatherings, or even Taco Tuesday.

    Incorporating authentic flavors is key to making delicious tacos. Using a blend of spices helps to enhance the natural flavor of the beef, while pickled or fresh veggies add both texture and freshness.

    Whether you prefer to keep it classic with traditional toppings like lettuce and cheese or venture into new territory with salsas and avocado, these classic beef tacos can be customized to fit any palate.

    • 1 pound ground beef
    • 1 small onion, diced
    • 2 cloves garlic, minced
    • 1 tablespoon chili powder
    • 1 teaspoon cumin
    • 1/2 teaspoon paprika
    • Salt and pepper to taste
    • 8 taco shells
    • Lettuce, shredded
    • Tomato, diced
    • Cheese, shredded (cheddar or Mexican blend)
    • Sour cream
    • Salsa

    In a large skillet over medium heat, sauté the diced onion until translucent. Add the minced garlic and cook for another minute before adding the ground beef.

    Cook the beef, breaking it apart with a spatula, until browned. Drain any excess fat. Stir in the chili powder, cumin, paprika, salt, and pepper, mixing thoroughly.

    Reduce the heat to low and let it simmer for a few minutes to allow the spices to meld together. Meanwhile, warm the taco shells in the oven according to the package instructions.

    For the best flavor and fresh components, prepare some of your toppings in advance. You can chop vegetables like onions, tomatoes, and lettuce ahead of time and store them separately in airtight containers.

    Additionally, allowing the seasoned beef to sit for a minute off the heat will enhance its flavor. Don't hesitate to experiment with different sauces or toppings to find your perfect taco combination!

    Cheesy Beef Casserole

    cheesy beef casserole dish

    Cheesy beef casserole is a comforting and hearty dish that brings together the robust flavors of ground beef and the gooey goodness of cheese. This dish isn't only a family favorite but also a convenient one-pot meal that's perfect for busy weeknights or potluck gatherings.

    With a savory blend of beef, pasta, and vegetables, all topped with a rich layer of melted cheese, it's sure to satisfy even the hungriest of appetites. You can customize the casserole to suit your tastes, adding different vegetables or spices to enhance the flavor profile.

    It's simple enough for novice cooks to master while still being impressive enough for seasoned chefs. Whether you're looking for a crowd-pleaser or a warm and cozy dinner at home, this cheesy beef casserole delivers all the comfort of home-cooked goodness in every bite.

    • 1 pound ground beef
    • 1 cup uncooked pasta (elbow macaroni or rotini work well)
    • 1 can (15 oz) diced tomatoes, drained
    • 1 cup frozen mixed vegetables (peas, carrots, corn)
    • 1 cup shredded cheddar cheese
    • 1 cup shredded mozzarella cheese
    • 1 small onion, chopped
    • 2 cloves garlic, minced
    • 1 teaspoon Italian seasoning
    • Salt and pepper to taste
    • 2 cups beef broth

    In a large skillet over medium heat, cook the ground beef, onion, and garlic until the beef is browned and the onion is tender, approximately 5-7 minutes. Drain excess fat and stir in the diced tomatoes, mixed vegetables, Italian seasoning, and beef broth.

    Bring the mixture to a boil before adding the uncooked pasta. Cover and reduce heat, allowing it to simmer for about 10-12 minutes or until the pasta is al dente. Preheat the oven to 350°F (175°C) and transfer the mixture to a baking dish.

    Top with cheddar and mozzarella cheese, and bake for about 15-20 minutes until the cheese is bubbly and golden brown. For added flavor, consider stirring in different spices or adding a dash of Worcestershire sauce to the beef mixture.

    You can also substitute the ground beef with other proteins like ground turkey or chicken, or use whole grain pasta for a healthier twist. Leftover casserole can be stored in the fridge for up to 4 days, and it reheats well in the microwave or oven, making it perfect for meal prep and leftovers.

    Spaghetti Bolognese

    classic italian meat sauce

    Spaghetti Bolognese is a classic Italian dish that combines the hearty flavors of ground beef with a rich, slow-cooked tomato sauce. Originating from the city of Bologna, this comforting meal has become a favorite around the world, thanks to its rich flavors and satisfying texture.

    Traditionally served over spaghetti, the sauce can also be paired with other types of pasta, making it a versatile option for any dinner table.

    The beauty of Spaghetti Bolognese lies in its simplicity and the ability to customize it based on your taste preferences. Whether you prefer a smoother sauce or one with chunky vegetables, adjusting the ingredients can yield delicious results.

    Paired with a sprinkle of Parmesan cheese and fresh basil, this dish elevates any ordinary weeknight dinner into a special feast.

    Ingredients:

    • 400g (14 oz) spaghetti
    • 500g (1 lb) ground beef
    • 1 tablespoon olive oil
    • 1 onion, chopped
    • 2 cloves garlic, minced
    • 1 carrot, diced
    • 1 celery stalk, diced
    • 400g (14 oz) canned tomatoes (crushed or diced)
    • 2 tablespoons tomato paste
    • 1 teaspoon dried oregano
    • 1 teaspoon dried basil
    • Salt and pepper to taste
    • Fresh basil leaves, for garnish
    • Grated Parmesan cheese, for serving

    In a large pot, bring water to a boil and cook the spaghetti according to package instructions until al dente.

    Meanwhile, in a separate large skillet, heat the olive oil over medium heat. Add chopped onion, minced garlic, diced carrot, and celery, and sauté until softened.

    Add the ground beef and cook until browned. Stir in the canned tomatoes, tomato paste, dried oregano, and dried basil.

    Simmer the sauce for about 20-30 minutes, letting the flavors meld together, and season with salt and pepper.

    Once the spaghetti is cooked, drain it and combine it with the sauce. Serve hot, garnished with fresh basil leaves and grated Parmesan cheese.

    For an extra flavor boost, consider adding a splash of red wine to the sauce while it simmers, giving it a deeper richness.

    You can also incorporate other vegetables like bell peppers or mushrooms for added texture and taste.

    If you're planning to make this dish ahead of time, the sauce freezes beautifully, making it a convenient option for busy weeknights.

    Enjoy experimenting with this timeless recipe to make it your own!

    Beef and Bean Chili

    hearty beef and beans

    Beef and Bean Chili is a hearty dish that brings warmth and comfort, perfect for chilly evenings or gathering with friends. Combining ground beef with a medley of beans, tomatoes, and spices, this flavorful chili isn't only easy to make but also packed with protein and fiber. It can be served on its own, over rice, or with a side of cornbread, making it a versatile choice for any meal.

    This dish also allows for personalization, as you can easily adjust the spice levels or incorporate your favorite vegetables. Whether you enjoy a mild flavor or crave a spicy kick, Beef and Bean Chili can be tailored to your taste. It's a fantastic recipe for meal prepping or feeding a crowd, and it often tastes even better the next day after the flavors have had time to meld.

    Ingredients:

    • 1 pound ground beef
    • 1 medium onion, chopped
    • 2 cloves garlic, minced
    • 1 can (15 oz) kidney beans, drained and rinsed
    • 1 can (15 oz) black beans, drained and rinsed
    • 1 can (28 oz) diced tomatoes
    • 2 tablespoons chili powder
    • 1 teaspoon cumin
    • 1 teaspoon smoked paprika
    • Salt and pepper, to taste
    • 2 cups beef broth
    • Optional toppings: shredded cheese, sour cream, chopped green onions

    In a large pot or Dutch oven, brown the ground beef over medium heat until fully cooked. Drain any excess fat, then add the chopped onion and garlic, sautéing until softened. Stir in the kidney beans, black beans, diced tomatoes, chili powder, cumin, smoked paprika, salt, pepper, and beef broth.

    Bring the mixture to a simmer, then reduce the heat and let it cook uncovered for about 30 minutes, stirring occasionally, until the chili thickens and the flavors blend together.

    When preparing Beef and Bean Chili, consider letting it simmer longer for a richer flavor, as the taste often improves with time. You can also experiment with different beans or add extra vegetables like bell peppers or corn for added texture.

    If you're looking to make the dish vegetarian, you can substitute the ground beef with lentils or more beans. Additionally, serving it with various toppings allows everyone to customize their chili to their liking.

    Stuffed Bell Peppers

    stuffed bell pepper recipe

    Stuffed bell peppers are a delightful and nutritious meal option that combines the bold flavors of ground beef and spices with the fresh crispiness of bell peppers. Often served as a main dish, this recipe isn't only easy to prepare but also a fantastic way to incorporate vegetables into your meal. The vibrant colors of the bell peppers can brighten up your dinner table and make for a visually appealing presentation.

    The beauty of stuffed bell peppers lies in their versatility. You can customize the filling to suit your taste, whether you want to add rice, quinoa, or even beans for extra texture and flavor. This dish is perfect for a family dinner, making it both satisfying and fun for everyone.

    Plus, they can be made ahead of time and reheated, making it an excellent choice for busy weeknights or meal prepping for the week.

    • 4 large bell peppers (any color)
    • 1 pound ground beef
    • 1 cup cooked rice
    • 1 small onion, diced
    • 2 cloves garlic, minced
    • 1 can (15 oz) diced tomatoes, drained
    • 1 teaspoon chili powder
    • 1 teaspoon paprika
    • Salt and pepper to taste
    • 1 cup shredded cheese (cheddar or mozzarella)
    • Fresh parsley for garnish (optional)

    Preheat your oven to 375°F (190°C). Begin by slicing the tops off each bell pepper and removing the seeds and membranes. In a skillet over medium heat, cook the ground beef with the diced onion and minced garlic until the meat is browned and fully cooked.

    Drain any excess fat, then stir in the cooked rice, drained diced tomatoes, chili powder, paprika, salt, and pepper. Once everything is well combined, fill each bell pepper with the beef mixture and place them upright in a baking dish.

    Sprinkle shredded cheese on top of each filled pepper, then cover the dish with foil and bake for 25 minutes. Remove the foil and bake for an additional 10 minutes, or until the cheese is bubbly and golden.

    When making stuffed bell peppers, consider pre-cooking the peppers slightly before filling them. This can help guarantee that they're tender throughout by the time they finish baking.

    Additionally, feel free to get creative with the filling: add in vegetables like corn or zucchini, try different spices to match your taste preferences, or experiment with various types of cheese. Leftovers can be stored in the refrigerator for several days and make for a fantastic lunch option!

    Ground Beef Stroganoff

    creamy beef pasta dish

    Ground Beef Stroganoff is a classic comfort dish that combines the savory flavors of tender beef, creamy sauce, and hearty mushrooms. This dish, originating from Russia, has been embraced by many cultures, making it a popular choice for family dinners. It isn't only quick to prepare but also delicious, comforting, and can be served over various bases, such as egg noodles, rice, or mashed potatoes.

    This recipe showcases the rich flavors of ground beef combined with a creamy, tangy sauce that complements the umami taste of mushrooms. It's an ideal meal for busy weekdays, as it can be prepared in under 30 minutes. With simple ingredients and straightforward steps, you'll have a satisfying dish on the table in no time.

    Ingredients:

    • 1 pound ground beef
    • 1 medium onion, chopped
    • 2 cloves garlic, minced
    • 8 ounces mushrooms, sliced
    • 1 cup beef broth
    • 1 cup sour cream
    • 2 tablespoons all-purpose flour
    • 2 tablespoons Worcestershire sauce
    • Salt and pepper to taste
    • Egg noodles or rice for serving
    • Fresh parsley, chopped (for garnish)

    In a large skillet, brown the ground beef over medium-high heat until fully cooked, breaking it apart with a spatula. Drain excess fat if necessary, then add the chopped onion, garlic, and sliced mushrooms. Sauté until the onion is translucent and the mushrooms have released their moisture.

    In a small bowl, combine the beef broth, sour cream, flour, and Worcestershire sauce, then stir this mixture into the skillet. Cook for an additional 5-7 minutes, allowing the sauce to thicken slightly. Serve over cooked egg noodles or rice and garnish with fresh parsley.

    When making Beef Stroganoff, consider using high-quality beef broth for a richer flavor. You can experiment with the type of mushrooms used—cremini, shiitake, or button mushrooms all work well.

    Additionally, for a bit of added depth, try incorporating a splash of white wine into the mixture before adding the broth. Remember to adjust seasoning to taste, and feel free to add cooked vegetables like peas or bell peppers for extra nutrition and color.

    One-Pan Beef and Rice

    quick and easy dinner

    One-Pan Beef and Rice is a hearty, delicious dish perfect for a weeknight dinner. The beauty of this recipe lies in its simplicity and the one-pan method, which minimizes cleanup while still packing in tons of flavor. With tender ground beef, fluffy rice, and a mix of vibrant vegetables, this dish can be a comforting meal that pleases the whole family.

    This recipe is versatile, allowing you to customize it based on your preference for spices, vegetables, or even additional protein. Plus, it comes together quickly, making it a fantastic option for busy nights. Serve it with a sprinkle of fresh herbs or a side of your favorite salad for a complete meal.

    Ingredients:

    • 1 pound ground beef
    • 1 cup long-grain rice
    • 1 onion, diced
    • 2 cloves garlic, minced
    • 1 bell pepper, diced
    • 1 can (14.5 ounces) diced tomatoes, undrained
    • 2 cups beef broth
    • 1 teaspoon paprika
    • 1 teaspoon cumin
    • Salt and pepper to taste
    • Olive oil for cooking
    • Fresh parsley or cilantro for garnish (optional)

    In a large skillet or pan, heat a drizzle of olive oil over medium heat. Add the diced onion and bell pepper and sauté until softened, about 3-4 minutes. Stir in the minced garlic and ground beef, breaking it up as it cooks until browned.

    Once the beef is cooked through, drain any excess fat if necessary. Add the rice, diced tomatoes, beef broth, paprika, cumin, salt, and pepper, and bring to a simmer. Cover and cook for about 20 minutes, or until the rice is tender and the liquid has been absorbed.

    For best results, let the dish sit covered for a few minutes after cooking to allow the flavors to meld. You can also add a splash of soy sauce or Worcestershire sauce for an extra depth of flavor.

    Feel free to swap in your favorite vegetables or use brown rice for a healthier option, adjusting cooking times as necessary. Keep an eye on the liquid levels to confirm the rice cooks evenly and doesn't dry out.

    Beef Enchiladas

    beef filled tortilla dish

    Beef enchiladas are a delicious and comforting dish that showcase the rich flavors of seasoned ground beef, wrapped in soft tortillas and topped with a zesty sauce and melted cheese. This traditional Mexican meal is perfect for family dinners or casual gatherings with friends. The combination of flavors—from the savory meat filling to the spicy and tangy enchilada sauce—makes for a satisfying and hearty meal that everyone will love.

    Making beef enchiladas is easier than you might think and can be tailored to suit your taste preferences. Whether you prefer spicy or mild, you can adjust the ingredients and sauce to create the perfect dish. It's an excellent way to use up leftovers or to prepare a dish in advance and freeze for later.

    Once baked, the enchiladas not only look stunning but also fill your kitchen with enticing aromas that will have your guests excitedly awaiting dinner.

    Ingredients:

    • 1 pound ground beef
    • 1 small onion, chopped
    • 2 cloves garlic, minced
    • 1 teaspoon ground cumin
    • 1 teaspoon chili powder
    • 1 cup shredded cheese (cheddar or Mexican blend)
    • 1 can (10 oz) enchilada sauce
    • 8 small flour or corn tortillas
    • Salt and pepper, to taste
    • Optional toppings: sour cream, diced tomatoes, sliced olives, chopped cilantro

    In a large skillet, brown the ground beef over medium heat until fully cooked; drain excess fat if necessary. Add the chopped onion and minced garlic to the skillet and sauté until the onion is translucent.

    Stir in cumin, chili powder, salt, and pepper, mixing well. Remove from heat and combine half of the cheese with the beef mixture.

    To assemble, pour a third of the enchilada sauce into the bottom of a baking dish. Spoon the beef mixture into each tortilla, roll them up, and place them seam-side down in the dish.

    Pour the remaining enchilada sauce over the tortillas and top with the rest of the cheese. Bake in a preheated oven at 350°F (175°C) for about 20 minutes or until the cheese is melted and bubbly.

    For the best flavor, allow the enchiladas to sit for a few minutes before serving; this helps the flavors meld together. You can also customize the filling with black beans, corn, or different types of cheese for added variety.

    If you're looking to save time, prepare the beef mixture and sauce ahead of time, so you can quickly assemble and bake the enchiladas when you're ready to eat. Enjoy your delicious creation!

    Shepherd's Pie

    comfort food with layers

    Shepherd's Pie is a classic comfort food that originated in the United Kingdom and is beloved by many for its hearty ingredients and rich flavors. This dish is traditionally made with ground lamb, but ground beef has become a popular alternative, making it accessible to various palates. The combination of savory meat, vegetables, and creamy mashed potatoes creates a satisfying meal that's perfect for family dinners or gatherings.

    Preparing Shepherd's Pie involves layering flavorful ground beef with vegetables, often seasoned with herbs, and topping it off with a smooth layer of mashed potatoes. This blend not only provides delicious flavors but also presents a beautiful contrast in texture. Baking it until the top is golden brown adds an irresistible charm to the dish that will have everyone coming back for seconds.

    Ingredients:

    • 1 pound ground beef
    • 1 onion, diced
    • 2 carrots, diced
    • 2 cloves garlic, minced
    • 1 cup frozen peas
    • 2 tablespoons tomato paste
    • 1 teaspoon Worcestershire sauce
    • 1 cup beef broth
    • 4 cups mashed potatoes (prepared with butter and milk)
    • Salt and pepper to taste
    • 2 tablespoons olive oil
    • Fresh parsley for garnish (optional)

    In a large skillet, heat olive oil over medium heat. Add the diced onions and carrots, cooking until softened, approximately 5 minutes. Add the minced garlic and ground beef, breaking up the meat as it cooks.

    Once browned, stir in the tomato paste, Worcestershire sauce, beef broth, and frozen peas. Season with salt and pepper, then let the mixture simmer for about 10 minutes until the sauce thickens slightly.

    Transfer the meat mixture to a baking dish and spoon the creamy mashed potatoes over the top, smoothing them out evenly. Bake in a preheated oven at 400°F (200°C) for about 25-30 minutes or until the top is golden brown.

    For an added layer of flavor, consider mixing in a splash of red wine when simmering the beef mixture. Additionally, topping the mashed potatoes with a sprinkle of cheese before baking can provide a delightful crust.

    Don't hesitate to experiment with different vegetables like corn or green beans, or swap out seasonings based on your preference. Using leftover mashed potatoes not only saves time but also enhances the richness of the dish, making it even more delicious.

    Beef and Vegetable Stir-Fry

    beef and vegetable stir fry

    Ground beef and vegetable stir-fry is a quick and versatile dish that makes for a satisfying meal any day of the week. Combining the rich, savory flavor of ground beef with colorful and crunchy vegetables, this recipe isn't only delicious but also packed with nutrients.

    It's perfect for busy weeknights when you need something hearty yet simple to throw together. By using a variety of vegetables, you can customize the dish to suit your preferences or whatever you have on hand.

    The wonderful thing about a stir-fry is its speed; you can have a meal ready in under 30 minutes! This recipe will show you how to create a flavorful sauce that pairs beautifully with the beef and vegetables.

    Serving this stir-fry over rice or noodles will help to soak up the delicious sauce, making every bite a tasty experience. So, gather your ingredients and get ready for a wholesome dinner that the whole family will enjoy.

    • 1 pound ground beef
    • 2 cups mixed vegetables (bell peppers, broccoli, carrots, snap peas)
    • 1 onion, sliced
    • 3 cloves garlic, minced
    • 2 tablespoons soy sauce
    • 1 tablespoon oyster sauce (optional)
    • 1 tablespoon cornstarch
    • 1 cup beef broth or water
    • 2 tablespoons vegetable oil
    • Salt and pepper to taste
    • Cooked rice or noodles for serving

    In a large skillet or wok, heat the vegetable oil over medium-high heat. Add the ground beef and cook until browned, breaking it apart with a spatula.

    Once the beef is nearly cooked through, add the sliced onion and minced garlic, stirring until the onion becomes translucent. Next, toss in the mixed vegetables and cook for another 3-4 minutes until they're tender but still crisp.

    In a small bowl, mix the soy sauce, oyster sauce (if using), cornstarch, and beef broth; pour this mixture into the skillet and stir until the sauce thickens. Season with salt and pepper to taste, and serve immediately over rice or noodles.

    When preparing this dish, feel free to experiment with different vegetables based on what's in season or what you have available. Fresh options like zucchini, bok choy, or mushrooms can all add unique flavors and textures.

    Also, consider cooking the vegetables separately for a minute or two before adding them to the beef to retain their brightness and crunch. Finally, if you like your stir-fry spicy, feel free to add some red pepper flakes or a dash of sriracha for an extra kick!

  • 10 Healthy Gluten-Free Snacks for On-the-Go

    When you're on the go, healthy gluten-free snacks can keep your energy up and cravings at bay. Try almonds and trail mix for a nutritious crunch, or rice cakes with nut butter for a creamy combo. Greek yogurt parfaits and veggie sticks with hummus make tasty picks too. Don't forget hard-boiled eggs, cheese sticks, and gluten-free protein bars for protein boosts. Fresh fruit with nut butter adds a sweet touch. There's plenty more to discover to suit your busy lifestyle.

    Almonds and Trail Mix

    nutty snack combination delight

    Almonds and trail mix aren't just delicious but also incredibly nutritious, serving as a fantastic gluten-free snack option. Combining the rich flavor of almonds with a variety of other nuts, seeds, and dried fruits results in an energizing mix perfect for any time of the day. This snack is great for on-the-go munching, whether you're hiking, at the office, or simply craving something healthy at home.

    Making your own trail mix allows you to customize it to your taste and dietary needs. You can adjust the proportions of each ingredient or add your favorite flavors to create the perfect blend. This recipe is straightforward and can be made in minutes, providing a satisfying crunch and an assortment of vitamins and minerals.

    • 1 cup raw almonds
    • 1 cup cashews
    • 1 cup walnuts
    • 1 cup sunflower seeds
    • 1 cup dried cranberries
    • 1 cup dark chocolate chips (optional)
    • 1 tsp cinnamon (optional)
    • Sea salt to taste

    Preheat your oven to 350°F (175°C). Spread the almonds, cashews, walnuts, and sunflower seeds on a baking sheet and toast them in the oven for about 10-12 minutes, stirring halfway through, until they're lightly golden and fragrant. Remove from the oven and allow them to cool completely.

    Once cooled, combine the toasted nuts and seeds in a large bowl with dried cranberries and dark chocolate chips (if using). Mix well and sprinkle with cinnamon and sea salt to taste.

    When making your trail mix, consider adjusting the ingredients based on what's available or your personal preferences. You can substitute or add different nuts such as pecans, hazelnuts, or pistachios. Additionally, for a touch of sweetness, you may opt for alternative dried fruits like apricots or mangoes.

    Store the trail mix in an airtight container to maintain freshness, and feel free to experiment with spices or nut butters for an extra flair!

    Rice Cakes With Nut Butter

    nutty rice cake snack

    Rice cakes with nut butter are an effortlessly satisfying gluten-free snack that's perfect for any time of the day. They're light and crunchy, providing the perfect base for creamy nut butters like almond, cashew, or peanut. With various toppings and flavors to explore, you can customize each rice cake to your liking.

    Not only are they delicious, but they also offer a delightful combination of textures and nutrients that make them both filling and energizing. This snack is quick to prepare, making it an excellent option for those with busy lifestyles or anyone looking for a simple treat. You can enjoy them as a midday snack, breakfast, or even a light dessert when topped with fruits.

    Pairing rice cakes with nut butter delivers a healthy dose of protein and healthy fats, helping you to stay satisfied and curb cravings between meals.

    • Rice cakes
    • Nut butter of choice (almond, peanut, or cashew)
    • Optional toppings (sliced bananas, berries, honey, or chia seeds)

    Start by selecting your favorite rice cakes and placing them on a clean surface. Using a butter knife or a spoon, spread a generous layer of nut butter over one side of each rice cake.

    If desired, add any optional toppings such as sliced bananas, fresh berries, a drizzle of honey, or a sprinkle of chia seeds for extra flavor and nutrition. Enjoy your delicious creation right away or pack them for a snack later on!

    When preparing this dish, feel free to experiment with different nut butters and toppings to find your favorite combination. You can also try heating the rice cakes slightly in the microwave for a warm and gooey dessert style treat.

    Remember to keep any leftovers in an airtight container to maintain their crunchiness, although these tasty bites are likely to be devoured quickly!

    Greek Yogurt Parfaits

    layered yogurt fruit dessert

    Greek yogurt parfaits are a delicious and nutritious snack, perfect for any time of day. They combine the creaminess of Greek yogurt with layers of fresh fruits and crunchy toppings, creating a delightful mix of flavors and textures. This snack isn't only gluten-free but also packed with protein and essential nutrients.

    It's versatile, allowing you to customize it with your favorite fruits, nuts, and seeds, making it an ideal choice for breakfast, a midday snack, or a light dessert.

    To make a Greek yogurt parfait, you'll want to start with high-quality Greek yogurt as the base. Full-fat or non-fat options both work well, depending on your dietary preferences. Layer the yogurt with fresh berries, such as strawberries, blueberries, or raspberries, and add a sprinkle of granola or nuts for an added crunch.

    The beauty of this recipe is that you can mix and match ingredients according to what you have on hand, ensuring that it always stays delicious and invigorating.

    • 2 cups Greek yogurt
    • 1 cup mixed berries (strawberries, blueberries, raspberries)
    • 1/2 cup gluten-free granola or nuts (almonds, walnuts)
    • 2 tablespoons honey or maple syrup (optional)
    • 1 teaspoon vanilla extract (optional)
    • Fresh mint leaves for garnish (optional)

    In a clear glass or bowl, start by adding a layer of Greek yogurt at the bottom. Follow with a layer of your chosen mixed berries, then add a layer of gluten-free granola or nuts.

    Repeat the layers until the glass or bowl is full, finishing with a layer of berries on top. Drizzle honey or maple syrup over the top if desired, and garnish with mint leaves for added freshness.

    When preparing your Greek yogurt parfaits, consider using seasonal fruits for the best flavor and nutrition. You can also experiment with different flavors of yogurt or add spices like cinnamon for an extra kick.

    For a vegan version, substitute Greek yogurt with coconut or almond-based yogurt and choose plant-based granola. Enjoy mixing and matching your favorite ingredients to create a parfait that suits your taste!

    Veggie Sticks With Hummus

    healthy snack option

    Veggie sticks with hummus make for a delightful and healthy snack that not only satisfies hunger but also provides a burst of flavor and nutrition. This dish is incredibly versatile, allowing you to select a variety of fresh vegetables based on your preferences. Crunchy cucumbers, colorful bell peppers, crisp celery, and vibrant carrots are just a few invigorating options that pair beautifully with creamy hummus.

    Preparing veggie sticks with hummus is straightforward and quick, making it an ideal snack for any time of the day, whether you're at home, at the office, or on the go. Making your hummus from scratch can elevate the dish even more, adding a personal touch that store-bought varieties often lack. Additionally, this snack can be easily personalized with various seasonings or additional ingredients mixed into the hummus to suit your taste.

    Ingredients:

    • 1 cup of hummus (homemade or store-bought)
    • 1 large cucumber
    • 2-3 medium carrots
    • 1 bell pepper (any color)
    • 2 stalks of celery
    • Optional: cherry tomatoes, radishes, or any other favorite veggies

    To prepare, begin by washing and peeling (if desired) the vegetables. Cut the cucumber into sticks, slice the carrots into thin batons, chop the bell pepper into strips, and cut the celery into segments. If you're including cherry tomatoes or radishes, leave them whole or slice them as preferred.

    Arrange all the veggie sticks on a plate and serve with hummus in a small bowl for dipping.

    When serving veggie sticks with hummus, consider preparing a variety of hummus flavors by blending in extras like roasted garlic, sun-dried tomatoes, or herbs such as basil and parsley. This not only adds exciting flavors but also keeps things interesting, especially if you're enjoying them as a snack throughout the week.

    Additionally, storing any leftover cut veggies in an airtight container will maintain their freshness for a few days, making them readily available for quick snacking.

    Popcorn Seasoned With Nutritional Yeast

    nutritional yeast popcorn seasoning

    Popcorn seasoned with nutritional yeast is a delicious and healthy snack that offers a cheesy flavor without the dairy. This gluten-free treat is high in fiber and packed with nutrients, making it an ideal choice for those seeking a nutritious alternative to traditional snacks.

    Not only does nutritional yeast add a savory taste to your popcorn, but it's also a great source of B-vitamins, protein, and other essential nutrients. Making popcorn at home allows you to control the ingredients and the seasonings, guaranteeing that you avoid any unwanted additives or excess salt.

    Whether you enjoy it while binge-watching your favorite show or as a midday pick-me-up, this popcorn recipe is simple, satisfying, and can be customized to suit your taste preferences.

    • 1/2 cup popcorn kernels
    • 2 tablespoons olive oil or coconut oil
    • 1/4 cup nutritional yeast
    • 1/2 teaspoon garlic powder (optional)
    • 1/2 teaspoon onion powder (optional)
    • Salt, to taste

    In a large pot with a lid, heat the olive oil over medium heat. Once the oil is hot, add the popcorn kernels and cover the pot. Shake the pot occasionally to guarantee the kernels heat evenly.

    Once the popping slows down to about 2 seconds between pops, remove the pot from the heat. Carefully uncover the pot, allowing the steam to escape, and transfer the popcorn to a large bowl. While the popcorn is still warm, sprinkle the nutritional yeast, garlic powder, onion powder, and salt over the top. Toss gently until fully coated.

    To enhance the flavor, consider experimenting with different seasonings. You might add a sprinkle of smoked paprika for a hint of smokiness, or try chili powder for a spicy kick. Additionally, adjusting the amount of nutritional yeast based on your preference can help you achieve the perfect level of cheesiness.

    Don't forget to serve your seasoned popcorn right away for the best texture, as it can become stale if left sitting for too long.

    Energy Balls With Oats and Seeds

    nutritious oat seed snacks

    Energy balls are a fantastic snack option that combine taste and nutrition, making them a perfect choice for those leading busy lifestyles or looking for a healthy treat between meals. Packed with wholesome ingredients, these little bites provide a good balance of protein, fiber, and healthy fats, helping to keep your energy levels stable throughout the day.

    Making energy balls at home is incredibly easy, and they can be tailored to suit your flavor preferences by incorporating various seeds, nuts, or spices. In this recipe, we'll focus on oats and seeds as the main components, creating a crunchy yet chewy snack that's gluten-free and naturally sweetened with honey or maple syrup.

    These energy balls can be stored in the fridge for quick access and are great for post-workout fuel or as a satisfying midday snack. With just a few simple steps, you can whip up a batch that will likely become a new favorite!

    • 1 cup rolled oats
    • ½ cup nut butter (peanut, almond, or cashew)
    • ¼ cup honey or maple syrup
    • ¼ cup chia seeds
    • ¼ cup sunflower seeds
    • ¼ cup pumpkin seeds (pepitas)
    • 1 teaspoon vanilla extract
    • A pinch of salt

    In a medium mixing bowl, combine the rolled oats, nut butter, honey or maple syrup, chia seeds, sunflower seeds, pumpkin seeds, vanilla extract, and salt. Stir the mixture thoroughly until all ingredients are well combined and sticky.

    Once mixed, use your hands to form small balls, about 1 inch in diameter, and place them on a parchment-lined baking sheet. Refrigerate for at least 30 minutes to firm up before enjoying.

    When preparing energy balls, feel free to get creative with the ingredients. You can add chocolate chips, dried fruits, or spices like cinnamon to personalize your snacks. If the mixture feels too dry, a little water or extra nut butter can help achieve the right consistency.

    On the other hand, if it's too wet, sprinkle in some additional oats or seeds. Remember to store the energy balls in an airtight container in the fridge, where they'll stay fresh for up to a week!

    Hard-Boiled Eggs

    perfectly cooked egg dish

    Hard-boiled eggs are a nutritious and satisfying snack that can easily fit into a gluten-free diet. They aren't only rich in protein but also contain essential vitamins and minerals, making them an excellent option for a quick grab-and-go snack.

    With just a little preparation, you can have these delicious eggs ready to enjoy at any time throughout the day, whether you're heading out for work, enjoying a picnic, or simply looking for a healthy treat at home.

    The beauty of hard-boiled eggs lies in their versatility. They can be eaten plain, seasoned with a pinch of salt and pepper, or dressed up in various ways to suit different tastes. Beyond being a snack, hard-boiled eggs can also serve as a base for other recipes, such as egg salad or as a topping for salads and grain bowls, earning their rightful place in a health-conscious kitchen.

    • Eggs (large)
    • Water
    • Salt (optional)
    • Ice (for the ice bath)

    To cook hard-boiled eggs, start by placing your desired number of eggs in a single layer at the bottom of a saucepan. Fill the pan with enough water to cover the eggs by about an inch. Bring the water to a boil over medium-high heat.

    Once boiling, cover the saucepan and remove it from the heat. Allow the eggs to sit in the covered saucepan for 9 to 12 minutes, depending on how firm you prefer the yolk. After the time has elapsed, transfer the eggs to a bowl filled with ice water to stop the cooking process.

    For the best results, make certain to use eggs that are a bit older, as fresher eggs can be harder to peel after boiling. Additionally, you can experiment with cooking times to find your perfect level of doneness.

    If you plan to make hard-boiled eggs in larger quantities, consider setting a timer to guarantee they're cooked consistently. The ice bath not only helps in peeling the eggs but also keeps them cool until you're ready to enjoy them!

    Cheese Sticks or Mini Cheese Wheels

    cheese snacks variety selection

    Cheese sticks and mini cheese wheels aren't only delicious but also make for a perfect gluten-free snack that can be enjoyed at any time of the day. These snacks are versatile and can cater to a variety of tastes, whether you prefer a simple cheese stick or a more colorful mini cheese wheel infused with herbs and spices. They offer a protein-rich alternative to traditional snack options and are sure to please both adults and children.

    Making cheese sticks or mini cheese wheels at home allows you to customize flavors and guarantee freshness. By using high-quality cheeses, you can elevate this simple snack to a gourmet level, adding any herbs or spices that appeal to your palate. Not only do these snacks deliver on taste, but they also provide a healthy option that can satisfy cravings without the gluten.

    Ingredients:

    • 8 ounces of mozzarella cheese (string cheese works well)
    • 1 cup of shredded cheddar cheese
    • 1 tablespoon of Italian seasoning (optional)
    • 1 teaspoon of garlic powder (optional)
    • Salt, to taste
    • Olive oil (for brushing)
    • Parchment paper for baking

    Slice the mozzarella cheese into sticks or cut the cheddar into small circles using a cookie cutter to create mini cheese wheels. If using Italian seasoning or garlic powder, mix these with a pinch of salt in a bowl. Preheat your oven to 375°F (190°C) and line a baking sheet with parchment paper.

    Arrange the cheese sticks or wheels on the baking sheet, lightly brush them with olive oil, and sprinkle the seasoning mixture on top. Bake for about 10-12 minutes or until the cheese is melted and golden around the edges. Allow to cool slightly before serving.

    For the best results, consider experimenting with different types of cheese or additional flavorings such as paprika or chili powder. You can also incorporate a variety of herbs like rosemary or thyme into the cheese mixture for added depth.

    If you want crispy cheese sticks, allow them to bake a little longer, but keep an eye on them to avoid burning. These snacks can be enjoyed warm or stored in an airtight container in the refrigerator for a quick grab-and-go option later.

    Gluten-Free Protein Bars

    healthy snack option available

    When searching for convenient and nutritious snacks, gluten-free protein bars stand out as an excellent option for anyone leading an active lifestyle or just looking to maintain a balanced diet. Packed with protein and made from wholesome ingredients, they aren't only satisfying but also versatile.

    You can easily customize them to suit your taste preferences by adding different nuts, seeds, or dried fruits. Not only do these bars provide a delicious treat, but they can also keep your energy levels stable throughout the day.

    Making your own gluten-free protein bars at home guarantees that you know exactly what's going into your body, allowing you to avoid unwanted additives or preservatives often found in store-bought versions. This recipe is straightforward and requires minimal cooking skills, making it perfect for beginners.

    In just a short time, you can whip up a batch of these nutrient-dense bars to keep on hand for snacks or post-workout recovery.

    • 1 cup gluten-free rolled oats
    • 1/2 cup nut butter (almond, peanut, or sunflower)
    • 1/2 cup honey or maple syrup
    • 1/4 cup protein powder (whey or plant-based)
    • 1/2 cup chopped nuts (almonds, walnuts, or pecans)
    • 1/4 cup chocolate chips or dried fruit (optional)
    • 1 teaspoon vanilla extract
    • A pinch of salt

    In a large mixing bowl, combine the gluten-free rolled oats, nut butter, honey or maple syrup, protein powder, chopped nuts, chocolate chips or dried fruit, vanilla extract, and a pinch of salt. Stir everything together until well mixed, then transfer the mixture into a lined 8×8-inch baking dish.

    Press it down firmly to guarantee even distribution, and refrigerate for at least 1-2 hours before cutting into bars.

    For enhanced flavor and texture, consider adding spices like cinnamon or nutmeg to your mixture. If you don't have a specific type of nut butter on hand, feel free to substitute it with another variety, as this will change the taste and creaminess of the bars.

    Additionally, wrapping individual bars in parchment paper helps with portion control and makes them easier to grab on-the-go, keeping them fresh in the refrigerator for up to a week or in the freezer for longer storage.

    Fresh Fruit and Nut Butter

    nut butter with fresh fruit

    Fresh fruit paired with nut butter makes for a delicious and nutritious gluten-free snack that's quick and easy to prepare. The combination of fresh fruit, which is rich in vitamins and antioxidants, with nut butter, packed with healthy fats and protein, creates a satisfying treat that can help keep your energy levels stable. Not only is it perfect for a mid-morning pick-me-up, but it also makes an excellent post-workout snack or a guilt-free dessert.

    You can choose any fruit you like—apples, bananas, pears, or even berries work brilliantly. For the nut butter, almond, peanut, or cashew butter all offer different flavors and textures, allowing you to customize your snack. Feel free to add a sprinkle of cinnamon or a drizzle of honey for an extra kick of flavor! This simple yet wholesome combination will leave you feeling nourished and satisfied.

    • Fresh fruit of choice (apple, banana, pear, etc.)
    • Nut butter (almond, peanut, cashew, etc.)
    • Optional: honey
    • Optional: cinnamon
    • Optional: dark chocolate chips or nuts for topping

    To prepare, simply wash and slice your chosen fresh fruit into manageable pieces. If you're using apples or pears, you can remove the core and slice them into wedges. Serve the fruit slices with a generous dollop of nut butter on the side for dipping or spread the nut butter directly onto the fruit for a delightful pop of flavor.

    When making this snack, verify you choose nut butter that's free of added sugars or oils for the healthiest option. You can store leftovers in an airtight container in the refrigerator for a quick grab-and-go snack later.

    Feel free to experiment with different fruit and nut butter combinations, and don't hesitate to add toppings like seeds or dried fruit to enhance both flavor and nutrition!

  • 12 Quick Instant Pot Meals for Instant Satisfaction

    If you're looking for quick and satisfying meals, the Instant Pot has you covered! Imagine whipping up creamy Chicken and Rice or savory Beef Stroganoff in under an hour. Or how about a zesty Taco Soup and hearty Lentil Chili for a cozy night in? With dishes like Garlic Lemon Chicken Thighs and Sweet and Sour Pork, you'll impress your family with minimal effort. Want to discover even more delicious options? You won't want to miss what's next!

    Instant Pot Beef Stroganoff

    quick and easy dinner

    Instant Pot Beef Stroganoff is a comforting and delicious dish that combines tender beef with a creamy sauce and earthy mushrooms, all served over a bed of noodles. This meal isn't only satisfying but also quick to prepare, thanks to the magic of the Instant Pot. In just under an hour, you can have a hearty dinner on the table that tastes like it has been simmering all day.

    The key to this recipe is the Instant Pot's pressure cooking feature, which allows for the beef to become tender quickly while infusing it with rich flavors. The combination of beef broth, sour cream, and spices creates a luscious sauce that clings perfectly to the noodles. Whether it's a weeknight meal or a cozy family gathering, Instant Pot Beef Stroganoff is sure to impress.

    Ingredients:

    • 1 lb beef stew meat, cut into bite-sized pieces
    • 1 cup sliced mushrooms
    • 1 medium onion, chopped
    • 2 cloves garlic, minced
    • 1 cup beef broth
    • 1 tablespoon Worcestershire sauce
    • 1 teaspoon Dijon mustard
    • 2 cups egg noodles
    • 1 cup sour cream
    • Salt and pepper to taste
    • 2 tablespoons olive oil
    • Fresh parsley, chopped (for garnish)

    Add olive oil to the Instant Pot and set it to the sauté function. Once hot, brown the beef stew meat in batches to avoid overcrowding, seasoning with salt and pepper. After browning, remove the meat and set aside.

    In the same pot, sauté the onions and garlic until translucent, then add the mushrooms and cook until softened. Return the beef to the pot, pour in the beef broth, Worcestershire sauce, and Dijon mustard, and stir.

    Add the egg noodles on top without stirring. Seal the lid, set the Instant Pot to high pressure for 8 minutes, and then do a quick release. Finally, stir in the sour cream until smooth, and serve garnished with fresh parsley.

    When making Beef Stroganoff in the Instant Pot, it's important to remember not to overcook the beef, as it can become tough. For best results, choose a well-marbled cut of beef for tenderness.

    Additionally, you can customize the dish by adding more vegetables like peas or carrots for extra nutrition. If you prefer a thicker sauce, you can also use a cornstarch slurry after pressure cooking, which will help achieve the desired consistency. Enjoy your delicious and quick Beef Stroganoff!

    Creamy Chicken and Rice

    creamy chicken and rice

    Creamy chicken and rice is a delightful one-pot meal that's perfect for busy weeknights when you want something hearty and satisfying without spending hours in the kitchen. With the Instant Pot, you can achieve that creamy, comforting texture in just a fraction of the time it would normally take. The combination of tender chicken and fluffy rice, all enveloped in a luscious cream sauce, will have your family asking for seconds.

    What makes this dish even more appealing is its versatility. You can easily customize it by adding your favorite vegetables or adjusting the seasoning to suit your taste preferences. In just one pot, you can create a rich and satisfying dinner that the whole family will love. Let's jump into the recipe and discover how to whip up this creamy delight!

    • 1 lb boneless, skinless chicken breasts
    • 1 cup long-grain white rice
    • 1 onion, diced
    • 3 cloves garlic, minced
    • 2 cups chicken broth
    • 1 cup heavy cream
    • 1 cup frozen peas and carrots (or fresh, if preferred)
    • 1 teaspoon salt
    • 1/2 teaspoon black pepper
    • 1 teaspoon garlic powder
    • 1 teaspoon onion powder
    • 1 teaspoon dried thyme
    • 2 tablespoons olive oil
    • Fresh parsley, chopped (for garnish)

    Start by setting your Instant Pot to the sauté mode and adding olive oil. Once hot, add the diced onion and minced garlic, sautéing until softened. Next, season the chicken breasts with salt, pepper, garlic powder, onion powder, and thyme, and add them to the pot along with the rice, chicken broth, and frozen peas and carrots.

    Seal the pot and cook on high pressure for 10 minutes. Once the timer goes off, allow for a natural release for 5 minutes, then quick-release any remaining steam. Open the lid, stir in the heavy cream, and let it thicken slightly before serving.

    To enhance your creamy chicken and rice dish, consider adding a splash of lemon juice for brightness or some grated Parmesan for extra richness. If you prefer a thicker sauce, let the dish simmer for a few more minutes on the sauté setting after adding the cream. You can also swap in brown rice, but remember to adjust the cooking time as brown rice generally takes longer to cook.

    Enjoy this dish with a side salad or some crusty bread to soak up the delicious cream sauce!

    Zesty Taco Soup

    spicy and flavorful soup

    Zesty Taco Soup is a vibrant and hearty dish that's perfect for busy weeknights or a cozy gathering with friends and family. This one-pot meal isn't only quick to prepare but also rich in flavor, combining savory spices, tender beans, and juicy meat, all enriched by the zesty tang of tomatoes and green chilies. The beauty of making this soup in an Instant Pot is that you can achieve maximum flavor in minimal time, while also freeing up your stovetop for other preparations.

    What makes this taco soup stand out is its versatility. Feel free to customize the ingredients according to your preferences. You can swap in ground turkey for a lighter option, add more vegetables for extra nutrition, or even make it vegetarian using plant-based protein. Whether served with tortilla chips, topped with cheese, or garnished with fresh cilantro, this dish is sure to become a go-to favorite in your household.

    Ingredients:

    • 1 lb ground beef (or turkey)
    • 1 onion, chopped
    • 1 bell pepper, chopped
    • 2 cloves garlic, minced
    • 1 can (15 oz) black beans, drained and rinsed
    • 1 can (15 oz) corn, drained
    • 1 can (14.5 oz) diced tomatoes with green chilies
    • 1 taco seasoning packet
    • 4 cups beef or vegetable broth
    • Salt and pepper to taste
    • Optional toppings: shredded cheese, sour cream, avocado, cilantro, tortilla chips

    Start by selecting the sauté function on your Instant Pot. Add the ground meat, onion, and bell pepper, cooking until the meat is browned and the vegetables are softened. Stir in the garlic, followed by the black beans, corn, diced tomatoes, taco seasoning, and broth. Close the lid and seal the vent, then cook on high pressure for 10 minutes.

    Once done, allow for natural pressure release for 5 minutes before manually releasing any remaining pressure. Stir the soup, adjust seasoning as needed, and serve hot with your choice of toppings.

    When making Zesty Taco Soup, consider preparing a batch ahead of time and refrigerating or freezing portions for easy meals later. The flavors often deepen and become even better after a day in the fridge, so it can be a fantastic make-ahead option.

    Additionally, don't hesitate to play with the spice levels; adding jalapeños or using a spicier taco seasoning can elevate the heat if that's your preference!

    Hearty Lentil Chili

    delicious nutritious lentil dish

    Hearty Lentil Chili is a perfect choice for anyone looking for a nutritious, filling meal that comes together quickly in your Instant Pot. This plant-based dish is packed with protein and fiber, thanks to the lentils and beans, while a medley of spices and vegetables gives it a robust flavor that's sure to satisfy. Ideal for weeknight dinners or meal prep, this chili can be customized with your favorite toppings, making it a versatile and delicious option for varying tastes.

    Not only is this dish hearty and comforting, but it's also incredibly easy to make. With minimal prep needed and the Instant Pot doing most of the work, you can have a warm, inviting bowl of lentil chili ready in under an hour. Serve it with some crusty bread or over rice, and you'll have a meal that's both wholesome and hearty enough to keep you full and satisfied.

    Ingredients:

    • 1 tablespoon olive oil
    • 1 onion, diced
    • 2 cloves garlic, minced
    • 1 bell pepper, diced
    • 2 carrots, diced
    • 2 celery stalks, diced
    • 1 can (14.5 oz) diced tomatoes, with juice
    • 1 cup dried lentils (green or brown, rinsed)
    • 1 can (15 oz) kidney beans, drained and rinsed
    • 4 cups vegetable broth
    • 2 tablespoons chili powder
    • 1 teaspoon cumin
    • 1 teaspoon smoked paprika
    • 1/2 teaspoon salt
    • 1/4 teaspoon black pepper
    • Optional toppings: chopped cilantro, avocado, shredded cheese, or sour cream

    Set your Instant Pot to the sauté mode and heat the olive oil. Add the diced onion, garlic, bell pepper, carrots, and celery, sautéing for about 5-7 minutes until the vegetables are softened.

    Next, add in the diced tomatoes, lentils, kidney beans, vegetable broth, and all the spices. Stir well to combine, then seal the lid and set the Instant Pot to cook on high pressure for 15 minutes.

    Once the cooking time is complete, allow the pressure to release naturally for about 10 minutes before manually releasing any remaining pressure.

    One important tip when making Hearty Lentil Chili in the Instant Pot is to verify that you rinse the lentils and beans before adding them to the pot to remove any excess starch or impurities. This helps enhance the flavor and texture of the chili.

    Additionally, feel free to adjust the spices according to your taste preferences or add more vegetables like zucchini or corn for added flavor and nutrition. If you prefer a thicker consistency, you can puree a portion of the chili with an immersion blender or let it simmer on sauté mode for a few extra minutes after pressure cooking.

    Enjoy your delicious homemade chili!

    Garlic Lemon Chicken Thighs

    zesty chicken thigh recipe

    If you're looking for a delicious and quick meal, Garlic Lemon Chicken Thighs are the perfect choice. This dish isn't only packed with flavor, but it also cooks efficiently in the Instant Pot, which means you'll spend less time in the kitchen and more time enjoying your meal.

    The combination of garlic and lemon creates a bright and zesty flavor profile that will have your taste buds singing. Plus, using chicken thighs guarantees that the meat remains juicy and tender, making it a crowd-pleaser for any dinner table.

    Preparing this meal requires minimal effort, making it ideal for busy weeknights or lazy weekends. The Instant Pot speeds up the cooking process, allowing you to infuse the chicken with satisfying flavors in a fraction of the time it would take using traditional methods. Just gather the ingredients, set your pot, and soon enough, you'll have perfectly cooked chicken thighs that are great on their own or served alongside your favorite sides.

    Ingredients:

    • 4 bone-in, skin-on chicken thighs
    • 4 cloves garlic, minced
    • Juice and zest of 2 lemons
    • 1 teaspoon dried oregano
    • 1 teaspoon salt
    • 1/2 teaspoon black pepper
    • 1 tablespoon olive oil
    • 1 cup chicken broth
    • Fresh parsley, chopped (for garnish)

    Season the chicken thighs with salt, pepper, and oregano. Set your Instant Pot to "Sauté" mode and add the olive oil. Once hot, place the chicken thighs skin-side down and sear for about 4-5 minutes until golden brown.

    Remove the chicken and set aside. Add the minced garlic to the pot and sauté for 30 seconds until fragrant, then pour in the chicken broth and lemon juice, scraping any browned bits from the bottom. Return the chicken thighs to the pot, skin-side up, and select "Pressure Cook" mode for 10 minutes.

    Once done, let the pressure release naturally for 5 minutes, then switch to quick release. Garnish with lemon zest and fresh parsley before serving.

    For the best results, make certain to pat the chicken thighs dry before seasoning to help achieve a fantastic sear. If you prefer a tangier flavor, you can add an extra splash of lemon juice before serving.

    Additionally, feel free to experiment with fresh herbs like thyme or rosemary to elevate the flavor further. Using a meat thermometer can help you confirm the chicken is cooked through, reaching an internal temperature of 165°F, perfect for juicy, tender meat.

    Vegetable Quinoa Pilaf

    healthy quinoa vegetable dish

    Vegetable Quinoa Pilaf is a delightful and nutritious dish that not only satisfies your hunger but also packs a punch regarding flavor. This easy-to-make recipe is perfect for busy weeknights when you want something wholesome yet quick. Using the Instant Pot allows you to achieve fluffy quinoa combined with colorful vegetables in a matter of minutes, making it an ideal meal option for anyone looking to eat well without the hassle of lengthy preparation.

    Incorporating a variety of vegetables not only enhances the nutritional value of the dish but also adds vibrant colors and textures. You can customize the vegetables based on what you have on hand or what's in season, making this pilaf versatile and accommodating to personal preferences. Serve it as a standalone dish, or pair it with grilled chicken, fish, or other proteins for a complete meal.

    • 1 cup quinoa, rinsed
    • 2 cups vegetable broth or water
    • 1 medium onion, diced
    • 2 cloves garlic, minced
    • 1 carrot, diced
    • 1 bell pepper, diced
    • 1 zucchini, diced
    • 1 teaspoon dried thyme
    • 1 teaspoon cumin
    • Salt and pepper to taste
    • 2 tablespoons olive oil
    • Fresh parsley, chopped (for garnish)

    In the Instant Pot, set it to the sauté function and heat the olive oil. Add the diced onion, garlic, carrot, bell pepper, and zucchini, cooking until the vegetables are softened, about 5 minutes.

    Stir in the rinsed quinoa, vegetable broth or water, thyme, cumin, salt, and pepper. Close the lid, set the valve to sealing, and cook on high pressure for 1 minute. Once it's done cooking, allow for a natural pressure release for 10 minutes before turning the valve to venting to release any remaining pressure. Fluff the pilaf with a fork and garnish with chopped parsley before serving.

    When cooking vegetable quinoa pilaf, feel free to get creative with your vegetable choices and herbs. Adding a splash of lemon juice before serving can brighten the dish.

    If you enjoy a bit of heat, consider adding red pepper flakes or your favorite hot sauce. Leftovers can be stored in the refrigerator and make for a great lunch option, so consider making a double batch to enjoy throughout the week!

    Classic Beef and Barley Soup

    hearty beef barley soup

    Classic Beef and Barley Soup is a hearty and comforting dish that combines tender chunks of beef, nutritious vegetables, and wholesome barley in a rich broth. This recipe makes use of an Instant Pot, allowing for a deeply flavorful soup that simmers in a fraction of the time it would require on the stove. The use of the pressure cooker helps to tenderize the beef while infusing the broth with robust flavors, making it perfect for busy weeknights or chilly evenings.

    What makes this soup extraordinary isn't only its hearty texture but also its versatility. You can easily customize the ingredients based on what you have on hand, whether that's swapping out the vegetables or adjusting the spices. The result is a deliciously satisfying bowl of soup that feels nurturing and soul-warming. Serve it with crusty bread for a complete meal that's sure to please the whole family.

    Ingredients:

    • 1 lb beef chuck, cut into 1-inch cubes
    • 1 cup barley, rinsed
    • 1 large onion, diced
    • 3 carrots, sliced
    • 3 celery stalks, sliced
    • 3 cloves garlic, minced
    • 6 cups beef broth
    • 1 tbsp tomato paste
    • 1 tsp dried thyme
    • 1 bay leaf
    • Salt and pepper to taste
    • 1 tbsp olive oil

    Add the olive oil to your Instant Pot and set it to the sauté mode. Once the oil is hot, add the beef cubes and sear them until browned on all sides, about 5 minutes.

    Add the onions, garlic, carrots, and celery, cooking for another 2-3 minutes until the onions become translucent. Stir in the tomato paste, barley, thyme, bay leaf, and beef broth, ensuring everything is well combined.

    Seal the Instant Pot and cook on high pressure for 30 minutes. Allow for a natural release for 10 minutes before manually releasing any remaining pressure. Open the lid, taste the soup, and adjust seasoning with salt and pepper as desired.

    For the best flavor, consider browning the beef thoroughly to create a deep, rich base. You can also add a splash of Worcestershire sauce or a few splashes of hot sauce to enhance the depth of flavor in the soup.

    If you're looking for a thicker soup, let it simmer on the sauté setting after the pressure cooking is complete to thicken up. Finally, feel free to top the soup with fresh herbs like parsley or thyme for an added freshness before serving.

    Spicy Sausage and Peppers

    sausage and peppers dish

    Spicy Sausage and Peppers is a vibrant and flavorful dish that highlights the rich taste of Italian sausage paired with colorful bell peppers and a kick of heat. This dish is perfect for a quick weeknight meal or a hearty gathering with family and friends. The Instant Pot makes it a breeze to cook, enhancing the flavors while guaranteeing everything is cooked to perfection in a fraction of the time it would take on the stovetop.

    The combination of spices, sweet bell peppers, and juicy sausage creates a satisfying meal that can be served on its own, over rice, or with crusty bread for dipping.

    Plus, this dish is versatile; feel free to adjust the heat level by using different types of sausage or adding extra crushed red pepper flakes for those who enjoy a fiery kick.

    • 1 pound spicy Italian sausage (sliced)
    • 2 bell peppers (sliced; any colors you prefer)
    • 1 medium onion (sliced)
    • 3 cloves garlic (minced)
    • 1 can (14.5 oz) diced tomatoes (with juice)
    • 1 teaspoon Italian seasoning
    • 1/2 teaspoon crushed red pepper flakes (optional, for extra heat)
    • Salt and pepper to taste
    • 1 tablespoon olive oil
    • Fresh parsley or basil for garnish (optional)

    Set your Instant Pot to sauté mode and add olive oil. Once heated, add the sliced sausage and cook until browned, about 3-5 minutes.

    Then, add the onion, garlic, and bell peppers, stirring often for another 3 minutes. Incorporate the diced tomatoes, Italian seasoning, crushed red pepper flakes (if using), salt, and pepper. Stir well to combine all ingredients. Secure the lid and set the Instant Pot to cook on high pressure for 5 minutes.

    Once finished, release the pressure manually, stir, and serve hot, garnished with fresh herbs as desired.

    For the best results, be sure that the sausage is browned well before adding the vegetables, as this will deepen the flavor of the dish. You can easily customize the vegetable mix to include other favorites like zucchini or mushrooms.

    Serve leftovers in a sandwich or wrap for a delicious next-day lunch, making this dish not only quick but also versatile in its use.

    Teriyaki Salmon With Rice

    salmon glazed with teriyaki

    Teriyaki Salmon With Rice is an easy and flavorful dish that can be whipped up in no time using the Instant Pot. With its sweet and savory flavors, this dish not only satisfies your taste buds but also delivers a healthy dose of omega-3 fatty acids from the salmon. Paired with fluffy rice, it makes for a quick weeknight dinner or an impressive meal for guests, all prepared in one pot.

    Using the Instant Pot streamlines the cooking process by allowing you to steam your salmon while the rice cooks at the same time. This combination guarantees that the rice absorbs the delicious flavors of the teriyaki sauce, resulting in a well-rounded dish that's packed with flavor without requiring tons of dishes to wash afterward.

    Let's delve into the ingredients and cook up this delightful meal!

    Ingredients:

    • 4 salmon fillets
    • 1 cup jasmine or basmati rice
    • 1/4 cup teriyaki sauce
    • 1 1/2 cups water
    • 1 teaspoon sesame oil
    • 1 tablespoon green onions, chopped (for garnish)
    • Optional: broccoli florets or snap peas (for added vegetables)

    Add the jasmine rice and water to the Instant Pot, then place the trivet on top. Set the salmon fillets on the trivet, brushing each with teriyaki sauce. If adding vegetables, layer them around the salmon.

    Secure the lid, verifying the steam release valve is set to sealing. Cook on high pressure for 5 minutes, then let the pressure release naturally for 10 minutes before releasing any remaining pressure. Fluff the rice with a fork and serve the salmon over rice, garnished with chopped green onions.

    For the best results, confirm your salmon fillets are of uniform size for even cooking. If you're using frozen salmon, add an extra minute to the cooking time.

    Feel free to customize this dish by incorporating your favorite vegetables; just make sure they're suitable for pressure cooking. Serve with extra teriyaki sauce on the side for those who prefer a little more flavor!

    Moroccan Chickpea Stew

    spicy mediterranean chickpea dish

    Moroccan Chickpea Stew is a hearty and flavorful dish that brings together the vibrant spices of Moroccan cuisine and the wholesome goodness of chickpeas. This easy-to-make stew isn't only satisfying but also packed with nutrients, making it a perfect choice for a quick weeknight meal.

    The combination of warm spices like cumin, coriander, and cinnamon, along with sweet dried fruits, adds dimension and depth to the stew, resulting in a comforting dish that's both delicious and nourishing.

    The beauty of this recipe is that it can be cooked in an Instant Pot, considerably reducing cooking time without sacrificing flavor. In under 30 minutes, you can serve up a bowl of this aromatic stew, paired perfectly with couscous, quinoa, or crusty bread.

    It also makes for excellent leftovers, as the flavors only deepen after a day in the fridge. Embrace the goodness of plant-based cooking with this delightful Moroccan Chickpea Stew.

    • 1 tablespoon olive oil
    • 1 medium onion, diced
    • 2 garlic cloves, minced
    • 1 inch piece of ginger, grated
    • 1 teaspoon ground cumin
    • 1 teaspoon ground coriander
    • 1 teaspoon ground cinnamon
    • 1 can (15 oz) chickpeas, drained and rinsed
    • 1 can (14 oz) diced tomatoes
    • 2 cups vegetable broth
    • 1 cup carrots, diced
    • 1 cup bell pepper, diced
    • 1/2 cup dried apricots, chopped
    • Salt and pepper, to taste
    • Fresh cilantro or parsley, for garnish

    In the Instant Pot, heat the olive oil using the sauté function, then add diced onion, garlic, and ginger, cooking for about 3-4 minutes until softened.

    Stir in the spices and continue cooking for another minute to toast them. Add the chickpeas, diced tomatoes, vegetable broth, carrots, bell pepper, and chopped dried apricots.

    Close the lid, set the valve to sealing, and cook on high pressure for 10 minutes. Once the timer goes off, allow for a natural release for 5 minutes before carefully turning the valve to venting.

    Season with salt and pepper, give it a stir, and garnish with fresh cilantro or parsley before serving.

    For added authenticity, consider pairing the stew with a side of harissa or a dollop of yogurt to balance the flavors.

    If you prefer a thicker stew, you can puree a portion of the chickpeas before adding them to the pot. Feel free to adjust the level of spices according to your taste, and don't hesitate to add in seasonal vegetables for variety.

    This versatile dish adapts well to personal preferences, so get creative!

    Macaroni and Cheese

    creamy pasta comfort food

    Macaroni and cheese is a beloved comfort food that brings nostalgia to many. It's creamy, cheesy, and incredibly satisfying, making it a favorite for both kids and adults alike.

    The Instant Pot takes the hassle out of traditional mac and cheese preparation, allowing you to whip up a luscious, velvety dish in no time with minimal cleanup. Integrated cooking and pressure functions lock in flavor and prevent overcooking, so you'll consistently get creamy pasta without the fuss.

    Using the Instant Pot means you can have dinner ready in approximately 20 minutes, including both cooking and pressure release time. This method keeps the pasta tender and the cheese sauce perfectly thick without requiring multiple pots on the stove.

    Plus, you can easily customize the dish by adding in your favorite ingredients such as broccoli, bacon, or different types of cheeses for an extra layer of flavor.

    • 2 cups elbow macaroni
    • 2 cups water
    • 1 tablespoon butter
    • 1 teaspoon salt
    • 1 teaspoon garlic powder
    • 1 teaspoon onion powder
    • 1 cup shredded cheddar cheese
    • ½ cup grated parmesan cheese
    • ½ cup milk or heavy cream

    To prepare, add the elbow macaroni, water, butter, salt, garlic powder, and onion powder to the Instant Pot. Stir the ingredients together, then secure the lid and set the vent to sealing.

    Select the manual pressure cooking setting and cook on high for 4 minutes. Once the cooking time is complete, carefully perform a quick release to let out the steam, then open the lid. Stir in the cheddar cheese, parmesan cheese, and milk or heavy cream until everything is well combined and creamy.

    For best results, make certain to stir the pasta promptly after opening the lid to prevent sticking and guarantee even melting. You can also experiment with different cheese combinations, such as using gouda for a smoky flavor or adding a touch of cream cheese for added creaminess.

    If you prefer a baked taste, sprinkle some breadcrumbs on top and pop the dish under the broiler for a few minutes after cooking.

    Sweet and Sour Pork

    tangy glazed meat dish

    Sweet and Sour Pork is a classic dish that combines the perfect balance of flavors, showcasing a delightful contrast between the tangy sweetness of the sauce and the savory richness of the pork. This dish isn't only vibrant in color but also a crowd-pleaser, making it an excellent option for family dinners or entertaining guests.

    With the help of an Instant Pot, you can prepare this dish in a fraction of the time it would take using conventional cooking methods, allowing the sweet and sour sauce to soak into the pork beautifully.

    Cooking Sweet and Sour Pork in an Instant Pot simplifies the process while guaranteeing the meat remains tender and juicy. The pressure cooker creates a flavorful environment that helps meld the sweet and tangy elements perfectly. Serve this dish over steamed rice or with stir-fried vegetables for a complete meal that's sure to impress.

    Ingredients:

    • 1.5 pounds pork tenderloin, cut into bite-sized pieces
    • 1 tablespoon vegetable oil
    • 1 bell pepper, chopped (red or green)
    • 1 onion, sliced
    • 1 cup pineapple chunks (canned or fresh)
    • 1/2 cup sugar
    • 1/2 cup apple cider vinegar
    • 1/2 cup ketchup
    • 2 tablespoons soy sauce
    • 1 teaspoon garlic powder
    • 1 teaspoon ground ginger
    • Salt and pepper to taste
    • Cooked rice for serving

    Add the oil to the Instant Pot and set it to the sauté mode. Once the oil is hot, add the pork pieces and season with salt and pepper, browning them on all sides for about 5-7 minutes.

    After browning, pour in the pineapple chunks (with juice), bell pepper, and onion. In a separate bowl, mix together the sugar, apple cider vinegar, ketchup, soy sauce, garlic powder, and ground ginger, then pour this mixture over the pork and vegetables.

    Secure the lid, make sure the vent is set to sealing, and cook on high pressure for 8 minutes. Allow for a natural pressure release for 10 minutes, then quick release any remaining pressure, stir well, and serve over cooked rice.

    When making Sweet and Sour Pork, consider adjusting the level of sweetness according to your taste preference.

    If you prefer a bolder flavor, you can incorporate more soy sauce or add a splash of orange juice to enhance the citrus notes. Additionally, you might experiment with adding more vegetables, like carrots or snap peas, to increase the nutritional value and texture of the dish.

    Finally, for those who enjoy a bit of heat, a sprinkle of red pepper flakes or a dash of hot sauce can elevate the overall flavor profile.

  • 15 Best Air Fryer Recipes for Quick & Crispy Dishes

    If you're looking for quick and crispy dishes, air fryers are your new best friend! You can whip up everything from juicy air fryer chicken wings and crispy french fries to tasty air fryer Brussels sprouts and salmon fillets. Don't forget about sweet potato chips and zucchini fritters for snacks! Even desserts like donuts can be made healthier. There's plenty more to discover that'll transform your cooking with crispy perfection—stick around for all the tempting recipes!

    Air Fryer Chicken Wings

    crispy air fried wings

    Air fryer chicken wings are a game changer for those who crave crispy, flavorful wings without the excess oil of traditional frying methods. This cooking technique allows you to enjoy your favorite snack with considerably less fat while still delivering that satisfying crunch.

    Whether you're preparing for a game day party, a casual gathering, or simply indulging in a tasty treat, air fryer chicken wings are sure to impress.

    To achieve perfect wings, the key is to season them well and cook them at the right temperature. The air fryer circulates hot air around the wings, crisping up the skin evenly while keeping the meat juicy. You can customize the flavors with various marinades and sauces, from spicy buffalo to sweet barbecue, making it easy to cater to different palates. So, let's get cooking!

    • 2 pounds chicken wings
    • 1 tablespoon olive oil
    • 1 teaspoon garlic powder
    • 1 teaspoon onion powder
    • 1 teaspoon paprika
    • 1 teaspoon salt
    • ½ teaspoon black pepper
    • Optional: your favorite hot sauce or wing sauce for tossing after cooking

    In a large bowl, toss the chicken wings with olive oil, garlic powder, onion powder, paprika, salt, and black pepper until evenly coated.

    Preheat the air fryer to 400°F (200°C). Arrange the wings in a single layer in the air fryer basket, making sure they aren't overcrowded. Cook for 25-30 minutes, flipping halfway through, until the wings are golden brown and crispy. If you prefer extra crispy wings, you can cook them for an additional 5 minutes.

    When cooking air fryer chicken wings, it's important to check for doneness by making sure the internal temperature reaches 165°F (75°C). You can also finish them off with a quick toss in your favorite sauce right after cooking, giving them an extra flavor kick.

    If you have leftover wings, they reheat well in the air fryer, maintaining that desirable crispiness for your next snack!

    Crispy Air Fryer French Fries

    crispy air fryer fries

    Crispy air fryer French fries are a delicious and healthier alternative to traditional deep-fried fries. The air fryer uses hot circulating air to cook the potatoes, resulting in a crispy exterior and fluffy interior without the need for excessive oil. This method not only cuts down on calories but also delivers perfectly cooked fries that are ideal for snacking or as a side dish with your favorite meals.

    Making air fryer French fries is incredibly simple and can be customized to suit your taste preferences. Whether you enjoy your fries seasoned with just salt or want to try out a variety of spices, this recipe provides a great base that allows for personal touches. So, grab your air fryer and let's get started on creating these irresistible crispy fries that are sure to impress!

    • 2 large russet potatoes
    • 1-2 tablespoons olive oil
    • 1 teaspoon salt
    • ½ teaspoon black pepper
    • Optional seasonings (e.g., garlic powder, paprika, or seasoning salt)

    To begin, wash and peel the russet potatoes, then cut them into even-sized sticks, about 1/4 inch thick. Soak the potato sticks in a bowl of cold water for 30 minutes to remove excess starch, which helps achieve crispiness.

    After soaking, drain, and pat them dry with a kitchen towel. In a large bowl, toss the potato sticks with olive oil, salt, and any optional seasonings you prefer. Preheat your air fryer to 375°F (190°C), then arrange the seasoned fries in a single layer in the air fryer basket. Cook for 15-20 minutes, shaking the basket halfway through, until the fries are golden brown and crispy.

    For the best results, make certain to space the fries out in the air fryer basket to guarantee proper air circulation, which promotes even cooking. Feel free to experiment with different seasonings for variety; for instance, adding a sprinkle of Parmesan cheese or a dash of cayenne pepper can add a unique twist.

    Also, remember that thinner fries will cook faster, so adjust your cooking time accordingly based on the thickness of your cuts. Enjoy your crispy air fryer French fries!

    Air Fryer Brussels Sprouts

    crispy air fryer brussels sprouts

    Air fryer Brussels sprouts are a quick and tasty way to enjoy this nutritious vegetable. The air fryer circulates hot air around the Brussels sprouts, resulting in a crispy exterior while keeping the insides tender and flavorful. This method not only enhances their natural flavors but also cuts down on the oil needed compared to traditional frying methods.

    Brussels sprouts are packed with vitamins and minerals, making them a great addition to any meal. By cooking them in the air fryer, you can achieve a delightful crunchy texture without the excess grease, allowing you to indulge guilt-free.

    Whether you're serving them as a side dish or tossing them into a salad, air fryer Brussels sprouts are sure to become a favorite in your home.

    • 1 pound Brussels sprouts, trimmed and halved
    • 2 tablespoons olive oil
    • 1 teaspoon garlic powder
    • 1 teaspoon onion powder
    • Salt and pepper to taste
    • Optional: balsamic glaze or lemon juice for drizzling

    In a large bowl, combine the halved Brussels sprouts, olive oil, garlic powder, onion powder, salt, and pepper. Toss until the Brussels sprouts are evenly coated with the mixture. Preheat your air fryer to 375°F (190°C).

    Place the Brussels sprouts in the air fryer basket in a single layer and cook for 15-20 minutes, shaking the basket halfway through to ascertain even cooking, until they're crispy and golden brown.

    For extra flavor, consider adding a sprinkle of Parmesan cheese or a touch of smoked paprika before serving. You can also experiment with different seasonings such as cayenne pepper for a kick or lemon zest for brightness.

    Remember to always check on your Brussels sprouts during cooking, as air fryers can vary in power and cooking time. Adjust the cooking time accordingly to achieve your desired level of crispiness.

    Air Fryer Salmon Fillets

    simple air fryer recipe

    Air fryer salmon fillets are a simple yet delicious way to prepare a healthy meal in no time. This cooking method retains the juicy tenderness of the fish while giving it a delightful crispy exterior. With minimal ingredients and quick prep time, these salmon fillets are perfect for both busy weeknights and casual dinners with guests.

    Seasoned to perfection, air fryer salmon fillets can be customized with a variety of flavors, such as citrus, herbs, or spices. The use of an air fryer not only speeds up the cooking process but also reduces the amount of oil needed, making it a healthier alternative to traditional frying methods.

    With the right technique, you can achieve perfectly cooked salmon that melts in your mouth and is full of flavor.

    • 2 salmon fillets (skin-on or skinless)
    • 1 tablespoon olive oil
    • 1 teaspoon garlic powder
    • 1 teaspoon paprika
    • Salt and pepper, to taste
    • Fresh herbs (like dill or parsley), for garnish (optional)
    • Lemon wedges, for serving (optional)

    Preheat your air fryer to 400°F (200°C). While it's heating, pat the salmon fillets dry with a paper towel. Brush both sides of the fillets with olive oil and season with garlic powder, paprika, salt, and pepper.

    Once the air fryer is ready, place the salmon fillets in the basket, skin-side down if applicable, and cook for about 7-10 minutes or until they're cooked through and easily flake with a fork.

    For best results, choose thick fillets to prevent overcooking and ascertain even cooking. You can also experiment with different seasonings or marinades prior to cooking to enhance the flavor profile of your salmon.

    If you're cooking multiple fillets, make sure not to overcrowd the air fryer basket; you want to allow air circulation for even cooking. Finally, let the salmon rest for a couple of minutes after cooking to help retain its moisture. Serve with your choice of sides for a complete meal!

    Sweet Potato Air Fryer Chips

    crispy sweet potato chips

    Sweet Potato Air Fryer Chips are a delightful and healthy snack option that satisfies your craving for crunch while providing a nutritious boost. Made from simple ingredients, these chips offer a perfect balance of sweetness and saltiness, making them a great alternative to regular potato chips.

    Whether you're enjoying them as a snack, a side dish, or topping a salad for added texture, these air fryer chips are versatile and easy to prepare. Using an air fryer transforms sweet potatoes into crisp, delicious chips without the need for excessive oil or frying. The hot air circulation in the air fryer cooks the chips evenly while creating that satisfying crunch, making them a guilt-free indulgence.

    As a bonus, sweet potatoes are rich in vitamins and antioxidants, so you can feel good about munching on these tasty treats!

    • 2 medium sweet potatoes
    • 2 tablespoons olive oil
    • 1 teaspoon sea salt
    • 1/2 teaspoon paprika (optional)
    • 1/2 teaspoon garlic powder (optional)
    • Fresh herbs for garnish (optional)

    Slice the sweet potatoes into thin rounds, about 1/8 inch thick, using a sharp knife or a mandoline for even cuts. In a bowl, toss the sweet potato slices with olive oil, sea salt, and any seasonings you'd like to add.

    Preheat the air fryer to 375°F (190°C) and arrange the sweet potato slices in a single layer in the fryer basket. Cook for 10-15 minutes, shaking the basket halfway through to guarantee even cooking, until the chips are golden and crispy.

    When making sweet potato chips, it's important to slice the potatoes evenly to guarantee they cook uniformly; otherwise, some may end up burnt while others stay chewy.

    Additionally, avoid overcrowding the air fryer basket, as this can lead to uneven cooking. Experiment with different seasonings to discover your favorite flavor combinations, and for even crispier chips, consider soaking the sweet potato slices in water for about an hour before cooking—this helps to remove excess starch.

    Enjoy your homemade snacks right away, as they're best served fresh!

    Air Fryer Buffalo Cauliflower

    crispy buffalo cauliflower bites

    Air Fryer Buffalo Cauliflower is an incredibly tasty and healthier alternative to traditional buffalo wings. This dish is perfect for gatherings, game days, or as a satisfying snack. With a crispy exterior and a spicy, tangy flavor, it's sure to be a hit with everyone, including those who may not typically enjoy vegetables. Using an air fryer allows for all the flavor with greatly less oil, making it a guilt-free option for satisfying those cravings.

    Making buffalo cauliflower involves coating fresh cauliflower florets with a seasoned batter and tossing them in a spicy buffalo sauce. The simplicity of this recipe makes it easily adaptable; you can experiment with different spices and sauces to fit your palate.

    Plus, the air fryer cooks these florets to perfection, guaranteeing they're crispy all around while keeping them tender on the inside.

    • 1 medium head of cauliflower, cut into florets
    • 1 cup all-purpose flour (or gluten-free flour)
    • 1 cup water
    • 1 teaspoon garlic powder
    • 1 teaspoon onion powder
    • 1 teaspoon paprika
    • Salt and pepper to taste
    • 1 cup buffalo sauce
    • 2 tablespoons olive oil (optional, for extra crispiness)
    • Fresh parsley or green onions for garnish

    In a large bowl, combine the flour, garlic powder, onion powder, paprika, salt, and pepper. Gradually mix in the water until a smooth batter forms.

    Dip the cauliflower florets in the batter, allowing any excess to drip off, then place them in the air fryer basket in a single layer. Cook at 375°F (190°C) for approximately 12-15 minutes, shaking the basket halfway through to guarantee even cooking.

    Once the cauliflower is crispy and golden, toss it in the buffalo sauce until well-coated.

    For the best results, make sure to preheat your air fryer for even cooking and avoid overcrowding the basket, as this can lead to uneven crispiness.

    You can also adjust the spice level of the buffalo sauce by choosing milder or hotter options, or even mix in a little honey or maple syrup for a sweet and spicy twist.

    Don't forget to serve the buffalo cauliflower with your favorite dipping sauce, such as ranch or blue cheese, to enhance the flavor experience even further!

    Air Fryer Onion Rings

    crispy air fryer onion rings

    Air fryer onion rings are a delicious and healthier alternative to the deep-fried version typically found at your favorite diners. By utilizing an air fryer, you can achieve that crispy texture and golden-brown appearance without the excess oil. This method not only saves calories but also makes for easy cleanup, allowing you to enjoy your onion rings guilt-free and stress-free.

    Making air fryer onion rings is also a fun cooking project that the whole family can enjoy. Turn your kitchen into a mini diner as you prepare this savory snack for game days, movie nights, or as a delightful side dish for burgers and sandwiches. With a few simple ingredients and quick prep time, you'll soon be indulging in these crunchy bites of flavor.

    • 2 large onions (preferably sweet onions)
    • 1 cup all-purpose flour
    • 1 teaspoon garlic powder
    • 1 teaspoon paprika
    • 1 teaspoon salt
    • 1/2 teaspoon black pepper
    • 2 large eggs
    • 1 cup breadcrumbs (panko for extra crunch)
    • Cooking spray

    To cook the onion rings, first, slice the onions into 1/4 inch thick rings and separate the rings from each other. In a bowl, combine the flour, garlic powder, paprika, salt, and black pepper. In another bowl, beat the eggs. In a third bowl, place the breadcrumbs. Dredge each onion ring in the flour mixture, dip in the egg, and then coat with breadcrumbs.

    Preheat your air fryer to 400°F (200°C). Arrange the onion rings in a single layer in the air fryer basket, spray with cooking spray, and cook for 12-15 minutes, flipping halfway through, until golden and crispy.

    When making air fryer onion rings, it's important to avoid overcrowding the basket. If necessary, cook in batches to guarantee even cooking and maximum crispiness. For additional flavor, consider experimenting with different seasonings in the flour mixture or using seasoned breadcrumbs. To keep the rings even more crispy, try letting them sit for a few minutes after cooking before serving.

    Enjoy your homemade crunchy onion rings with your favorite dipping sauce!

    Stuffed Air Fryer Peppers

    air fryer stuffed peppers

    Stuffed air fryer peppers are a delightful and healthy dish that brings vibrant colors and flavors to your table. Air frying these stuffed peppers not only cuts down on the extra oil and calories typically used in traditional frying methods, but it also leaves the peppers tender, filled with savory goodness, and perfectly cooked.

    This dish is versatile, allowing you to customize the stuffing to fit your tastes or incorporate leftovers, making it both practical and delicious. You can use various fillings such as seasoned ground meat, quinoa, rice, or even beans, mixed with vegetables and spices of your choice. Pair your stuffed peppers with a sprinkle of cheese on top for an added layer of flavor that melts beautifully in the air fryer.

    This is a quick recipe that can fit seamlessly into any weeknight meal rotation or impress guests at a gathering.

    • 4 large bell peppers (any color)
    • 1 cup cooked rice (white or brown)
    • 1 pound ground turkey or beef
    • 1 cup black beans, drained and rinsed
    • 1 cup corn (fresh or frozen)
    • 1 cup diced tomatoes (canned or fresh)
    • 1 teaspoon chili powder
    • 1 teaspoon cumin
    • Salt and pepper to taste
    • 1 cup shredded cheese (cheddar or Mexican blend)
    • Fresh cilantro (optional, for garnish)

    To make stuffed air fryer peppers, start by preheating your air fryer to 360°F (180°C). While it's warming up, cut the tops off the bell peppers and remove the seeds and membranes.

    In a mixing bowl, combine the cooked rice, ground turkey or beef (cooked), black beans, corn, diced tomatoes, chili powder, cumin, salt, and pepper. Stuff each bell pepper with the filling mixture, pressing down gently to pack it in.

    Top them with shredded cheese, then carefully place the stuffed peppers in the air fryer basket in a single layer. Cook for about 12-15 minutes, or until the peppers are tender and the cheese is melted and bubbly.

    When preparing stuffed air fryer peppers, remember to choose peppers that are firm and free from blemishes to guarantee the best texture during cooking. Additionally, if you want to add more flavor, consider sautéing onions and garlic before mixing them with your filling.

    Be mindful of the filling amount; overstuffing may cause the filling to spill out during cooking, so just fill them generously without squishing. Finally, don't hesitate to experiment with different spices and fillings to create your unique twist on this delicious dish!

    Air Fryer Mozzarella Sticks

    crispy cheese sticks recipe

    Air fryer mozzarella sticks are a deliciously cheesy snack that's easy to prepare and cook. They provide a healthier alternative to traditional deep-fried mozzarella sticks while still delivering the delightful crunch and gooey interior that everyone loves. The magic of the air fryer allows you to achieve that perfect crispy exterior without the use of excess oil, making them a great appetizer for parties, movie nights, or just a satisfying treat.

    To make air fryer mozzarella sticks, you'll need to carefully coat the cheese to guarantee it doesn't ooze out during cooking. Using a combination of breadcrumbs and seasoning adds flavor and texture to the outside, while ensuring the cheese inside remains delectably melty. This recipe will guide you through the simple steps to achieve perfectly golden-brown mozzarella sticks that are sure to impress.

    • 12 mozzarella sticks
    • 1 cup all-purpose flour
    • 2 large eggs
    • 1 cup breadcrumbs (preferably Italian-style or panko)
    • 1 teaspoon garlic powder
    • 1 teaspoon onion powder
    • 1 teaspoon Italian seasoning
    • Salt and pepper to taste
    • Cooking spray

    Begin by setting up a breading station: Place the flour in one bowl, beat the eggs in a second bowl, and combine the breadcrumbs, garlic powder, onion powder, Italian seasoning, salt, and pepper in a third bowl.

    Dip each mozzarella stick first into flour, then into the beaten eggs, and finally coat with the breadcrumb mixture. Arrange the coated mozzarella sticks on a plate and freeze them for at least 30 minutes.

    Once the sticks are firm, preheat your air fryer to 390°F (200°C), spray the basket lightly with cooking spray, and place the mozzarella sticks in a single layer. Cook for about 6-8 minutes or until golden brown and crispy, turning them halfway through for even cooking.

    For the best results, make sure to freeze the coated mozzarella sticks before air frying; this helps prevent the cheese from leaking out during the cooking process. Additionally, you can experiment with different seasonings in the breadcrumb mixture to suit your taste preferences, or serve them with marinara sauce, ranch dressing, or your favorite dipping sauce for an extra flavorful kick.

    Enjoy the cheesy goodness!

    Air Fryer Vegetable Spring Rolls

    crispy air fryer spring rolls

    Air fryer vegetable spring rolls are a delightful and healthier alternative to traditional deep-fried spring rolls. The air fryer uses hot air circulation to achieve a crispy exterior while requiring considerably less oil, making these treats a guilt-free option for snacking or appetizer serving. Perfectly seasoned and stuffed with fresh vegetables, these spring rolls are easy to prepare and can be customized with your favorite fillings.

    Making these spring rolls isn't only simple but also a fun activity, especially if you get your friends or family involved. Roll up a variety of ingredients to create unique flavor combinations, or keep it classic with a mix of familiar vegetables. Serve them with a dipping sauce of your choice for an added burst of flavor that complements their crispy goodness.

    • 1 cup shredded cabbage
    • 1 cup shredded carrots
    • 1 cup bean sprouts
    • 1/2 cup sliced bell peppers
    • 1/4 cup chopped green onions
    • 1 tablespoon soy sauce
    • 1 teaspoon garlic powder
    • 1 teaspoon ginger powder
    • 10 spring roll wrappers
    • Cooking spray

    In a large bowl, combine the shredded cabbage, carrots, bean sprouts, and bell peppers. Add in the green onions, soy sauce, garlic powder, and ginger powder, mixing well until all ingredients are thoroughly combined.

    Lay a spring roll wrapper on a flat surface, place a couple of tablespoons of the vegetable mixture at one end of the wrapper, and roll it up tightly, folding in the sides as you go.

    Repeat this process with all the wrappers and filling. Preheat your air fryer to 375°F (190°C), arrange the spring rolls in a single layer in the air fryer basket, lightly spray them with cooking spray, and cook for about 10-12 minutes or until they're golden brown and crispy, turning halfway through.

    When cooking air fryer vegetable spring rolls, it's important to confirm that they aren't overcrowded in the basket, as this can prevent even cooking and crispiness. If necessary, you can cook them in batches.

    Additionally, feel free to experiment with different vegetables or add in some proteins like tofu or cooked shrimp for variety, adjusting the seasoning as desired. Don't forget to serve them with sweet chili sauce, peanut sauce, or soy sauce for dipping!

    Air Fryer Pork Chops

    crispy air fryer pork chops

    Air fryer pork chops are a delicious and healthy alternative to traditional frying methods. With their juicy, tender inside and a crispy exterior, these pork chops are simple to prepare and can be ready on your dinner table in no time. By using the air fryer, you can achieve that irresistible crunch without needing copious amounts of oil, making these chops a guilt-free option for a weekday meal or a special occasion.

    To guarantee maximum flavor, marinate your pork chops before cooking. This not only enhances the taste but also helps keep the meat moist during the cooking process. Pair the pork chops with your favorite sides such as roasted vegetables, mashed potatoes, or a fresh salad for a well-rounded meal that your entire family will enjoy.

    Ingredients:

    • 4 boneless pork chops (about 1 inch thick)
    • 1 tablespoon olive oil
    • 1 teaspoon garlic powder
    • 1 teaspoon onion powder
    • 1 teaspoon smoked paprika
    • 1 teaspoon salt
    • ½ teaspoon black pepper
    • ½ teaspoon dried thyme
    • Optional: Fresh parsley for garnish

    Coat the pork chops with olive oil and rub the seasoning mixture evenly on both sides. Preheat your air fryer to 400°F (200°C). Place the seasoned pork chops in a single layer in the air fryer basket and cook for about 12-15 minutes, flipping halfway through, or until the internal temperature reaches 145°F (63°C). Let the pork chops rest for a few minutes before serving to allow the juices to redistribute.

    For best results, verify your air fryer is properly preheated, as this helps to create that perfect crispy exterior. If your air fryer has a smaller capacity, you may need to cook the pork chops in batches to avoid overcrowding.

    Don't forget to let the chops rest after cooking; this step is essential for achieving that juicy bite. Finally, feel free to experiment with different seasonings or marinades to find the flavor combinations that you love most!

    Air Fryer Zucchini Fritters

    crispy zucchini fritters recipe

    Air fryer zucchini fritters are a delicious and healthy alternative to traditional fried fritters, making them perfect for a light lunch or as a snack. With the air fryer, you can achieve that crispy texture without the excess oil, allowing the natural flavors of the zucchini to shine through. This recipe is quick, easy, and a great way to incorporate more vegetables into your diet.

    Zucchini fritters are incredibly versatile: you can serve them with a side of yogurt, a fresh salad, or your favorite dipping sauce. They aren't only gluten-free but can also be made vegan by substituting the egg with a flaxseed meal or applesauce.

    These fritters are perfect for meal prepping as they can be stored in the fridge and reheated easily, maintaining their crunchiness and flavor.

    Ingredients:

    • 2 medium zucchinis, grated
    • 1 teaspoon salt
    • 1/2 cup all-purpose flour (or almond flour for gluten-free)
    • 1/4 cup grated Parmesan cheese (optional)
    • 1 large egg
    • 2 green onions, finely chopped
    • 1 clove garlic, minced
    • 1/2 teaspoon black pepper
    • 1/2 teaspoon paprika
    • Cooking spray or olive oil

    To prepare the fritters, start by placing the grated zucchini in a clean kitchen towel or cheesecloth and squeezing out as much moisture as possible.

    In a mixing bowl, combine the drained zucchini, flour, cheese (if using), egg, green onions, garlic, black pepper, paprika, and salt. Mix well until all ingredients are evenly combined.

    Preheat the air fryer to 375°F (190°C), then form the zucchini mixture into small patties and place them in a single layer in the air fryer basket. Lightly spray the tops with cooking spray and air fry for about 10-12 minutes, flipping halfway through, until they're golden brown and crispy.

    For the best results, make sure the zucchini is well-drained to prevent soggy fritters. If you find the mixture too wet, you can add a little more flour to help bind it together.

    Additionally, experimenting with various herbs and spices can enhance the flavor profile of your fritters, so feel free to get creative! Ultimately, serving the fritters with a revitalizing dip, such as tzatziki or lemon-garlic aioli, can elevate this dish even further.

    Air Fryer Chicken Tenders

    crispy air fried chicken

    Air fryer chicken tenders are a delicious and healthier alternative to traditional fried chicken tenders. By using an air fryer, you can achieve a crispy outer coating while keeping the inside juicy and tender without the need for excessive oil. This makes it a perfect weeknight meal, satisfying family cravings while also being relatively quick and easy to prepare.

    With just a few basic ingredients and simple steps, you'll have a plate of irresistible chicken tenders in no time.

    To add flavor and crunch, you can marinate the chicken tenders before cooking them. A straightforward but effective marinade with seasonings, some garlic powder, and a bit of salt and pepper can elevate the taste considerably. Additionally, you can customize your breading by incorporating your favorite herbs and spices. Serve these chicken tenders with a side of dipping sauce for a fun and tasty meal that everyone will enjoy.

    Ingredients:

    • 1 lb chicken tenders
    • 1 cup breadcrumbs (panko or regular)
    • 1/2 cup flour
    • 2 large eggs
    • 1 tsp garlic powder
    • 1 tsp onion powder
    • 1 tsp paprika
    • 1/2 tsp salt
    • 1/2 tsp black pepper
    • Cooking spray or olive oil

    Coat each chicken tender first in flour, then dip in beaten eggs, and finally, roll in the breadcrumb mixture until fully coated. Preheat your air fryer to 400°F (200°C). Lightly spray the air fryer basket with cooking spray, then arrange the coated chicken tenders in a single layer. Cook for 10-12 minutes, flipping halfway through, until golden brown and cooked through with an internal temperature of 165°F (75°C).

    For the best results, allow the chicken tenders to rest for a few minutes after cooking—they will finish cooking and absorb a bit of moisture from the air, keeping them tender. Be sure not to overcrowd the air fryer basket, as this can lead to uneven cooking.

    If you have a larger batch, cook them in batches instead. Experiment with different seasonings and marinades to suit your taste, and enjoy pairing them with various dipping sauces like honey mustard or ranch for dipping!

    Air Fryer Donuts

    air fryer donut recipe

    Air fryer donuts are a delightful and healthier alternative to traditional fried donuts, offering all the sweetness and flavor with appreciably less oil. Using an air fryer allows you to achieve that golden-brown exterior while keeping the inside soft and fluffy.

    What's great about making donuts at home is that you can customize the flavors, toppings, and fillings based on your personal preferences or the season. Whether you're in the mood for classic glazed donuts or something more adventurous, the air fryer makes it easy and fun to whip up a batch.

    These donuts require minimal ingredients and the process is quite straightforward, making them perfect for breakfast or a sweet treat any time of the day. The best part? The air fryer cooks them quickly, allowing you to enjoy freshly made donuts without long wait times or extensive cleanup.

    Gather your loved ones and get ready to indulge in this easy-to-make, lightened-up version of a classic favorite.

    • 1 cup all-purpose flour
    • 1/3 cup granulated sugar
    • 1 tsp baking powder
    • 1/2 tsp baking soda
    • 1/4 tsp salt
    • 1/4 cup milk
    • 1 large egg
    • 2 tbsp melted butter
    • 1 tsp vanilla extract
    • 1/4 tsp cinnamon (optional)
    • Cooking spray

    In a mixing bowl, whisk together the flour, sugar, baking powder, baking soda, and salt. In another bowl, combine the milk, egg, melted butter, vanilla extract, and optional cinnamon.

    Gradually add the wet ingredients to the dry ingredients and mix until just combined. Transfer the dough to a floured surface, and gently roll or pat it out to about 1/2-inch thick. Use a donut cutter or two round cookie cutters to cut out your donuts.

    Preheat the air fryer to 350°F (175°C), and spray the basket with cooking spray. Place the donuts in the basket, spaced apart, and air fry for about 5-6 minutes, or until they're golden brown.

    When making air fryer donuts, remember that cooking times may vary depending on the model of your air fryer, so keep an eye on them as they cook. For extra flavor, consider adding different spices or citrus zests to the dough.

    After air frying, let the donuts cool slightly before glazing or dusting them with powdered sugar. Enjoy experimenting with various toppings like sprinkles, chocolate glaze, or even a drizzle of caramel for a fun twist!

    Air Fryer Fried Rice

    crispy air fryer rice

    Air fryer fried rice is a quick and healthy twist on the classic takeout dish. Perfect for using up leftover rice and vegetables, this method makes it easy to achieve that perfect crispy texture without the need for excessive oil.

    Plus, with the air fryer, the cooking time is greatly reduced, allowing you to enjoy delicious fried rice in no time. Whether you're preparing a simple weeknight dinner or a meal prep option, air fryer fried rice is incredibly versatile, allowing you to customize it to your taste.

    You can experiment with various ingredients based on what you have on hand or your dietary preferences. From adding proteins like chicken, shrimp, or tofu to incorporating a range of vegetables, this dish can be tailored to suit any palate.

    The air fryer locks in flavors while giving a satisfying crunch to the rice, making it a favorite option for both kids and adults. Let's get started on creating this easy and delicious air fryer fried rice!

    • 2 cups cooked rice (preferably day-old)
    • 1 cup mixed vegetables (peas, carrots, bell peppers)
    • 2 eggs, beaten
    • 2 tablespoons soy sauce
    • 1 tablespoon sesame oil
    • 2 green onions, chopped
    • Salt and pepper to taste

    In a large mixing bowl, combine the cooked rice, mixed vegetables, beaten eggs, soy sauce, sesame oil, green onions, salt, and pepper. Mix everything together until well combined.

    Preheat your air fryer to 370°F (188°C). Once preheated, transfer the rice mixture to the air fryer basket, spreading it out evenly. Cook for about 8-10 minutes, shaking the basket halfway through to guarantee even cooking.

    Once done, check for doneness and serve hot. For best results, use day-old rice as it tends to be drier and prevents clumping, allowing for better frying in the air fryer.

    Feel free to adjust the cooking time based on your air fryer model, as they can vary in performance. If you like your fried rice a little crunchier, you can cook it for an extra few minutes, just keep an eye on it to avoid burning.

    Finally, garnish with additional green onions or a sprinkle of sesame seeds for an extra touch before serving. Enjoy your quick and delicious air fryer fried rice!

  • 10 Keto Dessert Recipes That Are Low-Carb & Delicious

    Looking for delicious keto dessert recipes that are low-carb? You've got great options! Try the Keto Chocolate Cake or Coconut Macaroons for a sweet treat. For a creamy bite, enjoy the Creamy Cheesecake Bites or the rich Chocolate Avocado Mousse. Don't miss the invigorating No-Bake Chocolate Dipped Strawberries or the classic Keto Pecan Pie Bars. You can even delight in a Lemon Meringue Pie or a nutritious Chia Seed Pudding. There's more to explore!

    Keto Chocolate Cake

    keto friendly chocolate dessert

    For those following a ketogenic lifestyle, finding satisfying desserts can sometimes feel like an uphill battle. However, keto chocolate cake proves that you can indulge your sweet tooth without derailing your low-carb diet. This decadent and rich cake is made with almond flour and cocoa powder, making it not only low in carbs but also gluten-free.

    With a few simple ingredients, you can whip up a delightful treat that will have everyone asking for seconds. This keto chocolate cake is perfect for birthdays, celebrations, or simply a cozy night in. Its light and fluffy texture combined with the intense chocolate flavor will make you forget that it's a low-carb dessert.

    Served with a dollop of whipped cream or a scoop of sugar-free ice cream, this cake is sure to impress family and friends alike.

    Ingredients:

    • 2 cups almond flour
    • 1/2 cup unsweetened cocoa powder
    • 1 cup erythritol (or your preferred keto sweetener)
    • 1 tsp baking powder
    • 1/2 tsp baking soda
    • 1/4 tsp salt
    • 4 large eggs
    • 1/2 cup unsweetened almond milk
    • 1/2 cup melted coconut oil or butter
    • 1 tsp vanilla extract

    Preheat your oven to 350°F (175°C) and grease a 9-inch round cake pan. In a large mixing bowl, combine the almond flour, cocoa powder, erythritol, baking powder, baking soda, and salt.

    In a separate bowl, whisk together the eggs, almond milk, melted coconut oil or butter, and vanilla extract. Gradually add the wet ingredients to the dry ingredients, mixing until just combined.

    Pour the batter into the prepared cake pan and bake for 25-30 minutes, or until a toothpick inserted in the center comes out clean. Allow the cake to cool completely in the pan before transferring it to a wire rack for serving.

    For extra flavor, consider adding a splash of strong coffee to enhance the chocolate experience. If you prefer a sweeter cake, you can increase the amount of sweetener to your taste.

    This cake stores well in the refrigerator for up to a week and also freezes nicely, making it a convenient option for meal prepping. To add a special touch, top it with homemade sugar-free frosting or a sprinkle of unsweetened cocoa powder before serving.

    Coconut Macaroons

    coconut dessert treat recipe

    Coconut macaroons are a delectable treat that fits perfectly into a keto diet. These guilt-free delights are chewy on the inside and slightly crisp on the outside, making them irresistible for those who enjoy a sweet, coconutty snack. With their minimal ingredients, they aren't only easy to prepare but also offer a burst of flavor that can satisfy any sweet tooth without derailing your keto goals.

    The beauty of coconut macaroons lies in their versatility. You can serve them as a delightful dessert at a gathering or simply enjoy them as a midday snack. Their rich coconut flavor is accentuated with just the right amount of sweetness, ensuring that each bite is a heavenly experience.

    Plus, they can be stored easily, making them a perfect go-to treat whenever you're in need of a quick and satisfying dessert.

    • 3 cups unsweetened shredded coconut
    • 1/2 cup erythritol (or another keto-friendly sweetener)
    • 4 large egg whites
    • 1 teaspoon vanilla extract
    • Pinch of salt
    • Optional: 1/3 cup sugar-free dark chocolate (for drizzling)

    Preheat your oven to 325°F (163°C) and line a baking sheet with parchment paper. In a large mixing bowl, combine the shredded coconut, erythritol, egg whites, vanilla extract, and salt until fully mixed. Scoop tablespoon-sized mounds of the mixture onto the prepared baking sheet, spacing them evenly apart.

    Bake in the preheated oven for 20-25 minutes or until the macaroons turn golden brown. Allow them to cool before drizzling with sugar-free dark chocolate, if desired.

    When making coconut macaroons, feel free to customize the flavor by adding a sprinkle of cinnamon or using almond extract instead of vanilla for a different twist. Additionally, if you like your macaroons crispier, you can extend the baking time slightly, but keep an eye on them to prevent burning.

    For a more decadent dessert, consider dipping half of each macaroon in melted sugar-free chocolate after they've cooled. Enjoy experimenting with flavors and textures!

    Creamy Cheesecake Bites

    delicious bite sized cheesecakes

    Creamy cheesecake bites are the perfect guilt-free treat for anyone following a keto lifestyle. With their velvety smooth texture and rich flavor, they satisfy your sweet cravings without compromising your dietary goals.

    These bite-sized desserts are incredibly simple to make, offering a delightful combination of cream cheese, natural sweeteners, and low-carb ingredients. You can easily personalize them by adding your favorite flavorings or toppings, making them a versatile option for any occasion.

    These little desserts are fantastic for parties, as a quick snack, or even as a dessert to end your day on a high note. Since these cheesecake bites are low in carbs, they won't derail your ketogenic diet.

    Plus, they can be made ahead of time and stored in the freezer, allowing for convenience and ease whenever you need a sweet treat. Let's plunge into this delicious keto-friendly recipe!

    Ingredients:

    • 8 oz cream cheese, softened
    • 1/4 cup powdered erythritol or your preferred keto sweetener
    • 1 tsp vanilla extract
    • 1/4 cup sour cream
    • 1/2 cup heavy cream
    • Optional: chocolate chips or berries for topping

    To prepare the cheesecake bites, start by beating the softened cream cheese and powdered erythritol together in a mixing bowl until smooth.

    Add in the vanilla extract and sour cream, mixing until well combined and creamy. In a separate bowl, whip the heavy cream until stiff peaks form, then gently fold it into the cream cheese mixture.

    Once everything is combined, spoon the mixture into silicone bite-sized molds or mini cupcake liners and freeze for 2-3 hours, or until firmly set.

    When making these cheesecake bites, be sure to let them thaw for a few minutes at room temperature before serving, as they can be quite firm when frozen.

    For added flavor, consider experimenting with different extracts such as almond or lemon, and don't hesitate to mix in bits of sugar-free chocolate or fresh berries for decoration.

    These treats can also be easily tailored to suit your taste preferences, so get creative with toppings and flavors to make them truly your own!

    Low-Carb Peanut Butter Cookies

    low carb peanut butter treats

    Low-Carb Peanut Butter Cookies are a delightful treat for anyone following a keto diet. These cookies aren't only simple to make but also satisfy your sweet tooth without the guilt of traditional high-carb desserts.

    With just a handful of ingredients, you can whip up a batch of these scrumptious cookies that are rich in flavor and healthy fats. Plus, the aroma of freshly baked peanut butter cookies wafting through your kitchen is an added bonus!

    This recipe is perfect for quick snacks or when you have unexpected guests. They're gluten-free and can be made in under 30 minutes. Whether you enjoy them straight out of the oven or prefer them chilled, these cookies are versatile enough to suit any craving.

    Grab your mixing bowl and a few essentials to start creating these low-carb delights!

    • 1 cup natural peanut butter (unsweetened)
    • 1/2 cup erythritol or any keto-friendly sweetener
    • 1 large egg
    • 1 teaspoon vanilla extract
    • 1/2 teaspoon baking soda
    • Pinch of salt

    In a large bowl, combine the peanut butter, erythritol, egg, vanilla extract, baking soda, and a pinch of salt until the mixture is well blended.

    Preheat your oven to 350°F (175°C) and line a baking sheet with parchment paper. Scoop tablespoon-sized portions of the dough onto the prepared baking sheet, allowing space between each cookie. Flatten them slightly with the back of a fork, creating a crisscross pattern.

    Bake for 10-12 minutes or until the edges are slightly golden, then remove from the oven and let them cool on the baking sheet for a few minutes before transferring them to a wire rack to cool completely.

    When making these cookies, feel free to experiment by adding sugar-free chocolate chips, chopped nuts, or a sprinkle of sea salt on top before baking. If you're using salted peanut butter, you may want to reduce the added salt to balance the flavors.

    Store leftover cookies in an airtight container to keep them fresh, and remember—they may become slightly firmer as they cool, so let them rest before enjoying!

    Chocolate Avocado Mousse

    decadent chocolate avocado dessert

    Indulging in dessert while following a keto lifestyle can seem challenging, but chocolate avocado mousse is the perfect solution. This rich, creamy treat not only satisfies your sweet tooth but is also packed with healthy fats, making it an ideal choice for anyone on a ketogenic diet.

    The avocados provide a smooth texture and a dose of nutrients, while cocoa powder delivers an intense chocolate flavor without the carbs found in traditional desserts. Plus, this mousse is incredibly easy to whip up, requiring just a handful of ingredients.

    To elevate your dessert experience, consider customizing your chocolate avocado mousse with various toppings such as whipped cream, fresh berries, or unsweetened coconut flakes. This dessert can be served in small cups or ramekins, making it perfect for entertaining or simply enjoying at home after a meal. With its delectable taste and healthy ingredients, you'll forget you're even indulging on a keto diet.

    • 2 ripe avocados
    • 1/2 cup unsweetened cocoa powder
    • 1/4 cup almond milk (unsweetened)
    • 1/4 cup erythritol or another keto-friendly sweetener (adjust to taste)
    • 1 tsp vanilla extract
    • Pinch of salt

    In a food processor, combine the ripe avocados, unsweetened cocoa powder, almond milk, erythritol, vanilla extract, and a pinch of salt. Blend until the mixture is creamy and smooth, scraping down the sides as needed to guarantee everything is well combined.

    Taste the mousse and adjust the sweetness if necessary. Once you achieve your desired flavor and texture, transfer the mousse to cups or ramekins and refrigerate for at least 30 minutes before serving to allow it to set.

    When preparing chocolate avocado mousse, using ripe avocados is key to achieving a silky texture; this means checking for slight softness when gently pressed. If you can't get ripe avocados, you can hasten the ripening process by placing them in a paper bag for a day or two.

    Additionally, feel free to experiment with flavor variations by adding a pinch of cinnamon or a splash of espresso to enhance the chocolate flavor further. For a more luxurious touch, top your mousse with a dollop of whipped cream, a sprinkle of cacao nibs, or a few berries before serving.

    Berry Almond Crumble

    berry almond dessert delight

    Satisfying a sweet tooth while on a keto diet can sometimes feel like a challenge, but the Berry Almond Crumble is a delightful solution that fulfills all your dessert cravings without compromising your dietary goals. This dish combines the natural sweetness of mixed berries with the crunchy, nutty flavor of almonds to create a dessert that's both delicious and low in carbs. It's perfect for a summer gathering or as a comforting treat to enjoy at home.

    The beauty of this dessert lies in its simplicity and taste. The tartness of the berries mixed with the wholesome crunch of the almond topping makes for a perfect balance of flavors. Plus, it's quick to prepare and can be served warm or chilled, making it versatile for any occasion.

    So, grab your baking dish and let's get started on this easy and nutritious treat!

    Ingredients:

    • 2 cups mixed berries (strawberries, blueberries, raspberries)
    • 1 cup almond flour
    • 1/2 cup almond meal
    • 1/4 cup erythritol or any keto-friendly sweetener
    • 1/2 cup unsalted butter, melted
    • 1 teaspoon cinnamon
    • 1/2 teaspoon vanilla extract
    • Pinch of salt
    • Optional: sliced almonds for garnish

    In a large bowl, combine the mixed berries with 2 tablespoons of erythritol and a sprinkle of cinnamon. Spread this berry mixture evenly in a greased baking dish.

    In a separate bowl, mix together the almond flour, almond meal, remaining erythritol, melted butter, cinnamon, vanilla extract, and salt until crumbly. Pour this mixture over the berries, spreading it evenly. Bake in a preheated oven at 350°F (175°C) for 25-30 minutes or until the topping is golden brown and the berries are bubbling.

    When preparing your Berry Almond Crumble, consider using a variety of berries for added flavor and texture. If you want to elevate the dish further, try adding a scoop of whipped coconut cream or a drizzle of sugar-free chocolate sauce before serving.

    Additionally, be mindful of the baking time as ovens can vary – keep an eye on the crumble to make sure it doesn't overcook. Enjoy your delicious and guilt-free dessert!

    No-Bake Chocolate Dipped Strawberries

    delicious chocolate covered strawberries

    Indulging in a sweet treat while sticking to a keto diet can be quite the challenge, but these No-Bake Chocolate Dipped Strawberries offer a delightful solution. They're not only simple and quick to prepare, but they also provide a burst of flavor with the perfect balance of sweetness and crunch.

    Strawberries are naturally low in carbohydrates and full of nutrients, making them a fantastic choice for a guilt-free dessert. Coupled with rich, dark chocolate, these treats are sure to satisfy your cravings without obstructing your health goals.

    This recipe is an excellent way to impress guests or enjoy a personal treat without the time commitment usually associated with elaborate desserts. The creamy chocolate coating pairs beautifully with the juicy strawberries, creating a delicious contrast that delivers an exquisite experience in every bite.

    Plus, they require no baking, making them perfect for a hot day or when you're short on time. Let's get started!

    Ingredients:

    • 1 pint of fresh strawberries
    • 1 cup of sugar-free dark chocolate chips
    • 1 tablespoon of coconut oil (optional for added shine)
    • Sea salt or chopped nuts (optional for garnish)

    To prepare the No-Bake Chocolate Dipped Strawberries, start by washing the strawberries and patting them dry; confirm they're completely dry to help the chocolate stick better. Melt the sugar-free dark chocolate chips along with the coconut oil in a microwave-safe bowl in 30-second intervals, stirring in between, until smooth and fully melted.

    Once melted, dip each strawberry into the chocolate, allowing any excess to drip off, and place them on a parchment-lined baking sheet. If desired, sprinkle with a pinch of sea salt or chopped nuts for added texture. Refrigerate until the chocolate is set, about 30 minutes.

    For the best results, choose ripe, firm strawberries that are free from bruises. It's helpful to allow the dipped strawberries to chill fully in the fridge—this not only solidifies the chocolate but also enhances the flavor as the chocolate melds with the strawberry.

    Experiment with different toppings, such as crushed nuts or unsweetened shredded coconut, for an added twist. Enjoy these delicious treats within a couple of days for the freshest flavor and texture!

    Keto Pecan Pie Bars

    keto friendly dessert recipe

    Keto Pecan Pie Bars are a delicious and satisfying dessert that brings the classic flavors of traditional pecan pie into a lower-carb format. These bars are perfect for those on a ketogenic diet, and they provide all the sweet, nutty goodness you'd expect, without the unnecessary sugars that usually come with them.

    With a buttery crust and a rich filling that's both crunchy and gooey, these bars are sure to impress anyone who tries them, whether they follow a keto lifestyle or not. Making these Keto Pecan Pie Bars isn't only simple but also allows you to use wholesome ingredients to create a treat that feels indulgent. They can be enjoyed any time of year, served at holiday gatherings, or simply as an everyday snack to satisfy your sweet tooth.

    The combination of delicious flavors and textures makes these bars a go-to dessert for everyone.

    Ingredients:

    • 1 ½ cups almond flour
    • 1/4 cup erythritol or preferred keto sweetener
    • 1/2 cup unsalted butter, melted
    • 1/2 teaspoon vanilla extract
    • 1/4 teaspoon salt
    • 3 large eggs
    • 1 cup pecans, roughly chopped
    • 1/4 cup sugar-free maple syrup or keto-friendly syrup

    In a mixing bowl, combine almond flour, erythritol, melted butter, vanilla extract, and salt, mixing until a dough forms. Press this mixture into the bottom of a lined 8×8 inch baking dish to create an even crust.

    In another bowl, whisk together the eggs, then mix in the chopped pecans and sugar-free syrup until well combined. Pour this pecan mixture over the crust and bake in a preheated oven at 350°F (175°C) for about 25-30 minutes or until the filling is set and slightly golden around the edges.

    Allow the bars to cool completely before cutting them into squares. For the best results, make sure to let the bars cool completely before slicing; this will help them to hold their shape better.

    You can store any leftovers in the refrigerator for a few days, and they may taste even better the next day as the flavors meld together. If you're looking for a twist, consider adding a pinch of cinnamon or nutmeg to the filling for an extra layer of flavor.

    Lemon Meringue Pie

    tangy citrus dessert delight

    Lemon Meringue Pie is a revitalizing and indulgent dessert that beautifully balances tangy citrus with sweet meringue. This keto-friendly version allows you to enjoy this classic treat without the added sugar and carbs, making it a perfect choice for those following a ketogenic lifestyle. The bright and zesty lemon filling, combined with a light and airy meringue topping, creates a satisfying dessert that's sure to impress your family and friends.

    In addition to its delightful taste, this pie is an excellent option for special occasions or gatherings. You can make it ahead of time and simply whip the meringue just before serving, guaranteeing that it stays fluffy and beautiful. With a few simple substitutions, such as using almond flour for the crust and a sugar substitute for the filling, you can enjoy a slice of this delicious Lemon Meringue Pie guilt-free.

    Ingredients:

    • 1 1/2 cups almond flour
    • 1/4 cup butter, melted
    • 2 tablespoons erythritol (or preferred keto sweetener)
    • 1/4 teaspoon salt
    • 3 large eggs, separated
    • 1/2 cup lemon juice (freshly squeezed)
    • 1 tablespoon lemon zest
    • 1/2 cup erythritol (for filling)
    • 1/4 teaspoon turmeric (for color, optional)
    • 1/4 teaspoon cream of tartar
    • 3 tablespoons powdered erythritol (for meringue)

    For the crust, combine almond flour, melted butter, erythritol, and salt; press the mixture into a pie dish and bake until golden brown.

    Meanwhile, in a saucepan, whisk together the egg yolks, lemon juice, lemon zest, and erythritol. Cook over medium heat until thickened, stirring constantly. Once thick, remove from heat and pour into the baked crust.

    For the meringue, beat egg whites and cream of tartar until soft peaks form, then gradually add powdered erythritol and beat until stiff peaks form. Spread on top of the lemon filling and bake until the meringue is golden.

    When preparing the meringue, verify that your mixing bowl and beaters are completely clean and free from any grease, as this will help the egg whites whip up perfectly. Additionally, for the best flavor, opt for fresh lemons for juicing and zesting.

    If your meringue weeps after baking, it may be due to excessive moisture in the mixture, so be sure to store the pie in a cool, dry place until you're ready to serve. Enjoy your delightful dessert in moderation to stay aligned with your keto goals!

    Chia Seed Pudding

    delicious chia seed pudding

    Chia seed pudding is a delightful and nutritious dessert that aligns perfectly with the keto diet. Packed with fiber and healthy fats, chia seeds expand in liquid, creating a creamy texture that makes this pudding a satisfying treat. It's easy to prepare and can be customized with various flavors, toppings, and sweeteners, allowing you to enjoy a guilt-free dessert any time of the day.

    To prepare chia seed pudding, you only need a handful of simple ingredients. This recipe calls for just a few essential components, guaranteeing you can whip it up in no time. Serve it chilled for a rejuvenating snack or dessert that can be made ahead of time and stored in the refrigerator.

    With an array of ingredients to choose from, you can create variations that suit your taste preferences while keeping it keto-friendly.

    • 1/4 cup chia seeds
    • 1 cup unsweetened almond milk (or any low-carb milk)
    • 1-2 tablespoons erythritol or your preferred keto sweetener
    • 1/2 teaspoon vanilla extract
    • Pinch of salt
    • Optional toppings: berries, nuts, coconut flakes, or sugar-free chocolate chips

    In a mixing bowl, combine the chia seeds, almond milk, erythritol, vanilla extract, and salt. Whisk the mixture to guarantee the chia seeds are evenly distributed and not clumping.

    Let it sit for about 5 minutes, then whisk again to break up any clumps. Cover the bowl with plastic wrap or transfer the mixture to individual jars and refrigerate for at least 2 hours or overnight until it thickens to a pudding-like consistency.

    For best results, make sure to stir the pudding a couple of times during the initial 5-minute waiting period to avoid clumping. You can adjust the sweetness by adding more or less erythritol or experimenting with different keto-friendly sweeteners.

    Feel free to get creative with your toppings by adding a variety of nuts, seeds, or unsweetened coconut flakes for added texture and flavor. This dessert can store well in the fridge for up to five days, making it an ideal make-ahead option.

  • 10 No-Bake Desserts for When You Need a Sweet Treat Fast

    When you're craving something sweet fast, no-bake desserts are the way to go! Whip up delicious Chocolate Peanut Butter Bars or cool off with a revitalizing Key Lime Pie. You might enjoy creamy No-Bake Cheesecake or energy-packed Energy Bites. Don't forget about delightful Fruit and Yogurt Parfaits, indulgent Oreo Truffles, or classic Rice Krispie Treats. And for a twist, try Coconut Macaroons or easy No-Bake Brownies. There's a world of flavors waiting for you!

    Chocolate Peanut Butter Bars

    chocolate peanut butter dessert bars

    Chocolate Peanut Butter Bars are a deliciously indulgent no-bake treat that combines the richness of chocolate with the creamy, nutty flavor of peanut butter. Perfect for satisfying your sweet tooth without turning on the oven, these bars require minimal effort and yield maximum satisfaction. Ideal for sharing at parties, potlucks, or simply indulging at home, they're sure to become a favorite for both kids and adults alike.

    The base of these bars is a mixture of crunchy graham cracker crumbs and oats, which give them a satisfying texture and a delightful crunch. Topped with a buttery peanut butter and chocolate layer, they offer a perfect balance of flavors. Best of all, these bars set up quickly in the refrigerator, so you can enjoy a sweet treat in no time!

    • 1 cup graham cracker crumbs
    • 1 cup rolled oats
    • 1/2 cup unsweetened cocoa powder
    • 1 cup creamy peanut butter
    • 1/2 cup honey or maple syrup
    • 1/2 cup powdered sugar
    • 1 cup semi-sweet chocolate chips
    • 2 tablespoons coconut oil (optional, for smoothness)

    In a large bowl, combine the graham cracker crumbs, rolled oats, cocoa powder, creamy peanut butter, honey (or maple syrup), and powdered sugar. Mix well until all ingredients are fully incorporated, forming a thick dough. Press the mixture into a greased 8×8-inch square baking pan.

    Melt the semi-sweet chocolate chips with the coconut oil in a microwave-safe bowl in intervals of 20 seconds, stirring in between until smooth. Pour the melted chocolate over the peanut butter layer in the pan and spread it evenly.

    Refrigerate the bars for at least 2 hours, or until firm, before slicing into squares and serving. For the best results, make certain to press the peanut butter mixture firmly into the pan to guarantee it holds together well once set.

    Feel free to get creative by adding toppings like chopped nuts or sea salt, or substituting different nut butters for a unique twist. These bars can be stored in an airtight container in the fridge for up to a week, but chances are they won't last that long once you taste them!

    No-Bake Cheesecake

    easy creamy dessert recipe

    No-bake cheesecake is a delightful dessert that's both easy and satisfying to prepare. It requires no oven time, making it perfect for warm days when you want a revitalizing treat without the fuss of baking. The creamy filling, which is made with cream cheese, sugar, and whipped cream, sits on a crumbly graham cracker crust that adds a complementary texture and flavor. Topped with your choice of fruits, chocolate, or caramel sauce, this cheesecake is sure to please everyone at your gathering.

    Making a no-bake cheesecake isn't only simple but also allows you to customize it to your liking. Whether you prefer a classic vanilla flavor or something more adventurous, like lemon or chocolate, the base recipe remains the same. This dessert sets in the refrigerator, allowing all the flavors to meld together, resulting in a luscious, decadent cheesecake that feels indulgent without any of the baking hassle.

    Ingredients:

    • 1 ½ cups graham cracker crumbs
    • ¼ cup sugar
    • ½ cup unsalted butter, melted
    • 2 (8 oz) packages cream cheese, softened
    • 1 cup powdered sugar
    • 1 teaspoon vanilla extract
    • 1 cup heavy whipping cream

    In a mixing bowl, combine the graham cracker crumbs, sugar, and melted butter, and mix well until crumbly. Press the mixture firmly into the bottom of a 9-inch springform pan to form the crust.

    In another bowl, beat the softened cream cheese until smooth. Gradually add in the powdered sugar and vanilla extract, mixing until well combined. In a separate bowl, whip the heavy cream until stiff peaks form, then gently fold it into the cream cheese mixture.

    Pour the filling over the crust in the springform pan and spread it evenly. Refrigerate for at least 4 hours, or until set, before serving.

    For an even more enjoyable experience, consider letting the cheesecake chill overnight for the best texture and flavor development. You can also experiment with various toppings such as fresh berries, chocolate shavings, or a drizzle of caramel or fruit sauce to enhance the presentation and taste.

    Remember to use room temperature cream cheese to prevent lumps in your filling, and verify your heavy cream is chilled before whipping for maximum volume.

    Energy Bites

    healthy snack energy boost

    Energy bites are a delightful way to satisfy your sweet tooth while providing a nutritious boost. Perfect as a quick snack for busy days, these no-bake energy bites are both easy to make and highly customizable. Packed with oats, nut butter, and various add-ins, they offer a perfect combination of proteins, healthy fats, and carbohydrates to keep you energized throughout the day.

    Preparation is a breeze since there's no baking involved; all you need is a mixing bowl and a few simple ingredients. With endless possibilities for flavor and texture, you can make them your own by adding your favorite seeds, dried fruits, or even a little dark chocolate.

    These energy bites aren't only delicious but also make a great snack for kids and adults alike, providing a wholesome alternative to store-bought energy bars.

    • 1 cup rolled oats
    • 1/2 cup nut butter (peanut, almond, or any favorite)
    • 1/3 cup honey or maple syrup
    • 1/2 cup chocolate chips or dried fruits
    • 1/4 cup ground flaxseed or chia seeds (optional)
    • 1/2 teaspoon vanilla extract
    • A pinch of salt

    In a large mixing bowl, combine the rolled oats, nut butter, honey, chocolate chips (or dried fruits), ground flaxseed (if using), vanilla extract, and a pinch of salt. Mix all the ingredients together until well combined.

    If the mixture is too dry, add a touch more nut butter or honey; if it's too wet, add a little more oats. Once the mixture is ready, use your hands to form small balls (about 1 inch in diameter) and place them on a parchment-lined tray.

    Refrigerate for at least 30 minutes before enjoying.

    For extra flavor and a health boost, you can experiment with different add-ins such as shredded coconut, chopped nuts, or protein powder. If you find the energy bites are a bit sticky to handle, lightly wet your hands before rolling them into balls.

    Store these treats in an airtight container in the refrigerator for up to a week, or freeze them for longer-lasting snacks.

    Fruit and Yogurt Parfaits

    layered fruit yogurt treat

    Fruit and yogurt parfaits are a delicious and nutritious no-bake dessert that can be enjoyed at any time of day. This treat features layers of creamy yogurt, fresh fruits, and crunchy granola, making it a perfect option for breakfast, as a snack, or even a light dessert. The vibrant colors of the layered ingredients not only make it visually appealing but also provide various flavors and textures that will delight your taste buds.

    Creating fruit and yogurt parfaits is simple and quick, requiring minimal effort in preparation. This recipe allows for plenty of flexibility in the choice of fruits and yogurt flavors, enabling you to customize it to your personal preferences. Whether you prefer classic flavors like strawberry and vanilla or want to get adventurous with tropical fruits and Greek yogurt, the possibilities are endless.

    Follow this straightforward recipe to whip up your own delicious parfaits!

    • 2 cups of your favorite yogurt (plain, Greek, or flavored)
    • 2 cups of fresh fruit, diced (such as strawberries, blueberries, bananas, or peaches)
    • 1 cup of granola
    • Honey or maple syrup (optional, for sweetness)
    • Fresh mint leaves (for garnish, optional)

    In a clear glass or bowl, start layering your parfait by adding a spoonful of yogurt at the bottom. Follow this with a layer of diced fruit, then add a layer of granola. Repeat these layers until you've reached the top of the glass, finishing with a layer of yogurt.

    If desired, drizzle a bit of honey or maple syrup on top and garnish with fresh mint leaves before serving.

    Remember that the key to a great parfait is balance—try to avoid adding too much of any single ingredient to guarantee an even distribution of flavors throughout. You can also mix and match fruits according to what's in season or on sale for added vitality.

    Consider freezing leftover fruits or yogurt in advance, as they can be used as a invigorating addition to your parfaits or enjoyed on their own as a healthy snack.

    Key Lime Pie

    tangy citrus dessert delight

    Key Lime Pie is a delightful no-bake dessert that offers a perfect balance of tartness and sweetness, making it a popular choice for gatherings and family dinners. This creamy pie features a zesty key lime filling set on a graham cracker crust, and it's topped off with a cloud of whipped cream. The beauty of this dessert lies in its simplicity; it requires minimal cooking and can be made in advance, allowing you to enjoy more time with your guests.

    To get started, you'll need fresh key lime juice for that bold citrus flavor, but if you can't find key limes, regular limes will work as well. The base crust is quick to prepare and adds a crunchy texture that perfectly complements the smooth filling.

    The final touch is a light and fluffy whipped cream topping, which not only enhances the pie's appearance but also adds a rich creaminess that balances the tangy filling.

    Ingredients:

    • 1 ½ cups graham cracker crumbs
    • ½ cup unsalted butter, melted
    • ¼ cup granulated sugar
    • 1 can (14 oz) sweetened condensed milk
    • ½ cup sour cream
    • ½ cup key lime juice (freshly squeezed or bottled)
    • Zest of 2 key limes
    • 1 cup heavy whipping cream
    • 2 tablespoons powdered sugar
    • Lime wedges (for garnish, optional)

    In a medium bowl, combine the graham cracker crumbs, melted butter, and granulated sugar until well mixed. Press the mixture evenly into the bottom and up the sides of a 9-inch pie pan.

    In another bowl, whisk together the sweetened condensed milk, sour cream, key lime juice, and lime zest until smooth. Pour the filling into the prepared crust and refrigerate for at least 4 hours, or until set.

    Before serving, whip the heavy cream with powdered sugar until soft peaks form, then spread it evenly over the pie. Garnish with lime wedges if desired.

    When making your Key Lime Pie, use fresh key limes for the best flavor, but if you have difficulty finding them, bottled key lime juice is a convenient substitute. Allow the pie to chill long enough to fully set, as this enhances the texture and flavor.

    For added flair, consider using a microplane to zest the limes directly over the whipped cream topping for a burst of citrus aroma when served. Enjoy the delightful balance of sweet and tart in every bite!

    Chocolate Mousse

    creamy rich chocolate dessert

    Chocolate mousse is a classic dessert that captures the essence of indulgence with its rich, creamy texture and intense chocolate flavor. This no-bake treat requires minimal ingredients and effort, making it a perfect choice for both novice and experienced cooks. Whether you're hosting a dinner party or simply looking to satisfy your chocolate cravings, this delightful mousse can be prepared in no time and is bound to impress.

    The beauty of chocolate mousse lies not only in its decadence but also in its versatility. You can enjoy it as is, or enhance it with toppings like whipped cream, chocolate shavings, or fresh berries. This recipe provides a base that you can easily adapt, allowing you to personalize the mousse to your liking. With the right balance of chocolate and cream, you'll achieve a dessert that's light yet satisfying, making it a favorite for chocolate lovers everywhere.

    Ingredients:

    • 6 ounces dark chocolate (semi-sweet or bittersweet)
    • 3 tablespoons unsalted butter
    • 3 large eggs, separated
    • 1/4 cup granulated sugar
    • 1 cup heavy cream
    • 1 teaspoon vanilla extract
    • A pinch of salt

    Melt the chocolate and butter together in a heatproof bowl set over a pot of simmering water, stirring until smooth. In another bowl, beat the egg yolks with the sugar until pale and creamy. Gradually fold the melted chocolate mixture into the egg yolks, followed by the vanilla extract.

    In a separate bowl, whisk the egg whites with a pinch of salt until stiff peaks form. Gently fold the beaten egg whites into the chocolate mixture until no streaks remain. Finally, whip the heavy cream until it forms soft peaks and fold it into the chocolate blend until fully incorporated.

    Spoon the mousse into serving dishes and refrigerate for at least 2 hours before serving. For best results, use high-quality chocolate as it greatly influences the flavor of your mousse. Confirm that your bowls and beaters are clean and free of grease when whipping the egg whites and cream to achieve maximum volume.

    Adding a bit of espresso powder can intensify the chocolate flavor, while allowing the mousse to set longer in the refrigerator will create a firmer texture. Enjoy your delicious creation with a sprinkle of cocoa powder or your favorite toppings for an extra touch!

    Coconut Macaroons

    delicious coconut dessert bites

    Coconut macaroons are a delightful treat that brings together the tropical flavor of coconut and the ease of no-bake dessert preparation.

    These sweet, chewy confections are perfect for any occasion, from casual family gatherings to elegant dinner parties. Not only are they simple to make, but they also cater to a variety of dietary needs, being naturally gluten-free and easily adaptable to vegan lifestyles.

    These delicious bites are characterized by their texture—soft on the inside and slightly crisp on the outside—along with their rich coconut flavor. With just a handful of ingredients, you can whip up a batch in no time.

    Whether you're a seasoned baker or a novice in the kitchen, these coconut macaroons are a guaranteed hit that will leave everyone wanting more.

    • 3 cups shredded unsweetened coconut
    • 2/3 cup sweetened condensed milk (or coconut milk for a vegan option)
    • 1 teaspoon vanilla extract
    • 1/4 teaspoon salt
    • 1/2 teaspoon almond extract (optional)
    • 1/2 cup chocolate chips (optional for drizzling or dipping)

    In a large mixing bowl, combine the shredded coconut, sweetened condensed milk, vanilla extract, salt, and almond extract (if using). Stir until all the ingredients are well mixed and the coconut is evenly coated.

    Using your hands, form small balls or mounds of the mixture and place them on a baking sheet lined with parchment paper. Refrigerate for at least 30 minutes to allow them to firm up before serving.

    When making coconut macaroons, feel free to change things up by adding different flavors or ingredients. For a chocolate twist, consider incorporating cocoa powder into the mixture or dipping the finished macaroons in melted chocolate for an extra indulgence.

    Make sure to pack the mixture firmly when shaping the macaroons to ascertain they hold their shape. Ultimately, these treats can be stored in an airtight container in the refrigerator for up to a week, making them a great make-ahead dessert!

    Oreo Truffles

    oreo chocolate dessert balls

    Oreo truffles are a decadent no-bake dessert that combines the beloved flavors of chocolate and cream in a simple yet irresistible bite-sized treat. These delightful confections are made with crushed Oreos blended with cream cheese, then coated in melted chocolate to create a rich exterior that complements the creamy interior. Whether served at parties, given as gifts, or enjoyed at home, Oreo truffles bring a delightful crunch and sweetness that everyone loves.

    The best part about making Oreo truffles is how easy and quick they're to prepare. With just a few ingredients and minimal cleanup required, you can whip up a batch in no time. These truffles are also incredibly versatile; you can customize the toppings or the type of chocolate used for coating to suit your taste preferences. Once you try making these delicious bites, they'll surely become a go-to dessert in your recipe repertoire.

    • 1 package of Oreo cookies (approximately 36 cookies)
    • 8 oz cream cheese, softened
    • 16 oz chocolate (milk, dark, or white), for coating
    • Optional: sprinkles, crushed nuts, or extra Oreo crumbs for garnish

    In a large mixing bowl, crush the Oreo cookies into fine crumbs using a food processor or by placing them in a sealed plastic bag and rolling over them with a rolling pin. Once crushed, add the softened cream cheese and mix until well combined. Use your hands to form the mixture into small balls, about 1 inch in diameter, and place them on a parchment-lined baking sheet.

    After all the mixture is formed into balls, freeze them for about 30 minutes until firm. Meanwhile, melt the chocolate in a microwave-safe bowl, stirring every 30 seconds until smooth. Once the truffles are chilled, dip each one in the melted chocolate, allowing excess chocolate to drip off before returning them to the baking sheet. Let the chocolate set at room temperature or refrigerate until firm.

    For a bit of variety, feel free to experiment with different types of chocolate or additional toppings like shredded coconut, colorful sprinkles, or even a drizzle of contrasting chocolate on top for a creative touch. If you're short on time, you can also skip the freezing step and simply serve the mixture in a bowl with a spoon for a fun dip-style dessert.

    Remember that the key to delicious truffles is to guarantee they're well-chilled before dipping, as this helps maintain their shape and allows for a smooth chocolate coating. Enjoy your Oreo truffles and watch them disappear at any gathering!

    Rice Krispie Treats

    sweet crunchy marshmallow dessert

    Rice Krispie treats are a classic no-bake dessert that many people fondly remember from their childhood. They're simple to make and require only a few ingredients, making them a go-to option for school lunches, parties, or whenever you're craving something sweet.

    The combination of crispy Rice Krispies cereal, melty marshmallows, and butter results in a deliciously chewy and satisfying treat that can be enjoyed by both kids and adults alike.

    Making Rice Krispie treats is a fun activity that can involve the whole family. Not only do they come together in just a matter of minutes, but they're also highly customizable. You can add in extras like chocolate chips, sprinkles, or even nuts to create your own unique twist on this timeless favorite.

    Whether you enjoy them plain or dressed up, these treats are sure to please crowds of all ages.

    • 3 tablespoons of butter
    • 1 package (10 oz) mini marshmallows
    • 6 cups of Rice Krispies cereal
    • Optional: chocolate chips, sprinkles, or nuts for mix-ins

    In a large saucepan, melt the butter over low heat. Once the butter is melted, add the mini marshmallows and stir continuously until they're completely melted and smooth.

    Remove the saucepan from heat, and quickly stir in the Rice Krispies cereal until evenly coated. Press the mixture into a greased 9×13-inch baking dish, using a spatula or your hands to flatten it down evenly. Let it cool for about 30 minutes before cutting into squares.

    When making Rice Krispie treats, be sure not to overcook the marshmallows as this can lead to a harder texture instead of the desired chewy treat.

    If you want to make them a bit extra special, consider drizzling melted chocolate over the top once they've cooled, or folding in some colorful sprinkles for a festive touch. Additionally, for a more flavorful twist, experiment with different flavored marshmallows or add a pinch of salt to balance the sweetness.

    No-Bake Brownies

    delicious easy chocolate treats

    No-bake brownies are a delicious alternative to their baked counterparts, providing a rich and fudgy treat without the need for an oven. These brownies are perfect for those hot summer days when you want something sweet but don't want to heat up the kitchen.

    They're incredibly easy to make and require only a few simple ingredients, making them a great option for both novice bakers and seasoned dessert lovers.

    To make no-bake brownies, you'll combine ingredients that create a dense and chewy texture, reminiscent of classic brownies without the lengthy baking time. Once prepared, these brownies can be cut into squares and chilled in the refrigerator until set, allowing the flavors to meld together beautifully. Enjoying a piece of these no-bake brownies is like indulging in a rich chocolate treat – all with minimal effort and time!

    • 1 cup pitted dates
    • 1 cup walnuts
    • 1/2 cup unsweetened cocoa powder
    • 1/4 cup almond flour (or any nut flour)
    • 1/4 cup maple syrup or honey
    • 1 teaspoon vanilla extract
    • A pinch of salt
    • Optional: chocolate chips or nuts for topping

    In a food processor, combine the pitted dates, walnuts, cocoa powder, almond flour, maple syrup, vanilla extract, and pinch of salt. Process the mixture until it becomes a sticky dough; if it's too dry, you can add a little water or more maple syrup to achieve the right consistency.

    Once blended, press the mixture evenly into an 8×8 inch baking dish lined with parchment paper, and smooth the top with a spatula. Chill in the refrigerator for at least 2 hours to set before cutting into squares.

    When making no-bake brownies, feel free to customize the recipe to suit your preferences. You can experiment by adding different nuts, such as pecans or almonds, or even incorporate nut butters for extra creaminess.

    For a more intense chocolate flavor, consider mixing in some chocolate chips or drizzling melted chocolate on top before chilling. Additionally, guarantee your dates are soft for the best texture; if they're too dry, soak them in warm water for a few minutes before mixing. Enjoy your delicious and easy no-bake brownies!