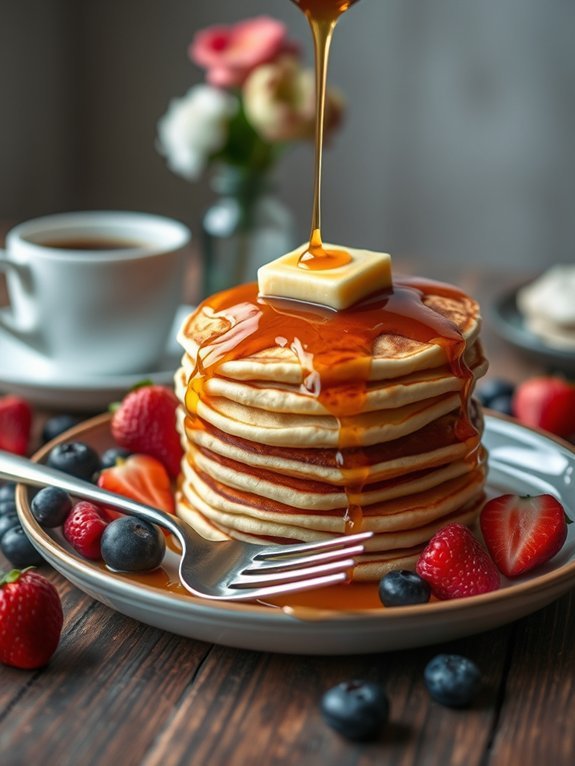
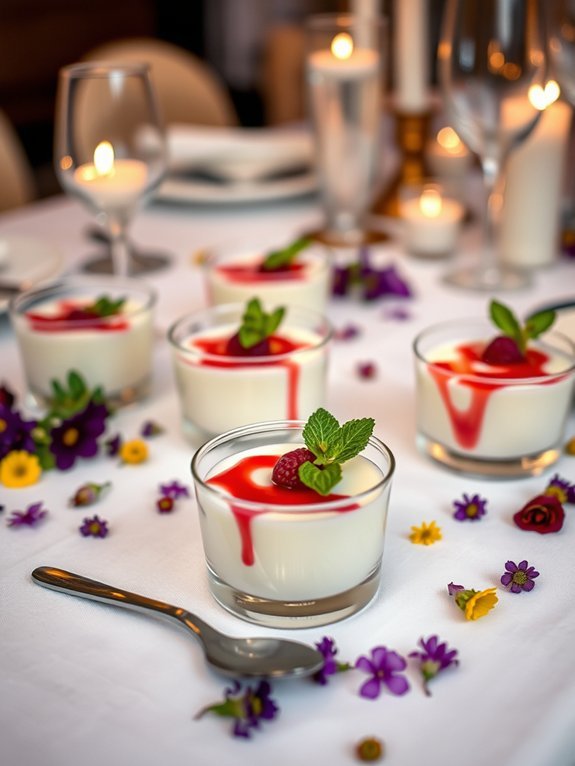
When you're craving something sweet fast, no-bake desserts are the way to go! Whip up delicious Chocolate Peanut Butter Bars or cool off with a revitalizing Key Lime Pie. You might enjoy creamy No-Bake Cheesecake or energy-packed Energy Bites. Don't forget about delightful Fruit and Yogurt Parfaits, indulgent Oreo Truffles, or classic Rice Krispie Treats. And for a twist, try Coconut Macaroons or easy No-Bake Brownies. There's a world of flavors waiting for you!
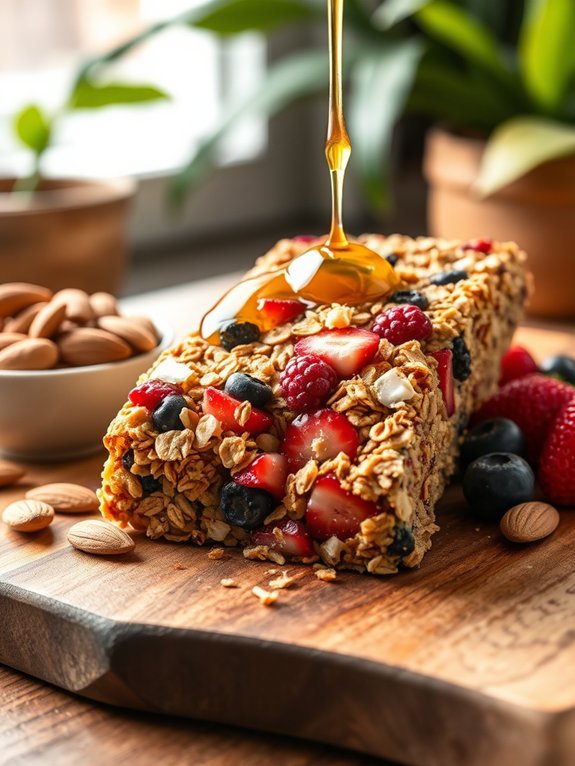
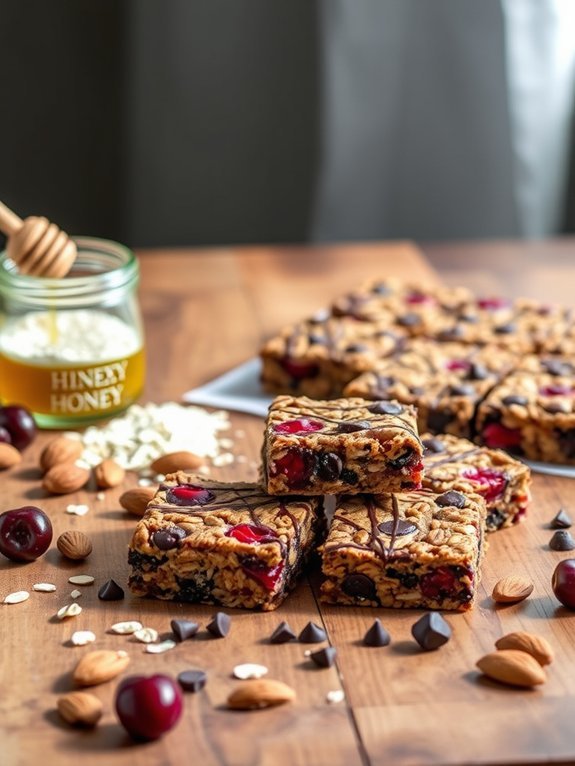
Chocolate Peanut Butter Bars
Chocolate Peanut Butter Bars are a deliciously indulgent no-bake treat that combines the richness of chocolate with the creamy, nutty flavor of peanut butter. Perfect for satisfying your sweet tooth without turning on the oven, these bars require minimal effort and yield maximum satisfaction. Ideal for sharing at parties, potlucks, or simply indulging at home, they're sure to become a favorite for both kids and adults alike.
The base of these bars is a mixture of crunchy graham cracker crumbs and oats, which give them a satisfying texture and a delightful crunch. Topped with a buttery peanut butter and chocolate layer, they offer a perfect balance of flavors. Best of all, these bars set up quickly in the refrigerator, so you can enjoy a sweet treat in no time!
- 1 cup graham cracker crumbs
- 1 cup rolled oats
- 1/2 cup unsweetened cocoa powder
- 1 cup creamy peanut butter
- 1/2 cup honey or maple syrup
- 1/2 cup powdered sugar
- 1 cup semi-sweet chocolate chips
- 2 tablespoons coconut oil (optional, for smoothness)
In a large bowl, combine the graham cracker crumbs, rolled oats, cocoa powder, creamy peanut butter, honey (or maple syrup), and powdered sugar. Mix well until all ingredients are fully incorporated, forming a thick dough. Press the mixture into a greased 8×8-inch square baking pan.
Melt the semi-sweet chocolate chips with the coconut oil in a microwave-safe bowl in intervals of 20 seconds, stirring in between until smooth. Pour the melted chocolate over the peanut butter layer in the pan and spread it evenly.
Refrigerate the bars for at least 2 hours, or until firm, before slicing into squares and serving. For the best results, make certain to press the peanut butter mixture firmly into the pan to guarantee it holds together well once set.
Feel free to get creative by adding toppings like chopped nuts or sea salt, or substituting different nut butters for a unique twist. These bars can be stored in an airtight container in the fridge for up to a week, but chances are they won't last that long once you taste them!
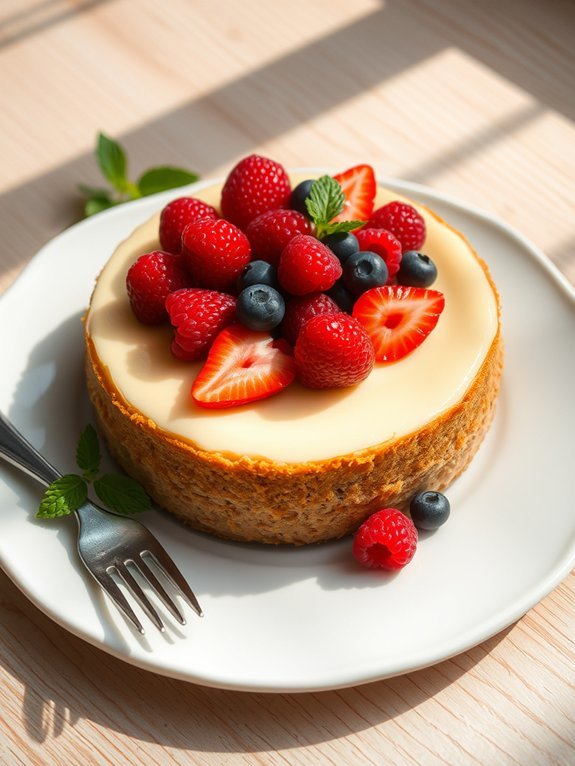
No-Bake Cheesecake
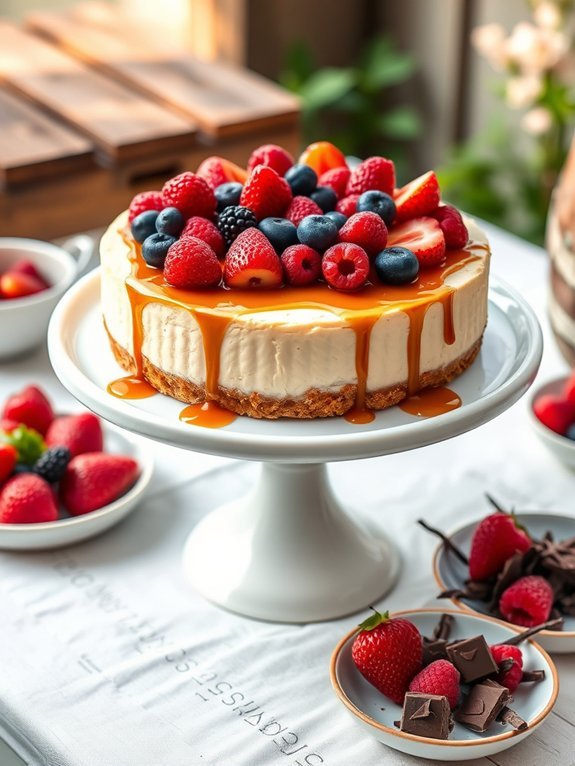
No-bake cheesecake is a delightful dessert that's both easy and satisfying to prepare. It requires no oven time, making it perfect for warm days when you want a revitalizing treat without the fuss of baking. The creamy filling, which is made with cream cheese, sugar, and whipped cream, sits on a crumbly graham cracker crust that adds a complementary texture and flavor. Topped with your choice of fruits, chocolate, or caramel sauce, this cheesecake is sure to please everyone at your gathering.
Making a no-bake cheesecake isn't only simple but also allows you to customize it to your liking. Whether you prefer a classic vanilla flavor or something more adventurous, like lemon or chocolate, the base recipe remains the same. This dessert sets in the refrigerator, allowing all the flavors to meld together, resulting in a luscious, decadent cheesecake that feels indulgent without any of the baking hassle.
Ingredients:
- 1 ½ cups graham cracker crumbs
- ¼ cup sugar
- ½ cup unsalted butter, melted
- 2 (8 oz) packages cream cheese, softened
- 1 cup powdered sugar
- 1 teaspoon vanilla extract
- 1 cup heavy whipping cream
In a mixing bowl, combine the graham cracker crumbs, sugar, and melted butter, and mix well until crumbly. Press the mixture firmly into the bottom of a 9-inch springform pan to form the crust.
In another bowl, beat the softened cream cheese until smooth. Gradually add in the powdered sugar and vanilla extract, mixing until well combined. In a separate bowl, whip the heavy cream until stiff peaks form, then gently fold it into the cream cheese mixture.
Pour the filling over the crust in the springform pan and spread it evenly. Refrigerate for at least 4 hours, or until set, before serving.
For an even more enjoyable experience, consider letting the cheesecake chill overnight for the best texture and flavor development. You can also experiment with various toppings such as fresh berries, chocolate shavings, or a drizzle of caramel or fruit sauce to enhance the presentation and taste.
Remember to use room temperature cream cheese to prevent lumps in your filling, and verify your heavy cream is chilled before whipping for maximum volume.
Energy Bites

Energy bites are a delightful way to satisfy your sweet tooth while providing a nutritious boost. Perfect as a quick snack for busy days, these no-bake energy bites are both easy to make and highly customizable. Packed with oats, nut butter, and various add-ins, they offer a perfect combination of proteins, healthy fats, and carbohydrates to keep you energized throughout the day.
Preparation is a breeze since there's no baking involved; all you need is a mixing bowl and a few simple ingredients. With endless possibilities for flavor and texture, you can make them your own by adding your favorite seeds, dried fruits, or even a little dark chocolate.
These energy bites aren't only delicious but also make a great snack for kids and adults alike, providing a wholesome alternative to store-bought energy bars.
- 1 cup rolled oats
- 1/2 cup nut butter (peanut, almond, or any favorite)
- 1/3 cup honey or maple syrup
- 1/2 cup chocolate chips or dried fruits
- 1/4 cup ground flaxseed or chia seeds (optional)
- 1/2 teaspoon vanilla extract
- A pinch of salt
In a large mixing bowl, combine the rolled oats, nut butter, honey, chocolate chips (or dried fruits), ground flaxseed (if using), vanilla extract, and a pinch of salt. Mix all the ingredients together until well combined.
If the mixture is too dry, add a touch more nut butter or honey; if it's too wet, add a little more oats. Once the mixture is ready, use your hands to form small balls (about 1 inch in diameter) and place them on a parchment-lined tray.
Refrigerate for at least 30 minutes before enjoying.
For extra flavor and a health boost, you can experiment with different add-ins such as shredded coconut, chopped nuts, or protein powder. If you find the energy bites are a bit sticky to handle, lightly wet your hands before rolling them into balls.
Store these treats in an airtight container in the refrigerator for up to a week, or freeze them for longer-lasting snacks.
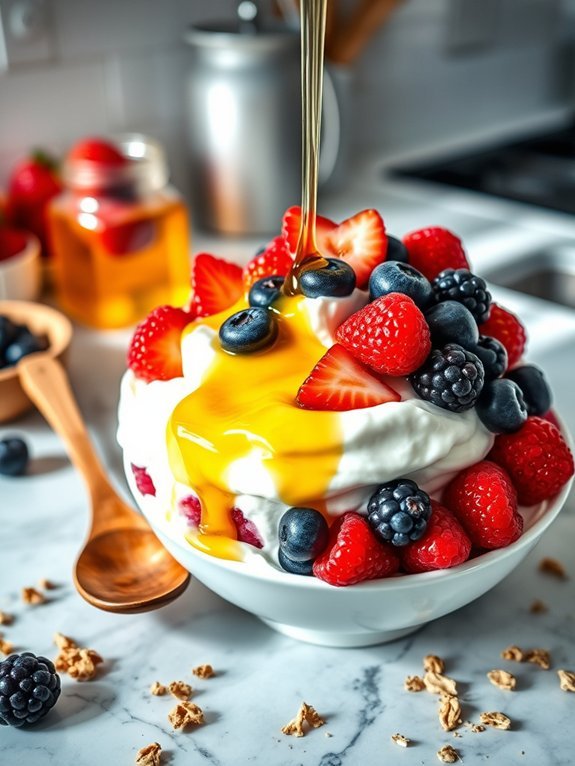
Fruit and Yogurt Parfaits
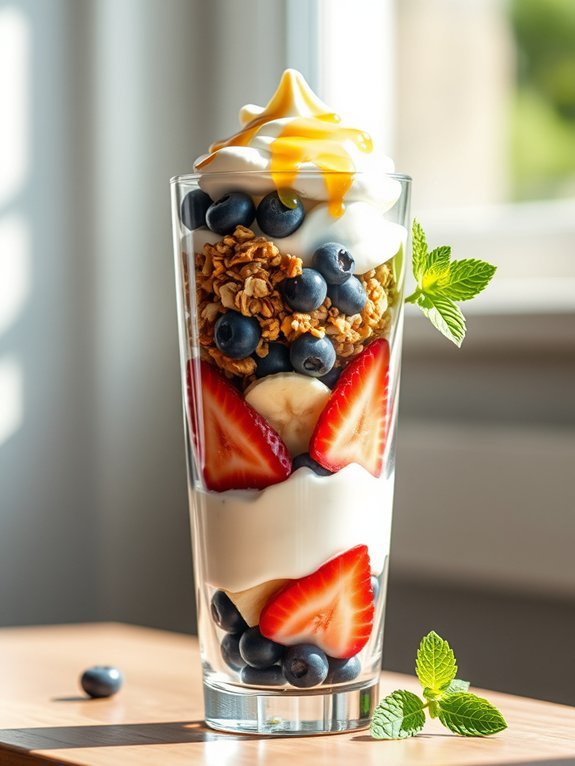
Fruit and yogurt parfaits are a delicious and nutritious no-bake dessert that can be enjoyed at any time of day. This treat features layers of creamy yogurt, fresh fruits, and crunchy granola, making it a perfect option for breakfast, as a snack, or even a light dessert. The vibrant colors of the layered ingredients not only make it visually appealing but also provide various flavors and textures that will delight your taste buds.
Creating fruit and yogurt parfaits is simple and quick, requiring minimal effort in preparation. This recipe allows for plenty of flexibility in the choice of fruits and yogurt flavors, enabling you to customize it to your personal preferences. Whether you prefer classic flavors like strawberry and vanilla or want to get adventurous with tropical fruits and Greek yogurt, the possibilities are endless.
Follow this straightforward recipe to whip up your own delicious parfaits!
- 2 cups of your favorite yogurt (plain, Greek, or flavored)
- 2 cups of fresh fruit, diced (such as strawberries, blueberries, bananas, or peaches)
- 1 cup of granola
- Honey or maple syrup (optional, for sweetness)
- Fresh mint leaves (for garnish, optional)
In a clear glass or bowl, start layering your parfait by adding a spoonful of yogurt at the bottom. Follow this with a layer of diced fruit, then add a layer of granola. Repeat these layers until you've reached the top of the glass, finishing with a layer of yogurt.
If desired, drizzle a bit of honey or maple syrup on top and garnish with fresh mint leaves before serving.
Remember that the key to a great parfait is balance—try to avoid adding too much of any single ingredient to guarantee an even distribution of flavors throughout. You can also mix and match fruits according to what's in season or on sale for added vitality.
Consider freezing leftover fruits or yogurt in advance, as they can be used as a invigorating addition to your parfaits or enjoyed on their own as a healthy snack.
Key Lime Pie

Key Lime Pie is a delightful no-bake dessert that offers a perfect balance of tartness and sweetness, making it a popular choice for gatherings and family dinners. This creamy pie features a zesty key lime filling set on a graham cracker crust, and it's topped off with a cloud of whipped cream. The beauty of this dessert lies in its simplicity; it requires minimal cooking and can be made in advance, allowing you to enjoy more time with your guests.
To get started, you'll need fresh key lime juice for that bold citrus flavor, but if you can't find key limes, regular limes will work as well. The base crust is quick to prepare and adds a crunchy texture that perfectly complements the smooth filling.
The final touch is a light and fluffy whipped cream topping, which not only enhances the pie's appearance but also adds a rich creaminess that balances the tangy filling.
Ingredients:
- 1 ½ cups graham cracker crumbs
- ½ cup unsalted butter, melted
- ¼ cup granulated sugar
- 1 can (14 oz) sweetened condensed milk
- ½ cup sour cream
- ½ cup key lime juice (freshly squeezed or bottled)
- Zest of 2 key limes
- 1 cup heavy whipping cream
- 2 tablespoons powdered sugar
- Lime wedges (for garnish, optional)
In a medium bowl, combine the graham cracker crumbs, melted butter, and granulated sugar until well mixed. Press the mixture evenly into the bottom and up the sides of a 9-inch pie pan.
In another bowl, whisk together the sweetened condensed milk, sour cream, key lime juice, and lime zest until smooth. Pour the filling into the prepared crust and refrigerate for at least 4 hours, or until set.
Before serving, whip the heavy cream with powdered sugar until soft peaks form, then spread it evenly over the pie. Garnish with lime wedges if desired.
When making your Key Lime Pie, use fresh key limes for the best flavor, but if you have difficulty finding them, bottled key lime juice is a convenient substitute. Allow the pie to chill long enough to fully set, as this enhances the texture and flavor.
For added flair, consider using a microplane to zest the limes directly over the whipped cream topping for a burst of citrus aroma when served. Enjoy the delightful balance of sweet and tart in every bite!
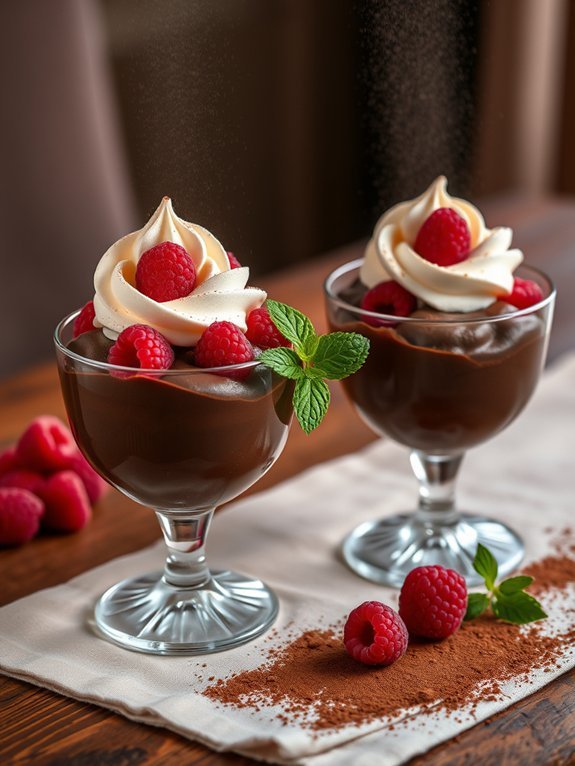
Chocolate Mousse
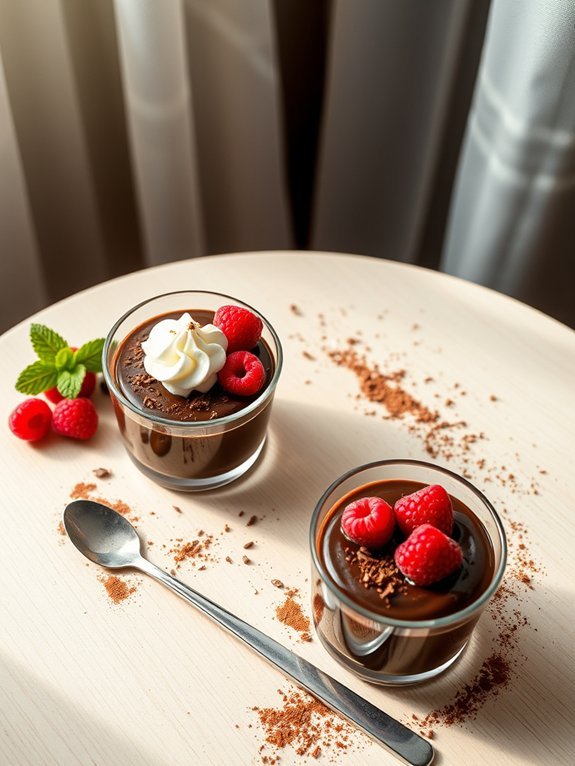
Chocolate mousse is a classic dessert that captures the essence of indulgence with its rich, creamy texture and intense chocolate flavor. This no-bake treat requires minimal ingredients and effort, making it a perfect choice for both novice and experienced cooks. Whether you're hosting a dinner party or simply looking to satisfy your chocolate cravings, this delightful mousse can be prepared in no time and is bound to impress.
The beauty of chocolate mousse lies not only in its decadence but also in its versatility. You can enjoy it as is, or enhance it with toppings like whipped cream, chocolate shavings, or fresh berries. This recipe provides a base that you can easily adapt, allowing you to personalize the mousse to your liking. With the right balance of chocolate and cream, you'll achieve a dessert that's light yet satisfying, making it a favorite for chocolate lovers everywhere.
Ingredients:
- 6 ounces dark chocolate (semi-sweet or bittersweet)
- 3 tablespoons unsalted butter
- 3 large eggs, separated
- 1/4 cup granulated sugar
- 1 cup heavy cream
- 1 teaspoon vanilla extract
- A pinch of salt
Melt the chocolate and butter together in a heatproof bowl set over a pot of simmering water, stirring until smooth. In another bowl, beat the egg yolks with the sugar until pale and creamy. Gradually fold the melted chocolate mixture into the egg yolks, followed by the vanilla extract.
In a separate bowl, whisk the egg whites with a pinch of salt until stiff peaks form. Gently fold the beaten egg whites into the chocolate mixture until no streaks remain. Finally, whip the heavy cream until it forms soft peaks and fold it into the chocolate blend until fully incorporated.
Spoon the mousse into serving dishes and refrigerate for at least 2 hours before serving. For best results, use high-quality chocolate as it greatly influences the flavor of your mousse. Confirm that your bowls and beaters are clean and free of grease when whipping the egg whites and cream to achieve maximum volume.
Adding a bit of espresso powder can intensify the chocolate flavor, while allowing the mousse to set longer in the refrigerator will create a firmer texture. Enjoy your delicious creation with a sprinkle of cocoa powder or your favorite toppings for an extra touch!
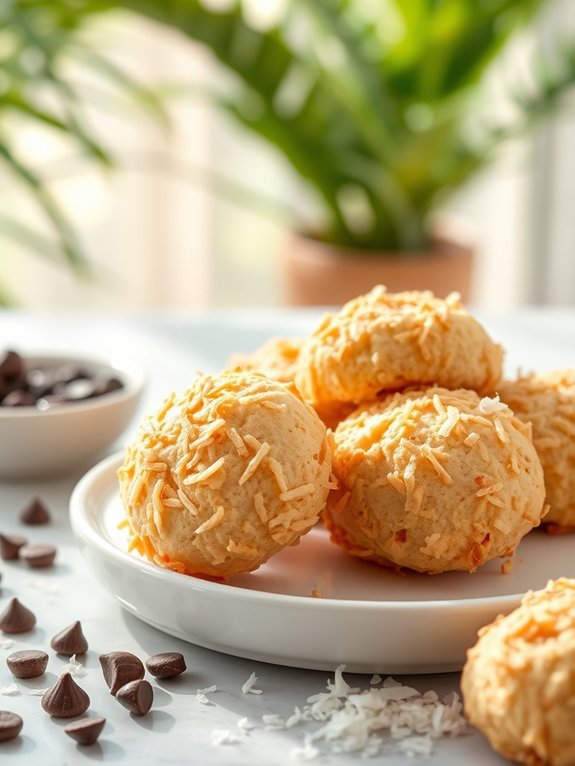
Coconut Macaroons
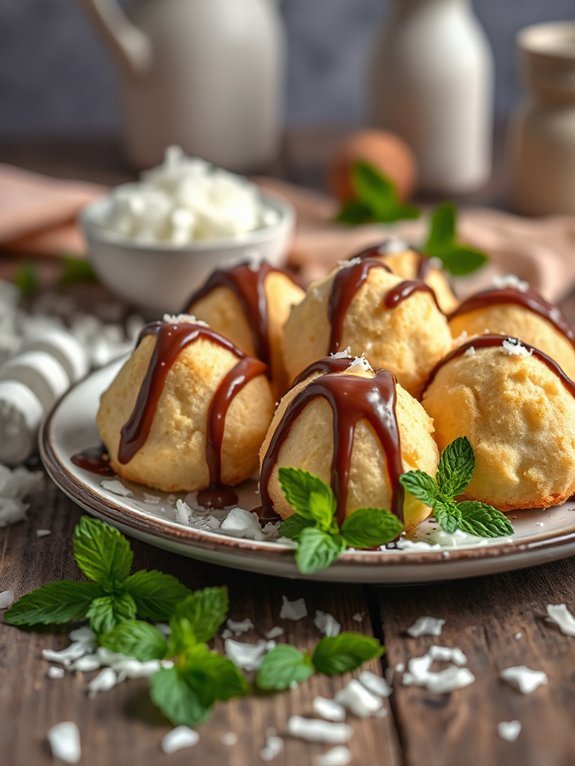
Coconut macaroons are a delightful treat that brings together the tropical flavor of coconut and the ease of no-bake dessert preparation.
These sweet, chewy confections are perfect for any occasion, from casual family gatherings to elegant dinner parties. Not only are they simple to make, but they also cater to a variety of dietary needs, being naturally gluten-free and easily adaptable to vegan lifestyles.
These delicious bites are characterized by their texture—soft on the inside and slightly crisp on the outside—along with their rich coconut flavor. With just a handful of ingredients, you can whip up a batch in no time.
Whether you're a seasoned baker or a novice in the kitchen, these coconut macaroons are a guaranteed hit that will leave everyone wanting more.
- 3 cups shredded unsweetened coconut
- 2/3 cup sweetened condensed milk (or coconut milk for a vegan option)
- 1 teaspoon vanilla extract
- 1/4 teaspoon salt
- 1/2 teaspoon almond extract (optional)
- 1/2 cup chocolate chips (optional for drizzling or dipping)
In a large mixing bowl, combine the shredded coconut, sweetened condensed milk, vanilla extract, salt, and almond extract (if using). Stir until all the ingredients are well mixed and the coconut is evenly coated.
Using your hands, form small balls or mounds of the mixture and place them on a baking sheet lined with parchment paper. Refrigerate for at least 30 minutes to allow them to firm up before serving.
When making coconut macaroons, feel free to change things up by adding different flavors or ingredients. For a chocolate twist, consider incorporating cocoa powder into the mixture or dipping the finished macaroons in melted chocolate for an extra indulgence.
Make sure to pack the mixture firmly when shaping the macaroons to ascertain they hold their shape. Ultimately, these treats can be stored in an airtight container in the refrigerator for up to a week, making them a great make-ahead dessert!
Oreo Truffles
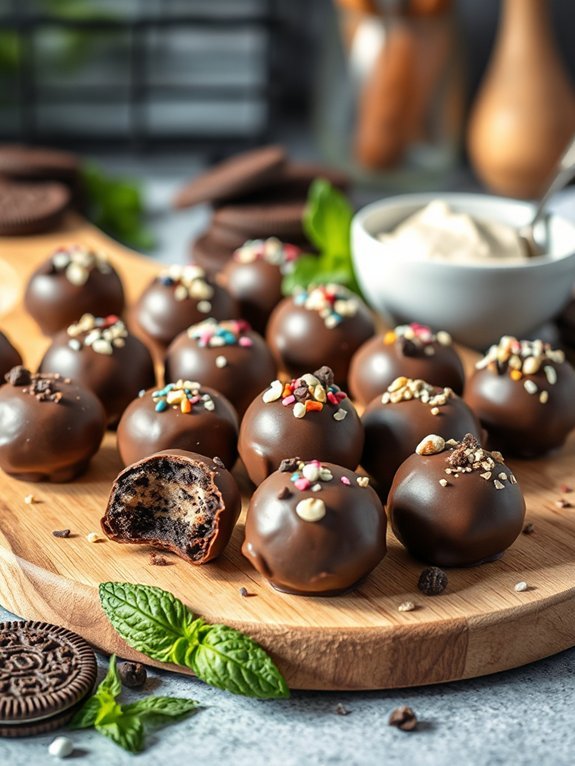
Oreo truffles are a decadent no-bake dessert that combines the beloved flavors of chocolate and cream in a simple yet irresistible bite-sized treat. These delightful confections are made with crushed Oreos blended with cream cheese, then coated in melted chocolate to create a rich exterior that complements the creamy interior. Whether served at parties, given as gifts, or enjoyed at home, Oreo truffles bring a delightful crunch and sweetness that everyone loves.
The best part about making Oreo truffles is how easy and quick they're to prepare. With just a few ingredients and minimal cleanup required, you can whip up a batch in no time. These truffles are also incredibly versatile; you can customize the toppings or the type of chocolate used for coating to suit your taste preferences. Once you try making these delicious bites, they'll surely become a go-to dessert in your recipe repertoire.
- 1 package of Oreo cookies (approximately 36 cookies)
- 8 oz cream cheese, softened
- 16 oz chocolate (milk, dark, or white), for coating
- Optional: sprinkles, crushed nuts, or extra Oreo crumbs for garnish
In a large mixing bowl, crush the Oreo cookies into fine crumbs using a food processor or by placing them in a sealed plastic bag and rolling over them with a rolling pin. Once crushed, add the softened cream cheese and mix until well combined. Use your hands to form the mixture into small balls, about 1 inch in diameter, and place them on a parchment-lined baking sheet.
After all the mixture is formed into balls, freeze them for about 30 minutes until firm. Meanwhile, melt the chocolate in a microwave-safe bowl, stirring every 30 seconds until smooth. Once the truffles are chilled, dip each one in the melted chocolate, allowing excess chocolate to drip off before returning them to the baking sheet. Let the chocolate set at room temperature or refrigerate until firm.
For a bit of variety, feel free to experiment with different types of chocolate or additional toppings like shredded coconut, colorful sprinkles, or even a drizzle of contrasting chocolate on top for a creative touch. If you're short on time, you can also skip the freezing step and simply serve the mixture in a bowl with a spoon for a fun dip-style dessert.
Remember that the key to delicious truffles is to guarantee they're well-chilled before dipping, as this helps maintain their shape and allows for a smooth chocolate coating. Enjoy your Oreo truffles and watch them disappear at any gathering!
Rice Krispie Treats
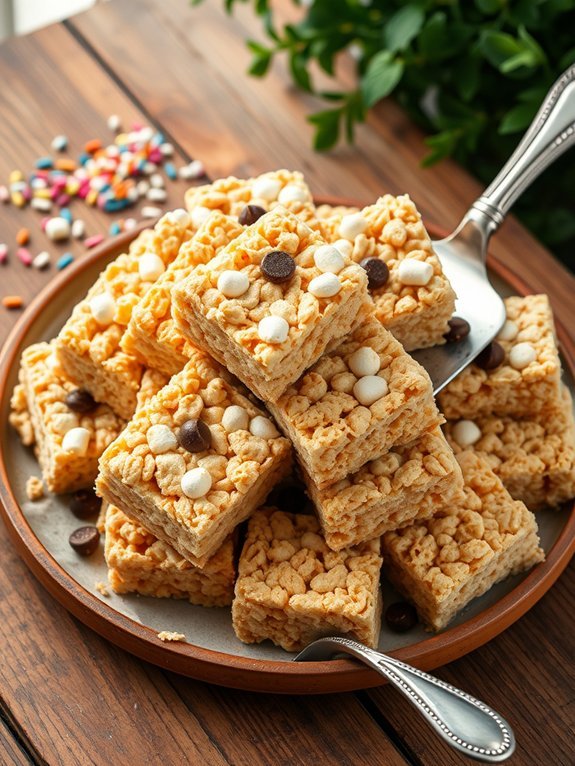
Rice Krispie treats are a classic no-bake dessert that many people fondly remember from their childhood. They're simple to make and require only a few ingredients, making them a go-to option for school lunches, parties, or whenever you're craving something sweet.
The combination of crispy Rice Krispies cereal, melty marshmallows, and butter results in a deliciously chewy and satisfying treat that can be enjoyed by both kids and adults alike.
Making Rice Krispie treats is a fun activity that can involve the whole family. Not only do they come together in just a matter of minutes, but they're also highly customizable. You can add in extras like chocolate chips, sprinkles, or even nuts to create your own unique twist on this timeless favorite.
Whether you enjoy them plain or dressed up, these treats are sure to please crowds of all ages.
- 3 tablespoons of butter
- 1 package (10 oz) mini marshmallows
- 6 cups of Rice Krispies cereal
- Optional: chocolate chips, sprinkles, or nuts for mix-ins
In a large saucepan, melt the butter over low heat. Once the butter is melted, add the mini marshmallows and stir continuously until they're completely melted and smooth.
Remove the saucepan from heat, and quickly stir in the Rice Krispies cereal until evenly coated. Press the mixture into a greased 9×13-inch baking dish, using a spatula or your hands to flatten it down evenly. Let it cool for about 30 minutes before cutting into squares.
When making Rice Krispie treats, be sure not to overcook the marshmallows as this can lead to a harder texture instead of the desired chewy treat.
If you want to make them a bit extra special, consider drizzling melted chocolate over the top once they've cooled, or folding in some colorful sprinkles for a festive touch. Additionally, for a more flavorful twist, experiment with different flavored marshmallows or add a pinch of salt to balance the sweetness.
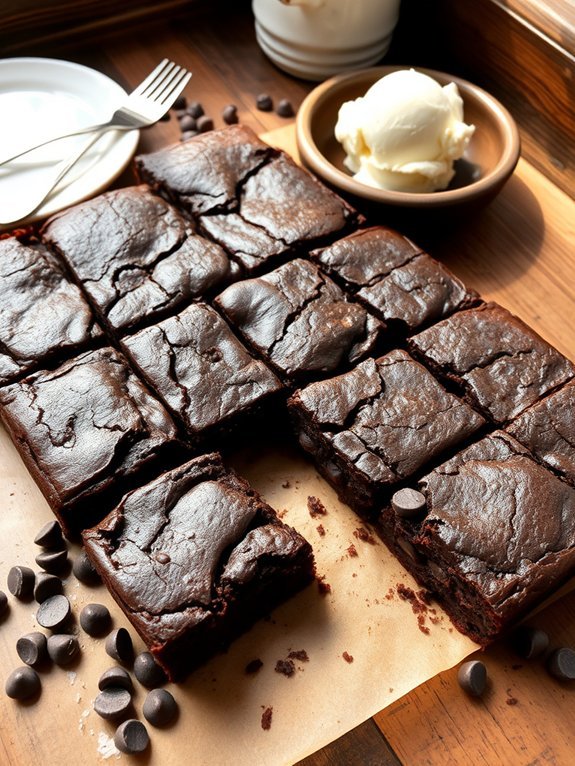
No-Bake Brownies
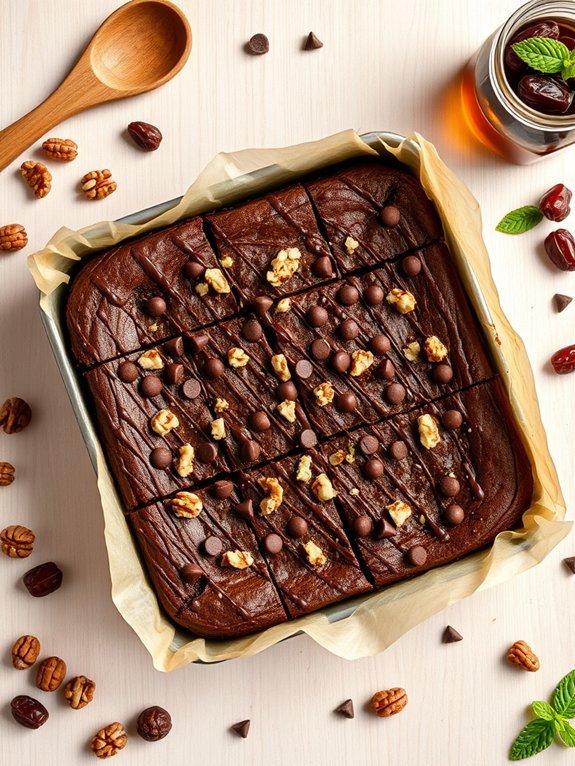
No-bake brownies are a delicious alternative to their baked counterparts, providing a rich and fudgy treat without the need for an oven. These brownies are perfect for those hot summer days when you want something sweet but don't want to heat up the kitchen.
They're incredibly easy to make and require only a few simple ingredients, making them a great option for both novice bakers and seasoned dessert lovers.
To make no-bake brownies, you'll combine ingredients that create a dense and chewy texture, reminiscent of classic brownies without the lengthy baking time. Once prepared, these brownies can be cut into squares and chilled in the refrigerator until set, allowing the flavors to meld together beautifully. Enjoying a piece of these no-bake brownies is like indulging in a rich chocolate treat – all with minimal effort and time!
- 1 cup pitted dates
- 1 cup walnuts
- 1/2 cup unsweetened cocoa powder
- 1/4 cup almond flour (or any nut flour)
- 1/4 cup maple syrup or honey
- 1 teaspoon vanilla extract
- A pinch of salt
- Optional: chocolate chips or nuts for topping
In a food processor, combine the pitted dates, walnuts, cocoa powder, almond flour, maple syrup, vanilla extract, and pinch of salt. Process the mixture until it becomes a sticky dough; if it's too dry, you can add a little water or more maple syrup to achieve the right consistency.
Once blended, press the mixture evenly into an 8×8 inch baking dish lined with parchment paper, and smooth the top with a spatula. Chill in the refrigerator for at least 2 hours to set before cutting into squares.
When making no-bake brownies, feel free to customize the recipe to suit your preferences. You can experiment by adding different nuts, such as pecans or almonds, or even incorporate nut butters for extra creaminess.
For a more intense chocolate flavor, consider mixing in some chocolate chips or drizzling melted chocolate on top before chilling. Additionally, guarantee your dates are soft for the best texture; if they're too dry, soak them in warm water for a few minutes before mixing. Enjoy your delicious and easy no-bake brownies!