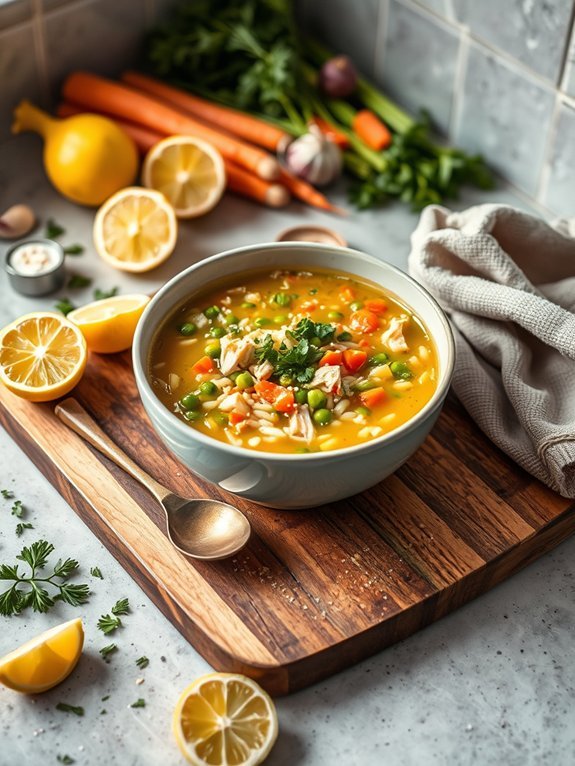
Looking for healthy slow cooker dinners? You've got great options, like Vegetable and Quinoa Stew, Lentil and Sweet Potato Curry, and Mediterranean Chickpea Soup. For meat lovers, Slow Cooker Chicken Tacos, Barbecue Pulled Pork, and Garlic Herb Roasted Chicken are delicious picks. These meals are not only nutritious but also easy to prepare, using minimal effort. Plus, they're perfect for meal prepping. Keep scrolling to discover more delicious recipes that fit your busy lifestyle!
Vegetable and Quinoa Stew
Looking for a nutritious and satisfying meal that requires minimal effort? This Vegetable and Quinoa Stew cooked in a slow cooker is the perfect solution! Packed with a variety of vegetables and protein-rich quinoa, this dish is a delightful medley of flavors that not only nourishes the body but pleases the taste buds.
The slow cooking process allows the vegetables to soften and the flavors to deepen, making every bite a comforting experience. One of the best things about this stew is its versatility. Feel free to use whatever veggies you have on hand, whether it's seasonal produce or leftovers hanging out in your fridge.
The quinoa adds heartiness and a wonderful texture while providing essential amino acids. Easy to prepare, this stew can be served alone or accompanied by a slice of crusty whole-grain bread for a complete meal.
Ingredients:
- 1 cup quinoa, rinsed and drained
- 4 cups vegetable broth
- 2 cups diced tomatoes (canned or fresh)
- 1 medium onion, diced
- 2 cloves garlic, minced
- 1 cup chopped carrots
- 1 cup chopped bell peppers (any color)
- 1 cup chopped zucchini
- 1 cup chopped spinach or kale
- 1 teaspoon dried oregano
- 1 teaspoon dried basil
- 1/2 teaspoon salt
- 1/4 teaspoon black pepper
- Optional: red pepper flakes for heat
To cook, combine all the ingredients in your slow cooker and stir to guarantee the quinoa and vegetables are well mixed. Cook on low for 6-8 hours or on high for 3-4 hours, until the vegetables are tender and the quinoa is cooked through.
If the stew is too thick, you can add a little more vegetable broth or water to reach your desired consistency before serving. When preparing this stew, keep in mind that different vegetables have varying cooking times.
For instance, root vegetables like carrots may take longer to cook, so feel free to chop them smaller for quicker cooking. Additionally, you can customize the seasonings according to your preference; adding herbs or spices like cumin or turmeric can elevate the flavor to suit your taste.
Finally, this stew stores well in the fridge for up to 5 days and can be frozen, making it a fantastic make-ahead meal option!
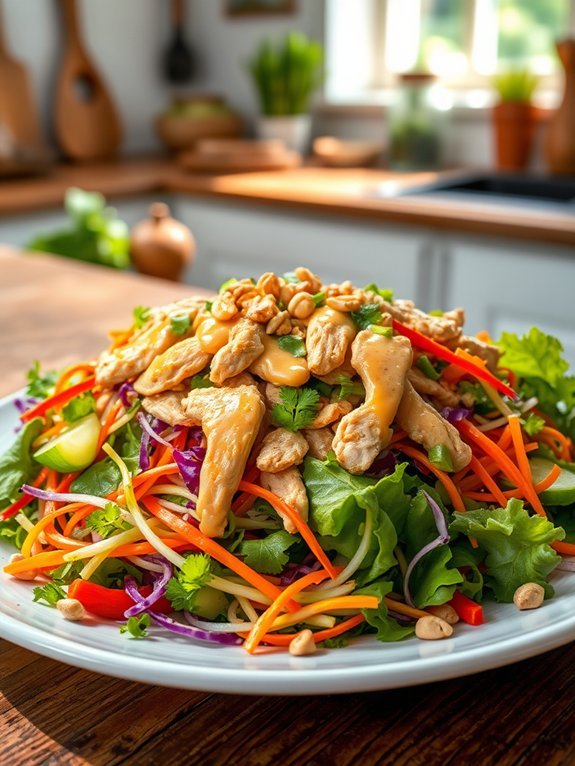
Slow Cooker Chicken Tacos

Slow cooker chicken tacos are a convenient and healthy option for busy weeknights. This recipe allows you to throw together simple ingredients and let the slow cooker work its magic, resulting in tender, flavorful chicken that everyone will love. Perfect for taco night or any casual gathering, these tacos can be customized with your favorite toppings, making them a hit with both adults and kids alike.
The beauty of slow cooker meals is their ability to enhance flavors without requiring constant attention. For this dish, chicken breasts or thighs are seasoned, sautéed briefly, and then cooked slowly with taco seasoning, diced tomatoes, and green chilies. The result is a hearty and delicious filling that can be served in tortillas, lettuce wraps, or even over rice. Enjoy a healthy meal without sacrificing flavor or time!
- 2 lbs boneless, skinless chicken breasts or thighs
- 1 packet taco seasoning
- 1 (14.5 oz) can diced tomatoes, undrained
- 1 (4 oz) can diced green chilies
- 1 medium onion, chopped
- 1 bell pepper, chopped (optional)
- 1 cup corn (fresh, frozen, or canned)
- Salt and pepper to taste
- Tortillas or lettuce wraps for serving
- Optional toppings: shredded cheese, avocado, cilantro, salsa, sour cream
Place the chicken in the slow cooker and sprinkle the taco seasoning evenly over the top. Add the diced tomatoes, green chilies, chopped onion, and bell pepper if using. Season with salt and pepper to taste, then stir gently to combine.
Cover and cook on low for 6-8 hours or on high for 3-4 hours, until the chicken is tender and fully cooked. After cooking, shred the chicken using two forks and mix it with the sauce before serving it in tortillas or lettuce wraps.
For extra flavor, consider marinating the chicken in the taco seasoning and a splash of lime juice for an hour before cooking. You can also amp up the nutritional content by adding beans, spinach, or even zucchini to the slow cooker.
If you're doubling the recipe, remember to give it enough cooking time and keep an eye on the liquid levels to prevent burning. Don't forget to save some of your favorite toppings for a fresh burst of flavor!
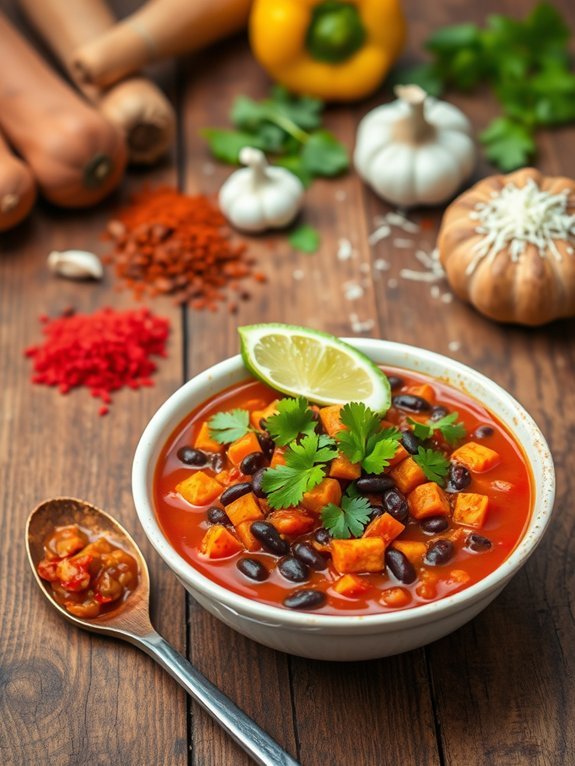
Lentil and Sweet Potato Curry
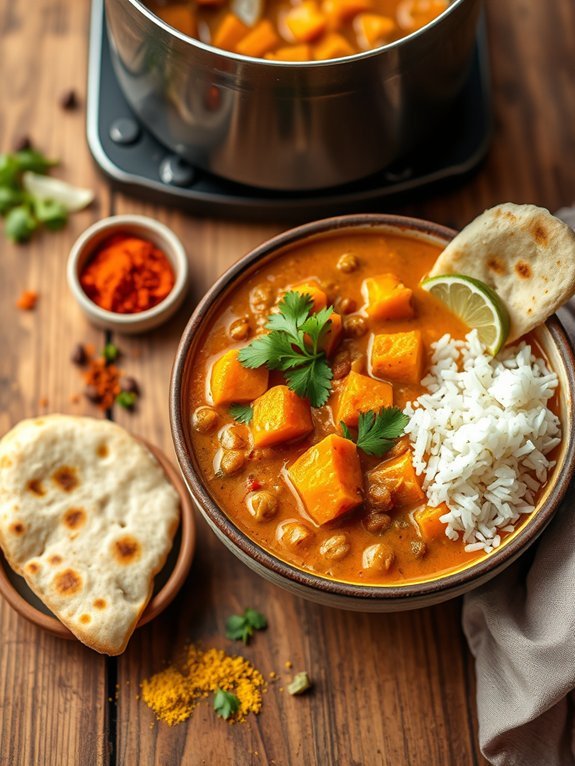
Lentil and sweet potato curry is a wholesome, flavorful dish that's as nutritious as it's satisfying. Its vibrant colors and inviting aroma make it an ideal choice for a comforting meal any day of the week. Packed with protein from the lentils and vitamins from the sweet potatoes, this curry is a fantastic way to incorporate plant-based ingredients into your diet.
The slow cooker makes preparation effortless, allowing you to set it and forget it, returning to a steaming, delicious dinner ready to be savored. This dish can easily be adjusted to suit your taste, whether adding more spices for extra heat or including additional vegetables for variety.
The earthy spices blend beautifully together, creating a rich flavor profile that pairs wonderfully with rice or naan. Making this curry in a slow cooker not only saves time but also enhances the depth of flavors, allowing each ingredient to meld together perfectly, resulting in a dish that everyone will love.
Ingredients:
- 1 cup dried green or brown lentils, rinsed
- 2 medium sweet potatoes, peeled and diced
- 1 large onion, chopped
- 3 cloves garlic, minced
- 1 tablespoon ginger, grated
- 1 can (14 oz) coconut milk
- 2 cups vegetable broth
- 1 can (14 oz) diced tomatoes
- 2 tablespoons curry powder
- 1 teaspoon ground cumin
- 1 teaspoon turmeric
- Salt and pepper to taste
- Fresh cilantro, for garnish (optional)
Combine all the ingredients, except for the fresh cilantro, in the slow cooker and stir well. Cover with the lid and cook on low heat for 6-8 hours or on high heat for 3-4 hours, until the lentils and sweet potatoes are tender.
Give it a good stir before serving, and if desired, garnish with fresh cilantro for an added burst of flavor. When making lentil and sweet potato curry, feel free to experiment with different vegetables such as spinach, bell peppers, or carrots, which can be added in the last hour of cooking if you want them to remain more firm.
Adjust the seasoning according to your preference, and consider adding a splash of lime juice before serving for a delightful tang. This recipe also freezes well, making it perfect for meal prep or busy weeknights when you need a quick, healthy meal.
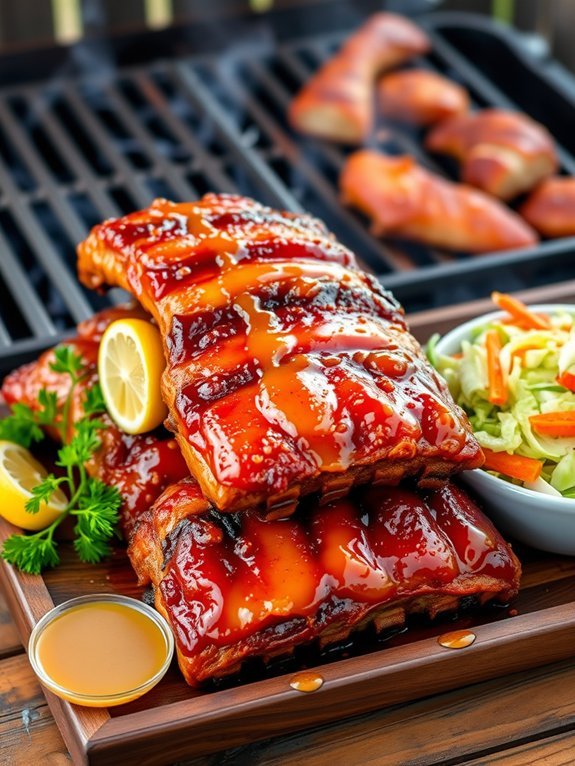
Barbecue Pulled Pork

Barbecue pulled pork is a satisfying and flavorful dish that's perfect for busy weeknights or a weekend barbecue gathering. With the magic of the slow cooker, this meal allows the pork to cook low and slow, resulting in tender, juicy meat that falls apart with the slightest touch. The combination of spices, barbecue sauce, and slow cooking creates a rich flavor profile that elevates this classic dish to new heights.
Assembling this dish is incredibly simple, making it a great option for both novice and experienced cooks. All you need to do is prepare your pork shoulder with a mix of spices, let it marinate, and then let the slow cooker do the hard work. Serve it with soft buns, coleslaw, or any of your favorite sides for a hearty meal everyone will love.
- 3 to 4 pounds pork shoulder (butt)
- 1 tablespoon paprika
- 1 tablespoon brown sugar
- 1 tablespoon garlic powder
- 1 tablespoon onion powder
- 1 teaspoon salt
- 1 teaspoon black pepper
- 1 teaspoon cayenne pepper (optional)
- 1 cup barbecue sauce (your choice)
- 1 onion, sliced
- 1/2 cup chicken broth or water
Rub the spice mixture (paprika, brown sugar, garlic powder, onion powder, salt, black pepper, and cayenne pepper, if using) all over the pork shoulder, making sure to cover it evenly.
Place the sliced onion at the bottom of the slow cooker and put the seasoned pork on top. Pour the chicken broth (or water) around the sides of the pork and then cover it with barbecue sauce.
Cook the pork on low for 8 to 10 hours or until it's tender and shreds easily with a fork.
For best results, let the pulled pork rest for a few minutes after cooking before shredding it. This allows the juices to redistribute throughout the meat.
You can adjust the level of barbecue sauce to suit your taste; feel free to reserve some to add while serving. If you enjoy a little extra heat, consider adding diced jalapeños or a spicy barbecue sauce for a kick.
Finally, leftovers can be stored in an airtight container in the fridge for up to five days or frozen for longer storage, making this an excellent option for meal prep!
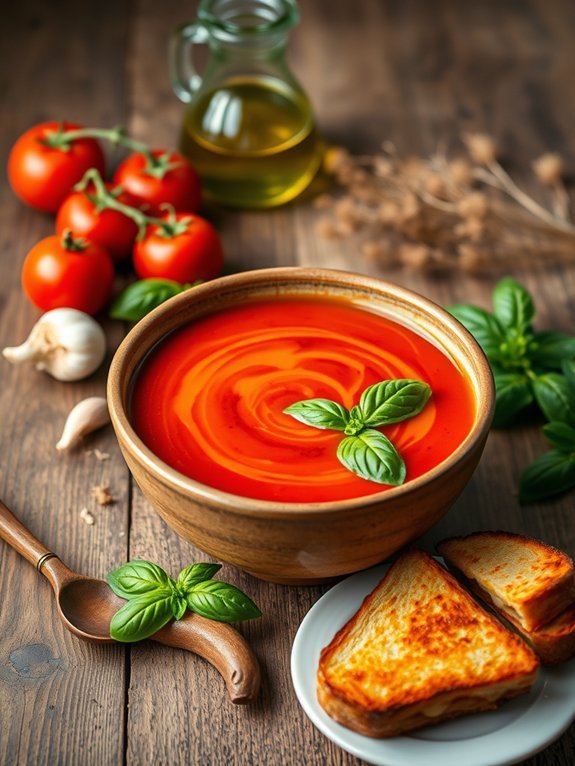
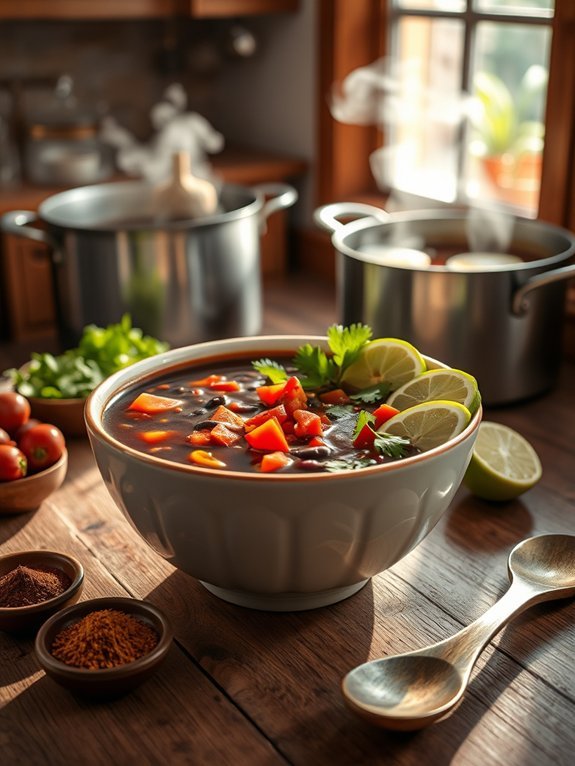
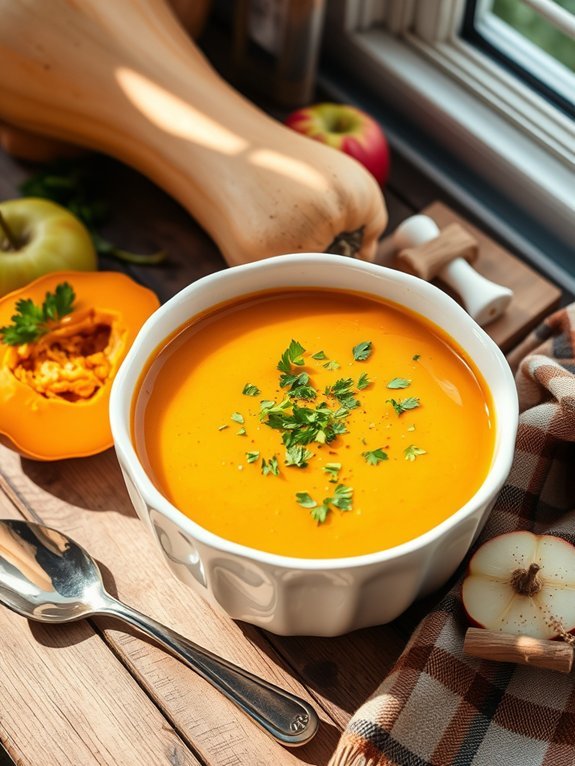
Mediterranean Chickpea Soup
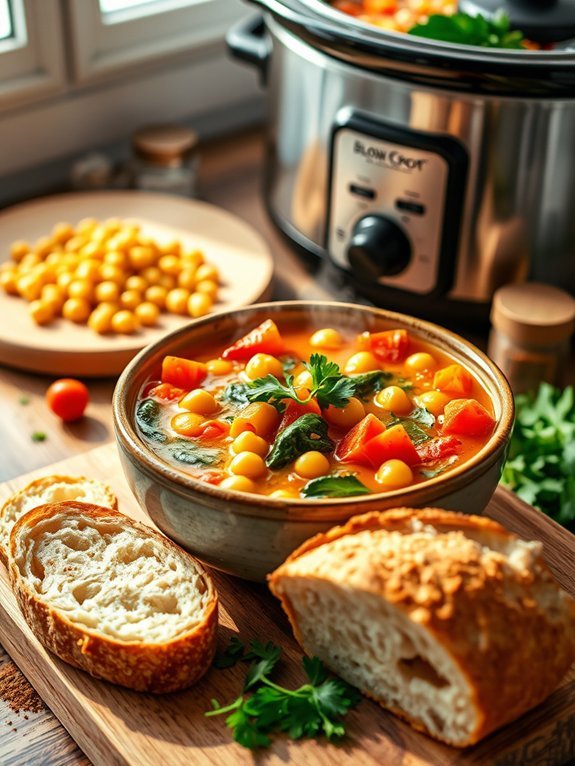
Mediterranean Chickpea Soup is a hearty and nutritious dish that brings together the vibrant flavors of the Mediterranean region. Made with hearty chickpeas, fresh vegetables, and aromatic spices, this soup isn't only delicious but also wholesome, making it perfect for a cozy dinner. The slow cooker method allows all the ingredients to meld together beautifully, ensuring that every bite bursts with flavor.
This recipe is incredibly versatile, so feel free to adjust the vegetables or spices according to your preference. Enjoy it on its own or serve it with a piece of crusty bread for a complete meal. It's an excellent option for meal prep, as it stores well and tastes even better the next day!
- 1 can (15 oz) chickpeas, rinsed and drained
- 1 can (14.5 oz) diced tomatoes
- 1 medium onion, diced
- 2 cloves garlic, minced
- 2 carrots, chopped
- 1 stalk celery, chopped
- 4 cups vegetable broth
- 1 teaspoon ground cumin
- 1 teaspoon smoked paprika
- 1 teaspoon dried oregano
- Salt and pepper to taste
- 2 cups fresh spinach or kale
- Juice of 1 lemon
- Fresh parsley for garnish
In your slow cooker, combine the chickpeas, diced tomatoes, onion, garlic, carrots, celery, vegetable broth, cumin, smoked paprika, oregano, salt, and pepper. Stir to mix evenly, then cover and cook on low for 6-8 hours or on high for 3-4 hours.
About 30 minutes before serving, stir in the fresh spinach or kale and lemon juice, allowing it to wilt down before serving. Garnish with fresh parsley before enjoying.
For the best flavor, consider sautéing the onions, garlic, and spices in a pan before adding them to the slow cooker, as this can enhance their aromatic qualities. You can also customize the soup by adding other vegetables such as zucchini or bell peppers, or by adjusting the spices to suit your taste.
This soup freezes well, so make a larger batch for easy meals later on!
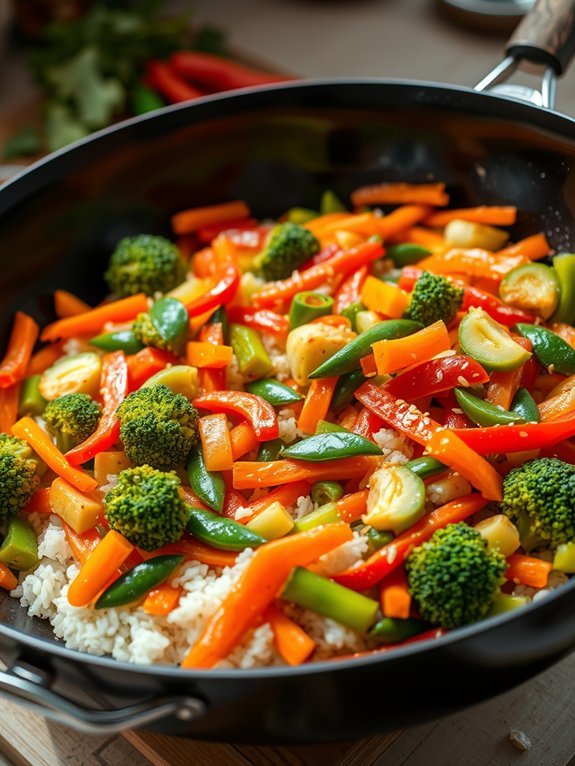
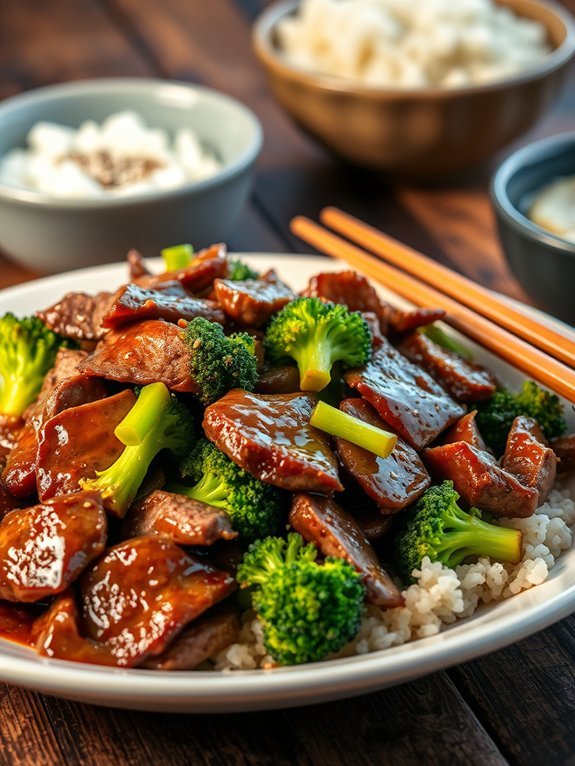
Beef and Broccoli Stir-Fry

Beef and Broccoli Stir-Fry is a delightful dish that combines tender strips of beef with vibrant, crisp broccoli and a savory sauce, making it ideal for a healthy weeknight dinner.
This dish not only satisfies your taste buds but also provides a balanced meal packed with protein and essential nutrients. Thanks to the slow cooker, you can prepare it with minimal effort while enhancing the flavors as they meld together throughout the cooking process.
Cooking beef and broccoli in a slow cooker allows the beef to become tender and infused with the rich flavors of the sauce. It's a flexible recipe—feel free to customize it by adding your favorite vegetables or adjusting the level of garlic and ginger to match your preferences.
Serve this delicious stir-fry over a bed of brown rice or quinoa for an extra nutritious boost.
Ingredients:
- 1 lb beef flank steak, thinly sliced
- 4 cups broccoli florets
- 1 cup low-sodium beef broth
- 1/4 cup soy sauce (low sodium)
- 2 tablespoons cornstarch
- 2 tablespoons sesame oil
- 2 tablespoons rice vinegar
- 2 cloves garlic, minced
- 1 teaspoon fresh ginger, minced
- 1 tablespoon brown sugar
- Cooked brown rice or quinoa, for serving
In a large bowl, toss the sliced beef with cornstarch, garlic, ginger, soy sauce, sesame oil, rice vinegar, and brown sugar until evenly coated.
Transfer the mixture into the slow cooker and pour the beef broth over it. Cook on low for 4-5 hours or on high for 2-3 hours, adding the broccoli florets in the last 30 minutes of cooking, until the beef is tender and broccoli is vibrant and slightly crisp.
When cooking Beef and Broccoli Stir-Fry, remember to slice the beef against the grain for maximum tenderness and consider searing the beef quickly in a hot skillet for additional flavor before adding it to the slow cooker.
You can also adjust the amount of broccoli based on personal preferences and seasonality, ensuring you always have fresh and flavorful ingredients.
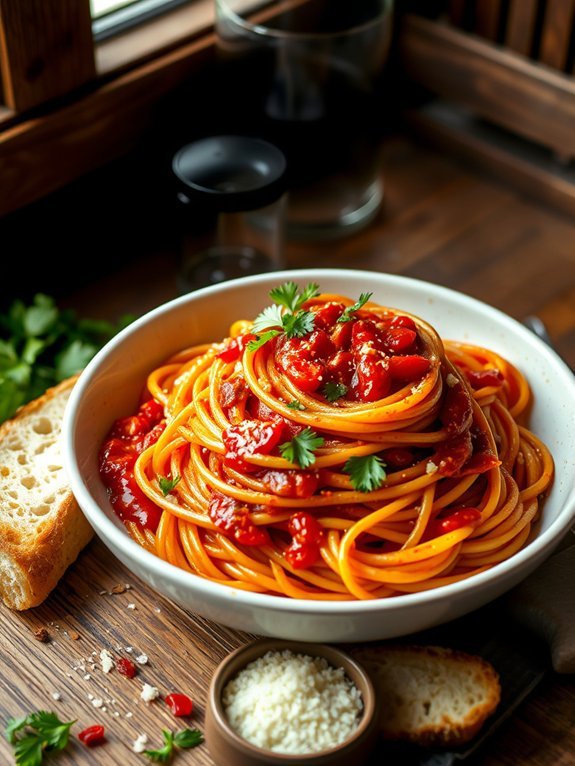
Spaghetti Squash Bolognese
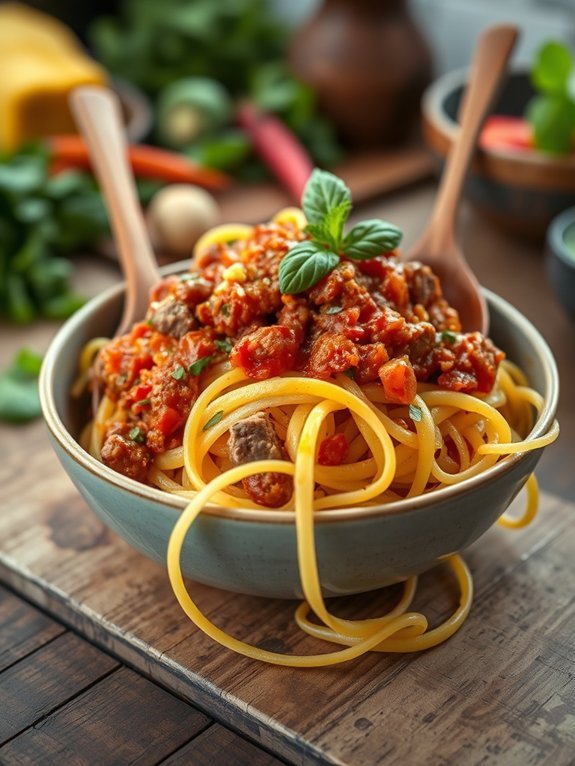
Spaghetti squash bolognese is the perfect comfort food alternative for those looking to enjoy a hearty meal while keeping things light and healthy. The star of this dish is the spaghetti squash, a versatile vegetable that, when roasted, transforms into spaghetti-like strands. Paired with a rich and flavorful bolognese sauce made from ground meat, tomatoes, and aromatic vegetables, this dish delivers on taste without the added carbs typically associated with traditional pasta recipes.
Using a slow cooker makes this meal both easy and convenient, allowing the flavors to meld beautifully over hours of cooking. Whether you're cooking for your family on a busy weeknight or preparing a meal for guests, spaghetti squash bolognese is sure to impress. The sauce can be prepared in advance, and the squash can be cooked in the slow cooker too, making it a hassle-free way to enjoy nutritious and fulfilling food.
Ingredients:
- 1 medium spaghetti squash
- 1 pound ground beef, turkey, or chicken
- 1 can (15 ounces) crushed tomatoes
- 1 small onion, diced
- 2 cloves garlic, minced
- 1 carrot, finely chopped
- 1 celery stalk, finely chopped
- 1 tablespoon olive oil
- 1 teaspoon dried oregano
- 1 teaspoon dried basil
- Salt and pepper to taste
- Fresh parsley or basil for garnish (optional)
Start by cutting the spaghetti squash in half lengthwise and scooping out the seeds. Place the squash cut side down in the slow cooker, along with the ground meat, crushed tomatoes, onion, garlic, carrot, celery, olive oil, oregano, basil, salt, and pepper. Stir the ingredients to combine, making sure the meat is well distributed throughout the sauce. Cover and cook on low for 6-8 hours or on high for 3-4 hours, until the meat is cooked through and the squash is tender.
Once ready, remove the squash, scrape the flesh into strands, and combine it with the bolognese sauce before serving. For the best results, select a spaghetti squash that feels heavy and has a firm skin, which indicates ripeness. If you find that the squash is too firm to cut, microwave it for a couple of minutes to soften it slightly.
Additionally, you can prepare a larger batch of the bolognese sauce and freeze portions for future meals. This dish is versatile—feel free to swap out the ground meat for plant-based alternatives or add in extra vegetables based on your preferences!
Honey-Garlic Glazed Salmon

Honey-Garlic Glazed Salmon is a delicious and nutritious dish that effortlessly combines rich flavors with healthy ingredients. One of the standout features of this recipe is the use of honey and garlic, which come together to create a sweet and savory glaze that perfectly complements the tender salmon fillets.
Cooking this dish in a slow cooker not only makes preparation easy and convenient, but it also allows the salmon to absorb the flavors fully, resulting in a succulent meal that can be enjoyed any night of the week.
Using a slow cooker for this recipe guarantees that the salmon remains moist and flaky. With minimal effort, you can prepare a hearty and healthy dinner that's packed with omega-3 fatty acids and essential nutrients. This dish pairs wonderfully with a side of steamed vegetables or a fresh salad, making it a well-rounded option for busy weeknights or family gatherings.
Ingredients:
- 4 salmon fillets
- 1/4 cup honey
- 1/4 cup soy sauce
- 3 cloves garlic, minced
- 1 tablespoon fresh ginger, minced
- 1 tablespoon rice vinegar
- 2 green onions, sliced (for garnish)
- Sesame seeds (for garnish)
Place the salmon fillets in the slow cooker. In a bowl, whisk together the honey, soy sauce, minced garlic, ginger, and rice vinegar. Pour the mixture over the salmon, guaranteeing the fillets are well-coated.
Cover and cook on low for about 2 to 3 hours, or until the salmon is cooked through and flakes easily with a fork. For added texture, you can broil the salmon for 1-2 minutes after slow cooking to achieve a slightly crisped glaze.
When cooking Honey-Garlic Glazed Salmon, it's important to keep an eye on the cooking time, as salmon can easily become overcooked. If you're using frozen salmon, be sure to thaw it completely before cooking for the best results.
Additionally, feel free to customize the glaze by adding spices or herbs like black pepper or cilantro to enhance the flavors to your liking. Enjoy your delicious and healthful dinner!
Garlic Herb Roasted Chicken
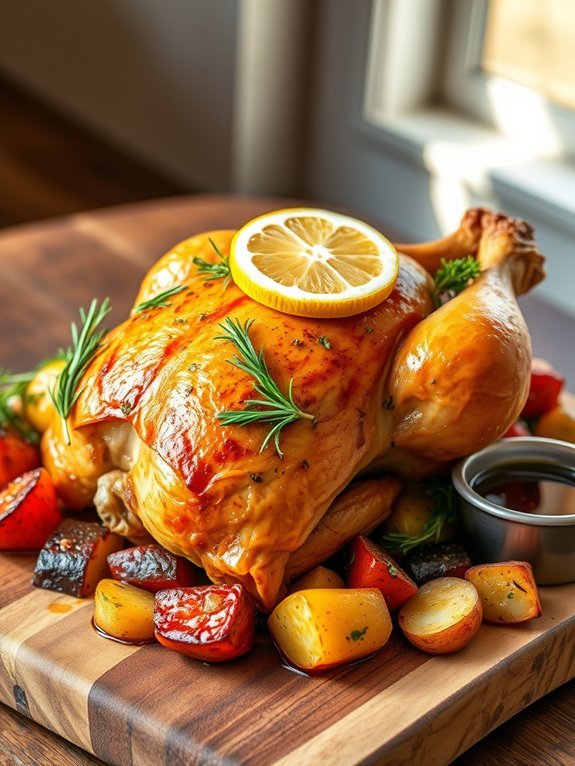
Garlic herb roasted chicken is a classic dish that transforms a simple chicken into a flavorful, aromatic centerpiece for any dinner table. The slow cooker method allows the chicken to become tender as it bathes in a rich blend of garlic, herbs, and spices, resulting in juicy meat that falls off the bone. Not only is this dish incredibly satisfying, but it's also quite easy to prepare, making it a perfect choice for busy weeknights or a leisurely Sunday dinner.
To complement the chicken, the herbs infuse the meat with their natural flavors, enhancing every bite. Pairing the chicken with root vegetables like carrots and potatoes can create a complete meal right in your slow cooker. This dish isn't just about flavor; it's about the health benefits of cooking with fresh ingredients and using a slow-cooking method that locks in moisture without excessive fats.
Ingredients:
- 1 whole chicken (about 4-5 pounds)
- 4 cloves garlic, minced
- 2 tablespoons olive oil
- 1 tablespoon fresh rosemary, chopped
- 1 tablespoon fresh thyme, chopped
- 1 tablespoon fresh parsley, chopped
- 1 teaspoon salt
- 1 teaspoon black pepper
- 4 medium carrots, chopped
- 4 medium potatoes, diced
- 1 lemon, sliced
Rub the entire chicken with the olive oil, minced garlic, rosemary, thyme, parsley, salt, and pepper, ensuring it's evenly coated.
Place the chopped carrots and potatoes in the bottom of the slow cooker, then set the seasoned chicken on top of the vegetables. Layer the lemon slices on the chicken, cover, and cook on low for 6-8 hours, or until the chicken reaches an internal temperature of 165°F.
For best results, consider removing the skin from the chicken before cooking to reduce the fat content. If you have time, let the chicken rest for about 10 minutes after cooking, allowing the juices to redistribute for even more tenderness.
You can also save any leftover cooking juices to drizzle over the chicken and vegetables for a delicious and healthy gravy.
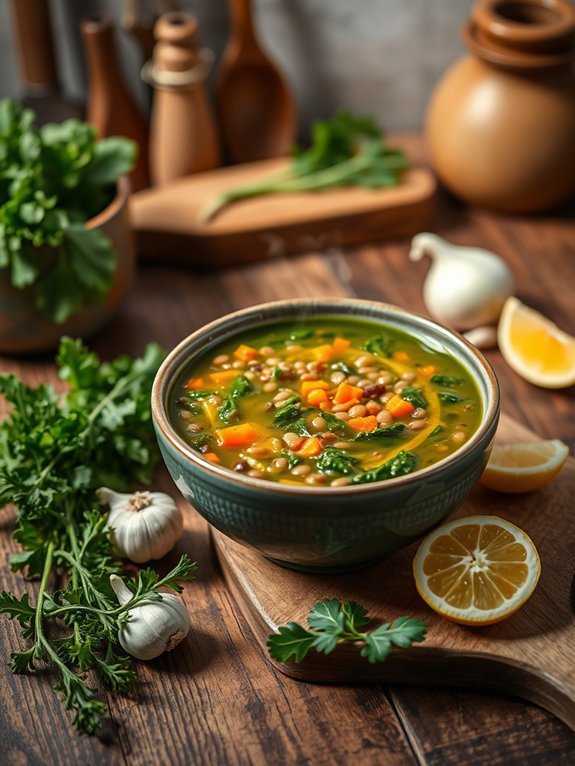
Tuscan White Bean and Kale Soup

Tuscan White Bean and Kale Soup is a nourishing and hearty dish that's perfect for any season. This soup combines the wholesome flavors of creamy white beans, nutrient-rich kale, and aromatic herbs, resulting in a meal that warms both body and soul. It isn't only delicious but also packed with protein, fiber, and vitamins, making it a fantastic option for those who want a healthy, satisfying dinner.
Using a slow cooker adds convenience to this recipe, allowing the flavors to meld beautifully while you go about your day. Simply throw in the ingredients and let the slow cooker do its magic. When you return home, you'll be greeted with the delightful aroma of Tuscan cuisine, and a wholesome meal will be ready to serve with minimal effort.
- 1 can (15 oz) white beans (cannellini or great northern), drained and rinsed
- 1 cup kale, chopped
- 1 medium onion, diced
- 2 cloves garlic, minced
- 2 carrots, diced
- 2 celery stalks, diced
- 4 cups vegetable broth
- 1 teaspoon dried thyme
- 1 teaspoon dried oregano
- Salt and pepper to taste
- 1 tablespoon olive oil
- 1 tablespoon lemon juice (optional)
- Grated Parmesan cheese for serving (optional)
In your slow cooker, combine the diced onion, minced garlic, carrots, and celery, adding in the drained white beans and chopped kale.
Pour the vegetable broth over the top, followed by the thyme, oregano, salt, and pepper. Drizzle the olive oil into the mixture and stir gently to combine. Cover and cook on low for 6-8 hours or on high for 3-4 hours.
Before serving, stir in the lemon juice for a pop of brightness, if desired.
For the best flavor, don't skip sautéing the onion and garlic before adding them to the slow cooker; this step enhances their sweetness and depth. Fresh kale works beautifully, but you can substitute it with Swiss chard or spinach if you prefer.
Additionally, feel free to add your favorite proteins, such as diced chicken or sausage, for extra heartiness, but remember that you might need to adjust the cooking time accordingly.
Serve this soup with a slice of crusty bread for a complete meal.
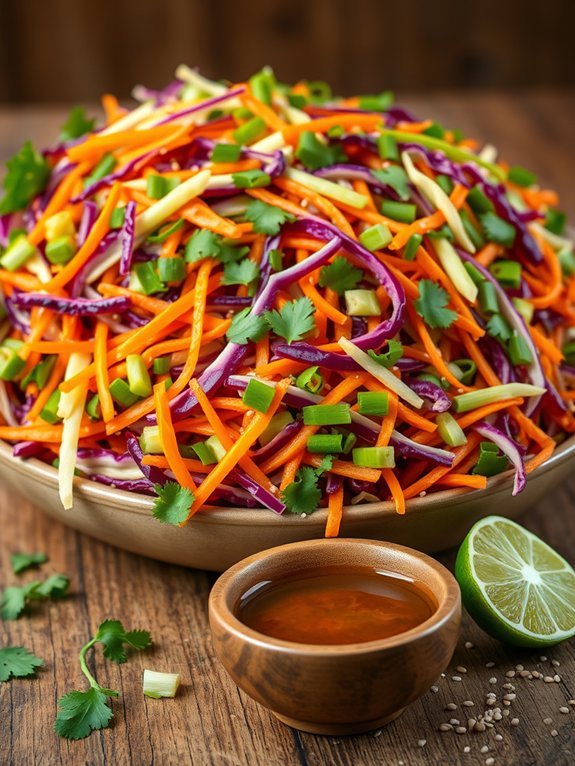
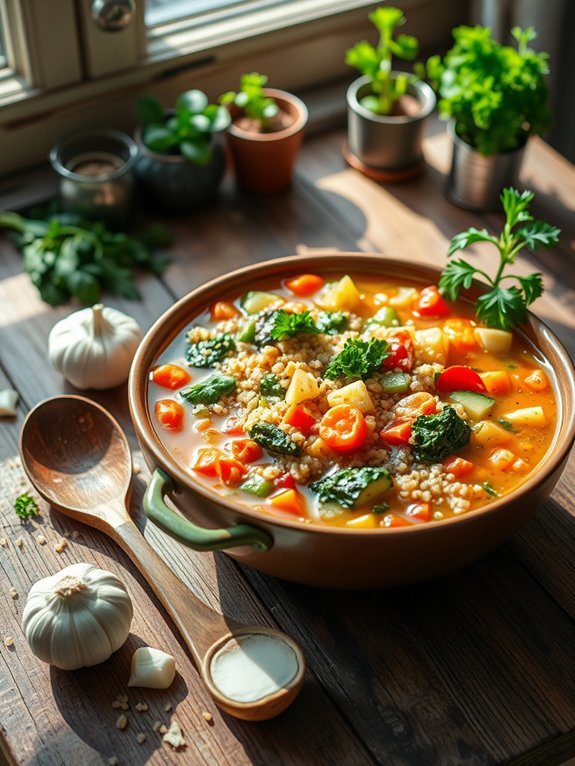
Vegetable and Brown Rice Casserole
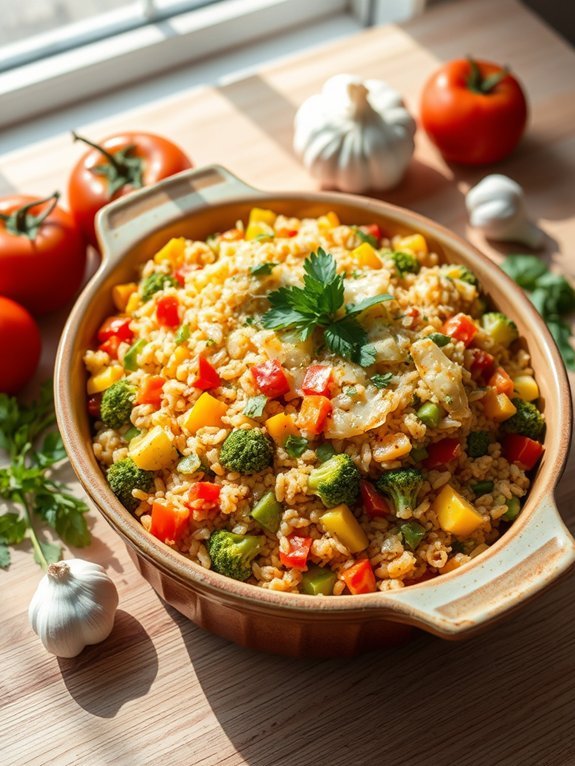
Vegetable and brown rice casserole is a wholesome and hearty dish that makes for a satisfying meal any night of the week. Packed with nutritious vegetables and fiber-rich brown rice, this casserole not only delights the palate but also nourishes the body. Using a slow cooker for this recipe allows the flavors to meld beautifully, creating a comforting dish that cooks while you go about your day.
This recipe is incredibly versatile, allowing you to swap in your favorite seasonal vegetables or whatever you have on hand. The slow cooker does most of the work, ensuring that the rice is perfectly tender and the vegetables are cooked to perfection, making it an ideal dish for busy families or meal prep enthusiasts.
Plus, with minimal clean-up required, you can focus more on enjoying your meal.
Ingredients:
- 1 cup brown rice, rinsed and drained
- 3 cups vegetable broth
- 1 cup diced bell peppers
- 1 cup chopped zucchini
- 1 cup chopped broccoli
- 1 cup diced tomatoes (fresh or canned)
- 1 small onion, diced
- 2 cloves garlic, minced
- 1 teaspoon dried Italian seasoning
- ½ teaspoon salt
- ½ teaspoon black pepper
- 1 cup shredded cheese (optional)
- Fresh parsley for garnish (optional)
In a slow cooker, combine the rinsed brown rice, vegetable broth, diced bell peppers, chopped zucchini, chopped broccoli, diced tomatoes, onion, garlic, Italian seasoning, salt, and black pepper. Stir well to mix all the ingredients evenly.
Cover and set the slow cooker on low for 6-8 hours, or on high for 3-4 hours, until the rice and vegetables are tender. If you choose to add cheese, stir it in during the last 15 minutes of cooking and allow it to melt before serving.
To enhance the flavor and nutritional value of your casserole, feel free to add leafy greens like spinach or kale in the final hour of cooking. You can also experiment by adding your favorite herbs and spices to make the dish uniquely yours.
If you prefer a creamier texture, consider mixing in some cream cheese or sour cream toward the end. For leftovers, store in an airtight container in the refrigerator and reheat gently on the stove or in the microwave for future meals.
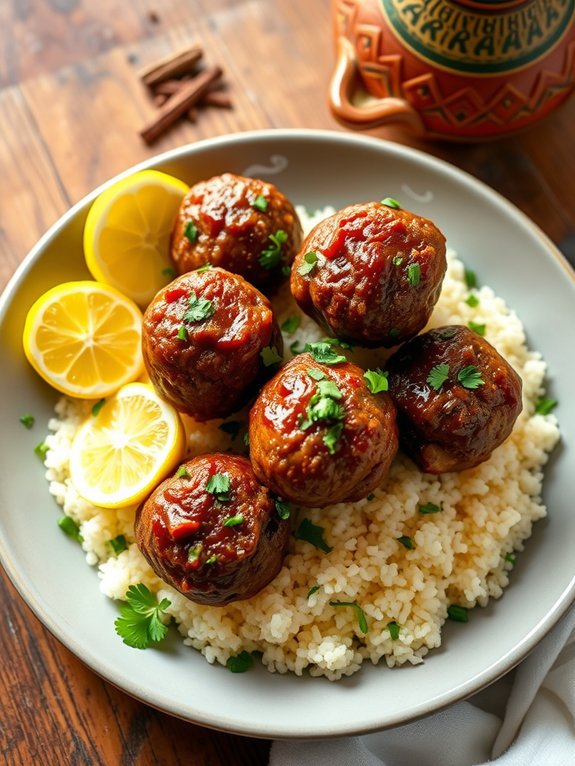
Moroccan-Spiced Lamb and Apricot Tagine
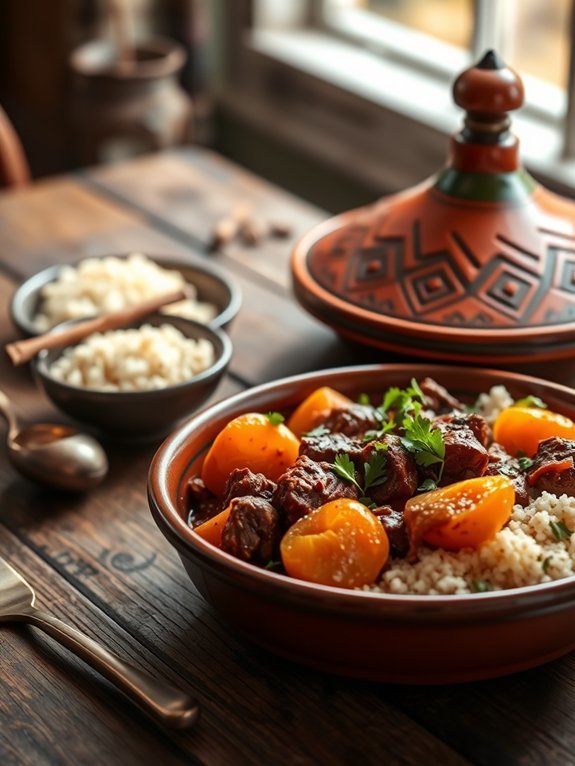
Experience the rich, aromatic flavors of Morocco right in your own home with this Moroccan-Spiced Lamb and Apricot Tagine. This slow cooker dish is perfect for those who want a hearty meal without spending hours in the kitchen. The tender pieces of lamb braise slowly with fragrant spices, sweet apricots, and other wholesome ingredients, creating a delightful balance of savory and sweet flavors, making it a unique culinary experience.
Using a slow cooker allows the ingredients to meld together beautifully, resulting in tender lamb that effortlessly falls apart. The combination of spices such as cumin, cinnamon, and ginger provides warmth and depth, while the apricots add a natural sweetness that perfectly contrasts the spiced meat.
Serve this dish with fluffy couscous or warm crusty bread to soak up the rich sauce, and you'll have a satisfying meal that brings a taste of Moroccan tradition into your kitchen.
Ingredients:
- 2 lbs lamb shoulder, cut into chunks
- 1 large onion, chopped
- 3 cloves garlic, minced
- 2 cups apricots, dried
- 2 cups vegetable or chicken broth
- 1 can (15 oz) chickpeas, drained and rinsed
- 2 tsp ground cumin
- 1 tsp ground cinnamon
- 1 tsp ground ginger
- 1 tsp turmeric
- 1/2 tsp cayenne pepper (optional)
- Salt and pepper to taste
- 2 tbsp olive oil
- Fresh cilantro or parsley for garnish
In a slow cooker, combine the lamb chunks, onion, garlic, apricots, chickpeas, broth, and spices (cumin, cinnamon, ginger, turmeric, cayenne, salt, and pepper). Drizzle the olive oil over the mixture, then stir everything together until the lamb is well coated in the spices. Cover and cook on low for 6-8 hours or until the lamb is tender and the flavors have melded together beautifully.
Serve hot, garnished with fresh cilantro or parsley, alongside couscous or bread.
When preparing Moroccan-Spiced Lamb and Apricot Tagine, feel free to adjust the spices according to your personal preference. Adding more or less cayenne pepper can control the heat level of the dish, while substituting the dried apricots with other dried fruits like figs or prunes can provide a different taste experience.
Additionally, if you prefer a thicker sauce, simply remove the lid during the last hour of cooking to allow some liquid to evaporate, intensifying the flavor.