For guilt-free indulgence, try these 12 healthy air fryer meals. Air fryer crispy Brussels sprouts and garlic Parmesan cauliflower offer great veggie sides. Enjoy juicy chicken wings with minimal oil or whip up sweet potato fries for a hearty snack. Savor lemon herb salmon, crunchy tofu, or savory quinoa patties as main courses. Don't forget air-fried apple chips for a sweet treat. Each recipe maximizes flavor and nutrition, and there's more to discover!
Air Fryer Crispy Brussels Sprouts

Air fryer crispy Brussels sprouts are a delightful and healthy side dish that can elevate any meal. This popular vegetable, once deemed unappealing by many, transforms into a crispy, flavorful delight when cooked in an air fryer. With their slightly nutty flavor and satisfying crunch, these Brussels sprouts are sure to become a staple in your cooking repertoire. Perfectly seasoned and with a hint of sweetness, they complement a variety of dishes, making them a versatile choice for any occasion.
Cooking Brussels sprouts in an air fryer not only speeds up the cooking time but also guarantees that they come out with a fantastic crispy texture that's hard to resist. This method is also a healthier alternative to traditional frying, as it requires considerably less oil, allowing the natural flavors to shine through.
Whether you're serving them at a holiday dinner or enjoying a casual meal, these air fryer crispy Brussels sprouts will impress your family and friends.
- 1 pound Brussels sprouts
- 2 tablespoons olive oil
- 1 teaspoon garlic powder
- 1 teaspoon onion powder
- 1 teaspoon salt
- ½ teaspoon black pepper
- ½ teaspoon paprika (optional)
Trim the end of each Brussels sprout and remove any yellow or damaged leaves. Cut them in half and place them in a mixing bowl. Drizzle with olive oil and season with garlic powder, onion powder, salt, black pepper, and paprika if using. Toss until the Brussels sprouts are well coated with the oil and seasonings.
Preheat the air fryer to 375°F (190°C), then arrange the Brussels sprouts in a single layer in the air fryer basket. Cook for 15-20 minutes, shaking the basket halfway through, until they're crispy and golden brown.
For extra crispiness, consider soaking the Brussels sprouts in water for about 30 minutes before cooking; just be sure to thoroughly dry them before seasoning. Additionally, you can experiment with different seasonings such as balsamic vinegar, lemon juice, or parmesan cheese to add an extra layer of flavor.
Remember not to overcrowd the air fryer basket for the best results, as this will allow heat to circulate properly around each sprout, leading to an even crispiness.
Garlic Parmesan Air Fryer Cauliflower

Garlic Parmesan Air Fryer Cauliflower is a delectable dish that transforms humble cauliflower into a crispy, flavorful side that pairs wonderfully with a variety of main courses. The air fryer enhances the natural sweetness of the cauliflower while delivering a satisfying crunch, making it a go-to option for healthy eating. This dish isn't only low in calories but also rich in vitamins and minerals, making it a fantastic choice for those looking to maintain a well-balanced diet.
The combination of garlic and Parmesan adds a savory depth to the cauliflower that elevates its flavor profile. Whether you serve it as an appetizer, a snack, or a side dish, it's sure to impress both family and guests alike.
Plus, this recipe is incredibly easy to prepare, requiring minimal ingredients and time to whip up. Once you try it, you'll find yourself making it on repeat!
Ingredients:
- 1 large head of cauliflower, cut into florets
- 3 tablespoons olive oil
- 4 cloves garlic, minced
- 1/2 cup grated Parmesan cheese
- 1 teaspoon paprika
- 1 teaspoon Italian seasoning
- Salt and pepper, to taste
- Fresh parsley, chopped (for garnish)
Toss the cauliflower florets in a bowl with olive oil, minced garlic, paprika, Italian seasoning, salt, and pepper until evenly coated. Preheat the air fryer to 400°F (200°C), then arrange the seasoned cauliflower in the air fryer basket, making certain they're in a single layer.
Cook for about 15-20 minutes, shaking the basket halfway through, until the cauliflower is golden brown and crispy. In the last few minutes of cooking, sprinkle the grated Parmesan cheese over the florets and allow it to melt before serving.
For best results, confirm your cauliflower is cut into uniform florets to promote even cooking. If you're cooking a larger batch, you may need to do it in multiple batches to avoid overcrowding the air fryer, which can lead to unevenly cooked cauliflower.
Additionally, feel free to experiment with different seasonings or cheeses to customize the flavor to your liking. A squeeze of lemon juice before serving can brighten the dish and enhance the overall taste. Enjoy your healthy, crispy delight!
Healthy Air Fryer Chicken Wings

Air fryer chicken wings are a fantastic way to enjoy crispy, flavorful wings without the excessive oil that comes from traditional frying methods. With an air fryer, you can achieve that coveted crunch while keeping the dish lighter and healthier. The high-speed circulation of hot air in the fryer allows the wings to cook evenly, locking in the juices and delivering succulent chicken that's perfect for any occasion—game day, parties, or even a weeknight dinner.
What's more, you can customize the seasoning to suit your tastes. Whether you prefer the classic buffalo flavor, garlic parmesan, or a zesty lemon pepper, air fryer chicken wings can be easily adapted to whatever flavor profile you desire. In just a fraction of the time it would take to deep fry, you can whip up a batch of wings that will have everyone coming back for seconds.
Ingredients:
- 2 pounds of chicken wings
- 1 tablespoon olive oil
- 1 teaspoon garlic powder
- 1 teaspoon onion powder
- 1 teaspoon smoked paprika
- 1 teaspoon salt
- ½ teaspoon black pepper
- ½ teaspoon cayenne pepper (optional, for heat)
- Your favorite wing sauce (buffalo, BBQ, or honey garlic)
Toss the chicken wings in a bowl with olive oil, garlic powder, onion powder, smoked paprika, salt, black pepper, and cayenne pepper (if using), making sure each wing is thoroughly coated. Preheat your air fryer to 400°F (200°C) and arrange the wings in a single layer in the air fryer basket.
Cook for 25-30 minutes, shaking the basket halfway through the cooking time to guarantee even crispiness. Once they're golden brown and crispy, toss them in your choice of wing sauce before serving.
When making air fryer chicken wings, it's important to avoid overcrowding the basket, as this can prevent proper air circulation and lead to uneven cooking. Additionally, for extra crispy wings, consider patting the wings dry with paper towels before seasoning them.
This removes excess moisture and helps achieve that desirable crunch. Experiment with different seasonings and sauces to find your perfect combination!
Air Fried Sweet Potato Fries

Air fried sweet potato fries are a delicious and healthier alternative to traditional French fries. The air fryer cooks them to crispy perfection with considerably less oil, making them a great option for those looking to enjoy a guilt-free side dish. Sweet potatoes aren't only tasty, but they're also packed with nutrients, including vitamin A, fiber, and antioxidants, making these fries a smart choice for any meal.
Preparing air fried sweet potato fries is simple and requires minimal ingredients. They can be seasoned to fit your taste preferences, whether you prefer something savory with herbs and spices or a bit sweeter with cinnamon. Pair them with your favorite dipping sauce, and you'll have a delightful snack or side that the whole family will enjoy.
- 2 large sweet potatoes
- 1 tablespoon olive oil
- 1 teaspoon paprika
- 1 teaspoon garlic powder
- ½ teaspoon salt
- ¼ teaspoon black pepper
Begin by preheating your air fryer to 400°F (200°C) and then peel and cut the sweet potatoes into thin strips, about ¼ to ½ inch thick. Toss the sweet potato fries in a bowl with olive oil, paprika, garlic powder, salt, and black pepper until well-coated.
Place the sweet potato fries in the air fryer basket in a single layer (you may need to cook in batches) and cook for about 15-20 minutes, shaking the basket halfway through to guarantee even cooking.
When preparing air fried sweet potato fries, remember that cutting the potatoes uniformly will help them cook evenly and achieve a consistent level of crispiness. You can also experiment with seasoning combinations; try adding cayenne pepper for heat or a sprinkle of cinnamon for a sweeter profile.
Additionally, make sure not to overcrowd the air fryer basket, as this can lead to soggy fries. Adjust cooking times as needed based on the thickness of your cuts and the specific model of your air fryer for the best results.
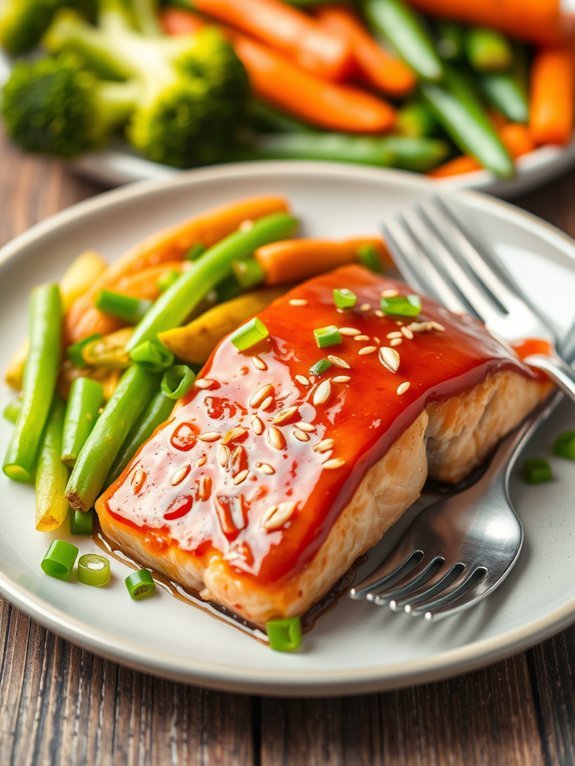
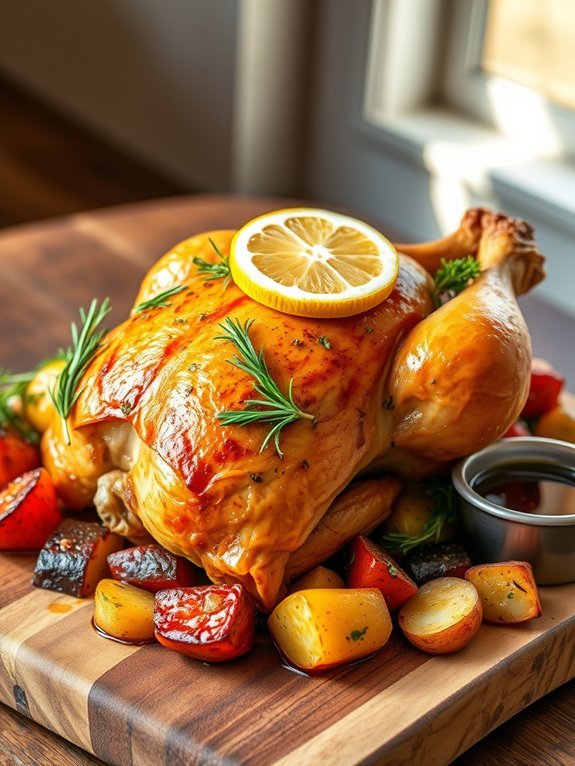
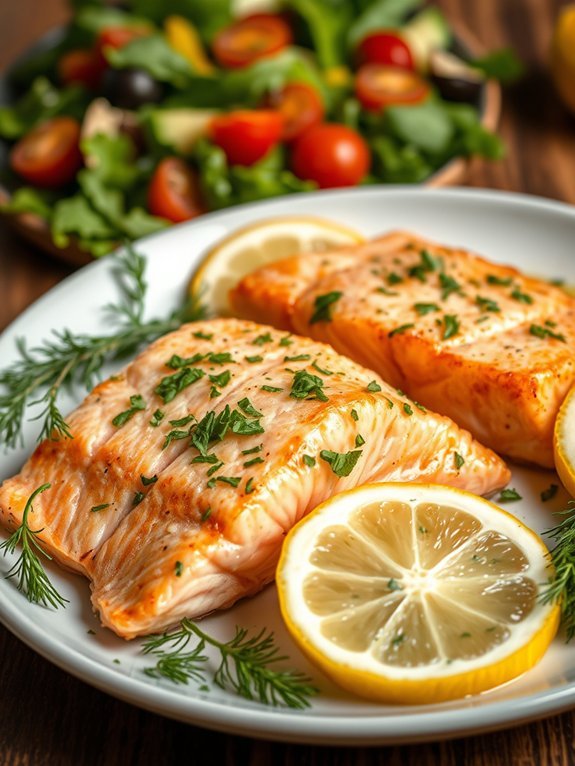
Lemon Herb Air Fryer Salmon

Cooking salmon in an air fryer is a fantastic way to enjoy a healthy meal without compromising on flavor. The air fryer locks in the moisture of the fish while providing a crispy exterior, thanks to its rapid circulation of hot air. This Lemon Herb Air Fryer Salmon recipe combines the brightness of lemon with a blend of fresh herbs to create a dish that's both zesty and aromatic.
It not only offers a delicious taste but also adds a burst of color to your dinner plate. This recipe is quick and easy, making it perfect for a weeknight dinner or a special occasion. The marinated salmon fillets cook in just a matter of minutes, allowing you to focus on sides or relax while dinner is prepared. Serve this salmon alongside your favorite vegetables or a fresh salad for a complete and healthy meal that everyone will love.
Ingredients:
- 2 salmon fillets
- 2 tablespoons olive oil
- Juice and zest of 1 lemon
- 2 cloves garlic, minced
- 1 teaspoon dried oregano
- 1 teaspoon dried thyme
- Salt, to taste
- Pepper, to taste
- Fresh parsley, chopped (for garnish)
Season the salmon fillets with salt and pepper, then combine olive oil, lemon juice, lemon zest, minced garlic, oregano, and thyme in a bowl. Coat the salmon with the marinade and let it sit for about 15-30 minutes to absorb the flavors.
Preheat the air fryer to 400°F (200°C). Once heated, place the marinated salmon fillets in the air fryer basket and cook for 8-10 minutes, depending on the thickness of the fillets, until the salmon easily flakes with a fork and is cooked through.
For the best results, take care not to overcrowd the air fryer to guarantee even cooking. You can also experiment with different herbs, such as dill or basil, according to your taste preferences. Additionally, if you prefer a crispier texture, feel free to increase the cook time by a couple of minutes, but watch closely to prevent overcooking.
Enjoy your flavorful and nutritious Lemon Herb Air Fryer Salmon!
Air Fryer Zucchini Fritters

Air Fryer Zucchini Fritters are a delicious and healthy alternative to traditional fried fritters. The air fryer cooks these patties to perfection, resulting in a crispy exterior while keeping them tender and flavorful on the inside. Made mainly with zucchini, these fritters are an excellent way to incorporate more vegetables into your diet without sacrificing taste. Perfect as an appetizer, snack, or side dish, they're easy to whip up and sure to please both kids and adults alike.
These fritters aren't only healthy but also versatile. You can customize the flavor by adding your favorite herbs or spices, making them a flexible dish for any meal. Pair them with a yogurt dip or a simple tomato sauce, and you have a meal that's both satisfying and nutritious. The best part? The air fryer allows you to achieve that delightful crunch without the need for excess oil, making these fritters a guilt-free indulgence.
- 2 medium zucchinis, grated
- 1 cup all-purpose flour (or gluten-free flour)
- 1/2 cup grated Parmesan cheese
- 1 large egg
- 2 green onions, finely chopped
- 1 clove garlic, minced
- 1 teaspoon salt
- 1/2 teaspoon black pepper
- 1 teaspoon dried oregano
- Cooking spray
In a large bowl, combine the grated zucchini with a pinch of salt and let it sit for about 10 minutes to draw out excess moisture. After 10 minutes, squeeze the zucchini with your hands to remove any extra water.
Add the flour, Parmesan cheese, egg, green onions, garlic, salt, pepper, and oregano. Mix until the ingredients are well combined. Preheat your air fryer to 375°F (190°C).
Form the mixture into small patties and lightly spray both sides with cooking spray. Place the fritters in the air fryer basket in a single layer and cook for about 10-12 minutes, flipping halfway through, until golden brown and crispy.
When making Air Fryer Zucchini Fritters, it's important to verify that the grated zucchini is well-drained to avoid soggy fritters. You can also experiment with different cheeses, like cheddar or feta, for added flavor.
For a spicier kick, try incorporating chopped jalapeños into the mix. Serve these fritters immediately while they're hot and crispy for the best texture, and consider making a double batch since they disappear quickly!
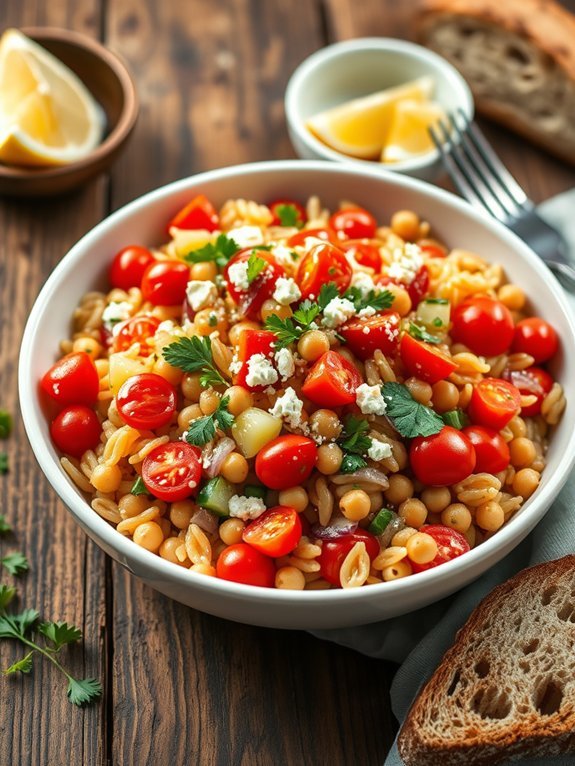
Spicy Air Fryer Chickpeas

Spicy air fryer chickpeas are a delicious and nutritious snack that's perfect for those looking to add a bit of crunch to their meals. These seasoned chickpeas aren't only packed with protein but are also a great source of fiber, making them a satisfying option to curb your hunger.
Preparing them in an air fryer gives you the crispy texture you desire without the need for excess oil, making it a healthier alternative to traditional frying.
The wonderful thing about spicy air fryer chickpeas is their versatility. You can easily customize the level of spiciness by adjusting the amount of spices you use, making them suitable for a wide range of palates. Additionally, you can toss them into salads, sprinkle them on soups, or simply enjoy them on their own as a guilt-free snack.
- 1 can (15 oz) of chickpeas, drained and rinsed
- 1 tablespoon olive oil
- 1 teaspoon smoked paprika
- 1 teaspoon garlic powder
- 1/2 teaspoon cayenne pepper (adjust for spice preference)
- 1/2 teaspoon salt
- 1/2 teaspoon black pepper
- Optional: a sprinkle of fresh herbs for garnish
In a mixing bowl, combine the drained chickpeas with olive oil, smoked paprika, garlic powder, cayenne pepper, salt, and black pepper. Toss them to guarantee all the chickpeas are well coated in the seasoning.
Preheat your air fryer to 400°F (200°C). Once heated, spread the chickpeas in a single layer in the air fryer basket and cook for 12-15 minutes, shaking the basket halfway through to promote even cooking, until they're crispy and golden brown.
For best results, make sure that your chickpeas are patted dry before tossing them with the oil and spices, as excess moisture can prevent them from crisping up properly.
Feel free to experiment with different spices like chili powder or cumin for a unique flavor profile. Additionally, store any leftovers in an airtight container, but be aware that they're best enjoyed fresh as they can lose their crispiness over time.
Air Fryer Stuffed Bell Peppers

Air fryer stuffed bell peppers are a delicious and healthy meal option that's easy to prepare and cook in a fraction of the time compared to traditional methods. The combination of juicy bell peppers, flavorful filling, and crispy texture creates a satisfying dish that can be customized to meet various dietary preferences.
Whether you're looking to use up leftover grains, meats, or vegetables, stuffed peppers make for a versatile base that allows for creativity in the kitchen. Using an air fryer not only cuts down on cooking time but also reduces the amount of oil needed, resulting in a meal that's lower in fat while still packed with flavor.
These stuffed peppers can be enjoyed as a main dish or served alongside a crisp salad for an even more nutritious meal. To get started on this tasty dish, gather your ingredients and equip your air fryer for a healthy cooking experience.
- 4 medium bell peppers (any color)
- 1 cup cooked quinoa or rice
- 1 cup cooked ground turkey or beef (or a plant-based alternative)
- 1 cup diced tomatoes (canned or fresh)
- 1 small onion, finely chopped
- 1 teaspoon garlic powder
- 1 teaspoon cumin
- 1 teaspoon paprika
- 1 cup shredded cheese (optional)
- Salt and pepper to taste
- Fresh herbs for garnish (optional)
Preheat your air fryer to 370°F (185°C). While it's heating, prepare your bell peppers by cutting off the tops and removing the seeds and membranes.
In a large bowl, combine the cooked quinoa or rice, cooked ground meat, diced tomatoes, onion, garlic powder, cumin, paprika, salt, and pepper. Mix until well combined. Stuff each bell pepper with the filling mixture and sprinkle cheese on top if desired.
Arrange the stuffed peppers upright in the air fryer basket and cook for about 15-20 minutes, or until the peppers are tender and the filling is hot. For best results, be sure not to overcrowd the air fryer basket, as adequate airflow is essential for even cooking.
If you prefer your peppers to be extra tender, you can microwave them for a few minutes before air frying. Feel free to experiment with different fillings based on what you have on hand, such as beans, corn, or various vegetables.
For added flavor, consider incorporating some spices or herbs into the filling to create your signature stuffed pepper dish. Don't forget to adjust the cooking time based on the size of your bell peppers; larger ones may take a bit longer to cook fully.
Enjoy experimenting and creating your own perfect air fryer stuffed bell peppers!
Crunchy Air Fryer Tofu

Air fryer tofu is a delicious and healthy alternative to traditional fried tofu, offering the same satisfying crunch without the excess oil. This method not only retains the wonderful texture but also infuses the tofu with flavor thanks to the seasoning. Whether you're a longtime fan of tofu or trying it for the first time, this recipe is a tasty way to enjoy the plant-based protein. The air fryer helps to achieve a delightful crispy exterior while keeping the inside soft and tender.
Making crunchy air fryer tofu is straightforward and requires minimal preparation. Start with firm or extra-firm tofu, which holds up better to the air frying process. The marination adds depth to the flavor, but if you're short on time, you can always skip this step and season it directly before air frying. Serve this crispy tofu as a snack, incorporate it into salads or grain bowls, or use it as a protein-packed addition to stir-fries.
- 1 block of firm or extra-firm tofu
- 2 tablespoons soy sauce or tamari
- 1 tablespoon cornstarch
- 1 teaspoon garlic powder
- 1 teaspoon onion powder
- 1 teaspoon smoked paprika (optional)
- Salt and pepper to taste
- Olive oil spray
Drain the tofu and press it gently to remove excess water, then cut it into bite-sized cubes. In a bowl, combine the soy sauce, cornstarch, garlic powder, onion powder, smoked paprika, salt, and pepper. Toss the tofu cubes in the mixture until evenly coated, then let them marinate for about 15-20 minutes.
Preheat your air fryer to 400°F (200°C), arrange the coated tofu in a single layer in the air fryer basket, and spray lightly with olive oil. Cook for 12-15 minutes, shaking the basket halfway through, until the tofu is golden brown and crispy.
When preparing air fryer tofu, it's important to verify that the tofu cubes are cut uniformly so they cook evenly. Don't overcrowd the air fryer basket; if necessary, cook in batches to achieve maximum crispiness.
Experiment with your favorite seasonings and sauces to customize the flavor profile, and for a kick, try adding a dash of cayenne pepper or chili powder to the marinade. Enjoy your healthy, crunchy tofu as a delightful addition to various meals!
Air Fried Quinoa Patties

Air fried quinoa patties are a delicious way to incorporate healthy grains and vegetables into your meal plan. These light and crispy patties are packed with protein and fiber, making them an excellent choice for lunch or dinner. They aren't only easy to prepare but are also incredibly versatile. You can serve them with a side of salad, tuck them into a whole grain bun, or enjoy them on their own with a dip.
The flavorful combination of quinoa, vegetables, and spices creates a satisfying meal without the need for deep frying. Using an air fryer drastically reduces the oil needed to achieve that perfect golden-brown exterior while keeping the insides moist and tender. Customize these patties by adding your favorite ingredients — like herbs, spices, or even shredded cheese — to make them your own!
- 1 cup cooked quinoa
- 1/2 cup grated zucchini (excess moisture squeezed out)
- 1/2 cup breadcrumbs (whole wheat or gluten-free)
- 1/4 cup diced onion
- 1/4 cup grated carrot
- 2 cloves garlic, minced
- 1 teaspoon cumin
- 1 teaspoon paprika
- 1/2 teaspoon salt
- 1/4 teaspoon black pepper
- 1 egg (or a flax egg for a vegan option)
- Cooking spray or oil for the air fryer
In a large bowl, combine the cooked quinoa, grated zucchini, breadcrumbs, diced onion, grated carrot, minced garlic, cumin, paprika, salt, pepper, and egg. Mix until all ingredients are well combined. Form the mixture into patties, about 1/2 inch thick.
Preheat your air fryer to 375°F (190°C) and lightly coat the basket with cooking spray or oil. Arrange the patties in the air fryer in a single layer, making sure not to overcrowd them. Cook for about 12-15 minutes, flipping halfway through, until they're golden brown and crispy.
For extra flavor, feel free to add fresh herbs like parsley or cilantro to the mixture. If the mixture is too dry, add a teaspoon of water or the juices from the grated zucchini. To guarantee a uniform cook, try to make patties of the same size.
Remember that air fryers can differ in size and cooking power, so keep an eye on the patties to avoid overcooking. These quinoa patties can also be made in advance and stored in the fridge, making them a quick and healthy meal option on busy days.
Savory Air Fryer Eggplant

Air frying has become a popular cooking method for those seeking a healthier alternative to traditional frying. It allows for dishes that are crispy on the outside while retaining a tender texture inside, all with notably less oil. One delightful option to explore in the air fryer is eggplant. This versatile vegetable can take on different flavors, making it a fantastic base for various seasonings and sauces.
In this recipe, the savory eggplant is sure to impress as a side dish or even a main meal. The process of preparing air fryer eggplant is straightforward, and the results are incredibly satisfying. The combination of spices provides a delicious depth of flavor, while the air fryer guarantees that each piece is perfectly cooked with a delightful crunch.
Serve these crispy eggplant slices alongside a zesty tomato dip or incorporate them into a vibrant salad to elevate your meal. Enjoy the rewarding taste of this healthy, air-fried deliciousness!
- 1 medium eggplant
- 2 tablespoons olive oil
- 1 teaspoon garlic powder
- 1 teaspoon onion powder
- 1 teaspoon smoked paprika
- 1/2 teaspoon salt
- 1/2 teaspoon black pepper
- Fresh parsley for garnish (optional)
Slice the eggplant into 1/2-inch thick rounds and place them in a bowl. Drizzle with olive oil and sprinkle garlic powder, onion powder, smoked paprika, salt, and black pepper over the eggplant. Toss everything together until the eggplant is evenly coated.
Preheat your air fryer to 375°F (190°C) and arrange the seasoned eggplant in a single layer in the basket. Air fry for about 15-18 minutes, flipping halfway through, until golden brown and tender.
For the best results, try to choose a firm and shiny eggplant, avoiding any that have blemishes or are overly soft. You can also experiment with different spices or marinades to customize the flavor profile to your liking.
If you prefer a softer texture, simply reduce the cooking time slightly. If you have any leftovers, they can be stored in an airtight container in the refrigerator and reheated in the air fryer for a quick and delicious snack.
Enjoy exploring the delightful world of air-fried eggplant!
Air Fryer Apple Chips

Air fryer apple chips are a delightful and healthy snack that can satisfy your cravings for something crunchy and sweet without the guilt. Using the air fryer for making these chips means that you can achieve that ideal crispy texture without deep-frying, which often adds unnecessary calories and fat. This recipe is simple, quick, and perfect for busy individuals or families looking to incorporate more healthy snacks into their diets.
The best part about air fryer apple chips is that you can customize them with your favorite spices. Whether you like a sprinkle of cinnamon for added warmth or a hint of nutmeg for a unique twist, these chips can be tweaked to suit your taste preferences. They make for a popular snack among kids and adults alike, and are fantastic for meal prep, allowing you to enjoy a delicious treat anytime.
- 2 medium apples (such as Fuji, Honeycrisp, or Granny Smith)
- 1 teaspoon cinnamon (optional)
- 1 tablespoon lemon juice (optional)
- Cooking spray or oil (optional)
Begin by preheating your air fryer to 300°F (150°C). While it's heating, wash and core the apples. Slice them thinly, ideally about 1/8 inch thick, to guarantee even cooking. If you like, you can toss the apple slices in a bowl with lemon juice and cinnamon for extra flavor, but this step is optional.
Arrange the apple slices in a single layer in the air fryer basket, making sure they aren't overlapping too much, and cook for about 15-20 minutes until they become crispy, flipping them halfway through.
When making apple chips, pay attention to the thickness of your apple slices, as this will greatly affect the cooking time and texture. Thinner slices will crisp up more quickly, while thicker slices may take a little longer. It's also a good idea to check the apples periodically to prevent them from burning, since air fryers can cook quickly.
If you're experimenting with flavors, consider adding a pinch of salt or a drizzle of honey after they're done cooking for a more gourmet treat!