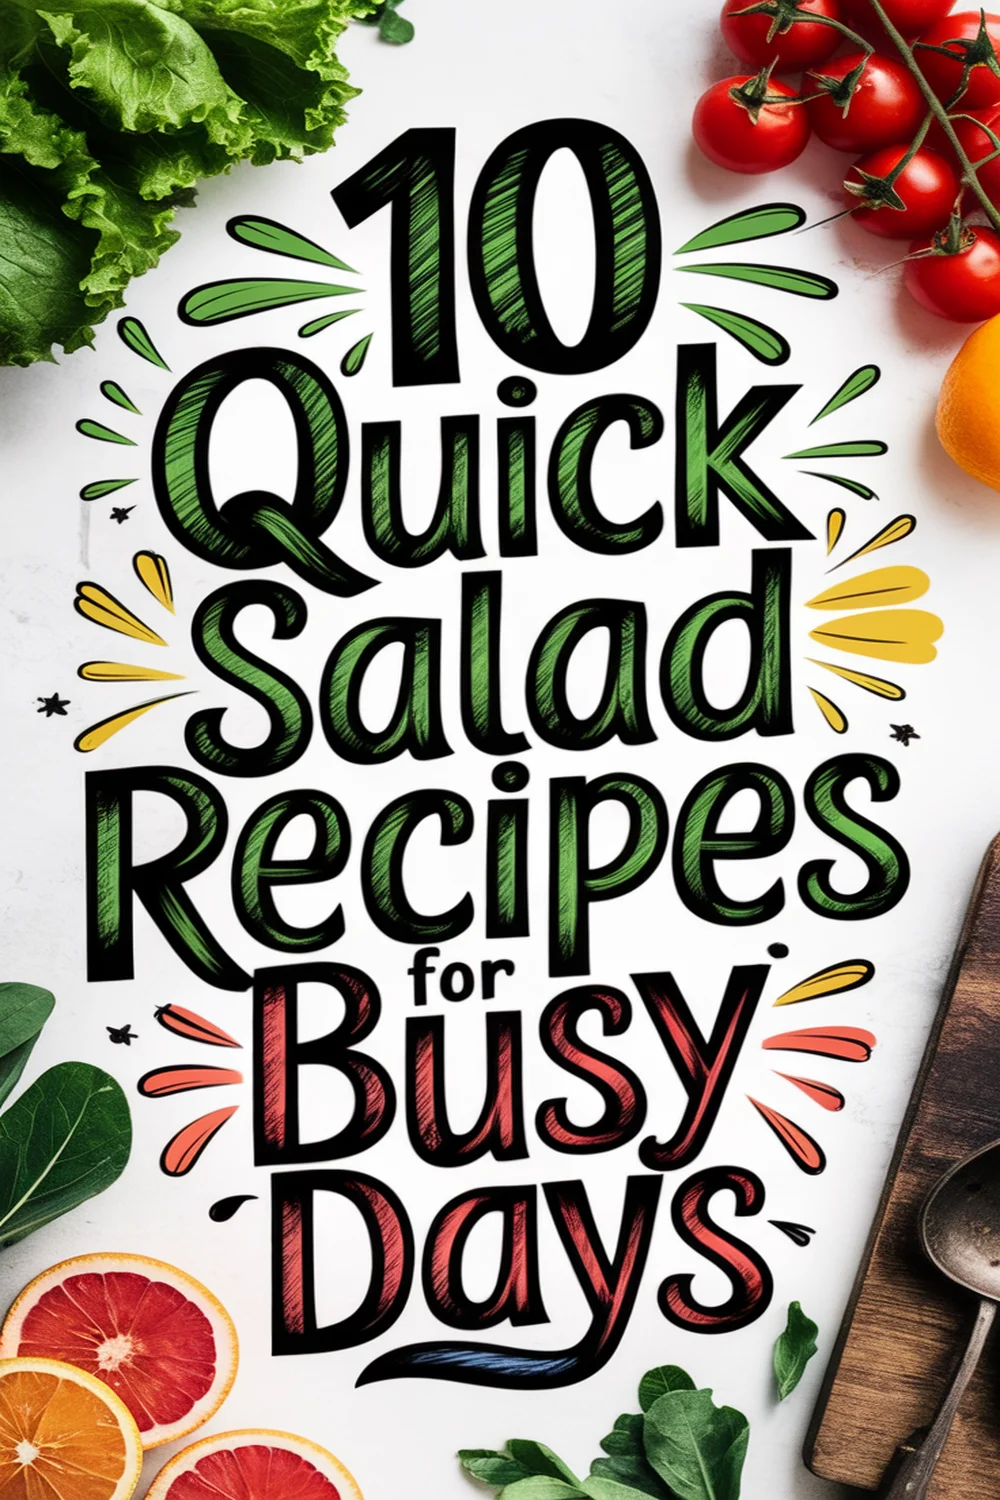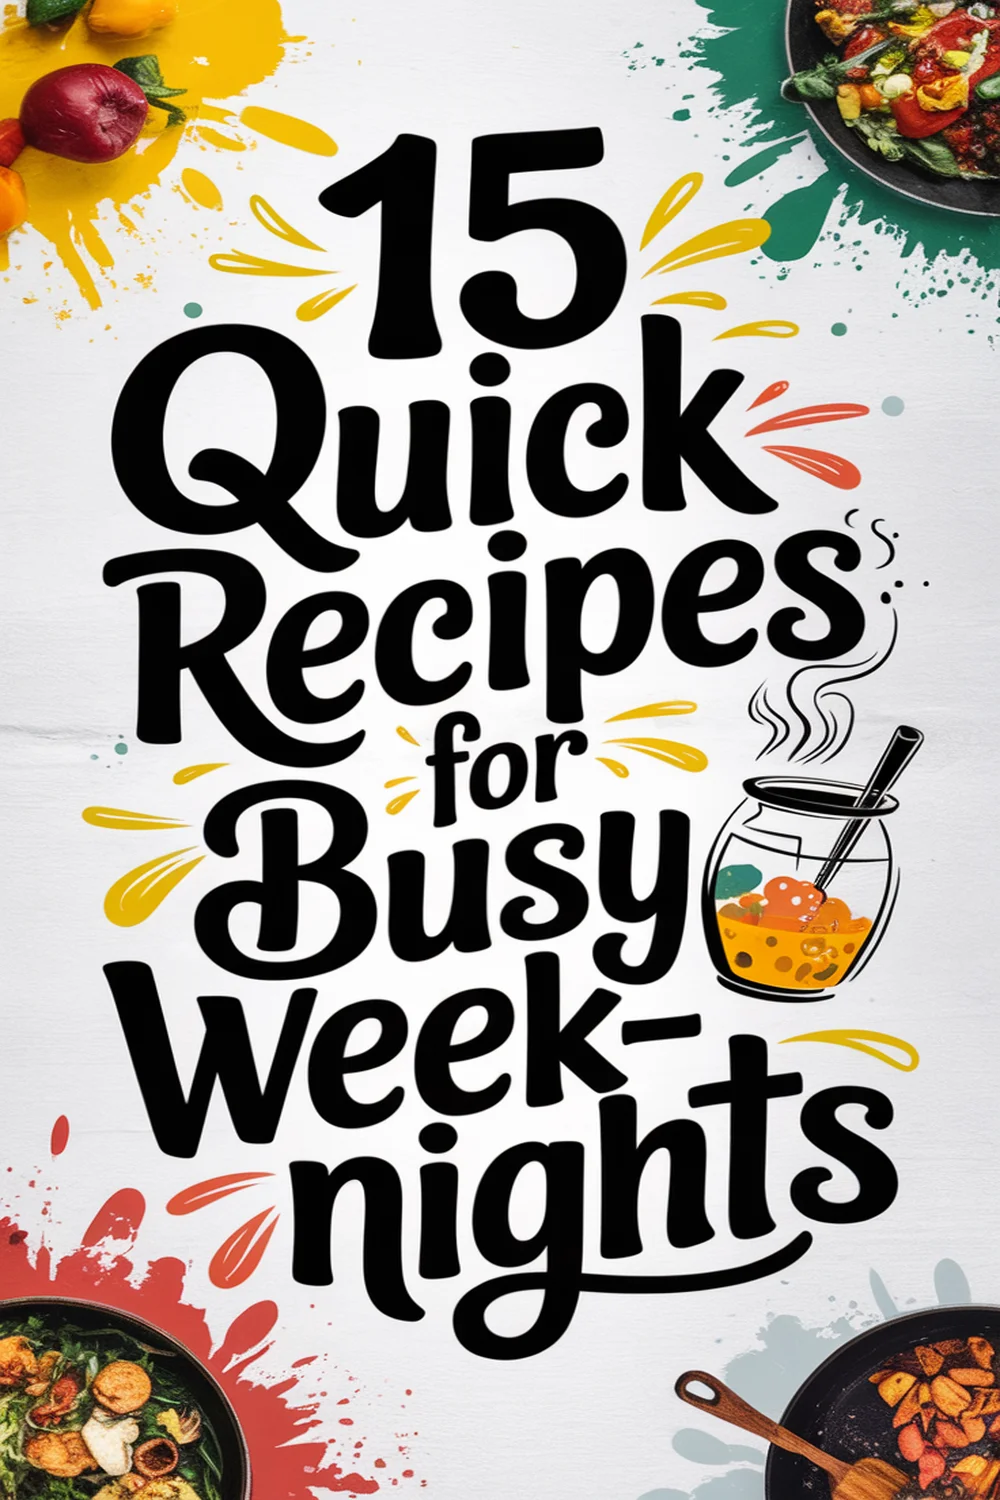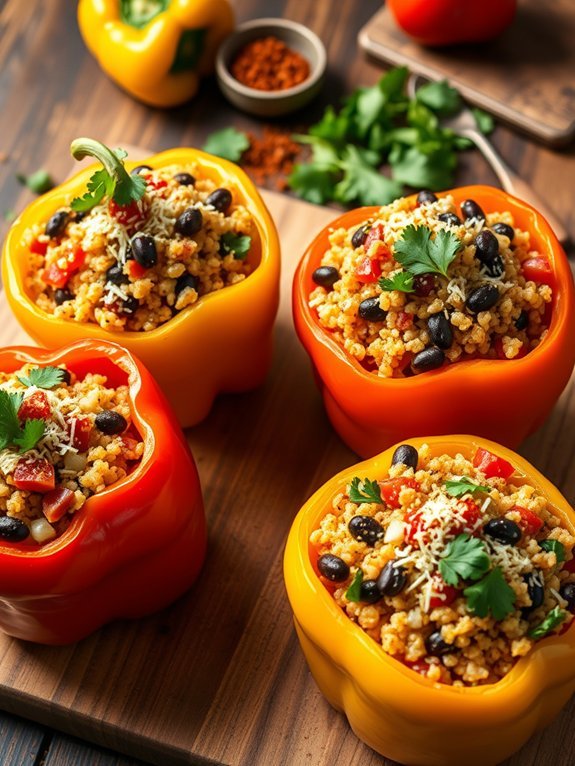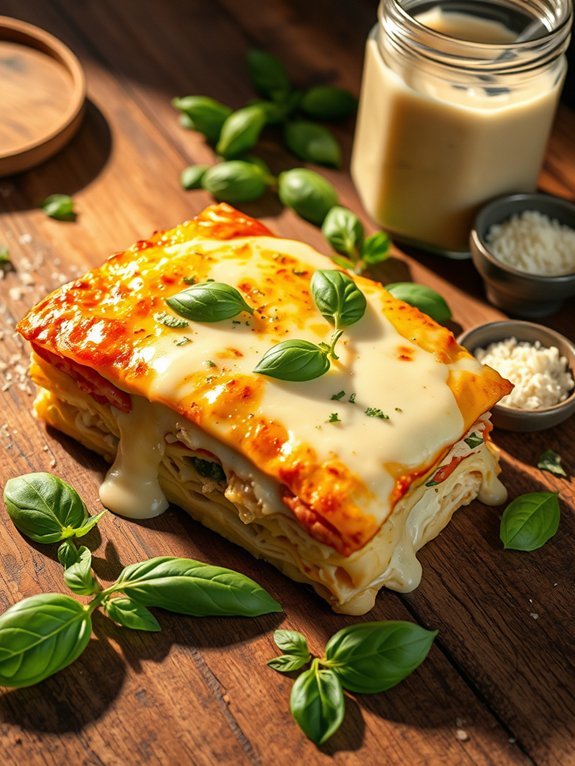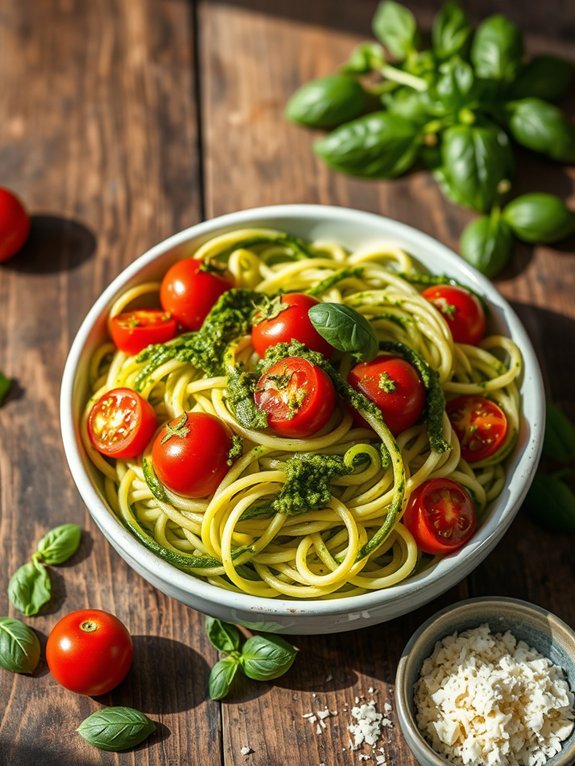
If you're craving something sweet, try these 12 easy dessert recipes anyone can make! Whip up No-Bake Chocolate Peanut Butter Bars for a quick fix or enjoy a Simple Vanilla Mug Cake that's ready in minutes. For a healthier treat, 3-Ingredient Banana Ice Cream is guilt-free and delicious. You'll also love Classic Rice Krispie Treats and Strawberry Shortcake Parfaits. Each recipe is simple yet satisfying, so stick around to discover your new favorite sweet treat!
No-Bake Chocolate Peanut Butter Bars
No-Bake Chocolate Peanut Butter Bars are the ultimate dessert for anyone who craves a sweet treat without the hassle of baking. These bars combine the rich flavors of chocolate and peanut butter, making them an irresistible indulgence. Perfect for a quick dessert option, they come together in just a few minutes and are sure to impress your family and friends.
Whether you're preparing for a party or just want to satisfy your sweet tooth, these bars are a delicious and simple choice. The best part about these no-bake bars is that they require minimal ingredients and effort. With just a few pantry staples, you can whip up a creamy, mouthwatering dessert that sets in the fridge.
Enjoy them chilled for a creamy texture, and watch as they disappear at your next gathering, leaving everyone wanting more. Ready to plunge into this easy dessert recipe? Let's get started!
- 1 cup graham cracker crumbs
- 1 cup powdered sugar
- 1 cup creamy peanut butter
- 1/2 cup unsalted butter, melted
- 1 cup semi-sweet chocolate chips
- 2 tablespoons coconut oil (optional)
In a medium mixing bowl, combine the graham cracker crumbs, powdered sugar, peanut butter, and melted butter. Stir until the mixture is fully combined and thick. Press this mixture evenly into the bottom of a greased 8×8 inch pan.
In a separate bowl, melt the chocolate chips and coconut oil (if using) together in the microwave in 30-second intervals, stirring until smooth. Pour the chocolate over the peanut butter layer and spread it evenly using a spatula.
Refrigerate for at least 2 hours until set, then slice into bars and serve. When making these bars, it's important to make sure the peanut butter mixture is pressed firmly into the pan to create a solid base.
Additionally, feel free to customize the chocolate topping by adding toppings such as chopped nuts, sea salt, or even a drizzle of caramel for extra flavor. Just remember to store the bars in the refrigerator to keep their shape and freshness!
Simple Vanilla Mug Cake
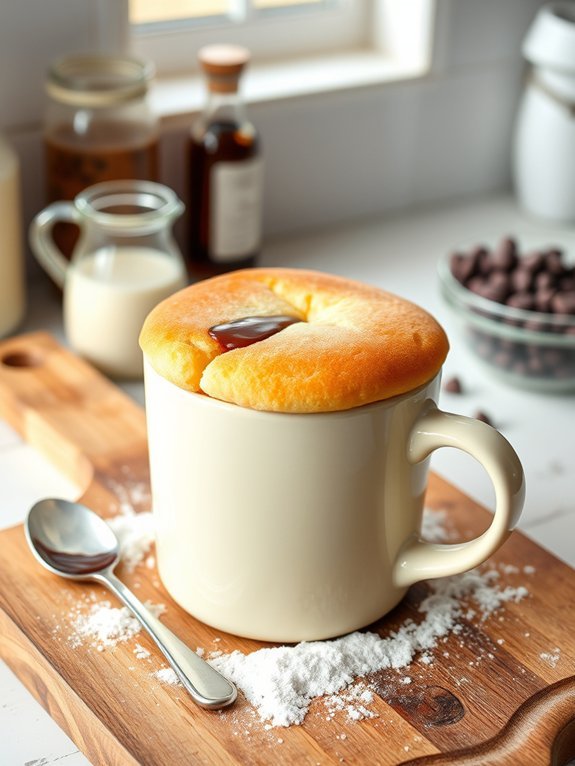
When you're craving something sweet but don't want to spend hours in the kitchen, a simple vanilla mug cake is the perfect solution. This delightful dessert takes just a few minutes to whip up and only requires a microwave, making it an ideal treat for those late-night cravings or spontaneous gatherings. With a fluffy texture and a light vanilla flavor, this mug cake can satisfy any sweet tooth in no time.
Making a vanilla mug cake isn't only quick but also highly customizable. You can add chocolate chips, nuts, or even a swirl of peanut butter to make it your own. The process is straightforward: you mix the ingredients right in the mug, pop it in the microwave, and within a minute or two, you have a warm, delicious cake that serves as a perfect dessert for one.
- 4 tablespoons all-purpose flour
- 4 tablespoons granulated sugar
- 1/8 teaspoon baking powder
- A pinch of salt
- 3 tablespoons milk
- 2 tablespoons vegetable oil
- 1/4 teaspoon vanilla extract
In a microwave-safe mug, combine the flour, sugar, baking powder, and salt. Mix these dry ingredients until well combined.
Then, add the milk, vegetable oil, and vanilla extract to the mug and stir until the batter is smooth. Make sure there are no lumps, then place the mug in the microwave and cook on high for about 1 minute and 30 seconds or until the cake has risen and is cooked through.
Let it cool for a minute before enjoying.
For the best results, be sure to use a microwave-safe mug that holds at least 12 ounces to allow for the cake to rise without overflowing. Keep an eye on the cooking time, as microwaves vary in power; if your cake isn't fully cooked after 1 minute and 30 seconds, continue microwaving in 10-second intervals until done.
Also, feel free to experiment with different flavorings or mix-ins to tailor the cake to your taste preferences!
3-Ingredient Banana Ice Cream
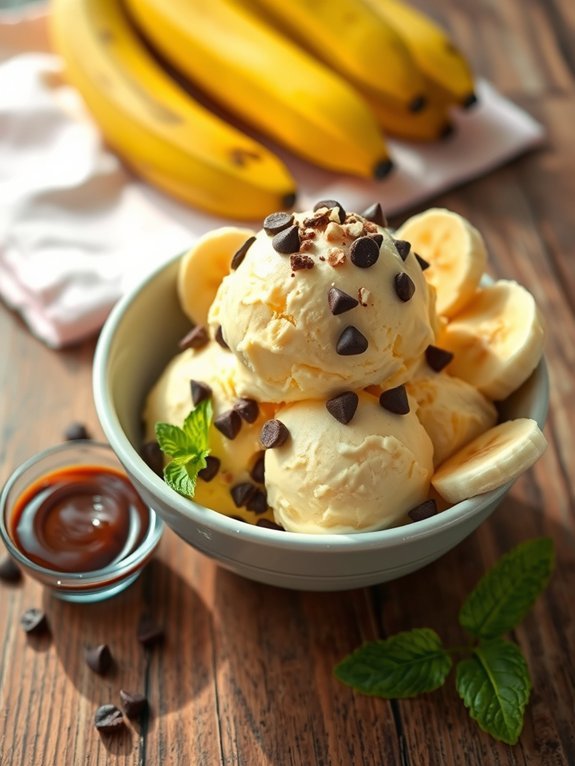
Banana ice cream is the ultimate treat for those hot summer days or whenever you're craving a sweet yet healthy dessert. This recipe isn't only incredibly simple to make but also requires minimal ingredients, making it a perfect choice for a quick and satisfying dessert. All you need are ripe bananas, and with a few clever techniques, you can create a creamy, delicious ice cream that feels indulgent without any guilt.
The best part about banana ice cream is its versatility. You can enjoy it plain, or you can jazz it up by adding various mix-ins like nuts, chocolate chips, or other fruits. It's an excellent way to use overripe bananas that may otherwise go to waste, turning them into a delightful treat everyone will love. Plus, this recipe is dairy-free and can easily be made vegan, making it a favorite for a wide range of diets.
Ingredients:
- 2 to 4 ripe bananas
- Optional: vanilla extract, cocoa powder, or a pinch of salt for flavor
- Optional toppings: nuts, chocolate chips, or other fruits
Slice the ripe bananas into thin rounds and place them in a single layer on a baking sheet. Freeze the banana slices for about 1 to 2 hours until they're completely solid. Once frozen, transfer the banana slices to a food processor and blend until smooth and creamy. If desired, add a splash of vanilla extract, cocoa powder, or a pinch of salt during blending to enhance the flavor.
Serve immediately for soft-serve texture or transfer to a container to freeze further for a firmer consistency. When making banana ice cream, guarantee that your bananas are very ripe, as this will help achieve the sweetest and most flavorful result.
If you want to mix in additional ingredients, do so after blending the bananas until smooth—this allows for even distribution without overwhelming the banana flavor. You can also experiment with different fruits or add-ins to customize your ice cream, making it a fun and creative activity for all ages!
Quick Chocolate Chip Cookies

Indulging in homemade chocolate chip cookies is one of life's simplest pleasures. With a few pantry staples and a little time, you can whip up a batch that will fill your home with the irresistible aroma of baked goodness.
These cookies are perfect for satisfying sweet cravings and are a great treat to share with family and friends, making them a staple for any gathering. Ideal for both novice bakers and seasoned pros, this recipe's simplicity is matched only by its deliciousness.
The beauty of these quick chocolate chip cookies lies in their ability to be made in under 30 minutes, from mixing the ingredients to taking the first warm cookie out of the oven. Soft, chewy, and packed with chocolate, they're perfect with a cold glass of milk or as an after-dinner treat.
Whether you enjoy them fresh from the oven or stored for later, these cookies are sure to become a favorite in your dessert repertoire.
Ingredients:
- 1 cup (2 sticks) unsalted butter, softened
- 3/4 cup granulated sugar
- 3/4 cup brown sugar, packed
- 1 teaspoon vanilla extract
- 2 large eggs
- 2 1/4 cups all-purpose flour
- 1 teaspoon baking soda
- 1/2 teaspoon salt
- 2 cups chocolate chips
Cream the softened butter, granulated sugar, and brown sugar together in a large mixing bowl until the mixture is light and fluffy. Add the vanilla extract and eggs, mixing until combined.
Gradually stir in the flour, baking soda, and salt until just combined. Finally, fold in the chocolate chips. Preheat your oven to 375°F (190°C) and drop spoonfuls of dough onto ungreased baking sheets, leaving space in between.
Bake for 9-11 minutes or until edges are golden brown. Let the cookies cool on the sheet for a couple of minutes before transferring them to a wire rack to cool completely.
When making these chocolate chip cookies, be mindful not to overmix the dough once you add the flour, as this can lead to tougher cookies.
Additionally, for an extra touch, consider chilling the dough for about 30 minutes before baking; this can enhance the flavors and create a thicker cookie. If you prefer, you can experiment with different types of chocolate chips, like dark chocolate or white chocolate, or even add nuts for a delightful crunch. Enjoy your baking!
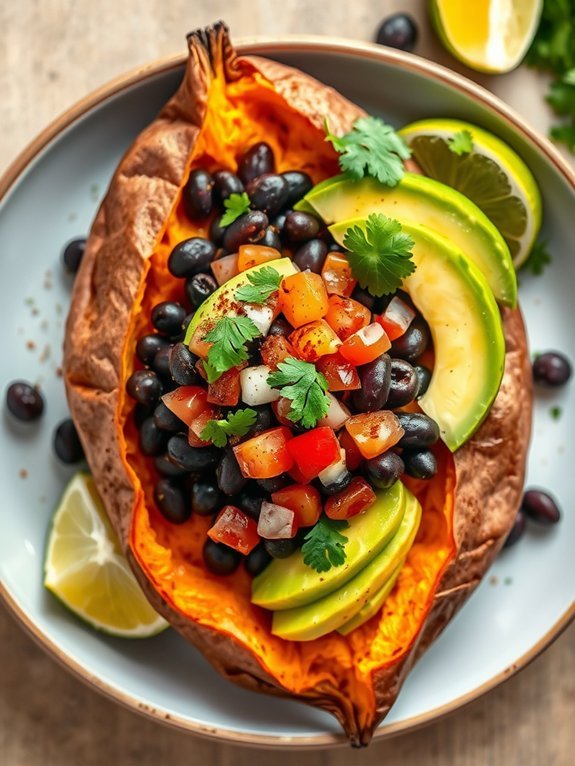
Easy Fruit Salad With Honey Lime Dressing

Creating a invigorating fruit salad is a delightful way to enjoy the flavors of seasonal fruits, and the addition of a honey lime dressing elevates the dish to a whole new level. This easy fruit salad can be prepared in just a few minutes, making it a perfect choice for potlucks, picnics, or simply as a healthy dessert option at home. The combination of sweet honey and zesty lime creates a bright and uplifting experience for your taste buds.
For this fruit salad, you can choose your favorite fruits or utilize what you have on hand. Variations may include everything from berries and melons to stone fruits like peaches and cherries. The key is to keep the fruit fresh and vibrant, allowing the honey lime dressing to enhance their natural sweetness. So, gather your ingredients, and let's get started on this invigorating treat!
- 2 cups strawberries, hulled and sliced
- 1 cup blueberries
- 1 cup diced pineapple
- 1 cup diced mango
- 1 banana, sliced
- 2 tablespoons honey
- Juice of 1 lime
- Zest of 1 lime
- Fresh mint leaves for garnish (optional)
In a large mixing bowl, combine all your prepared fruits. In a separate small bowl, whisk together the honey, lime juice, and lime zest until well combined. Drizzle the honey lime dressing over the fruit salad and gently toss to coat all the fruits evenly.
If desired, garnish with fresh mint leaves before serving.
For the best results, it's recommended to prepare this fruit salad shortly before serving to guarantee the fruit stays crisp and the dressing hasn't had too much time to soften everything. You can also chill the salad in the refrigerator for about 15-30 minutes to enhance the flavors before serving.
Feel free to customize the fruit selection according to what's in season or your personal preferences – almost any combination will work beautifully with the honey lime dressing!
No-Bake Cheesecake Cups
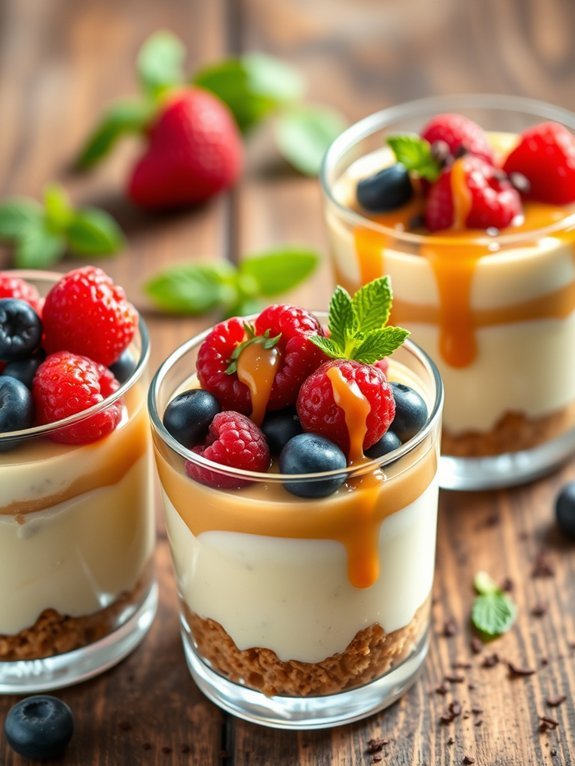
No-Bake Cheesecake Cups are the perfect dessert for those who want to indulge in something creamy and delicious without the hassle of baking. These delightful treats aren't only simple to prepare, but they also come together quickly, allowing you to satisfy your sweet tooth in no time.
The smooth, rich cream cheese filling pairs beautifully with a crunchy graham cracker crust and can be customized with your favorite fruits or toppings. Making No-Bake Cheesecake Cups is a fun activity for both kids and adults, making it an ideal choice for parties or family gatherings.
The versatility of this dessert means you can experiment with flavors, such as adding chocolate, caramel, or fruit purees. With just a few ingredients, you can create an elegant dessert that looks as great as it tastes.
Ingredients:
- 8 oz cream cheese, softened
- 1/2 cup powdered sugar
- 1 tsp vanilla extract
- 1 cup heavy whipping cream
- 1 cup graham cracker crumbs
- 4 tbsp unsalted butter, melted
- Fresh fruit or toppings of choice (optional)
In a mixing bowl, beat the softened cream cheese, powdered sugar, and vanilla extract together until smooth and creamy. In another bowl, whip the heavy cream until stiff peaks form, then gently fold it into the cream cheese mixture.
In a separate bowl, combine the graham cracker crumbs and melted butter until evenly mixed. To assemble the cheesecake cups, layer a spoonful of the graham cracker mixture at the bottom, followed by a layer of the cream cheese mixture. Repeat the layers until you reach the top of each cup, then chill in the refrigerator for at least 2 hours to set.
For an extra touch, consider adding a variety of toppings such as fresh berries, chocolate shavings, or a drizzle of caramel or chocolate sauce. Always confirm your cream cheese is at room temperature to achieve a smoother consistency, and for a lighter texture, be careful not to overmix the whipped cream when folding it into the cream cheese mixture.
These cheesecake cups can be made a day in advance, making them a convenient choice for parties or gatherings.
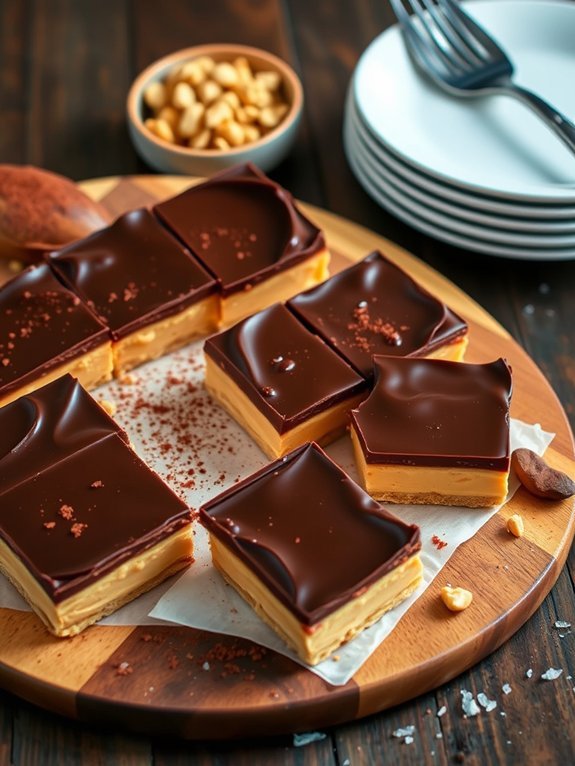
4-Ingredient Chocolate Fudge
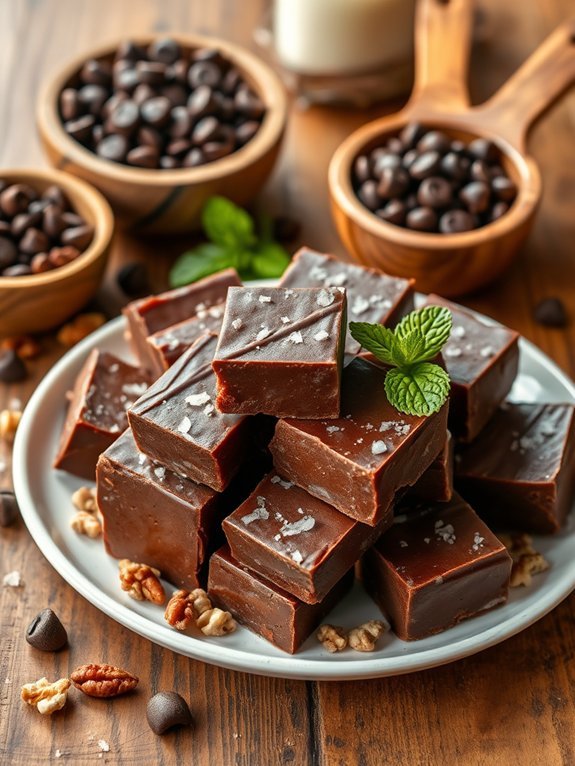
Chocolate fudge is a classic dessert that combines rich chocolate flavor with a silky smooth texture, making it a favorite among chocolate lovers. Preparing this indulgent treat is a simple and rewarding process, perfect for satisfying a sweet tooth or impressing guests at a gathering.
The beauty of chocolate fudge lies in its versatility; you can customize it with various mix-ins such as nuts, dried fruits, or even a sprinkle of sea salt on top for an added flavor contrast.
To achieve the best results, the key is to use high-quality chocolate and to make certain that you carefully follow the steps to create that velvety consistency. You'll want to take your time melting the chocolate, stirring it gently to avoid burning, and verifying that the ingredients are well combined.
Once cooled, cut the fudge into squares and enjoy a delightful chocolate treat that's sure to please anyone!
Ingredients:
- 2 cups semi-sweet chocolate chips
- 1 cup sweetened condensed milk
- 1/4 cup unsalted butter
- 1 teaspoon vanilla extract
- 1/4 teaspoon salt
- Optional: 1/2 cup chopped nuts or dried fruits
Melt the semi-sweet chocolate chips, sweetened condensed milk, and unsalted butter together in a saucepan over low heat, stirring constantly until the mixture is smooth and glossy. Once melted, remove from heat and stir in vanilla extract and salt.
If desired, fold in chopped nuts or dried fruits for extra flavor and texture. Pour the mixture into a greased 8×8-inch baking dish, spreading it evenly. Allow it to cool at room temperature for at least 2 hours before cutting into squares.
When making chocolate fudge, it's important to use fresh ingredients, especially the chocolate and sweetened condensed milk, for the best texture and flavor. Additionally, for a firmer fudge, consider refrigerating it for a bit longer after cooling at room temperature.
If you're feeling adventurous, try experimenting with different types of chocolate, like dark or white chocolate, or add flavorings like peppermint extract for a seasonal twist.
Mini Apple Crisp in a Cup
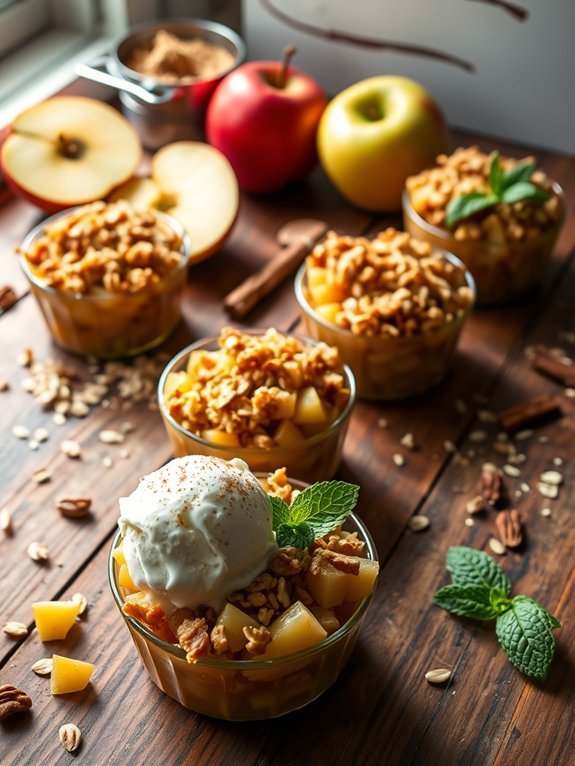
Mini Apple Crisp in a Cup is a delightful and individual-sized dessert perfect for satisfying your sweet tooth without the guilt of overindulging. This charming recipe allows you to enjoy the classic flavors of a traditional apple crisp in a convenient cup, making it an ideal treat for gatherings, picnics, or simply a cozy night in.
With its warm, spiced apples and a crunchy, buttery topping, each bite promises to be a burst of comfort and joy. Gathering the wholesome ingredients is the first step toward creating this delicious dessert. You'll be using fresh apples, which are the star of the show, enhanced by a mixture of brown sugar, oats, and spices that evoke the warmth of fall.
This recipe is incredibly easy to prepare, allowing you to whip up these mini crisps in no time, making it a great option for surprising your family or impressing guests with your culinary skills.
Ingredients:
- 2 medium apples, peeled and diced
- 2 tablespoons brown sugar
- 1 teaspoon cinnamon
- 1 teaspoon vanilla extract
- 1/2 cup rolled oats
- 1/4 cup all-purpose flour
- 3 tablespoons melted butter
- 1/4 cup chopped nuts (optional)
- Whipped cream or ice cream (for serving, optional)
In a mixing bowl, combine the diced apples with brown sugar, cinnamon, and vanilla extract, then divide the apple mixture into individual cups.
In another bowl, mix the rolled oats, flour, melted butter, and chopped nuts until crumbly. Spoon this topping over the apple mixture in each cup, then bake in a preheated oven at 350°F (175°C) for about 25-30 minutes, or until the apples are tender and the topping is golden brown.
For an added touch of flair, consider serving your Mini Apple Crisp with a dollop of whipped cream or a scoop of vanilla ice cream on top.
You can also customize the recipe by using different fruits like peaches or berries, allowing for seasonal variations. If you want a bit more crunch, add a sprinkle of granola to the topping. Finally, feel free to adjust the sweetness to your preference by using less sugar or substituting with honey or maple syrup. Enjoy your delicious creation!
Classic Rice Krispie Treats
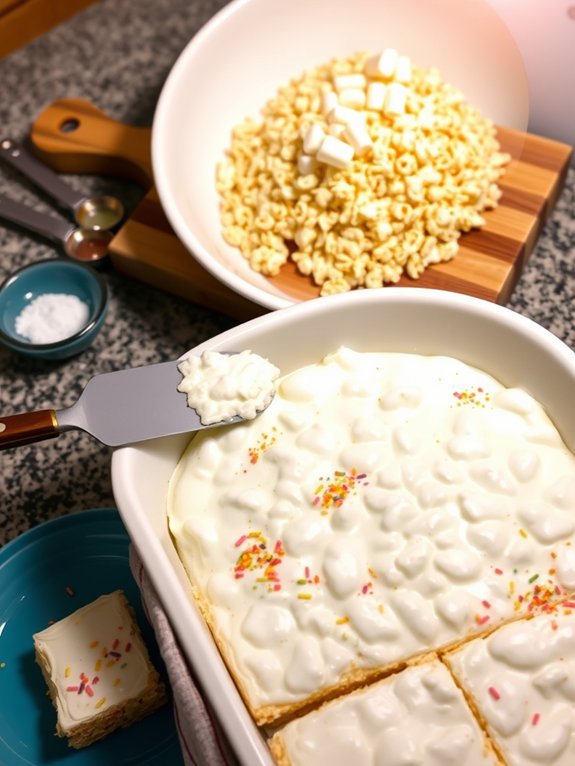
Classic Rice Krispie Treats are a timeless dessert that brings back nostalgic memories for many. With just a few simple ingredients, this treat isn't only easy to make but also a delightful chewy snack that everyone will love. Whether you're making them for a special occasion, a family gathering, or just to satisfy a sweet craving, Rice Krispie Treats are perfect because they require no baking and can be prepared in under 30 minutes.
To make the best Rice Krispie Treats, start with fresh marshmallows and make sure your butter is unsalted. The gooey marshmallows combined with the crispy Rice Krispies create a wonderful contrast in texture, making them addictive and satisfying. Feel free to mix in extras like chocolate chips or sprinkles for an added touch, or simply enjoy the classic flavor as it is.
Ingredients:
- 3 tablespoons unsalted butter
- 1 package (10 oz) mini marshmallows
- 6 cups Rice Krispies cereal
- 1 teaspoon vanilla extract (optional)
- Pinch of salt (optional)
Melt the butter in a large pot over low heat. Add the marshmallows and stir until they're completely melted and smooth. If using vanilla extract and salt, add them at this stage.
Remove the pot from heat and quickly stir in the Rice Krispies, ensuring that all the cereal is thoroughly coated with the marshmallow mixture. Transfer the mixture to a greased 9×13 inch baking dish and press it down firmly with a spatula or your hands. Allow it to cool completely before cutting into squares.
For best results, make sure to butter your hands or use a spatula when pressing the mixture into the baking dish, as it can be quite sticky. You can also cover the Rice Krispie Treats tightly with plastic wrap after they've cooled, which helps maintain their freshness.
If you want to make them ahead of time, these treats can be stored at room temperature for a few days, though they're best enjoyed fresh!
Lemon Sorbet With Fresh Mint
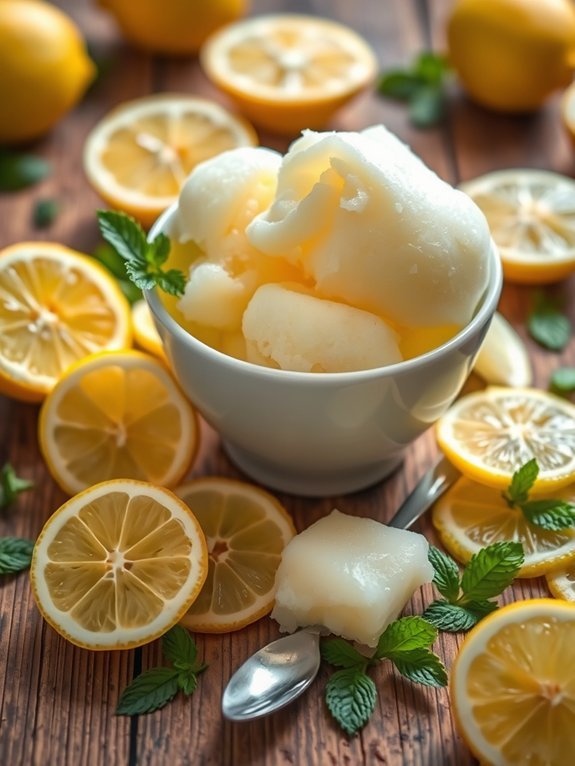
Lemon sorbet is a revitalizing dessert that beautifully balances tartness and sweetness, making it the perfect treat for hot summer days or as a palate cleanser between courses.
Adding fresh mint elevates the flavor profile, giving the sorbet an aromatic and invigorating twist that complements the bright lemon. Not only is this recipe simple to make, but it also requires only a few ingredients, making it an accessible option for both novice and experienced cooks.
To achieve the best results, it's crucial to use fresh, high-quality lemons and mint. The natural oils in mint and the acidity of lemons create a delightful contrast that makes each spoonful of sorbet an energizing experience. This dessert can be made in advance and stored in the freezer, allowing you to surprise your guests with a light and zesty end to your meal.
- 1 cup fresh lemon juice (approximately 4-6 lemons)
- 1 cup granulated sugar
- 2 cups water
- 1/4 cup fresh mint leaves, loosely packed
- Pinch of salt
In a medium saucepan, combine the water, sugar, and a pinch of salt over medium heat, stirring until the sugar is completely dissolved.
Remove the saucepan from the heat and add the fresh mint leaves. Allow the mixture to steep for about 30 minutes, then strain out the mint leaves. Mix in the fresh lemon juice and stir well. Pour the mixture into a shallow dish or an ice cream maker and freeze.
If using a dish, stir the mixture every 30 minutes with a fork until it reaches a fluffy, sorbet-like consistency, approximately 3-4 hours. For the best texture, be sure to scrape the sorbet every 30 minutes during the freezing process if using a shallow dish, as this prevents large ice crystals from forming.
If you have an ice cream maker, it will provide a smoother consistency. You can also garnish the sorbet with additional mint leaves or lemon zest for an elegant presentation. Enjoy it as a quick refreshment or a delightful finish to a dinner party!
Nutella Stuffed Croissants
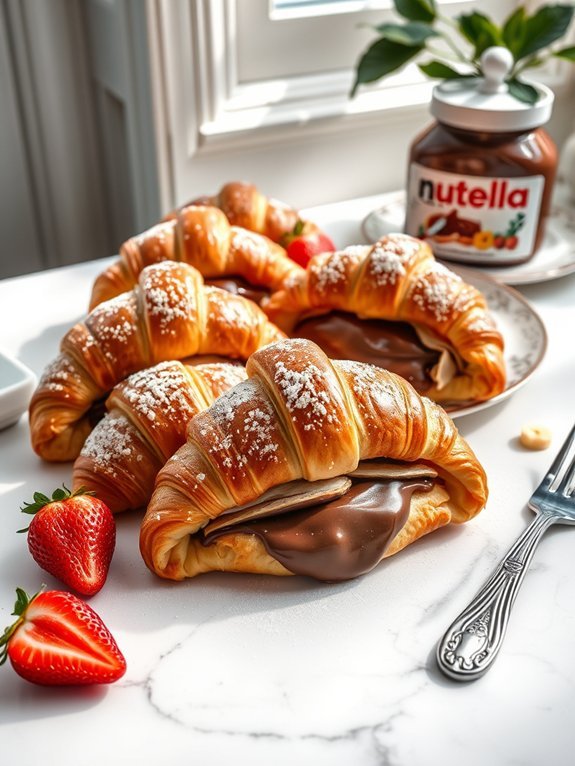
Nutella stuffed croissants are a delightful treat that combines the flakiness of buttery pastry with the rich, creamy indulgence of Nutella. They're perfect for breakfast, dessert, or a delightful snack any time of the day. This recipe isn't only easy to make but also requires minimal ingredients, allowing you to whip up a batch quickly.
Whether you're surprising your family or treating yourself, these croissants are sure to impress. Using store-bought puff pastry makes this recipe a breeze. You can enjoy the process of rolling, filling, and baking without the hassle of making dough from scratch.
Once they're out of the oven, golden brown and oozing with chocolate-hazelnut filling, there's no doubt this tempting treat will have everyone coming back for more.
Ingredients:
- 1 package of puff pastry (thawed)
- 1/2 cup Nutella
- 1 egg (beaten, for egg wash)
- Powdered sugar (for dusting)
- Optional: sliced strawberries or bananas for added flavor
Roll out the puff pastry and cut it into triangles. Place a spoonful of Nutella at the wide end of each triangle, then roll it up towards the tip, tucking the edges slightly to seal.
Arrange on a baking sheet lined with parchment paper, brush with the beaten egg, and bake in a preheated oven at 375°F (190°C) for about 15-20 minutes or until golden brown.
For an extra touch of sweetness, sprinkle the baked croissants with powdered sugar after they cool slightly. You might also consider adding sliced strawberries or bananas inside the croissant before sealing them for a delicious fruity twist.
Keep an eye on the baking time, as oven temperatures can vary; you want them just golden but not overdone. Experiment with different fillings or toppings to make these croissants your own!
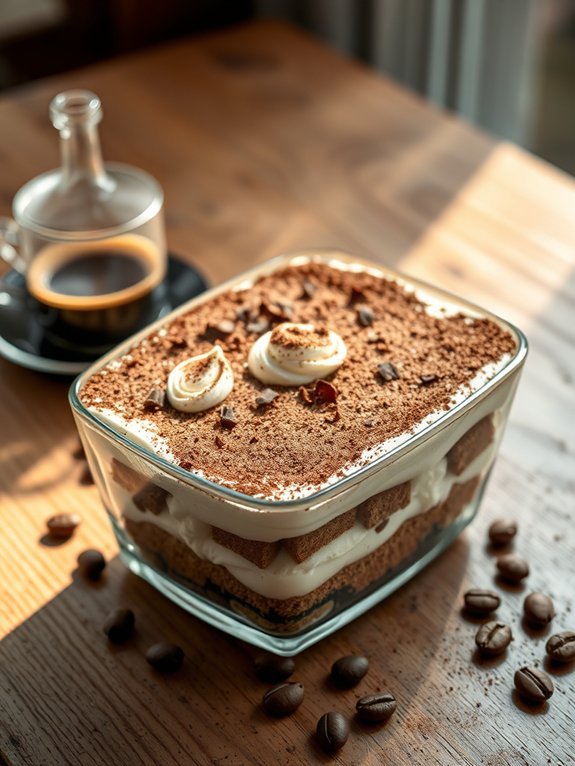
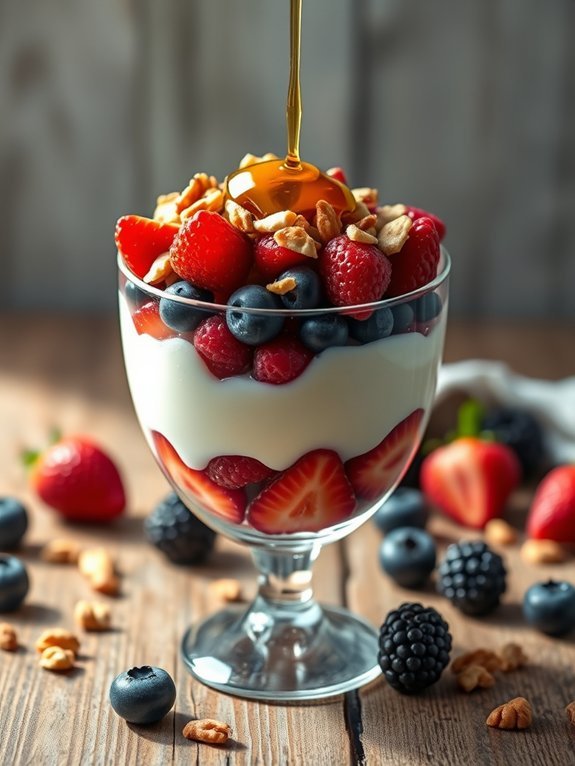
Strawberry Shortcake Parfaits
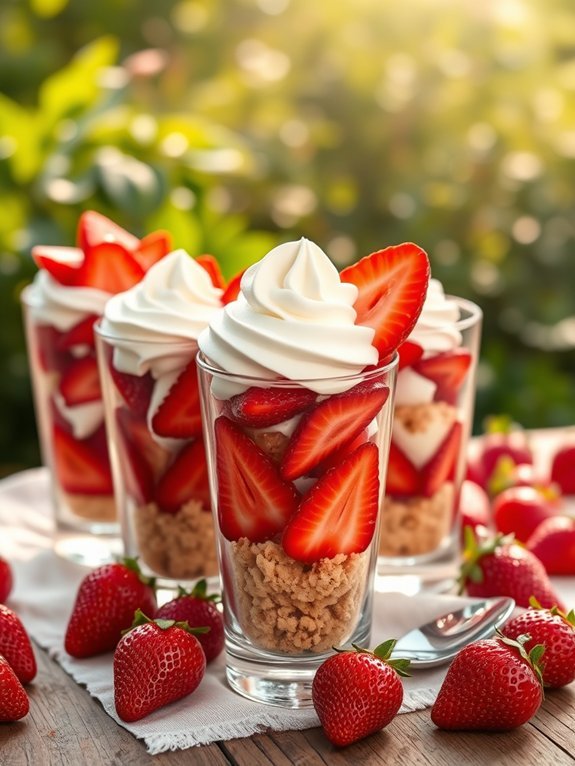
Strawberry shortcake parfaits are a delightful twist on the classic dessert, layering fresh strawberries, fluffy whipped cream, and tender cake for a treat that's as pleasing to the eye as it's to the palate. Perfect for summer gatherings, these parfaits are light yet satisfying and can be prepared in a matter of minutes.
They're also a fantastic way to use ripe strawberries when they're in season, showcasing their natural sweetness against a creamy backdrop.
The beauty of strawberry shortcake parfaits lies in their versatility; you can use store-bought shortcake or make your own, and the whipped cream can be flavored with vanilla or even a splash of liqueur for an adult twist. This dessert is customizable, allowing you to incorporate other fruits or swap out the cake base for cookies or granola, making it a hit for everyone at your table.
- 2 cups fresh strawberries, hulled and sliced
- 2 tablespoons granulated sugar
- 1 cup heavy whipping cream
- 2 tablespoons powdered sugar
- 1 teaspoon vanilla extract
- 2 cups shortcake (store-bought or homemade), crumbled
Begin by tossing the sliced strawberries with granulated sugar in a bowl and letting them sit for about 10 minutes to release their juices.
In a separate bowl, whip the heavy whipping cream, powdered sugar, and vanilla extract until soft peaks form.
To assemble the parfaits, layer the crumbled shortcake, followed by a layer of strawberries and whipped cream in individual cups or glasses, repeating the layers until filled to the top.
For the best flavor, let the parfaits chill in the refrigerator for about 30 minutes before serving; this gives the layers a chance to meld together.
You can also substitute other seasonal fruits, like blueberries or raspberries, for the strawberries. Additionally, for added texture, consider adding a layer of crushed nuts or granola between the layers for a delightful crunch.