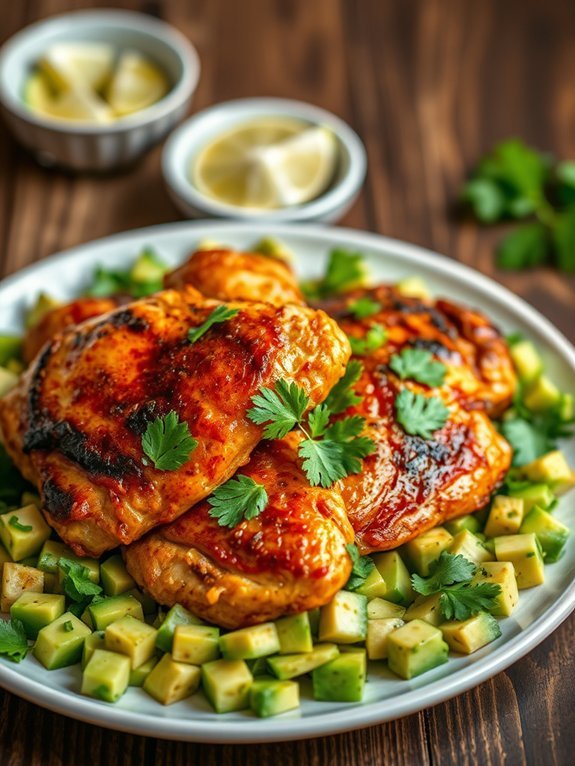
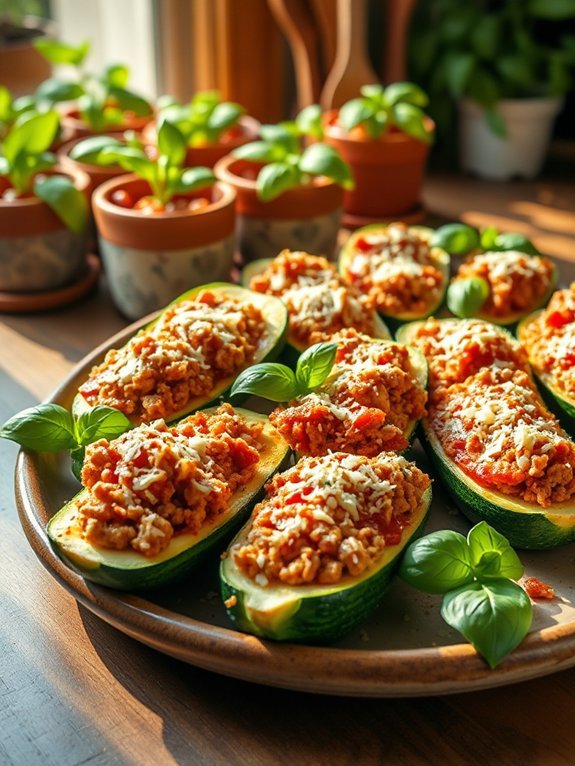
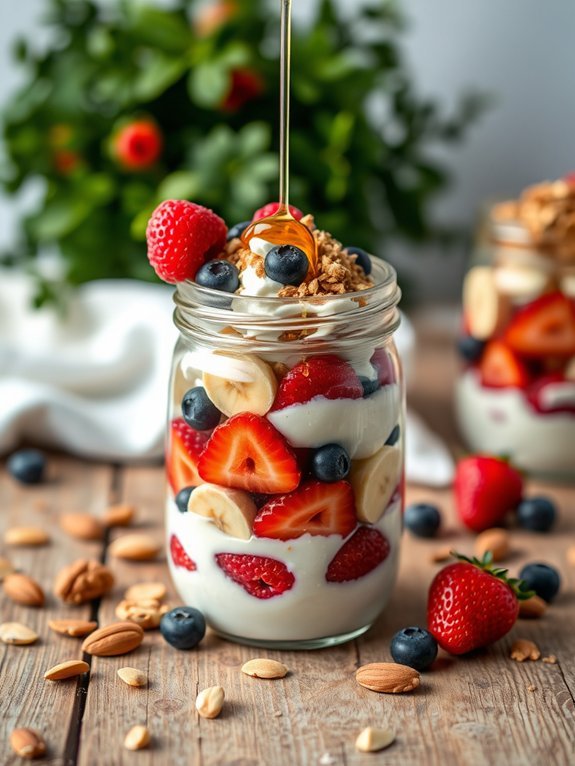
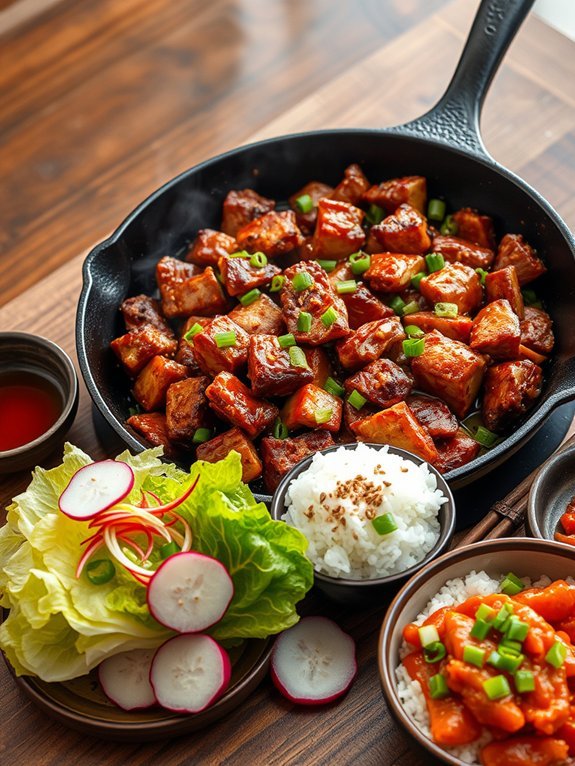
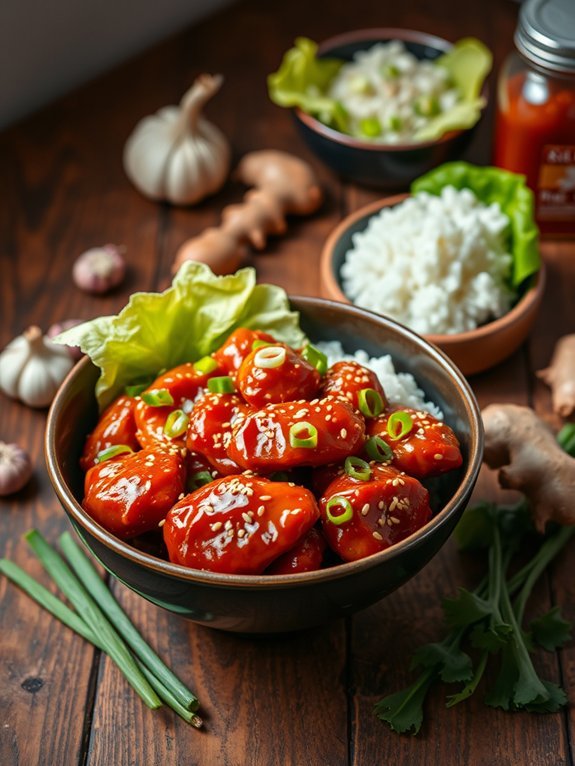
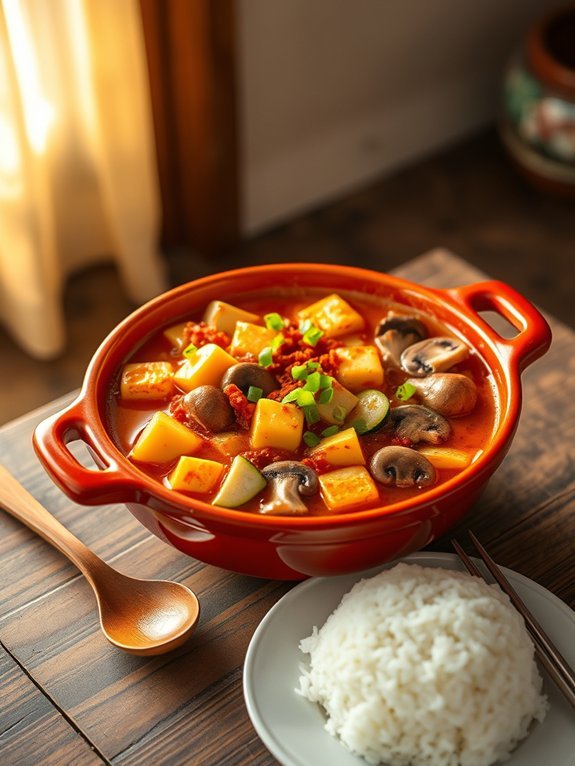
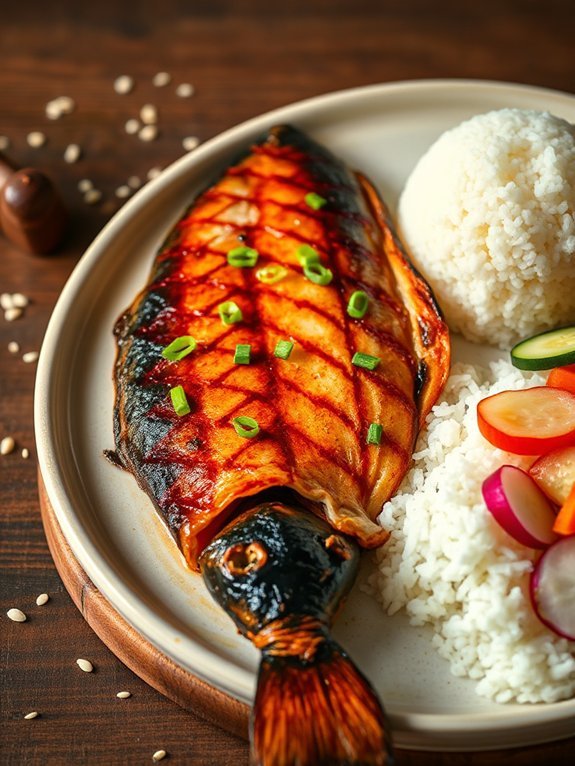
If you're looking for healthy seafood dishes packed with flavor, you've got great options! Try Grilled Lemon Herb Salmon or Spicy Garlic Shrimp Tacos for a delicious kick. Baked Cod With Tomato Basil Salsa and Cilantro Lime Shrimp with Quinoa are both fresh and nutritious. Explore Teriyaki Glazed Mahi-Mahi or indulge in Seafood Paella with Brown Rice for a satisfying meal. With so many vibrant flavors to savor, you'll discover even more exciting recipes ahead!
Grilled Lemon Herb Salmon
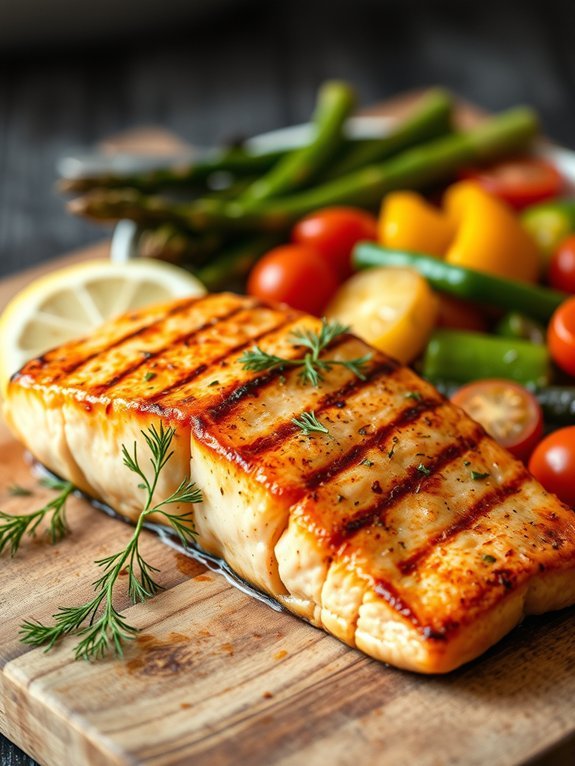
Grilled Lemon Herb Salmon is a delicious and nutritious option for seafood lovers looking to create a healthy meal without sacrificing flavor. Rich in omega-3 fatty acids, salmon is known for its heart-healthy benefits and is a fantastic source of protein. By grilling this succulent fish and pairing it with a zesty lemon herb marinade, you can enhance its natural taste while also adding a revitalizing twist.
The simplicity of this recipe makes it perfect for both busy weeknights and weekend gatherings. With just a few fresh ingredients and minimal prep time, you'll have a mouthwatering dish that pairs well with various sides, such as a crisp salad or roasted vegetables. This grilled salmon isn't only a feast for the palate, but it's also a visual delight with its vibrant colors and appetizing aroma.
Ingredients:
- 4 salmon fillets
- 2 tablespoons olive oil
- 2 tablespoons fresh lemon juice
- 2 teaspoons lemon zest
- 2 garlic cloves, minced
- 2 teaspoons fresh dill or parsley, chopped
- Salt and pepper to taste
- Lemon slices (for garnish)
To prepare the Grilled Lemon Herb Salmon, begin by mixing the olive oil, lemon juice, lemon zest, minced garlic, chopped dill or parsley, salt, and pepper in a small bowl to create the marinade. Place the salmon fillets in a shallow dish or zip-top bag and pour the marinade over them, making sure they're well-coated.
Let the salmon marinate for at least 30 minutes to absorb the flavors. Preheat the grill to medium-high heat. Once ready, place the salmon fillets skin-side down on the grill grates for about 6-8 minutes, then carefully flip and grill for an additional 4-5 minutes, or until the salmon flakes easily with a fork.
When cooking Grilled Lemon Herb Salmon, confirm that the grill is well-oiled to prevent sticking. If you prefer extra flavor, you can add a pinch of smoked paprika or a drizzle of honey to the marinade for a touch of sweetness.
Always check for doneness by using a meat thermometer; the internal temperature should reach 145°F (63°C). Finally, letting the salmon rest for a few minutes before serving will help seal in the juices, resulting in an even more tender and flavorful dish. Enjoy!
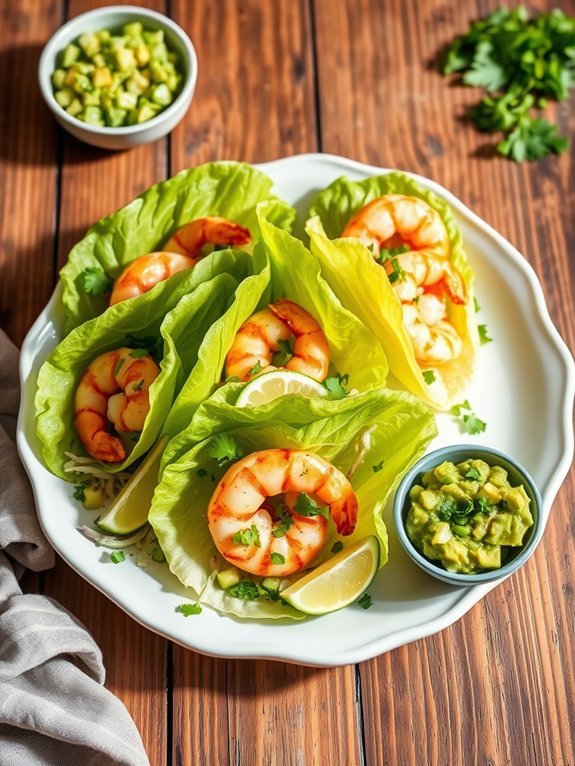
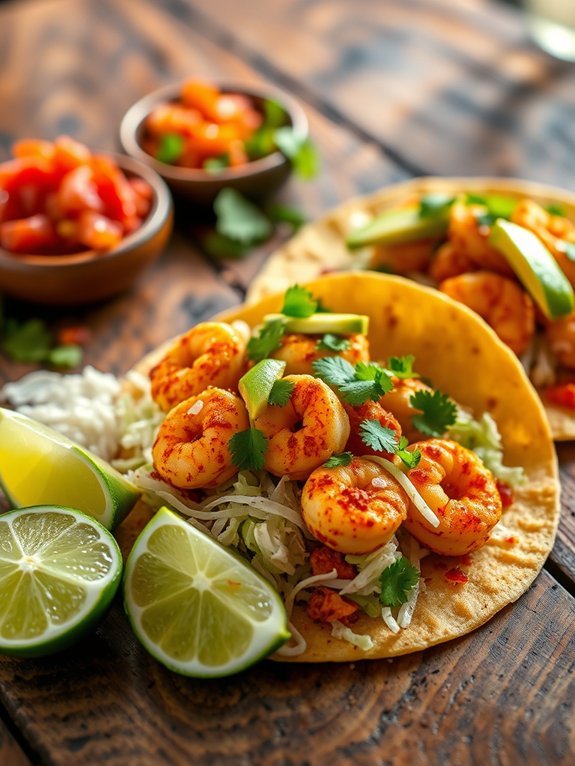
Spicy Garlic Shrimp Tacos
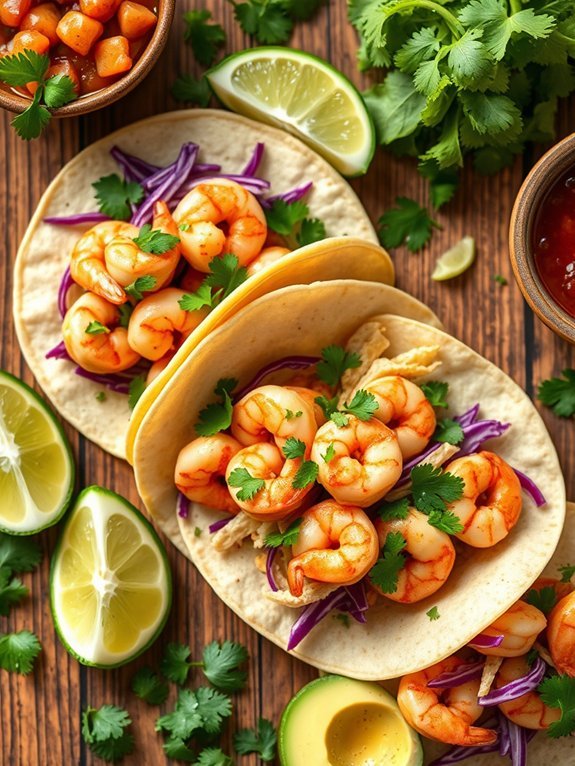
Spicy garlic shrimp tacos are a delicious and vibrant dish that perfectly balance heat and flavor. These tacos aren't only quick and easy to prepare but also packed with protein and essential nutrients from the succulent shrimp.
With the addition of fresh vegetables and a zingy sauce, they make for an exciting meal that can be enjoyed any day of the week.
The beauty of spicy garlic shrimp tacos lies in their versatility. You can customize the toppings and fillings to suit your taste, whether you prefer a creamy avocado sauce, zesty lime wedges, or crunchy cabbage slaw.
This dish is perfect for a casual weeknight dinner or for impressing guests at your next gathering, as it brings a touch of coastal flair right to your kitchen table.
- 1 pound large shrimp, peeled and deveined
- 2 tablespoons olive oil
- 4 cloves garlic, minced
- 1 teaspoon red pepper flakes (adjust for desired spice level)
- 1 teaspoon smoked paprika
- Salt and pepper to taste
- 8 small corn or flour tortillas
- 1 cup shredded cabbage (green or purple)
- 1 ripe avocado, sliced
- Lime wedges for serving
- Fresh cilantro for garnish
In a large skillet, heat the olive oil over medium-high heat. Add the minced garlic and red pepper flakes, sautéing for about 30 seconds until fragrant. Toss in the shrimp, smoking paprika, salt, and pepper, and cook for about 3-5 minutes or until the shrimp turn pink and are cooked through.
Remove from heat and set aside. Warm the tortillas in a separate pan or microwave, then assemble the tacos by adding the spicy shrimp mixture, topped with shredded cabbage, sliced avocado, and a squeeze of fresh lime juice.
Garnish with cilantro before serving.
For an added kick, consider marinating the shrimp in the spice mixture for 15-30 minutes before cooking to really bring out the flavors.
Additionally, feel free to experiment with other toppings such as pico de gallo, salsa, or a drizzle of chipotle crema for an extra layer of deliciousness.
Don't forget to warm your tortillas properly, as this enhances their texture and taste, making your tacos even more delightful!
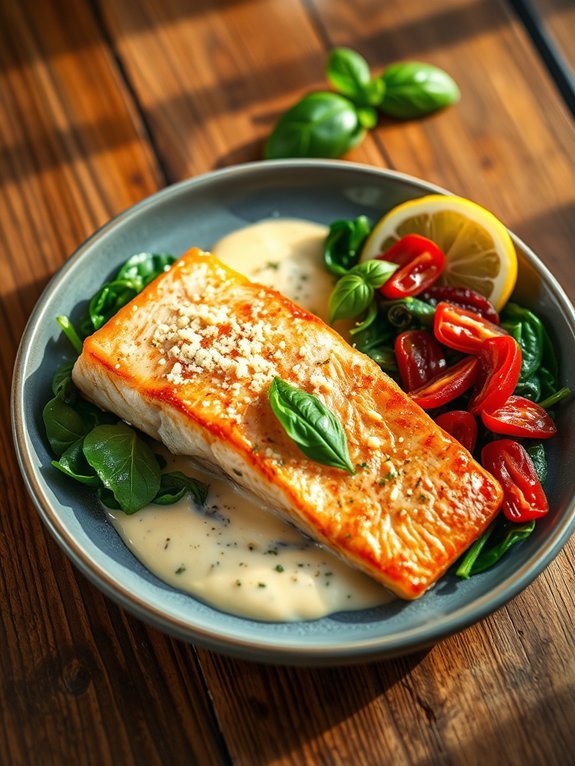
Baked Cod With Tomato Basil Salsa
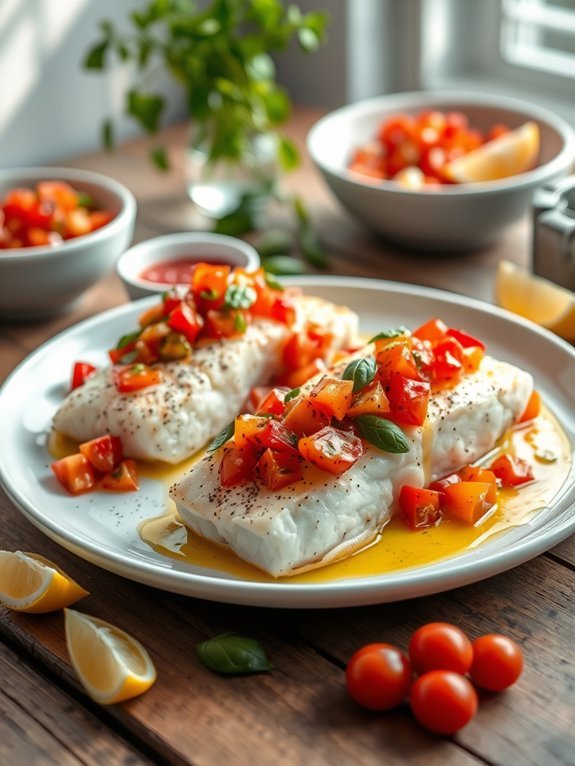
Baked Cod with Tomato Basil Salsa is a delightful seafood dish that combines the mild flavor of cod with the fresh and vibrant taste of a tomato basil salsa. Cod isn't only low in calories but also an excellent source of protein and omega-3 fatty acids, making it a nutritious option for any meal. This dish is perfect for busy weeknights, as it's quick to prepare, easy to cook, and bursting with flavor, making it a favorite among seafood lovers.
The combination of baked cod and the zesty tomato basil salsa brings a revitalizing twist to the classic baked fish recipe. The salsa, made with ripe tomatoes, fresh basil, and a hint of garlic, enhances the tenderness of the fish and adds a beautiful contrast in both flavor and texture. Pair this dish with a side of steamed vegetables or a light salad for a complete, healthy meal that's sure to please everyone at the table.
Ingredients:
- 2 cod fillets
- 2 tablespoons olive oil
- Salt and pepper to taste
- 1 cup cherry tomatoes, diced
- 1/4 cup fresh basil, chopped
- 1 clove garlic, minced
- 1 tablespoon balsamic vinegar
- 1 teaspoon lemon juice
- Optional: lemon wedges for serving
Preheat your oven to 400°F (200°C). Place the cod fillets on a baking sheet lined with parchment paper and drizzle with olive oil, followed by a sprinkle of salt and pepper. Bake the cod for about 12-15 minutes, or until the fish flakes easily with a fork.
Meanwhile, in a mixing bowl, combine the diced cherry tomatoes, chopped basil, minced garlic, balsamic vinegar, and lemon juice to create the salsa. Once the cod is cooked, top each fillet generously with the tomato basil salsa and serve, garnished with lemon wedges if desired.
When preparing this dish, make sure to choose fresh, high-quality cod for the best flavor. You can customize the salsa to your taste by adding your favorite herbs or spices, such as chopped red onion or a pinch of red pepper flakes for extra heat.
If fresh basil is unavailable, you can substitute it with dried basil, but use less, as dried herbs are more concentrated. Additionally, avoid overcooking the cod to maintain its moistness and tenderness – it should only be cooked until opaque and flaky. Enjoy your healthy meal!
Cilantro Lime Shrimp and Quinoa
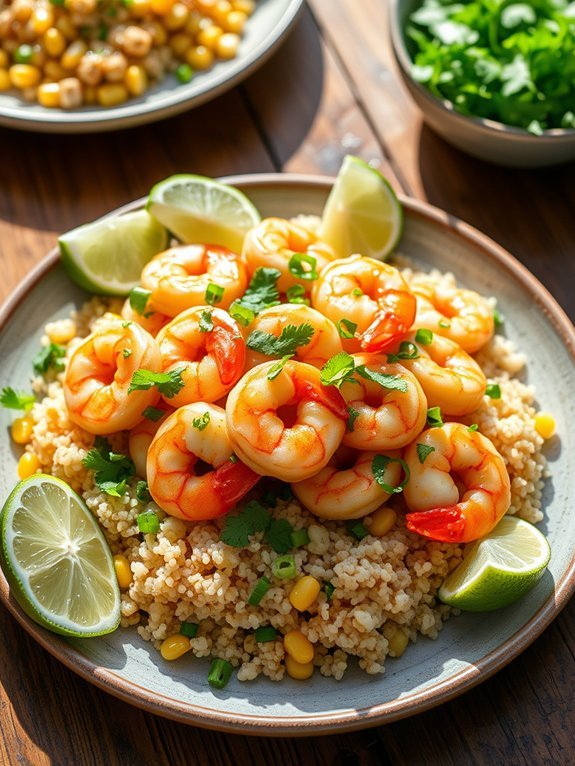
Cilantro Lime Shrimp and Quinoa is a vibrant dish bursting with flavors and nutrients, perfect for a quick weeknight dinner or a meal prep option. The combination of succulent shrimp marinated in zesty lime juice and fresh cilantro, served over fluffy quinoa, provides a delightful balance of protein and healthy carbohydrates.
This recipe isn't only easy to whip up but also showcases the freshness of the ingredients, making it a fantastic choice for seafood lovers. To elevate the dish, you can incorporate various vegetables such as bell peppers, avocado, or corn, adding color and additional nutrients to your plate.
The simplicity of this dish allows it to be customized based on personal preferences; you can adjust the heat by adding jalapeños or spices according to your taste. With its invigorating flavors and hearty components, Cilantro Lime Shrimp and Quinoa will surely become a favorite in your household.
Ingredients:
- 1 pound shrimp, peeled and deveined
- 1 cup quinoa
- 2 cups vegetable or chicken broth
- 1/4 cup fresh lime juice
- 1/4 cup fresh cilantro, chopped
- 2 cloves garlic, minced
- 1 teaspoon cumin
- 1/2 teaspoon salt
- 1/4 teaspoon black pepper
- Olive oil
- Optional toppings: diced avocado, chopped green onions, lime wedges
In a medium saucepan, rinse the quinoa under cold water and then combine it with the broth; bring to a boil, then reduce the heat to low, cover, and simmer for 15 minutes or until the liquid is absorbed.
Meanwhile, in a bowl, mix the shrimp with lime juice, cilantro, garlic, cumin, salt, and black pepper. Heat a splash of olive oil in a skillet over medium heat, and sauté the marinated shrimp until they turn pink and opaque, about 2-3 minutes per side.
Serve the cooked shrimp over the fluffy quinoa and add your choice of optional toppings. When cooking this dish, consider marinating the shrimp for at least 20-30 minutes to enhance the flavors, but avoid letting them sit too long as the acidity from the lime can start to "cook" the shrimp.
Confirm that the quinoa is cooked properly by following the rice-to-liquid ratio closely. Feel free to experiment with additional herbs and spices to personalize the dish to your taste!
Teriyaki Glazed Mahi-Mahi
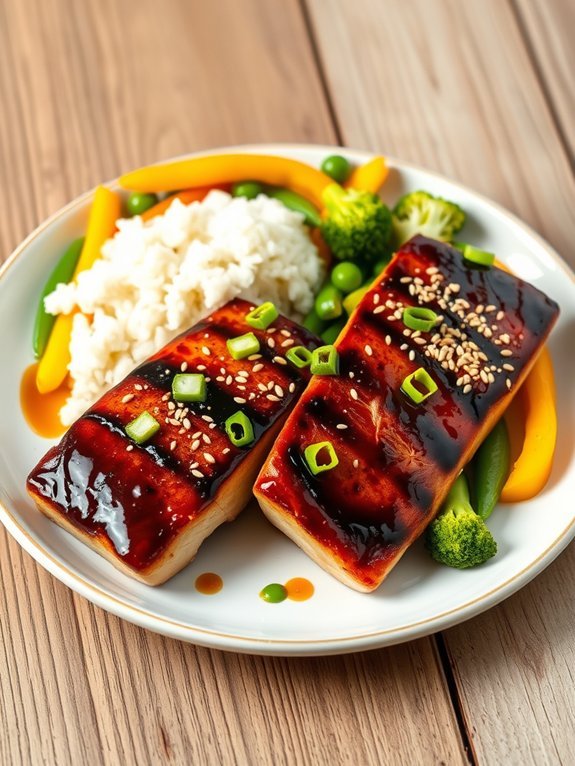
Teriyaki glazed mahi-mahi is a delightful seafood dish that combines the rich, buttery texture of mahi-mahi with the sweet and savory flavors of teriyaki sauce. Mahi-mahi, a firm and flaky fish, is an excellent choice for grilling or pan-searing and pairs wonderfully with the caramelized finish that the teriyaki glaze provides.
This dish isn't only tasty but also packed with essential nutrients, making it a healthy option for those looking to enjoy seafood that's both delicious and nutritious.
To elevate the flavors of this dish, marinating the fish in a homemade or store-bought teriyaki sauce can enhance the overall experience. The marination time can vary, but even a brief soak will impart a wonderful flavor to the fish. Serve teriyaki glazed mahi-mahi with a side of steamed vegetables or fluffy rice to complete a meal that's as wholesome as it's satisfying.
- 2 mahi-mahi fillets
- 1/4 cup teriyaki sauce (store-bought or homemade)
- 1 tablespoon olive oil
- 1 tablespoon honey (optional, for added sweetness)
- 1 teaspoon sesame oil
- 2 cloves garlic, minced
- 1 teaspoon fresh ginger, grated
- Salt and pepper to taste
- Sesame seeds and sliced green onions for garnish
To cook the dish, first prepare a marinade by mixing the teriyaki sauce, olive oil, honey, sesame oil, garlic, and ginger in a bowl.
Place the mahi-mahi fillets in a shallow dish and pour the marinade over them. Allow the fish to marinate for at least 15 minutes, or up to an hour for deeper flavor. Heat a grill or a skillet over medium-high heat and cook the fillets for about 4-5 minutes on each side, brushing with additional marinade as they cook, until the fish is opaque and flakes easily with a fork.
Garnish with sesame seeds and sliced green onions before serving. For best results, make sure not to overcook the mahi-mahi, as it can become dry.
If using store-bought teriyaki sauce, check for added sugars or preservatives and consider using a natural or low-sodium version. Additionally, if you desire a slightly thicker glaze, simmer the remaining marinade in a saucepan until it reduces to your liking before drizzling over the cooked fish.
Experiment with pairing different sides or adding extra veggies for a complete, wholesome meal!
Creamy Tuscan Garlic Salmon
Creamy Tuscan Garlic Salmon is a delectable dish that combines the rich flavors of salmon with a luscious creamy sauce infused with garlic, sun-dried tomatoes, and fresh spinach. This vibrant meal not only pleases the palate but also provides a healthy dose of omega-3 fatty acids, making it a fantastic choice for a nutritious dinner. Served over pasta or with a side of vegetables, it's perfect for both family meals and special occasions.
The beauty of this dish lies in its simplicity and speed. In just under 30 minutes, you can create a restaurant-quality meal that will impress anyone at the dining table. The creamy sauce is a harmonious mix of savory and slightly tangy flavors, elevating the salmon's natural richness while also being light and satisfying. Pair it with a glass of white wine or a crisp salad for a complete experience.
- 4 salmon fillets
- 2 tablespoons olive oil
- 4 cloves garlic, minced
- 1 cup heavy cream
- 1 cup chicken broth
- 1 cup baby spinach
- 1/2 cup sun-dried tomatoes, chopped
- 1 teaspoon Italian seasoning
- Salt and pepper to taste
- Grated Parmesan cheese (for garnish)
In a large skillet, heat the olive oil over medium heat. Season the salmon fillets with salt and pepper, then add them to the skillet, skin-side down. Cook for about 4-5 minutes on each side until golden and cooked through. Remove the salmon from the skillet and set aside.
In the same skillet, add the garlic and sauté for about 30 seconds until fragrant. Then, pour in the heavy cream and chicken broth, and bring it to a simmer. Stir in the Italian seasoning, sun-dried tomatoes, and baby spinach. Cook for a few minutes until the spinach wilts. Finally, return the salmon to the skillet, spooning some sauce over the top; let it heat through before serving.
To enhance the flavor of your Creamy Tuscan Garlic Salmon, consider marinating the salmon in lemon juice and a bit of garlic before cooking, as this adds a delightful zest. Additionally, if you prefer a lighter version, you can substitute the heavy cream with Greek yogurt or a dairy-free alternative while still enjoying a creamy texture.
This dish also pairs beautifully with various sides, so don't hesitate to get creative with your accompaniments!
Blackened Tilapia With Avocado Salsa
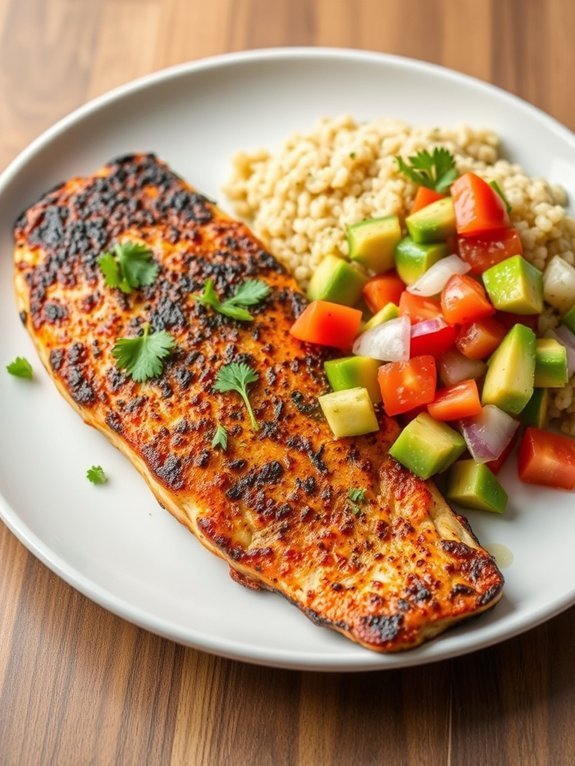
Blackened Tilapia with Avocado Salsa is a flavorful dish that combines the smoky, spiced flavors of blackened tilapia with a fresh, creamy avocado salsa. The tilapia is a mild, flaky fish that readily absorbs the bold spices, making it the perfect canvas for the delicious combination of seasonings. With its rich protein content and omega-3 fatty acids, tilapia isn't only a tasty choice but also a healthy one.
The bright and zesty avocado salsa adds a revitalizing contrast, brightening up the dish and providing a satisfying texture. This dish isn't only easy to prepare but also a feast for the senses, making it ideal for a weeknight meal or a special occasion. The preparation requires minimal ingredients while still delivering maximum flavor. Serve it alongside a simple salad or over a bed of quinoa for a wholesome dinner that leaves you feeling nourished and satisfied.
Ingredients:
- 4 tilapia fillets
- 2 tablespoons olive oil
- 2 teaspoons paprika
- 1 teaspoon garlic powder
- 1 teaspoon onion powder
- 1 teaspoon cayenne pepper
- 1 teaspoon dried thyme
- Salt and pepper to taste
- 1 ripe avocado, diced
- 1 medium tomato, diced
- ¼ cup red onion, finely chopped
- Juice of 1 lime
- Fresh cilantro, chopped
Season both sides of the tilapia fillets with a mixture of paprika, garlic powder, onion powder, cayenne pepper, thyme, salt, and pepper. Heat olive oil in a cast-iron skillet over high heat until shimmering. Place the seasoned fillets in the skillet, cooking for 3-4 minutes on each side or until the fish is cooked through and has a crispy blackened crust.
While the fish is cooking, combine the diced avocado, tomato, red onion, lime juice, cilantro, and a pinch of salt in a bowl to create the salsa. When preparing Blackened Tilapia with Avocado Salsa, make sure to monitor the cooking temperature closely; if the skillet is too hot, the spices may burn, giving a bitter taste.
Also, for an extra kick, you can adjust the level of cayenne pepper according to your preference. Finally, serve the dish immediately for the best texture and flavor; the tilapia is best enjoyed when it's hot and fresh off the skillet.
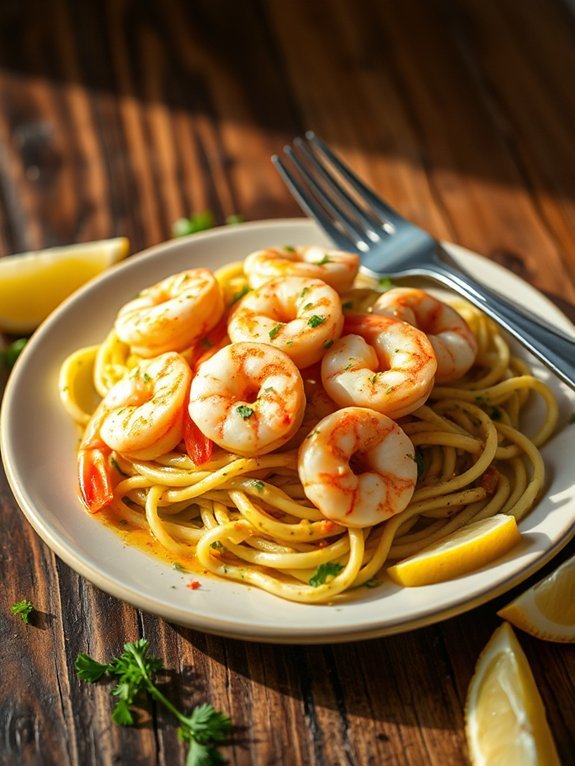
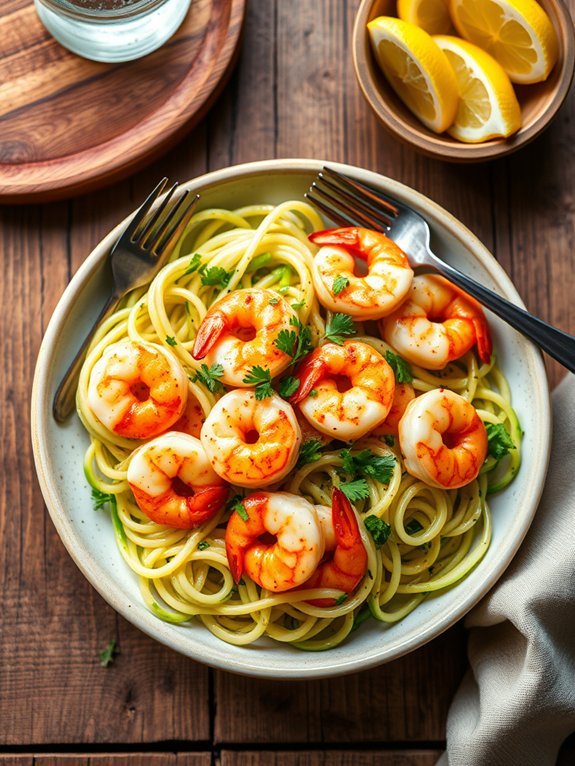
Mediterranean Shrimp Pasta

Mediterranean shrimp pasta is a delightful and healthy dish that beautifully combines the flavors of the Mediterranean with the comforting texture of pasta. This dish features succulent shrimp sautéed in olive oil, infused with garlic, white wine, and a medley of fresh vegetables, all tossed with al dente pasta.
It's not only a flavorful meal but also packed with nutritious ingredients that make it a perfect choice for a quick weeknight dinner or a special occasion. Rich in healthy fats, protein, and an array of vitamins and minerals from the vegetables, Mediterranean shrimp pasta offers a satisfying way to enjoy seafood while also nourishing your body.
The bright notes of lemon juice and the earthy flavors of fresh herbs elevate the dish, making it perfect for seafood lovers. Simple yet elegant, this recipe is sure to impress both family and guests alike.
Ingredients
- 8 ounces whole grain pasta (e.g., linguine or spaghetti)
- 1 pound large shrimp, peeled and deveined
- 2 tablespoons olive oil
- 3 cloves garlic, minced
- 1 cup cherry tomatoes, halved
- 1 medium zucchini, diced
- 1 bell pepper, diced (any color)
- 1/2 cup dry white wine (or vegetable broth)
- Juice of 1 lemon
- 1/4 cup fresh parsley, chopped
- Salt and pepper to taste
- Optional: red pepper flakes for heat
Cook the pasta according to package instructions until al dente, then drain and set aside. In a large skillet over medium heat, heat the olive oil and sauté the garlic until fragrant. Add the shrimp and cook until they turn pink, about 2-3 minutes per side.
Toss in the zucchini, bell pepper, and cherry tomatoes, cooking for another 4-5 minutes until the vegetables are tender. Deglaze the pan with white wine (or broth) and stir in the lemon juice. Finally, combine the cooked pasta with the sautéed mixture, season with salt, pepper, and red pepper flakes if desired, and toss to combine. Serve hot, garnished with fresh parsley.
To elevate your Mediterranean shrimp pasta, feel free to customize it with your favorite vegetables or even add a handful of spinach for extra nutrition. Using whole grain pasta not only enhances the dish's health benefits but also adds a wonderful nuttiness.
Be mindful not to overcook the shrimp; they should be just cooked through to retain their moisture and tenderness. For an extra touch of flavor, consider adding a sprinkle of grated Parmesan cheese just before serving, but keep in mind that it will add additional calories.
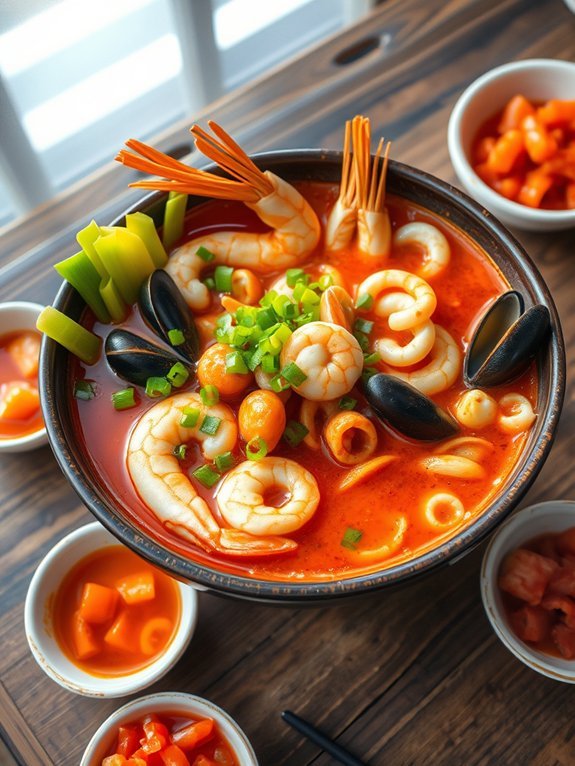
Seafood Paella With Brown Rice
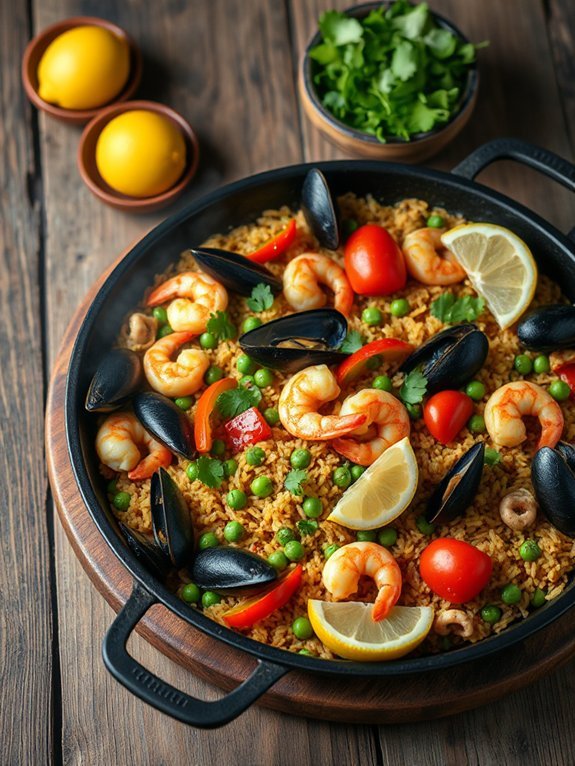
Seafood paella is a vibrant dish that hails from the coastal regions of Spain, known for its rich flavors and colorful presentation. This healthy version uses brown rice instead of traditional white rice, adding a nutty flavor and increased fiber content. Packed with a variety of seafood, vegetables, and spices, this dish not only satisfies the palate but also nourishes the body.
Cooking seafood paella with brown rice is a delightful way to incorporate nutritious ingredients into a hearty meal. The brown rice takes a bit longer to cook, allowing it to absorb the flavorful broth, which infuses every bite with a burst of Mediterranean flavor. Whether you're serving it for a special occasion or a casual family dinner, this dish is sure to impress.
Ingredients:
- 1 cup brown rice
- 2 tablespoons olive oil
- 1 onion, diced
- 3 cloves garlic, minced
- 1 bell pepper, diced
- 1 cup green peas
- 1 tomato, diced
- 2 cups vegetable or seafood broth
- 1 teaspoon smoked paprika
- 1/2 teaspoon saffron threads
- 1 cup shrimp, peeled and deveined
- 1 cup mussels, cleaned
- 1 cup squid, sliced into rings
- Salt and pepper to taste
- Lemon wedges, for serving
- Fresh parsley, chopped, for garnish
In a large skillet or paella pan, heat the olive oil over medium heat. Sauté the onion and garlic until softened, then add the bell pepper and cook for a few more minutes.
Stir in the brown rice, smoked paprika, saffron, and diced tomato, ensuring the rice is well-coated. Gradually add the broth, bringing the mixture to a gentle simmer. Cover and let cook for about 30-40 minutes, or until the rice is tender and has absorbed the broth.
Add the shrimp, mussels, and squid in the final 10 minutes of cooking, ensuring that the seafood is evenly distributed and cooked through. Once done, fluff the paella with a fork and garnish with chopped parsley and serve with lemon wedges.
For the best results, allow the paella to rest for a few minutes before serving, as this will help the flavors meld together. If you're up for a little experimentation, feel free to add other seafood options like clams or scallops.
Pairing the dish with a light salad or crusty whole-grain bread can enhance the meal even further. Remember, patience is key when letting the rice absorb the broth, so avoid stirring it too often to maintain that delightful texture!
Lemon Butter Scallops and Asparagus
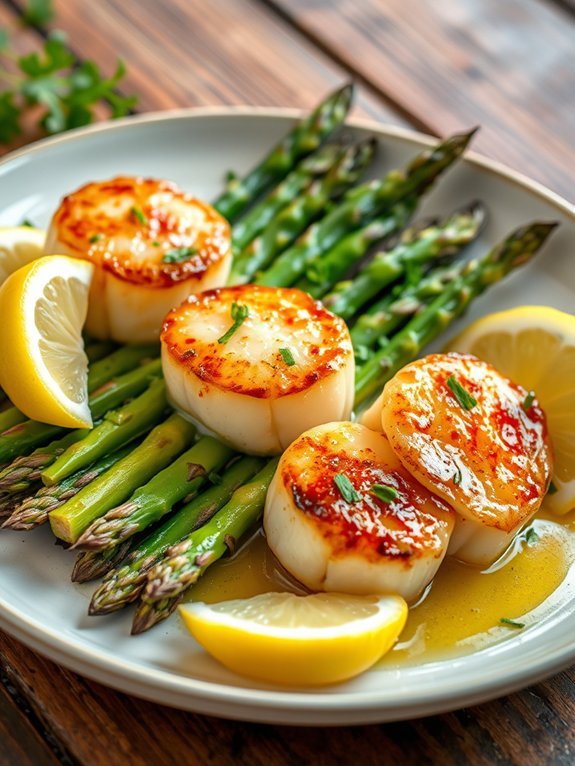
Lemon Butter Scallops and Asparagus is a delightful seafood dish that brings together the delicate sweetness of scallops with the bright flavors of lemon and the earthy crunch of asparagus. This recipe is quick to prepare, making it a perfect option for a busy weeknight dinner or a special occasion.
Paired with a side of whole grain rice or quinoa, this meal not only satisfies your taste buds but also offers a nutritious boost filled with protein and vitamins.
Cooking scallops can sometimes be intimidating, but they're quite simple to prepare once you understand the basics. The key to perfectly seared scallops is to cook them at a high temperature for a short period, creating a beautiful golden crust while keeping the inside tender and juicy.
The asparagus adds a pop of color and nutrients, making this dish not just delicious but visually appealing as well.
Ingredients:
- 1 pound sea scallops
- 1 bunch asparagus, trimmed
- 3 tablespoons butter
- 2 tablespoons olive oil
- 2 garlic cloves, minced
- 1 lemon, juiced and zested
- Salt and pepper to taste
- Fresh parsley for garnish (optional)
Heat a large skillet over medium-high heat and add 2 tablespoons of olive oil. Season the scallops with salt and pepper, and once the oil is hot, add the scallops to the pan. Cook for about 2-3 minutes on each side until they develop a golden crust.
Remove the scallops from the pan and set aside. In the same skillet, add the butter, minced garlic, and asparagus. Sauté the asparagus for about 5-7 minutes until tender-crisp, then add the lemon juice and zest.
Return the scallops to the pan, gently toss everything together, and cook for an additional minute to warm through. Serve hot, garnished with fresh parsley if desired.
When cooking scallops, make certain that they're patted dry before seasoning to achieve that lovely sear. Also, avoid overcrowding the pan, as this can cause them to steam instead of brown.
For an added touch, experiment with different herbs or a splash of white wine to balance the flavors. Enjoy your beautifully cooked Lemon Butter Scallops and Asparagus!
Fish Tacos With Mango Salsa
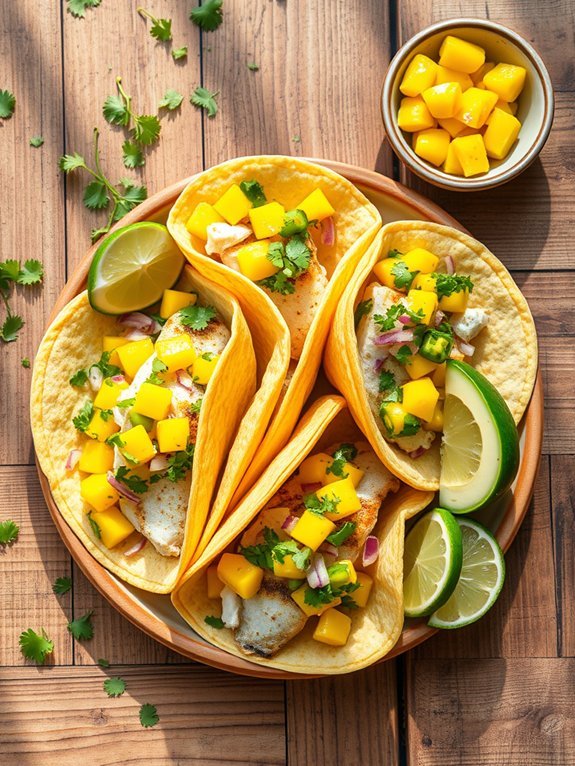
Fish tacos with mango salsa are a vibrant and flavorful dish that perfectly encapsulates the taste of summer. The combination of tender fish, crunchy tortillas, and fresh, zesty salsa makes for a delightful meal that's both healthy and satisfying. With the addition of mango, which brings a sweet and juicy element, these tacos are sure to become a favorite in your household.
The beauty of fish tacos lies not only in their taste but also in their versatility. You can use a variety of white fish, such as cod, tilapia, or mahi-mahi, and the mango salsa can be customized based on your preferences. Whether you want to spice things up with jalapeños or keep it simple with onions and cilantro, these tacos can cater to your every craving.
Plus, they're quick to prepare, making them a perfect option for busy weeknights or casual gatherings with friends and family.
Ingredients:
- 1 pound white fish (cod, tilapia, or mahi-mahi)
- 1 tablespoon olive oil
- 1 teaspoon chili powder
- 1 teaspoon cumin
- Salt and pepper, to taste
- 8 small corn or flour tortillas
- 1 ripe mango, diced
- 1/2 red onion, finely chopped
- 1 jalapeño, seeded and minced (optional)
- 1/4 cup fresh cilantro, chopped
- Juice of 1 lime
- Sliced avocado, for serving
- Lime wedges, for serving
Start by preheating your grill or stovetop pan over medium-high heat. Season the fish fillets with olive oil, chili powder, cumin, salt, and pepper. Grill the fish for about 4-5 minutes on each side or until cooked through and flaky.
While the fish is cooking, prepare the mango salsa by combining the diced mango, red onion, jalapeño, cilantro, and lime juice in a bowl. Once the fish is cooked, warm the tortillas briefly on the grill or in a pan, then assemble the tacos by placing a piece of fish in each tortilla, topping with mango salsa, and adding slices of avocado. Serve with lime wedges on the side.
For the best flavor, let the fish marinate in the spices for at least 15 minutes before cooking to enhance the taste. Also, feel free to make the mango salsa ahead of time to allow the flavors to meld together, which will elevate the dish.
Don't be afraid to adjust the level of spice in the salsa based on your preference, and experiment with additional toppings like shredded cabbage or a creamy sauce to further enhance your fish tacos.
Coconut Crusted Shrimp With Mango Dipping Sauce
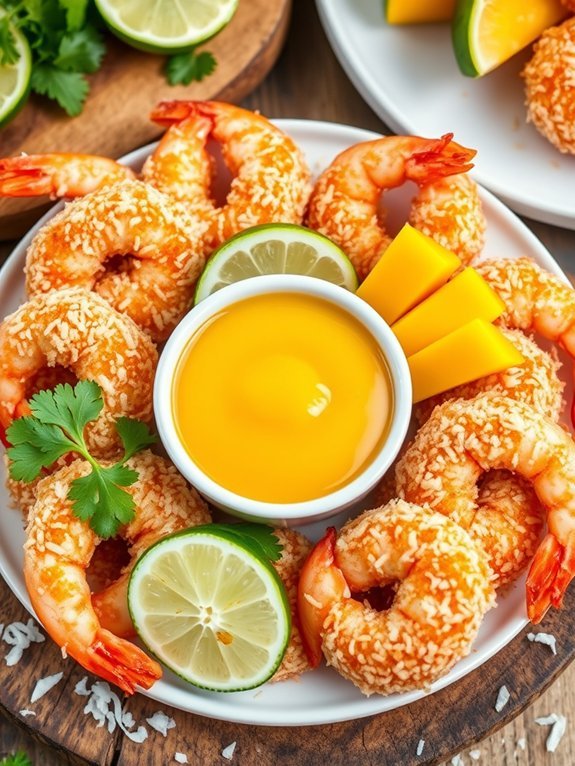
Coconut crusted shrimp with mango dipping sauce is a delightful and tropical dish that transports you straight to a beachside paradise with every bite. The crunchy, golden coconut crust adds a satisfying texture to succulent shrimp, while the sweet and tangy mango dipping sauce balances the flavors beautifully.
Whether you're preparing a casual dinner at home or hosting friends for a fun soirée, this dish is sure to impress. This recipe isn't only easy to make but also quick, making it a perfect option for busy weeknights or last-minute gatherings. The combination of coconut and mango provides a fantastic flavor profile that pairs beautifully with the natural sweetness of shrimp.
If you're looking to impress without spending hours in the kitchen, this coconut crusted shrimp is your go-to recipe that delivers both taste and visual appeal.
- 1 pound large shrimp, peeled and deveined
- 1 cup shredded coconut
- 1 cup panko bread crumbs
- 1/2 cup all-purpose flour
- 2 large eggs, beaten
- Salt and pepper to taste
- Vegetable oil for frying
- 1 ripe mango, diced
- 1 tablespoon lime juice
- 1 tablespoon honey (optional)
To prepare the coconut crusted shrimp, start by setting up your breading station with three separate bowls: one with flour seasoned with salt and pepper, one with the beaten eggs, and the last with a mix of shredded coconut and panko breadcrumbs.
Dip each shrimp first in the flour, shaking off excess, then in the egg, and finally coat it well with the coconut-panko mixture. Heat vegetable oil in a frying pan over medium-high heat and fry the shrimp in batches until they're golden brown and cooked through, about 3-4 minutes per side.
For the mango dipping sauce, blend the diced mango, lime juice, and honey in a food processor until smooth. When cooking coconut crusted shrimp, keep an eye on the oil temperature to guarantee a perfect fry without burning the breadcrumbs.
If you're preparing a large batch, consider using a shallow baking sheet lined with parchment paper to keep the cooked shrimp warm in a low oven while you finish frying the rest. Additionally, feel free to experiment with adding spices to the coconut mixture, such as paprika or garlic powder, to elevate the flavor even further.
Enjoy your tropical treat!