For nutritious and delicious baking ideas, try Whole Wheat Banana Muffins for a fiber-rich treat, or Almond Flour Chocolate Chip Cookies that provide healthy fats. Oatmeal Peanut Butter Energy Bites make for great on-the-go snacks, while Avocado Brownies satisfy sweet cravings guilt-free. Greek Yogurt Pancakes offer fluffiness, and Sweet Potato Bread is packed with vitamins. Chia Seed Pudding Cups are perfect for meal prep, along with Zucchini Bread and Coconut Flour Blueberry Muffins for added variety. More tasty options await you!
Whole Wheat Banana Muffins
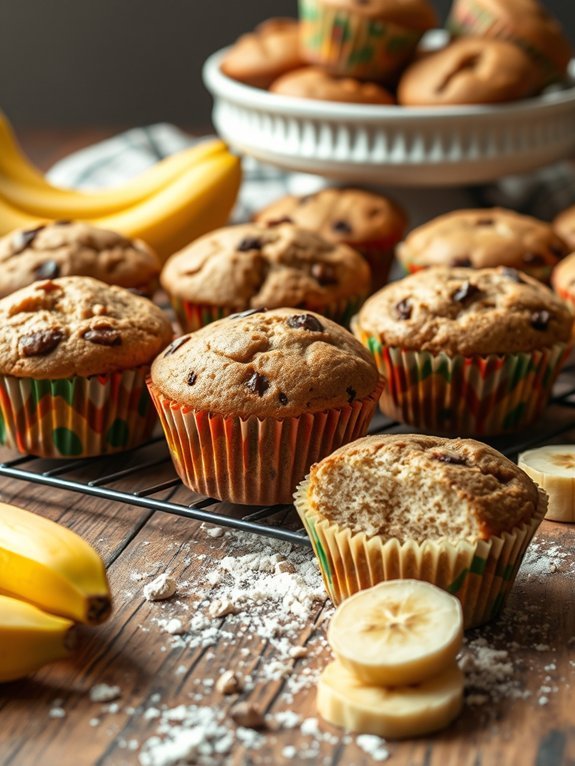
Whole Wheat Banana Muffins are a delicious and nutritious option for breakfast or a snack. Packed with fiber and natural sweetness from ripe bananas, these muffins make a perfect pick-me-up throughout the day. Using whole wheat flour adds a wholesome touch and gives the muffins a hearty texture that you can enjoy guilt-free.
They're simple to make, requiring just a few pantry staples, and are perfect for using up overripe bananas.
These muffins aren't only healthier but also incredibly flexible. You can customize them by adding in your favorite mix-ins, such as nuts, chocolate chips, or dried fruit. This makes them a versatile treat that can cater to different tastes and dietary preferences. You can easily adjust the sweetness by reducing or enhancing the sugar content based on the ripeness of the bananas you use. Enjoy these muffins fresh out of the oven, or store them for a quick snack throughout the week.
Ingredients:
- 1 ½ cups whole wheat flour
- 1 teaspoon baking soda
- ½ teaspoon baking powder
- ½ teaspoon salt
- 3 ripe bananas, mashed
- ¼ cup honey or maple syrup
- ¼ cup unsweetened applesauce
- 2 large eggs
- 1 teaspoon vanilla extract
- Optional: ½ cup chopped nuts or chocolate chips
Preheat your oven to 350°F (175°C) and line a muffin tin with paper liners or grease it lightly. In a large mixing bowl, whisk together the whole wheat flour, baking soda, baking powder, and salt.
In another bowl, combine the mashed bananas, honey (or maple syrup), applesauce, eggs, and vanilla extract. Mix the wet ingredients well and then pour them into the dry mixture, stirring until just combined. If desired, fold in any optional ingredients like nuts or chocolate chips.
Fill each muffin cup about two-thirds full with the batter and bake for 18-22 minutes, or until a toothpick inserted in the center comes out clean.
For best results, allow your muffins to cool completely in the tin for about 5-10 minutes before transferring them to a wire rack.
These muffins can be stored in an airtight container at room temperature for up to 3 days or refrigerated for a longer shelf life. Feel free to experiment with your favorite spices like cinnamon or nutmeg to add extra flavor.
Additionally, these muffins freeze well; simply wrap them individually and store them in the freezer for a quick, healthy snack anytime!
Almond Flour Chocolate Chip Cookies

Almond flour chocolate chip cookies are a delightful twist on the classic treat, replacing regular flour with nutritious almond flour. This gluten-free alternative not only adds a lovely nutty flavor but also increases the protein and healthy fat content of the cookies.
Whether you're looking for a healthier dessert option or simply want to enjoy some delicious cookies, this recipe will satisfy your sweet tooth without the guilt.
Making almond flour chocolate chip cookies is both simple and enjoyable. The combination of almond flour, sweet chocolate chips, and a touch of natural sweetness creates a perfect balance of flavors.
Plus, these cookies come together quickly, making them an excellent choice for a last-minute treat or a cozy family baking activity.
Ingredients:
- 2 cups almond flour
- 1/2 teaspoon baking soda
- 1/4 teaspoon salt
- 1/3 cup coconut oil or unsalted butter (melted)
- 1/3 cup maple syrup or honey
- 1 teaspoon vanilla extract
- 1/2 cup chocolate chips (dairy-free if desired)
Preheat your oven to 350°F (175°C) and line a baking sheet with parchment paper. In a large bowl, mix together the almond flour, baking soda, and salt.
In another bowl, whisk the melted coconut oil (or butter), maple syrup (or honey), and vanilla extract until well combined.
Pour the wet ingredients into the dry ingredients and stir until just combined. Gently fold in the chocolate chips.
Scoop tablespoon-sized balls of dough onto the baking sheet, spacing them about 2 inches apart. Bake for 8-10 minutes or until the edges are lightly golden.
Allow the cookies to cool for a couple of minutes on the baking sheet before transferring them to a wire rack to cool completely.
When making almond flour chocolate chip cookies, consider chilling your dough for about 30 minutes before baking. This can help enhance the flavor and texture of the cookies.
Additionally, be mindful not to overbake them; they may appear soft when you take them out of the oven, but they'll firm up as they cool. Experiment with adding nuts, dried fruit, or spices for a creative twist on this basic recipe!
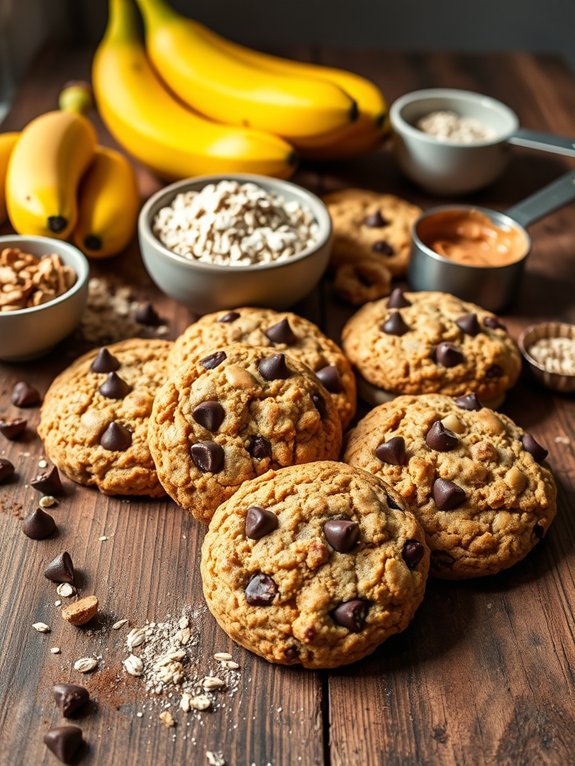
Oatmeal Peanut Butter Energy Bites

Oatmeal Peanut Butter Energy Bites are a delicious and nutritious snack that can easily be prepared in your own kitchen. Packed with wholesome ingredients, these bites aren't only quick to make but also provide a perfect energy boost for a busy day.
Combining the rich, creamy flavor of peanut butter with hearty oats and an array of mix-ins, these energy bites are a crowd-pleaser for both kids and adults alike.
These energy bites are incredibly versatile and can be tailored to fit various taste preferences. You can add dark chocolate chips, dried fruits, or seeds to customize the flavor and texture.
These no-bake treats are perfect for meal prep as they store well in the fridge and can easily be grabbed on the go for a nutritious pick-me-up during the day.
Ingredients:
- 1 cup rolled oats
- 1/2 cup peanut butter
- 1/3 cup honey or maple syrup
- 1/4 cup chocolate chips (optional)
- 1/4 cup ground flaxseed (optional)
- 1/2 teaspoon vanilla extract
- A pinch of salt
In a large mixing bowl, combine the rolled oats, peanut butter, honey, chocolate chips, flaxseed, vanilla extract, and salt. Mix thoroughly until all ingredients are well combined.
Once the mixture is well mixed, use your hands to form small balls, about 1 inch in diameter. Place the formed bites on a baking sheet lined with parchment paper and refrigerate for at least 30 minutes to help them firm up.
When preparing oatmeal peanut butter energy bites, feel free to get creative with the mix-ins! You can substitute almond or cashew butter for a different nutty flavor, and consider incorporating protein powder for an additional nutrition boost.
These bites can also be rolled in shredded coconut or crushed nuts for a fun twist.
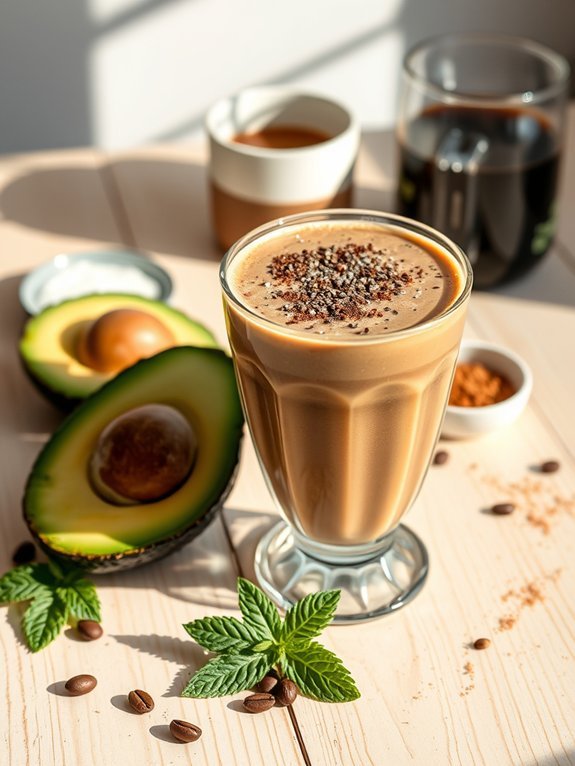
Avocado Brownies
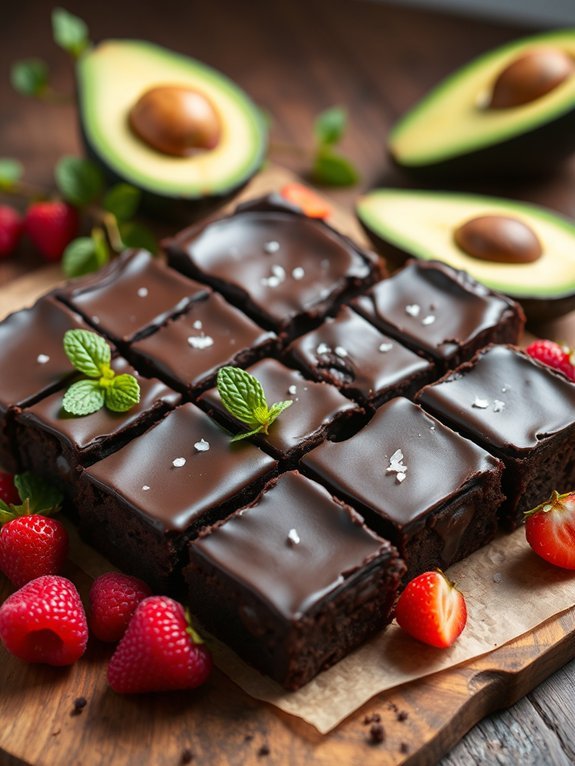
Avocado brownies are a delightful twist on a classic dessert that provides a rich and fudgy texture while sneaking in some extra nutrition. Utilizing ripe avocados instead of traditional fats like butter or oil, these brownies not only keep the indulgence but also add a boost of healthy fats and fiber.
They're a great choice for anyone looking to satisfy their sweet tooth without the guilt, making them a perfect treat for both kids and adults alike.
These brownies are surprisingly easy to make and don't require any specialized baking skills. Simply blend the key ingredients together, pour the mixture into a pan, and bake until perfectly set. The result is a moist, chocolatey treat that can be enjoyed on its own or paired with fresh fruit or a scoop of low-fat ice cream for a delicious dessert experience.
Ingredients:
- 1 ripe avocado
- 1 cup dark chocolate chips
- 1/2 cup honey or maple syrup
- 2 large eggs
- 1/2 teaspoon vanilla extract
- 1/3 cup unsweetened cocoa powder
- 1/4 teaspoon baking soda
- 1/4 teaspoon salt
Preheat the oven to 350°F (175°C) and grease an 8×8-inch baking pan. In a microwave-safe bowl, melt the dark chocolate chips until smooth.
In a blender or food processor, combine the ripe avocado, melted chocolate, honey or maple syrup, eggs, and vanilla extract. Blend until creamy and well combined.
Add the cocoa powder, baking soda, and salt, and blend again until smooth. Pour the batter into the prepared pan and bake for 20-25 minutes, or until a toothpick inserted in the center comes out clean.
For the best results, allow the brownies to cool completely in the pan before slicing them into squares. If you prefer a sweeter taste, adjust the sweetener to your liking; however, be cautious not to overpower the chocolate flavor.
Feel free to add in optional mix-ins like nuts, chocolate chunks, or dried fruit for an extra texture and flavor boost. Enjoy your healthy brownies with a sprinkle of sea salt on top for a gourmet touch!
Greek Yogurt Pancakes

Greek yogurt pancakes are a delicious and healthier alternative to traditional pancakes, offering a perfect blend of fluffiness and flavor. By incorporating Greek yogurt, these pancakes not only provide a boost of protein but also guarantee a moist texture that will leave your taste buds wanting more. This recipe is quick and easy, making it perfect for a busy weekday breakfast or a leisurely weekend brunch with family and friends.
These pancakes are versatile and can be customized to suit your preferences. You can add fruits like blueberries or bananas, or even a sprinkle of cinnamon for an added kick. The use of Greek yogurt also means that you can reduce the amount of fat and sugar typically found in pancake recipes, allowing you to indulge without the guilt. Get ready to flip some delicious and healthy pancakes!
- 1 cup all-purpose flour
- 1 tablespoon sugar (or honey)
- 1 teaspoon baking powder
- 1/2 teaspoon baking soda
- 1/4 teaspoon salt
- 1 cup Greek yogurt
- 1 large egg
- 1 teaspoon vanilla extract
- 1/2 cup milk (or as needed)
- Cooking spray or butter (for the pan)
In a large mixing bowl, whisk together the flour, sugar, baking powder, baking soda, and salt. In another bowl, combine the Greek yogurt, egg, vanilla extract, and milk.
Pour the wet ingredients into the dry ingredients and mix until just combined, being careful not to overmix—the batter should be slightly lumpy. Heat a non-stick skillet over medium heat and lightly grease it with cooking spray or butter.
Pour about 1/4 cup of batter onto the skillet and cook until bubbles form on the surface, then flip to cook the other side until golden brown.
For the best results, let your pancake batter rest for about 5 minutes before cooking. This allows the ingredients to fully combine and can help improve the texture of the pancakes.
Consider using a cast-iron skillet for an even heat distribution, as it helps achieve a perfectly golden-brown finish. Experiment with toppings like fresh fruit, yogurt, or a drizzle of maple syrup to enhance the flavor further!
Quinoa Chocolate Chip Cookies

Quinoa chocolate chip cookies are a delightful and healthful twist on the classic treat. Packed with protein and fiber, quinoa not only adds a unique flavor and texture but also enhances the nutritional value of your cookies, making them a guilt-free indulgence. This recipe is perfect for satisfying your sweet tooth while still promoting a healthier lifestyle. You can serve them as a snack or dessert, and they're sure to impress both friends and family alike.
Creating these delectable cookies is relatively straightforward and doesn't require any fancy ingredients or equipment. By substituting traditional flour with cooked quinoa, you're crafting a gluten-free option that maintains the beloved chewy texture. The addition of chocolate chips guarantees these cookies remain irresistible, with the perfect balance of sweetness and richness. Let's explore the ingredients and get started on this tasty healthy treat!
- 1 cup cooked quinoa
- 1/2 cup almond flour
- 1/2 cup oat flour
- 1/3 cup coconut sugar
- 1/4 cup honey or maple syrup
- 1/4 cup coconut oil, melted
- 1 teaspoon vanilla extract
- 1/2 teaspoon baking soda
- 1/4 teaspoon salt
- 1/2 cup dark chocolate chips
Preheat your oven to 350°F (175°C) and line a baking sheet with parchment paper. In a large mixing bowl, combine the cooked quinoa, almond flour, oat flour, coconut sugar, honey (or maple syrup), melted coconut oil, vanilla extract, baking soda, and salt. Stir until all the ingredients are well incorporated.
Gently fold in the dark chocolate chips. Scoop out tablespoon-sized portions of the dough and place them onto the prepared baking sheet, spacing them about 2 inches apart. Bake for 10-12 minutes or until the edges are golden brown. Allow the cookies to cool before transferring them to a wire rack.
For best results, confirm your quinoa is fully cooked and cooled before adding it to the mixture; this prevents excess moisture from affecting the cookie's texture. You can also customize these cookies by adding in nuts, seeds, or even dried fruit for added flavor and nutrition.
If you want to make them even healthier, consider using dark chocolate chips that are at least 70% cocoa, which contain less sugar and more antioxidants. Remember to store any leftovers in an airtight container to keep them fresh for longer!
Sweet Potato Bread
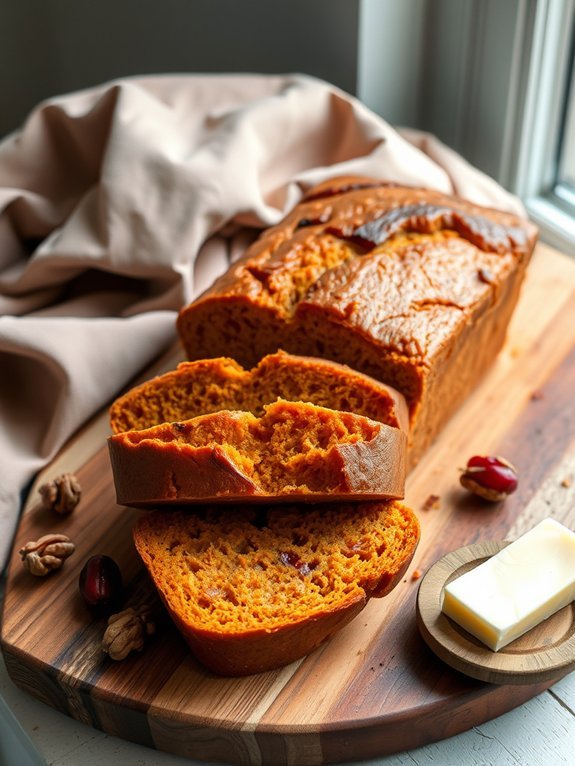
Sweet potato bread is a delightful and nutritious option for those seeking a wholesome alternative to traditional bread. Made from naturally sweet and vibrant orange sweet potatoes, this bread not only offers a unique flavor but also provides a plethora of health benefits. Rich in vitamins A and C, fiber, and antioxidants, sweet potato bread can be a delicious addition to your breakfast or used to make sandwiches for lunch. The combination of sweet potatoes with whole grains results in a moist, dense loaf that satisfies even the pickiest of eaters.
This recipe is incredibly versatile – you can enjoy it plain, toasted with a bit of butter, or even as a base for a delicious sandwich. It's also simple to prepare and can be made with ingredients that you likely already have in your pantry. Baking sweet potato bread is a fantastic way to sneak in extra nutrients while indulging in the comfort of freshly baked bread that fills your home with an inviting aroma.
Ingredients:
- 1 cup mashed cooked sweet potatoes
- 1/4 cup honey or maple syrup
- 1/4 cup milk (or non-dairy milk)
- 1/4 cup vegetable oil
- 2 large eggs
- 1 1/2 cups whole wheat flour
- 1 teaspoon baking powder
- 1 teaspoon baking soda
- 1 teaspoon ground cinnamon
- 1/2 teaspoon salt
- 1/2 teaspoon nutmeg (optional)
Preheat your oven to 350°F (175°C) and grease a standard loaf pan. In a large mixing bowl, combine the mashed sweet potatoes, honey or maple syrup, milk, vegetable oil, and eggs, mixing until smooth.
In another bowl, whisk together the whole wheat flour, baking powder, baking soda, cinnamon, salt, and nutmeg if using. Gradually add the dry ingredients to the wet ingredients, stirring until just combined. Pour the batter into the prepared loaf pan and bake for approximately 50-60 minutes, or until a toothpick inserted in the center comes out clean.
Allow the bread to cool for a few minutes in the pan before transferring it to a wire rack. For best results, verify your sweet potatoes are fully cooked and mashed to a smooth consistency to avoid lumps in the batter.
You can also add a handful of nuts or dried fruit to the batter for added texture and flavor. If you'd like a sweeter bread, feel free to increase the amount of honey or maple syrup. Finally, store any leftovers in an airtight container to keep it fresh for several days, or freeze individual slices for a quick, healthy snack later.
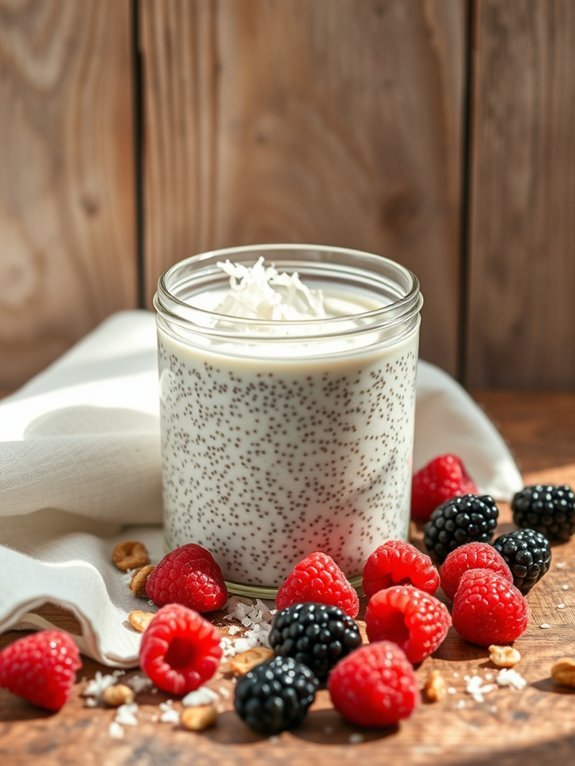
Chia Seed Pudding Cups
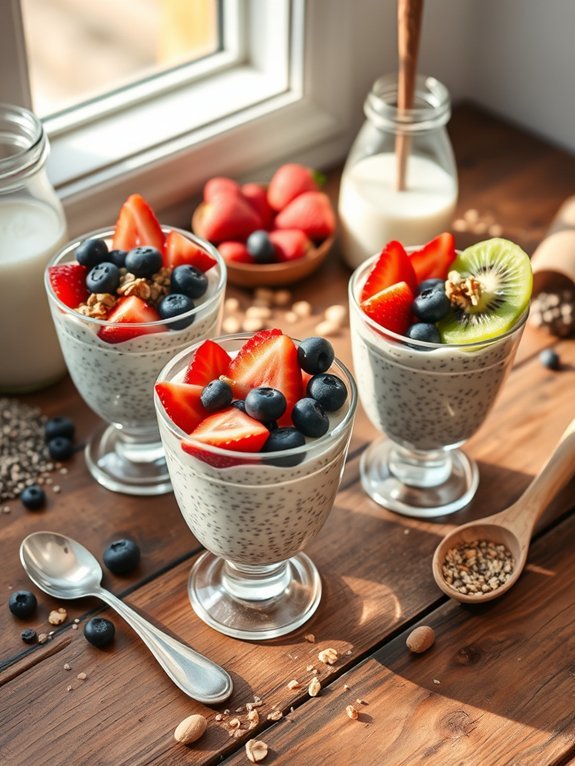
Chia seed pudding is a nutritious and versatile dish that serves as both a satisfying breakfast and a delightful dessert. Packed with omega-3 fatty acids, fiber, and protein, chia seeds are a powerhouse of nutrition. When mixed with your choice of liquid and allowed to soak, they expand and acquire a delightful pudding-like texture.
Enjoying chia seed pudding is as simple as preparing the ingredients and letting them work their magic! This recipe takes just a few minutes to prepare and requires minimal ingredients. You can customize your chia seed pudding with various flavors by adding your favorite fruits, nuts, or sweeteners. Whether you choose to enjoy it plain or dress it up, chia seed pudding is a delicious and healthy option for any time of day.
- 1/4 cup chia seeds
- 1 cup almond milk (or any milk of your choice)
- 2 tablespoons maple syrup (or honey for a vegan option)
- 1 teaspoon vanilla extract
- Fresh fruits, nuts, or granola for topping (optional)
In a mixing bowl, combine the chia seeds, almond milk, maple syrup, and vanilla extract. Stir well to ascertain the chia seeds are evenly distributed throughout the liquid. Let the mixture sit for about 10 minutes, then stir again to prevent clumping.
Cover the bowl and refrigerate for at least 2 hours or overnight until it reaches a pudding-like consistency. Serve in cups topped with fresh fruits, nuts, or granola as desired.
When preparing chia seed pudding, consider experimenting with different types of milk or sweeteners to create your preferred flavor profile. You can also add cocoa powder for a chocolatey twist or incorporate spices like cinnamon for an extra layer of flavor.
For best results, allow the pudding to set overnight for ideal texture. Enjoy it chilled for an invigorating treat!
Zucchini Bread
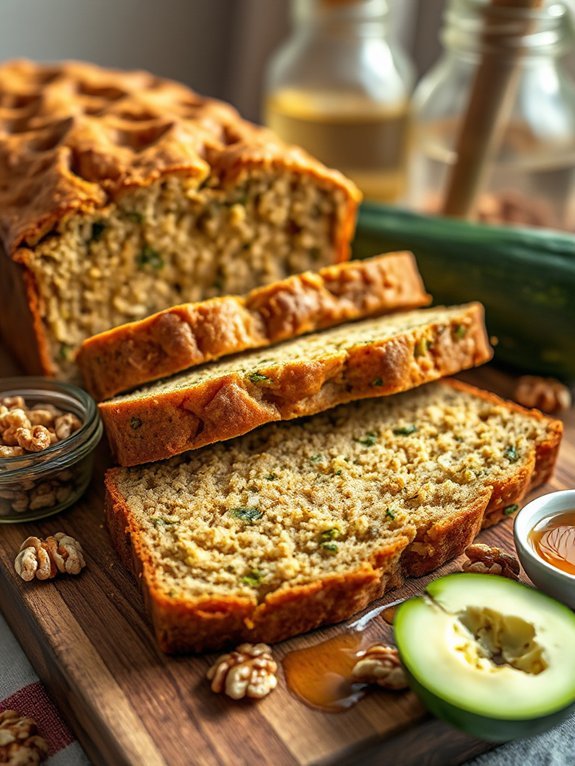
Zucchini bread is a delightful way to incorporate healthy vegetables into a delicious treat. This moist and flavorful quick bread isn't only perfect for breakfast but can also serve as a wholesome snack throughout the day. With the natural sweetness of zucchini, you'll find that it requires less sugar than traditional bread, making it a healthier option to satisfy your sweet tooth. Plus, it's a great way to use up that extra zucchini from your garden or the farmer's market.
This recipe for healthy zucchini bread is simple and can easily be modified to suit your preferences. Whether you fancy adding nuts, chocolate chips, or spices, you can tailor this bread to your taste. We'll use whole wheat flour and natural sweeteners to enhance its nutritional profile, allowing you to enjoy this baked good guilt-free.
- 1 cup shredded zucchini (squeezed dry)
- 1 cup whole wheat flour
- 1/2 cup almond flour
- 1/2 teaspoon baking soda
- 1/2 teaspoon baking powder
- 1/2 teaspoon salt
- 1 teaspoon cinnamon
- 1/3 cup honey or maple syrup
- 2 large eggs
- 1/4 cup coconut oil (melted)
- 1 teaspoon vanilla extract
- Optional: 1/2 cup chopped walnuts or chocolate chips
Preheat your oven to 350°F (175°C) and grease a loaf pan. In a large mixing bowl, combine the whole wheat flour, almond flour, baking soda, baking powder, salt, and cinnamon.
In another bowl, whisk together the honey (or maple syrup), eggs, melted coconut oil, and vanilla extract until combined. Stir in the shredded zucchini, then slowly add the wet mixture to the dry ingredients, mixing until just combined. If desired, fold in the walnuts or chocolate chips before pouring the batter into the prepared loaf pan.
Bake for 50-60 minutes, or until a toothpick inserted into the center comes out clean. Let it cool in the pan for a few minutes before transferring it to a wire rack.
When making zucchini bread, it's crucial to squeeze out as much excess moisture from the shredded zucchini as possible to avoid a soggy texture. Additionally, feel free to experiment with spices like nutmeg or even add some dried fruits for extra flavor.
If you prefer a sweeter bread, adjust the amount of honey or add some mashed bananas to the mixture. Finally, zucchini bread can be stored in an airtight container for several days, making it perfect for meal prep or sharing with friends and family!
Coconut Flour Blueberry Muffins
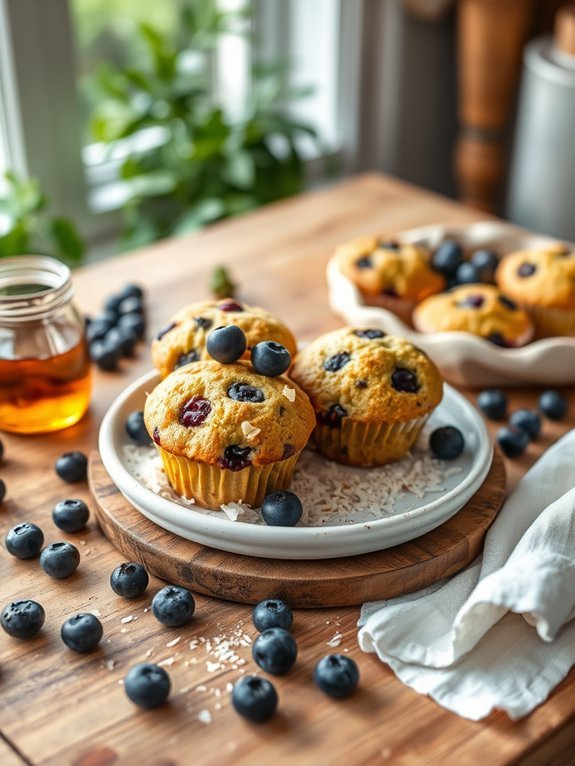
Coconut flour blueberry muffins are a delightful and healthy alternative to traditional muffins, perfect for breakfast or a mid-afternoon snack. This recipe utilizes coconut flour, which is gluten-free and high in fiber, making it a nourishing option for those looking to reduce gluten intake or increase their fiber consumption. Additionally, blueberries are packed with antioxidants and vitamins, providing a burst of flavor and nutrition in each bite.
These muffins aren't only easy to make but also deliciously moist thanks to the combination of eggs and coconut oil. The natural sweetness of ripe bananas complements the tartness of the blueberries, creating a delightful flavor balance. Whether you're enjoying them fresh out of the oven or as leftovers, these muffins are sure to become a favorite in your healthy baking repertoire.
- 1 cup coconut flour
- ½ teaspoon baking soda
- ½ teaspoon baking powder
- ¼ teaspoon salt
- 3 large eggs
- ½ cup honey or maple syrup
- ½ cup coconut oil, melted
- 1 teaspoon vanilla extract
- 1 cup fresh or frozen blueberries
Preheat your oven to 350°F (175°C) and line a muffin tin with paper liners. In a large mixing bowl, combine the coconut flour, baking soda, baking powder, and salt. In another bowl, whisk together the eggs, honey (or maple syrup), melted coconut oil, and vanilla extract until well combined.
Gradually mix the wet ingredients into the dry ingredients, ensuring there are no lumps. Gently fold in the blueberries. Spoon the batter into the prepared muffin tin and bake for approximately 20-25 minutes or until a toothpick inserted into the center comes out clean.
When making coconut flour blueberry muffins, keep in mind that coconut flour absorbs a lot of moisture. If the batter feels too thick, you can add a splash of milk or an additional egg to achieve the desired consistency.
Additionally, if using frozen blueberries, don't thaw them before adding to the batter to prevent them from bleeding into the mixture and turning it blue. Enjoy your muffins warm or at room temperature, and consider storing them in an airtight container for freshness!