If you're looking for delicious keto seafood dishes that are low-carb, you're in for a treat! Try the creamy garlic butter shrimp or the lemon herb grilled salmon for a burst of flavor. Low-carb shrimp scampi and spicy tuna poke bowls make for invigorating options, too. Don't forget to check out baked parmesan crusted tilapia and mouthwatering garlic butter crabs. For more enticing recipes and tips to elevate your meals, keep exploring!
Creamy Garlic Butter Shrimp
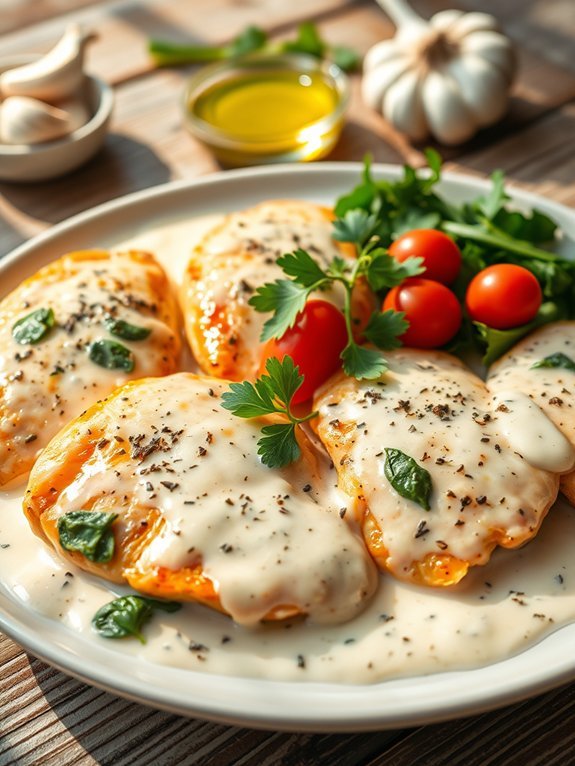
Creamy Garlic Butter Shrimp is a delicious keto-friendly dish that can elevate any weeknight dinner. This rich and flavorful dish combines succulent shrimp with a creamy garlic butter sauce that isn't only satisfying but also low in carbs, making it perfect for those following a ketogenic diet. The combination of garlic, butter, and herbs enhances the natural sweetness of the shrimp, creating a meal that's comforting yet elegant.
Preparing this dish is quick and easy, perfect for those busy days when you still want to enjoy a gourmet meal at home. You can serve this creamy garlic butter shrimp over zucchini noodles or cauliflower rice for an even more satisfying experience. With just a few simple ingredients, you can have a restaurant-quality dish in your own kitchen.
- 1 pound large shrimp, peeled and deveined
- 4 tablespoons unsalted butter
- 4 cloves garlic, minced
- 1/2 cup heavy cream
- 1/2 teaspoon paprika
- Salt and pepper to taste
- Fresh parsley, chopped for garnish
- Lemon wedges for serving
In a large skillet, melt the butter over medium heat, then add the minced garlic and cook until fragrant, about 1-2 minutes. Add the shrimp to the skillet, seasoning with paprika, salt, and pepper. Cook for 2-3 minutes on each side, or until the shrimp are pink and opaque.
Pour in the heavy cream and let the sauce simmer for another 2-3 minutes until it thickens slightly. Remove from heat and garnish with fresh parsley.
For an added depth of flavor, consider using freshly squeezed lemon juice or zest after cooking to brighten up the dish. To guarantee the shrimp maintain their tenderness, avoid overcooking them, as they can become tough and rubbery.
If you'd like to introduce some heat, a pinch of red pepper flakes can be added along with the garlic for a spicy kick. Serve immediately with a fresh green salad for a complete meal.
Lemon Herb Grilled Salmon
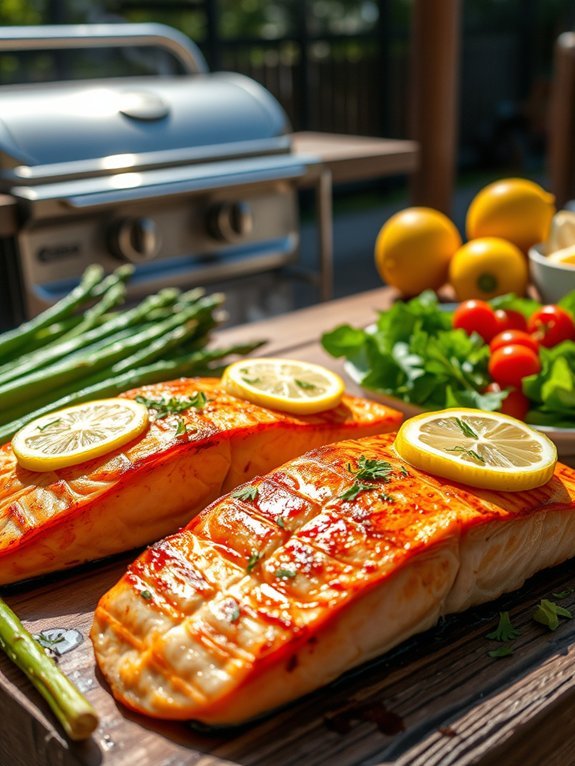
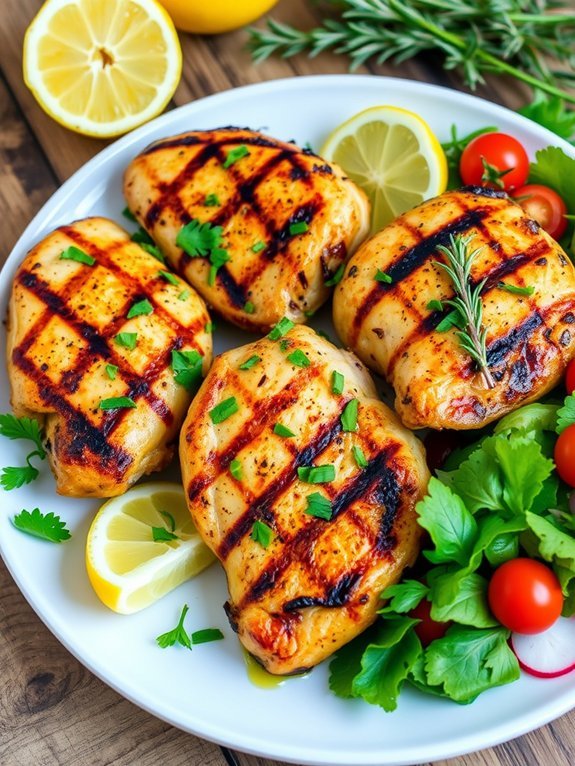
Lemon Herb Grilled Salmon is a fantastic keto dish that combines the rich, healthy flavors of salmon with a revitalizing citrus herb marinade. This dish isn't only simple to prepare but also packed with nutrients, making it a perfect choice for those following a ketogenic lifestyle.
The vibrant lemon juice and fragrant fresh herbs enhance the natural flavor of the fish, creating a meal that's both delicious and satisfying. Ideal for a summer cookout or a cozy dinner at home, grilled salmon can be paired with a variety of keto-friendly sides such as roasted vegetables or a fresh salad.
The key to achieving a perfectly grilled salmon is ensuring the fish is marinated well, allowing the flavors to penetrate deeply. This recipe isn't just a meal; it's a vibrant celebration of flavors that showcases the best of what seafood can offer.
Ingredients
- 4 salmon fillets
- 1/4 cup olive oil
- 2 tablespoons fresh lemon juice
- Zest of 1 lemon
- 2 cloves garlic, minced
- 1 tablespoon fresh parsley, chopped
- 1 tablespoon fresh dill, chopped
- Salt and pepper, to taste
- Lemon slices, for garnish
Grill the salmon fillets on medium-high heat for about 4-5 minutes per side, or until the fish flakes easily with a fork. Make sure to preheat the grill and oil it lightly to prevent sticking.
While grilling, use a brush to apply any remaining marinade onto the salmon for added flavor. Once cooked, remove the salmon from the grill and let it rest for a minute before serving with fresh lemon slices on top.
For the best flavor, allow the salmon to marinate in the mixture for at least 30 minutes prior to grilling. If you're short on time, even a quick 10-minute marinade can enhance the taste.
Additionally, consider using wild-caught salmon for a superior taste and texture. Experiment with different herbs based on your preference, such as tarragon or basil, to create your own unique variation of this dish.
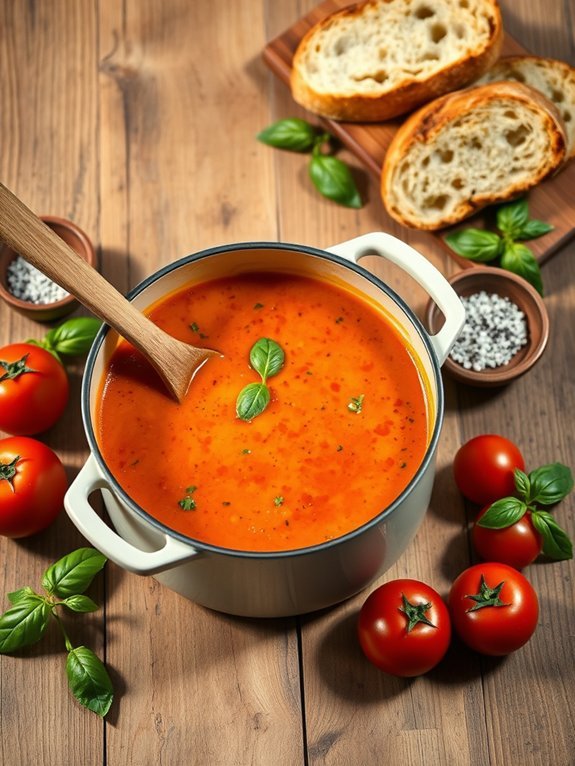
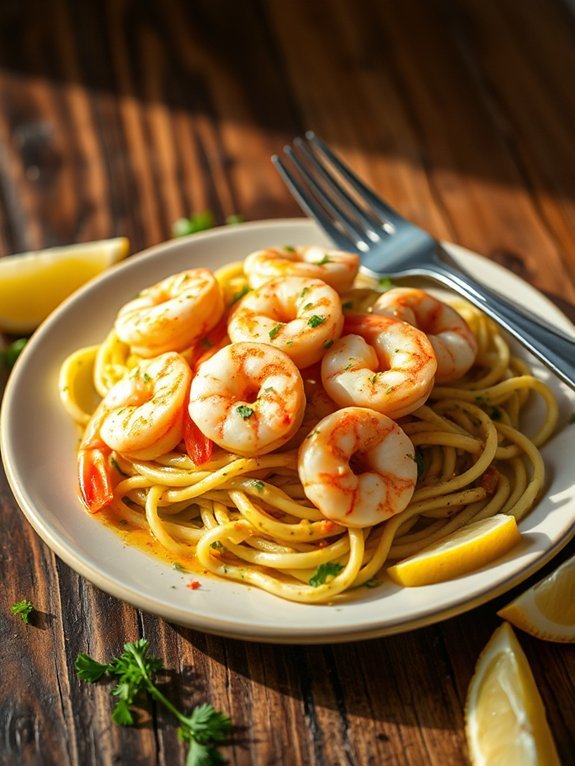
Low-Carb Shrimp Scampi
Low-Carb Shrimp Scampi is a delightful take on the classic Italian dish, perfect for those following a ketogenic lifestyle. This version replaces traditional high-carb pasta with zucchini noodles or cauliflower rice, allowing you to indulge in the rich flavors of garlic, butter, and shrimp without loading up on carbs. The sweetness of the shrimp combined with the garlic's fragrant aroma and the hint of lemon creates a mouthwatering meal that isn't only simple to prepare but also packed with nutrients.
Preparing Low-Carb Shrimp Scampi is a quick process that can be accomplished in under 30 minutes, making it an ideal weeknight dinner option. The freshness of the shrimp is essential, so opt for wild-caught if possible. This recipe can easily be adjusted to suit your taste preferences by adding different herbs or spices, ensuring a delightful dish every time you make it.
Ingredients:
- 1 pound large shrimp, peeled and deveined
- 2 tablespoons olive oil
- 4 tablespoons unsalted butter
- 4 cloves garlic, minced
- 1 teaspoon red pepper flakes (optional)
- Salt and pepper to taste
- Juice of 1 lemon
- Zucchini noodles or cauliflower rice (for serving)
- Fresh parsley, chopped (for garnish)
In a large skillet, heat the olive oil and butter over medium heat. Add the minced garlic and red pepper flakes, stirring until fragrant (about 1 minute). Toss in the shrimp and season with salt and pepper.
Cook the shrimp for 2-3 minutes on each side or until they turn pink and opaque. Squeeze the lemon juice over the shrimp, mix well, and serve immediately over zucchini noodles or cauliflower rice, garnished with fresh parsley.
When preparing this dish, make sure not to overcook the shrimp, as they can become tough and rubbery. For an extra punch of flavor, consider adding a splash of white wine to the skillet after sautéing the garlic, allowing it to reduce and infuse the dish with a rich taste.
Always remember to taste and adjust the seasoning as needed, ensuring every element of the dish shines. Enjoy your delicious Low-Carb Shrimp Scampi!
Spicy Tuna Poke Bowl

If you're looking for a fresh and exciting way to enjoy seafood while sticking to your keto lifestyle, a Spicy Tuna Poke Bowl is a perfect choice. This dish combines the luscious flavors of fresh tuna with a spicy kick that awakens the senses. The simplicity of the ingredients makes it quick to prepare, while still offering the satisfying experience of a gourmet meal. This vibrant bowl isn't only delicious but also packed with nutrients, making it ideal for a healthy lunch or dinner.
To boost the flavor and add some crunch, this poke bowl features a variety of toppings, including avocado and cucumber, which complement the rich tuna. Pairing these ingredients together creates a well-rounded dish that's a feast for the eyes as much as it's for the palate. You can easily customize the toppings according to your preference or what's available in your kitchen, making sure every bowl you make is uniquely yours.
Let's explore the recipe!
- 1 lb sushi-grade tuna, diced
- 2 tbsp soy sauce or tamari (for a gluten-free option)
- 1 tbsp sesame oil
- 1 tbsp sriracha (or to taste)
- 1 tsp rice vinegar
- 1 avocado, diced
- 1/2 cucumber, thinly sliced
- 2 green onions, chopped
- 1 tbsp sesame seeds
- Seaweed salad (for garnish)
- Riced cauliflower (as a base, optional)
In a mixing bowl, combine the diced tuna, soy sauce, sesame oil, sriracha, and rice vinegar; mix gently to coat evenly. Let the mixture sit for approximately 10-15 minutes to allow the flavors to meld.
In the meantime, prepare your base by placing a generous scoop of riced cauliflower in a bowl. Top the riced cauliflower with the marinated tuna mixture and arrange the diced avocado, cucumber slices, and chopped green onions on top. Finish with a sprinkle of sesame seeds and a side of seaweed salad, if desired.
When preparing this dish, it's crucial to use fresh sushi-grade tuna to guarantee both taste and safety. If you're not comfortable with raw fish, consider searing the tuna for a few seconds on each side to give it a warm touch while still retaining some raw texture.
You can also adjust the spice level to your liking; add less sriracha for a milder flavor, or incorporate additional toppings like radishes or jalapeños for extra heat. Enjoy your Poke Bowl creation!
Baked Parmesan Crusted Tilapia
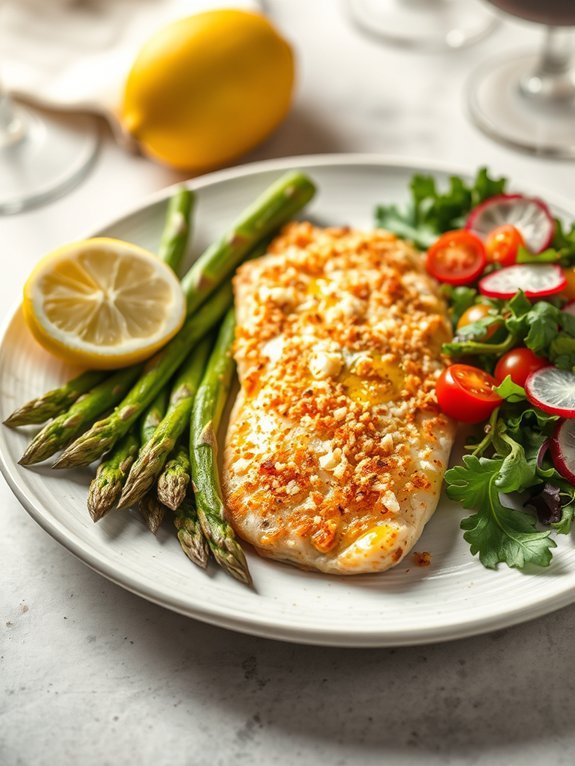
Baked Parmesan Crusted Tilapia is a delightful seafood dish that perfectly aligns with the keto lifestyle while delivering an irresistible flavor.
The delicate texture of the tilapia fillets pairs beautifully with a crisp, cheesy crust, making this dish both satisfying and healthy. This recipe isn't only easy to prepare but also quick to cook, making it an excellent choice for busy weeknights when you want a wholesome meal without spending hours in the kitchen.
To keep things keto-friendly, this dish uses almond flour instead of traditional breadcrumbs, which adds a nutty flavor and maintains the necessary low-carb aspect of your keto diet. The combination of parmesan cheese, garlic, and spices enhances the tilapia's natural flavors, creating a dish that's rich in taste but light on carbs.
Serve it alongside a fresh salad or steamed vegetables for a complete meal that fits seamlessly into your dietary goals.
Ingredients:
- 4 tilapia fillets
- 1/2 cup grated Parmesan cheese
- 1/2 cup almond flour
- 2 cloves garlic, minced
- 1 teaspoon paprika
- 1 teaspoon dried parsley
- Salt and pepper to taste
- 2 tablespoons olive oil
- Lemon wedges for serving
Preheat your oven to 400°F (200°C) and line a baking sheet with parchment paper. In a bowl, mix the grated Parmesan cheese, almond flour, minced garlic, paprika, dried parsley, salt, and pepper.
Dip each tilapia fillet in the olive oil, then coat it with the cheese mixture. Place the fillets on the prepared baking sheet and bake for about 15-20 minutes, or until the tilapia is cooked through and the crust is golden brown.
When preparing Baked Parmesan Crusted Tilapia, be sure not to overcook the fish, as it can become dry. Keep an eye on it during the last few minutes of baking to achieve that perfect flaky texture.
You can also experiment with different herbs and spices to customize the flavor to your liking. Serve your tilapia with a squeeze of fresh lemon juice for a zesty finish, and consider adding a side of low-carb vegetables such as zucchini or asparagus for a nutritious complement to the meal.
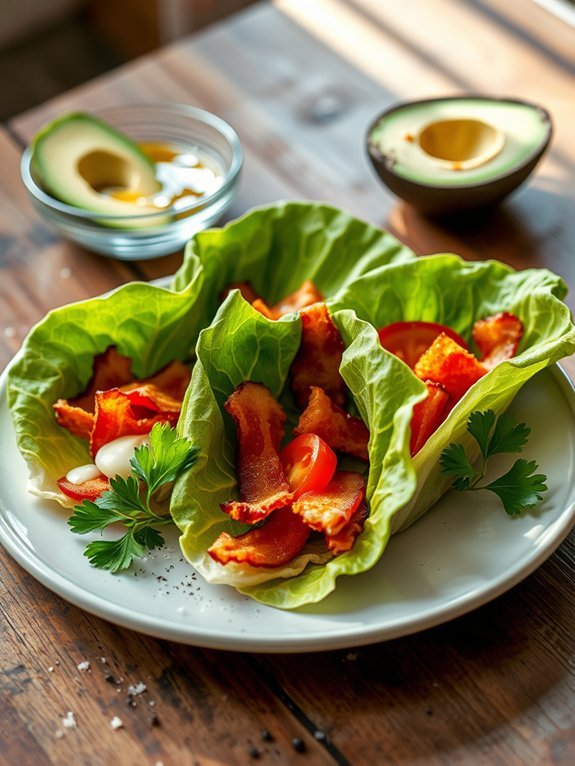
Keto Lobster Roll Lettuce Wraps
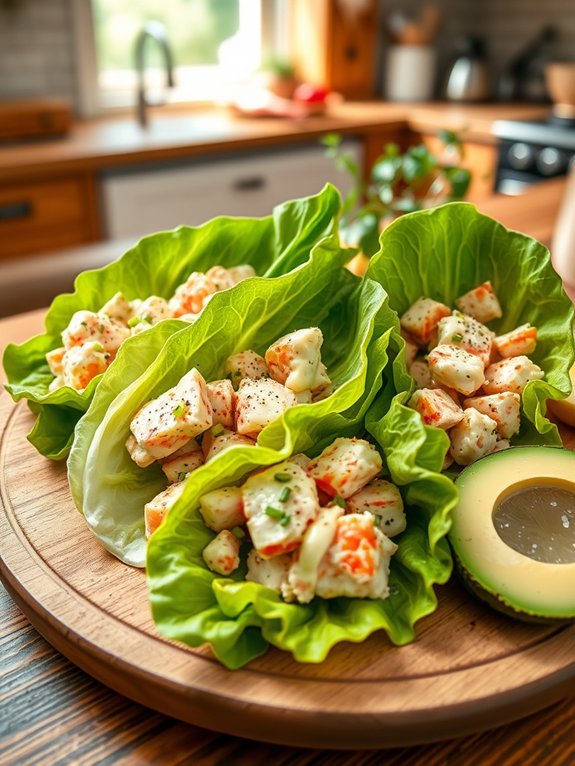
Keto Lobster Roll Lettuce Wraps offer a delicious and healthy alternative to the traditional lobster roll while sticking to your ketogenic diet. By swapping out the high-carb bread with crisp and invigorating lettuce leaves, you can still enjoy a satisfying and flavorful meal. This dish is packed with protein and healthy fats, making it an ideal choice for those looking to maintain or lose weight while indulging in the fresh, sumptuous taste of lobster.
These lobster roll lettuce wraps aren't only simple to make but also customizable to suit your preferences. You can add your favorite herbs, spices, and toppings for an extra burst of flavor. Whether you're hosting a summer barbeque, enjoying a light lunch, or simply craving seafood, these wraps are sure to impress your taste buds without compromising your dietary goals.
Ingredients:
- 1 pound cooked lobster meat, chopped
- 1/2 cup mayonnaise (preferably avocado oil-based)
- 1 tablespoon Dijon mustard
- 1 tablespoon lemon juice
- 1/4 cup celery, finely diced
- 2 tablespoons fresh chives, chopped
- Salt and pepper to taste
- Romaine or butter lettuce leaves, to serve
Combine the chopped lobster meat, mayonnaise, Dijon mustard, lemon juice, celery, chives, salt, and pepper in a large mixing bowl. Stir gently until the ingredients are evenly mixed, ensuring that the lobster is well coated with the creamy dressing.
Once the mixture is ready, spoon it generously onto the lettuce leaves, folding the leaves over the filling as you'd with a traditional sandwich. Serve immediately while the lettuce is crisp.
For added flavor and texture, consider incorporating avocado slices, diced cucumber, or even a sprinkle of Old Bay seasoning into your lobster mixture. Additionally, you can use different types of lettuce or even cabbage if you prefer a heartier wrap.
If you have any leftovers, store the lobster mix in an airtight container in the refrigerator and enjoy it within a couple of days, but note that the lettuce will wilt over time, so it's best to assemble them fresh before serving.
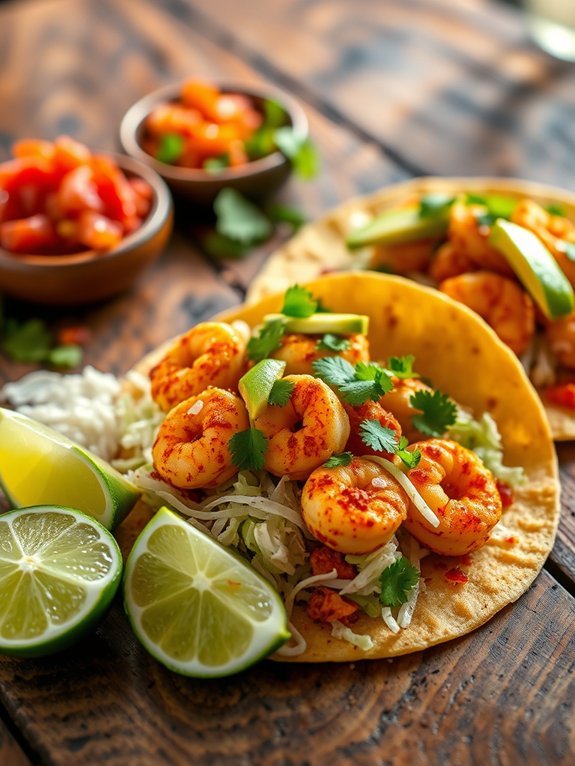
Cilantro Lime Shrimp Tacos
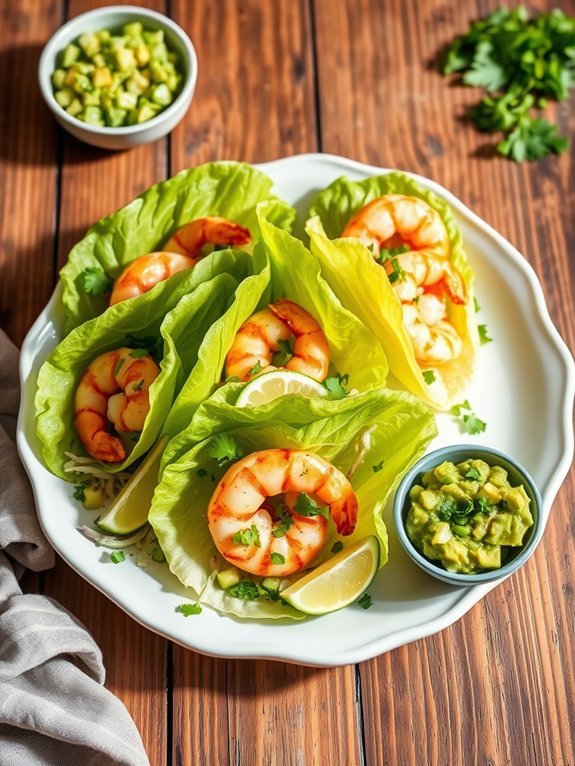
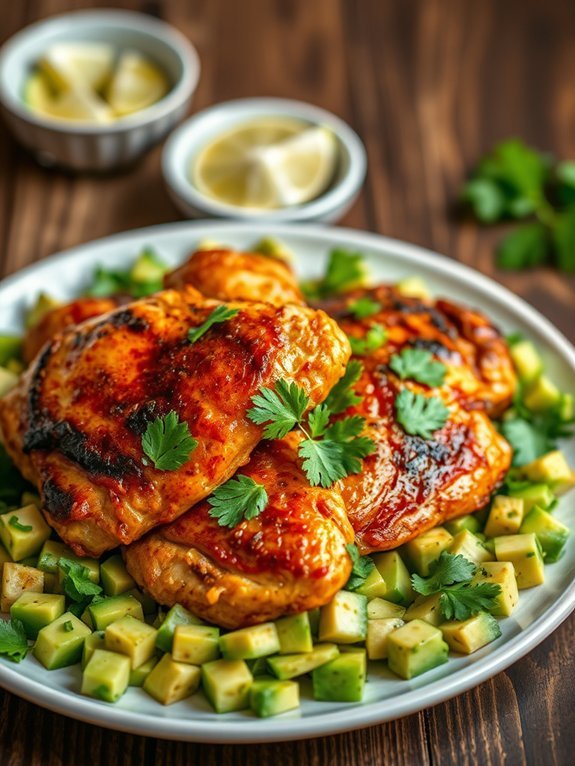
Cilantro Lime Shrimp Tacos are a new, zesty, and satisfying dish perfect for those following a keto diet. These tacos swap out traditional tortillas for a low-carb alternative, allowing you to enjoy the vibrant flavors without the added carbs. The combination of fresh cilantro, lime juice, and perfectly seasoned shrimp creates a tasty filling that bursts with flavor, making these tacos a delightful option for lunch or dinner.
This dish not only provides a healthy dose of protein but also incorporates nutritious ingredients rich in flavor. Whether you're hosting a gathering or just looking to treat yourself, Cilantro Lime Shrimp Tacos are sure to impress.
Paired with an invigorating avocado salsa or a side of sautéed veggies, these tacos can elevate your meal while keeping you on track with your dietary goals.
Ingredients:
- 1 pound of shrimp, peeled and deveined
- 1 tablespoon olive oil
- 2 limes (zest and juice)
- 2 cloves garlic, minced
- 1 teaspoon ground cumin
- 1 teaspoon paprika
- Salt and pepper, to taste
- 1/4 cup fresh cilantro, chopped
- Low-carb tortillas or lettuce leaves for wrapping
- Optional toppings: diced avocado, shredded cabbage, and cilantro
Season the shrimp with olive oil, lime juice, lime zest, minced garlic, cumin, paprika, salt, and pepper, ensuring they're well coated. Allow them to marinate for about 15 minutes.
In a skillet over medium heat, cook the marinated shrimp for 2-3 minutes on each side until they're pink and cooked through. Assemble the tacos by placing cooked shrimp on low-carb tortillas or lettuce leaves and topping them with cilantro and any additional toppings of your choice.
When cooking the shrimp, be careful not to overcook them as they can become rubbery. If you're using lettuce leaves, choose sturdy varieties like romaine or butter lettuce to hold the filling better.
Experiment with different toppings to suit your taste; adding fresh salsa or jalapeños can bring an extra kick to your tacos.
Finally, feel free to meal prep by marinating the shrimp in advance, making it easy to cook and assemble tacos for a quick, flavorful meal.
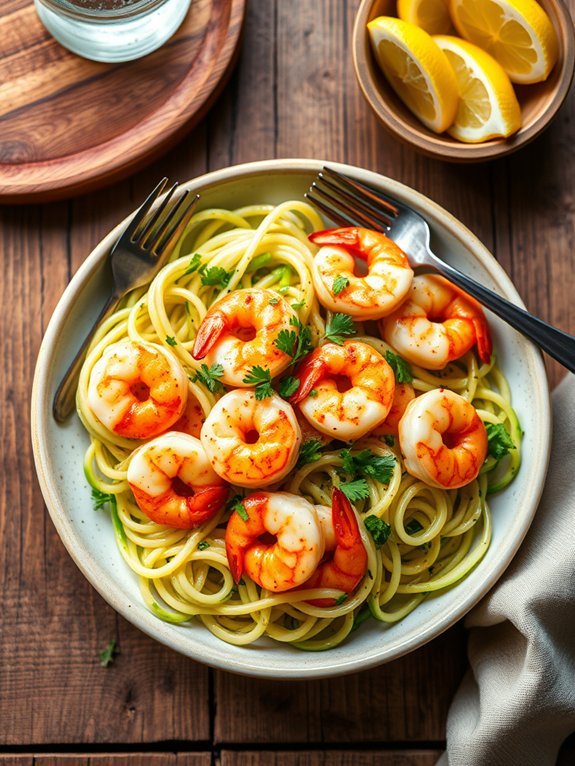
Seafood Zucchini Noodles
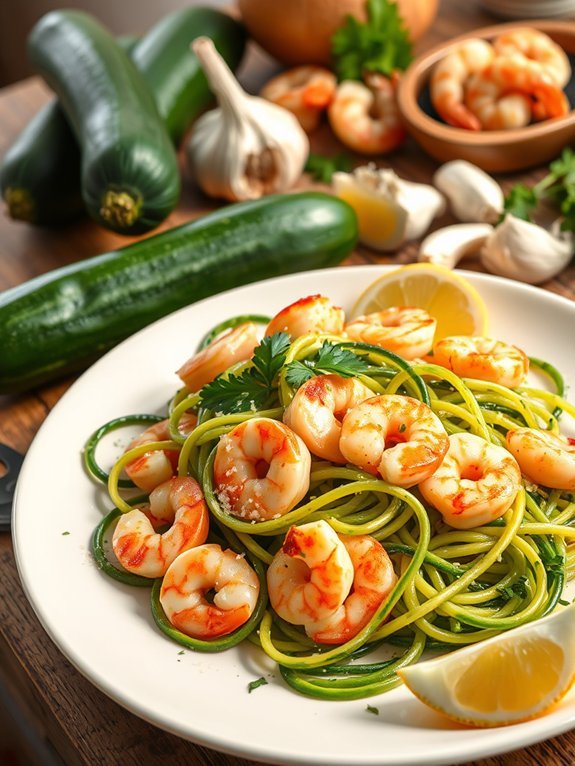
Seafood zucchini noodles are a delightful and nutritious alternative to traditional pasta, making them a perfect fit for those on a keto diet. This dish combines the fresh flavors of seafood with the lightness of zucchini, resulting in a satisfying meal that won't weigh you down. Not only is it low in carbohydrates, but it also packs a punch with high-quality protein and healthy fats from the seafood, making it both flavorful and health-conscious.
Preparing seafood zucchini noodles is simple and quick, making it an ideal choice for busy weeknights or an impressive meal for guests. With the right blend of spices and fresh ingredients, you can transform ordinary zucchini into a gourmet dish that highlights the natural sweetness of seafood. Whether you prefer shrimp, scallops, or a mix of both, this recipe allows you to customize it according to your seafood preferences.
Ingredients:
- 2 medium zucchinis
- 1 cup shrimp, peeled and deveined
- 1 cup scallops, rinsed and patted dry
- 2 tablespoons olive oil
- 2 cloves garlic, minced
- 1 teaspoon crushed red pepper flakes (optional)
- Salt and pepper to taste
- 1 tablespoon lemon juice
- Fresh parsley, chopped for garnish
- Grated Parmesan cheese (optional)
To prepare the seafood zucchini noodles, start by spiralizing the zucchinis to create noodle-like strands. Heat olive oil in a large skillet over medium heat, then add the minced garlic and sauté for about 1 minute until fragrant.
Add the shrimp and scallops to the skillet, seasoning them with salt, pepper, and crushed red pepper flakes if desired. Cook for about 3-4 minutes or until the seafood is opaque and cooked through. Toss in the zucchini noodles and lemon juice, cooking for an additional 2-3 minutes until the noodles are tender but still crisp. Serve hot, garnished with chopped parsley and grated Parmesan cheese if using.
When making seafood zucchini noodles, it's crucial to avoid overcooking the zucchinis. They should remain slightly firm to mimic the texture of traditional pasta, so be mindful of the cooking time.
If you're using frozen seafood, be sure to thaw and drain it thoroughly to prevent excess water from diluting the dish. Finally, feel free to get creative with the spices and herbs; adding your favorite seasonings can elevate the flavors and make this dish truly your own. Enjoy the freshness and health benefits of this keto-friendly meal!
Garlic Butter Crabs
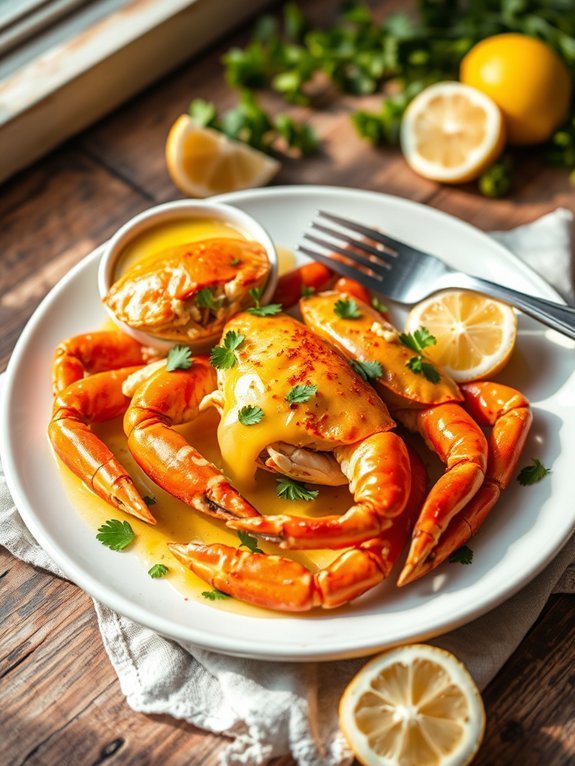
Garlic Butter Crabs are a delightful seafood dish that embodies the rich and savory flavors of the ocean, enhanced by the fragrant warmth of garlic and the creamy texture of butter. This dish isn't only packed with flavor but is also perfect for those following a ketogenic diet, allowing you to indulge without guilt. Crabs are naturally low in carbs and high in healthy fats, making them an excellent option for anyone looking to enjoy a sumptuous meal while adhering to keto principles.
Cooking Garlic Butter Crabs is a straightforward process that can be both enjoyable and rewarding. The combination of melted butter, fresh garlic, and the sweet, tender meat of the crabs creates a mouthwatering experience that's ideal for a special occasion dinner or a cozy seafood feast at home. With just a few simple ingredients, you can transform fresh crabs into a dish that will impress your family and friends.
- 2 large crabs (preferably Dungeness or blue crabs)
- 1 cup unsalted butter
- 6 cloves garlic, minced
- 1 tablespoon fresh parsley, chopped
- 1 teaspoon lemon juice
- Salt and pepper to taste
- Lemon wedges, for serving
In a large pot, bring water to a boil and season it with salt. Add the crabs and cook for about 15-20 minutes until bright orange and cooked through.
Meanwhile, melt the butter in a skillet over medium heat and add the minced garlic, cooking until fragrant. Stir in the parsley, lemon juice, salt, and pepper.
Once the crabs are cooked, remove them from the pot and drain. Serve the crabs drizzled with the garlic butter sauce, accompanied by lemon wedges.
For the best flavor, consider using fresh crabs if available, as frozen varieties may not have the same sweetness. If you want more heat, feel free to add a pinch of red pepper flakes to the garlic butter.
Serving the dish over a bed of sautéed spinach or zucchini noodles can provide a wonderful low-carb side that complements the crabs beautifully. Enjoy your Garlic Butter Crabs with a side of melted butter for dipping, making each bite a luxurious treat!
Blackened Mahi-Mahi

Blackened Mahi-Mahi is a flavorful and tantalizing dish that perfectly fits into a ketogenic diet. This preparation involves a spicy seasoning blend that creates a delicious crust on the fish, enhancing its natural flavor while adding a vibrant kick. Mahi-mahi, with its firm texture and mild taste, is a fantastic canvas for bold flavors, making it a popular choice among seafood lovers. Cooking this fish is also quite quick, making it an ideal option for busy weeknight dinners.
To achieve the classic blackened effect, it's important to use high heat while searing the fish, which helps develop the characteristic dark crust. Pairing the blackened mahi-mahi with a fresh salad or sautéed vegetables can complete the meal while keeping it keto-friendly. As you prepare to plunge into this recipe, gather your ingredients and get ready for a culinary adventure that's as satisfying to make as it's to eat.
- 2 mahi-mahi fillets
- 2 tablespoons olive oil
- 1 tablespoon paprika
- 1 teaspoon cayenne pepper
- 1 teaspoon garlic powder
- 1 teaspoon onion powder
- 1 teaspoon dried thyme
- 1 teaspoon dried oregano
- Salt and black pepper to taste
- Lemon wedges (for serving)
Heat a large cast-iron skillet over medium-high heat and add the olive oil. While the skillet is heating, mix the paprika, cayenne pepper, garlic powder, onion powder, thyme, oregano, salt, and black pepper in a small bowl.
Coat each mahi-mahi fillet with the spice blend on both sides, pressing it in slightly. Once the skillet is hot, place the seasoned fillets in the skillet and cook for about 4-5 minutes on each side, or until they're blackened and cooked through. Serve with lemon wedges for a zesty finish.
When cooking blackened mahi-mahi, don't be afraid to adjust the spice level to your preference; feel free to add more or less cayenne pepper depending on how spicy you like your food.
Additionally, make certain that your skillet is sufficiently hot before cooking to achieve that perfect char. For a healthier option, consider serving the fish over a bed of leafy greens tossed with a light vinaigrette, which will complement the robust flavors of the blackened mahi-mahi.
Lemon Dill Baked Cod

When it comes to creating a delicious and healthy dinner option, Lemon Dill Baked Cod is a fantastic choice that shines with fresh flavors and minimal prep work. This dish is perfect for anyone following a low-carb or keto lifestyle, as cod is a lean white fish rich in protein and omega-3 fatty acids, while the lemon and dill provide a rejuvenating contrast that enhances the natural taste of the fish.
With its zesty citrus notes and aromatic herbs, this recipe not only elevates your dinner table but also comes together quickly, making it ideal for busy weeknights or serene weekend evenings.
To prepare Lemon Dill Baked Cod, you'll need just a few fresh ingredients that pack a punch. Pairing the tender cod with freshly squeezed lemon juice and fragrant dill gives you a well-rounded flavor profile that will satisfy even the pickiest eaters.
This dish can be served alongside a simple green salad or steamed veggies, making it a balanced meal that adheres to your keto goals without sacrificing taste or satisfaction.
Ingredients:
- 4 cod fillets
- 2 tablespoons olive oil
- 2 tablespoons fresh lemon juice
- 1 tablespoon fresh dill, chopped (or 1 teaspoon dried dill)
- 2 cloves garlic, minced
- Salt and pepper, to taste
- Lemon slices, for garnish
- Fresh dill sprigs, for garnish
Preheat your oven to 400°F (200°C). In a small bowl, mix together the olive oil, lemon juice, chopped dill, minced garlic, salt, and pepper.
Place the cod fillets on a baking sheet lined with parchment paper or lightly greased. Brush the olive oil mixture over the fillets, ensuring they're well coated, and top them with lemon slices. Bake in the preheated oven for 12-15 minutes or until the fish easily flakes with a fork and is opaque throughout.
For the best results, make sure not to overcook the cod, as it can become dry and lose its tender texture. Keep an eye on the fillets as they bake; the thickness of the fish may require slight adjustments to the cooking time.
Additionally, feel free to experiment by adding other herbs or spices to the citrus mixture for a personalized touch, such as parsley or a sprinkle of paprika for added flavor and color.
Keto Shrimp and Cauliflower Grits
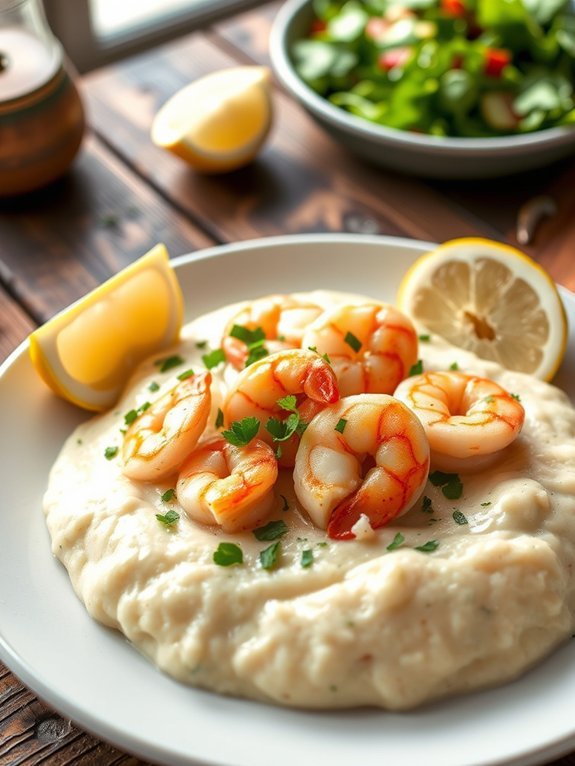
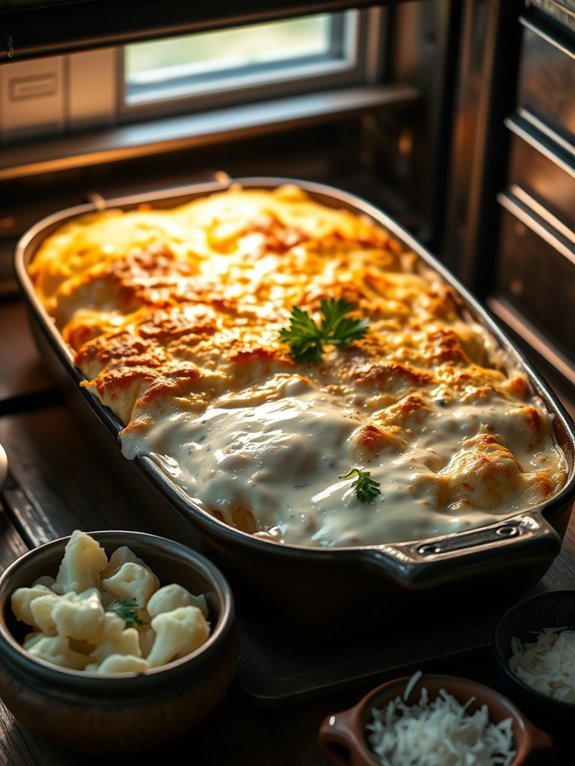
Keto Shrimp and Cauliflower Grits is a delightful twist on a classic Southern dish that captures the essence of flavor while keeping it low in carbohydrates. The use of cauliflower as a substitute for traditional grits not only aligns with the keto diet but also adds a creamy texture that pairs perfectly with succulent shrimp.
This dish isn't only simple to prepare but also a great way to impress family and friends with your culinary skills. Perfect for a cozy dinner or a quick weeknight meal, this dish showcases the delightful flavors of garlic, butter, and fresh herbs. Combined with the juicy and tender shrimp, you'll find that this meal is both satisfying and nutritious.
Serve it up with a fresh side salad or steamed vegetables for a complete keto-friendly feast!
- 1 pound shrimp, peeled and deveined
- 1 medium head cauliflower, cut into florets
- 4 tablespoons unsalted butter
- 3 cloves garlic, minced
- 1 cup chicken broth
- 1/2 cup heavy cream
- 1 teaspoon smoked paprika
- Salt and pepper, to taste
- Fresh parsley, chopped (for garnish)
- Lemon wedges (for serving)
In a large pot, steam the cauliflower florets until tender, about 10 minutes. Meanwhile, in a skillet over medium heat, melt 2 tablespoons of butter and sauté the minced garlic until fragrant.
Add the shrimp, smoked paprika, salt, and pepper, cooking until the shrimp are pink and opaque, about 4-5 minutes. Once the cauliflower is cooked, blend it with the chicken broth, heavy cream, and remaining butter until smooth.
Season to taste, then serve the creamy cauliflower grits topped with the garlic shrimp and garnish with fresh parsley and lemon wedges.
When making Keto Shrimp and Cauliflower Grits, one tip to enhance flavors is to let your shrimp marinate in a bit of lemon juice and seasonings for 15-30 minutes before cooking. This not only adds depth of flavor but can also tenderize the shrimp slightly.
Additionally, for a touch of heat, consider adding a sprinkle of red pepper flakes to the shrimp while sautéing. Enjoy experimenting with spices to make the dish your own!