This post may contain affiliate links. Please read our policy page.
If you’re craving something sweet but short on time, you’ve got plenty of options! Try a quick microwave mug cake for a tasty treat in minutes, or whip up no-bake cheesecake bites for easy indulgence. Chocolate-dipped strawberries are simple yet impressive, while a fruit and yogurt parfait is a colorful, healthy choice. Don’t forget the 3-ingredient peanut butter cookies and chocolate avocado mousse for a delightful twist! There’s so much more to discover to satisfy your sweet tooth.
Microwave Mug Cake
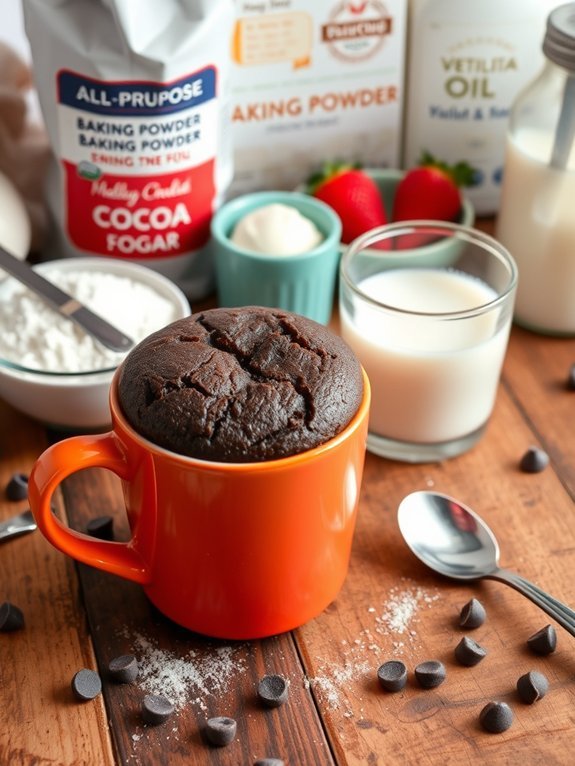
Microwave mug cakes are the perfect solution for a late-night sweet craving or a quick dessert fix. They’re super simple to make and require minimal ingredients and time. In just a few minutes, you can indulge in a warm, fluffy cake that’s cooked right in your own mug. This makes for a delightful treat, especially when you want something sweet without the fuss of baking an entire cake.
The beauty of a microwave mug cake is its versatility. You can customize it with different flavors and toppings to suit your taste. Whether you prefer chocolate, vanilla, or even a funfetti version, the possibilities are endless. Plus, it’s an excellent way to satisfy your sweet tooth without having to share!
Ingredients:
- 4 tablespoons all-purpose flour
- 4 tablespoons granulated sugar
- 2 tablespoons cocoa powder (for chocolate version)
- 1/8 teaspoon baking powder
- Pinch of salt
- 3 tablespoons milk
- 2 tablespoons vegetable oil
- 1/4 teaspoon vanilla extract
- Chocolate chips or nuts (optional)
In a microwave-safe mug, combine the dry ingredients: flour, sugar, cocoa powder, baking powder, and salt. Stir well to guarantee everything is evenly mixed.
Next, add the milk, vegetable oil, and vanilla extract to the mug, and mix until you have a smooth batter. If using chocolate chips or nuts, fold them into the batter.
Microwave the mug on high for about 1 minute and 30 seconds, or until the cake has risen and is set in the middle. Let it cool for a minute before digging in.
When making a microwave mug cake, keep an eye on the cooking time, as microwaves can vary in power. If your mug cake is undercooked, simply microwave it for an additional 10-15 seconds.
To prevent it from overflowing, don’t fill the mug more than halfway with batter. You can also top your mug cake with a scoop of ice cream or a dollop of whipped cream for an extra indulgent touch!
No-Bake Cheesecake Bites
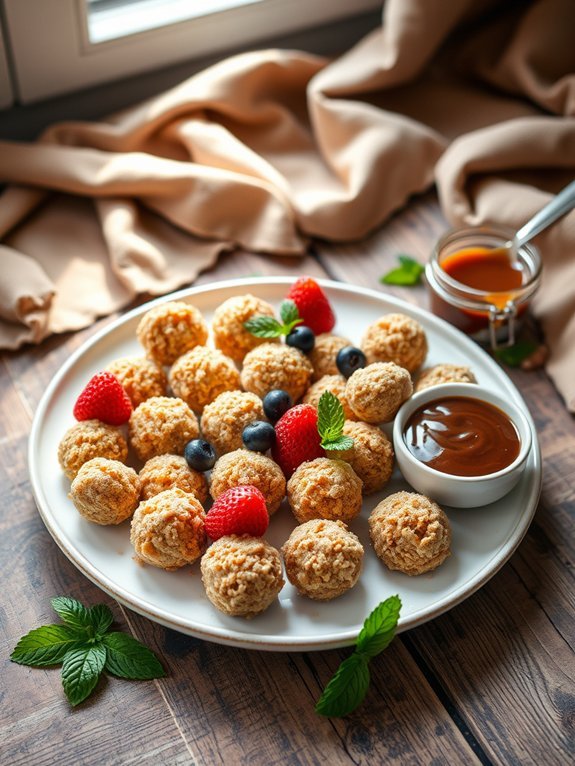
No-Bake Cheesecake Bites are the perfect treat for anyone looking to indulge in a sweet dessert without the hassle of baking. These little bites of creamy goodness are sure to satisfy your cheesecake cravings in a fraction of the time. The best part? You can easily customize them with your favorite toppings, making them a versatile and fun dessert option for any occasion.
This recipe isn’t only easy to follow but requires minimal ingredients, making it perfect for last-minute gatherings or when you simply want to treat yourself. With just a little time in the refrigerator, you’ll have a delightful dessert that’s rich, creamy, and incredibly delicious. Let’s explore the ingredients and get started on these No-Bake Cheesecake Bites!
- 8 oz cream cheese, softened
- 1/4 cup granulated sugar
- 1/2 tsp vanilla extract
- 1 cup whipped topping
- 1 cup graham cracker crumbs
- 2 tbsp melted butter
- Pinch of salt
- Toppings of your choice (e.g., chocolate chips, fruit, caramel sauce)
In a mixing bowl, combine the softened cream cheese, sugar, and vanilla extract, and beat until smooth. Gently fold in the whipped topping until well combined.
In a separate bowl, mix the graham cracker crumbs with melted butter and a pinch of salt. Roll the cream cheese mixture into small balls, then roll each ball in the graham cracker mixture to coat. Place the bites on a baking sheet lined with parchment paper and refrigerate for about 30 minutes before serving.
For an added touch, consider experimenting with different flavorings or toppings. You can mix in some lemon zest or a swirl of fruit preserves into the cream cheese mixture for a revitalizing twist. Dipping the bites in chocolate or drizzling them with caramel can elevate them even further.
Make sure to store any leftovers in an airtight container in the refrigerator—if they last that long!
Chocolate-Dipped Strawberries

Chocolate-dipped strawberries are a delightful treat that combines the freshness of ripe strawberries with the rich, indulgent flavor of chocolate. Perfect for special occasions or just a simple snack, this dessert is incredibly easy to prepare yet always impresses.
The sweetness of the strawberries pairs perfectly with the smooth melted chocolate, creating a delicious contrast in flavors and textures that’s sure to satisfy any sweet tooth. Whether you’re celebrating a romantic evening, hosting a party, or simply craving something sweet, chocolate-dipped strawberries are a go-to choice.
They take minimal time and effort, making them a fantastic option for both novice and experienced cooks. With just a few simple ingredients, you can achieve a stunning dessert that looks as good as it tastes.
- Fresh strawberries
- 1 cup of chocolate chips (dark, milk, or white chocolate)
- 1 tablespoon of coconut oil (optional, for a smoother consistency)
- Parchment paper (for cooling)
To prepare, begin by washing the strawberries gently under cool water and drying them thoroughly with a paper towel; moisture can prevent the chocolate from adhering properly.
In a microwave-safe bowl, combine the chocolate chips and coconut oil (if using). Microwave the mixture in 30-second intervals, stirring after each interval until fully melted and smooth.
Hold the strawberries by the green tops and dip them into the melted chocolate, covering them about two-thirds of the way up. Allow any excess chocolate to drip off before placing them on a parchment-lined baking sheet.
Repeat the process with all strawberries and let them cool until the chocolate sets. To add an extra touch, consider garnishing your chocolate-dipped strawberries with sprinkles, crushed nuts, or a drizzle of contrasting chocolate.
For the best results, make sure to use ripe strawberries that are firm and at their peak flavor. It’s also important to let the melted chocolate cool slightly before dipping to prevent it from being too hot, which can cause the strawberries to wilt or lose their freshness quickly.
Enjoy your delicious creations, whether you savor them alone or share them with others!
Vanilla Pudding Parfaits

Vanilla pudding parfaits are the perfect dessert for any occasion, combining the smooth creaminess of homemade vanilla pudding with layers of light and airy whipped cream and your favorite toppings. This quick and simple dessert not only satisfies your sweet tooth but also allows for endless creativity with flavors and textures.
Whether you’re hosting a dinner party or simply treating yourself at home, these parfaits can be assembled in minutes and are sure to impress with their elegant look and delicious taste.
Making vanilla pudding from scratch may seem intimidating, but once you’ve mastered this basic recipe, you’ll find yourself using it in various desserts. The key to a perfect pudding is to stir constantly while cooking to prevent lumps and achieve that silky texture. Layering the pudding with whipped cream and toppings adds a delightful crunch and sweetness, making each bite a delicious experience.
- 2 cups whole milk
- 1/2 cup granulated sugar
- 1/4 cup cornstarch
- 1/4 teaspoon salt
- 1 tablespoon unsalted butter
- 2 teaspoons vanilla extract
- 1 cup heavy whipping cream
- 2 tablespoons powdered sugar
- Fresh berries or crumbled cookies for layering
In a medium saucepan, whisk together the milk, sugar, cornstarch, and salt over medium heat. Stir constantly until the mixture thickens and begins to bubble.
Remove from heat and stir in the butter and vanilla extract. Let the pudding cool for a few minutes, then cover it with plastic wrap directly on the surface to prevent a skin from forming.
In a separate bowl, beat the heavy whipping cream and powdered sugar until soft peaks form. Once the pudding is cool, assemble your parfaits by layering pudding, whipped cream, and your choice of berries or cookie crumbles in clear cups or glasses.
When making these vanilla pudding parfaits, feel free to customize the layers based on your preferences or what you have on hand. You can use flavored extracts, such as almond or coconut, to create a twist on the classic vanilla.
For added richness, consider folding in some cream cheese into the whipped cream. Additionally, let your creativity shine by selecting seasonal fruits for a revitalizing touch or incorporating chocolate shavings and nuts for extra crunch.
Remember to chill the parfaits before serving for the best flavor and texture!
3-Ingredient Peanut Butter Cookies
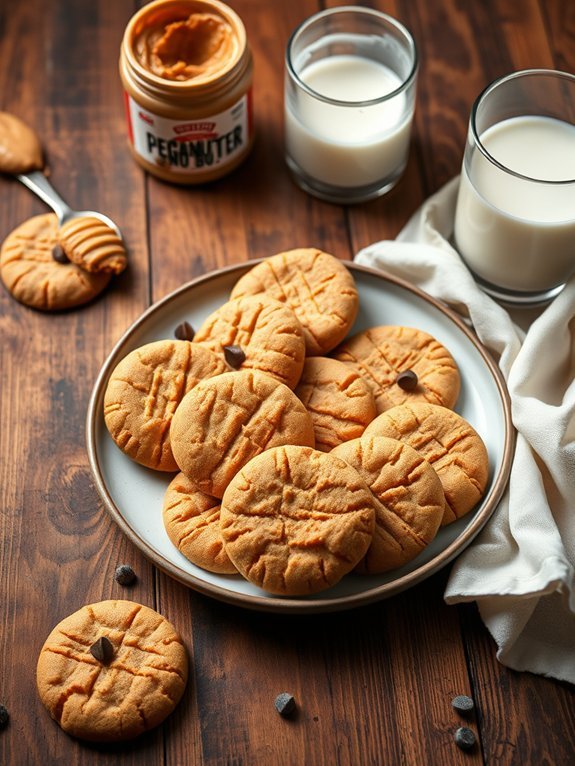
Peanut butter cookies are a classic treat that combines the rich, nutty flavor of peanut butter with a soft, chewy texture that makes them irresistible. These cookies are simple to make, requiring minimal ingredients that you likely already have in your pantry. Perfect for a quick dessert or an afternoon snack, peanut butter cookies provide a delightful way to satisfy your sweet tooth with little effort.
Whether you’re baking for a family gathering, a potluck, or just treating yourself, these cookies are sure to bring a smile to everyone who tastes them. You can also easily personalize this recipe by adding chocolate chips, oats, or your favorite nuts for an extra touch. Follow this straightforward recipe, and you’ll have warm, homemade peanut butter cookies ready in no time!
- 1 cup peanut butter
- 1 cup granulated sugar
- 1 egg
- 1 teaspoon baking soda
- 1 teaspoon vanilla extract
- Pinch of salt
In a large mixing bowl, combine the peanut butter, sugar, egg, baking soda, vanilla extract, and salt until the mixture is smooth and fully blended. Preheat your oven to 350°F (175°C) and prepare a baking sheet by lining it with parchment paper. Scoop tablespoon-sized amounts of the dough onto the sheet, spacing them about 2 inches apart. Use a fork to gently press down on each dough ball, creating a crisscross pattern.
Bake for 10-12 minutes, or until the edges are lightly golden. Allow the cookies to cool on the baking sheet for a few minutes before transferring them to a wire rack to cool completely.
One key tip for perfect peanut butter cookies is to ascertain your peanut butter is well-mixed if you’re using natural peanut butter, as the oil can separate. Additionally, for softer cookies, avoid overbaking them, as they’ll continue to firm up as they cool. If you prefer a more intense peanut flavor, try using crunchy peanut butter instead of smooth, or fold in some chocolate chips for a delicious variation.
Enjoy your homemade cookies with a glass of milk or as an after-dinner treat!
Banana Ice Cream
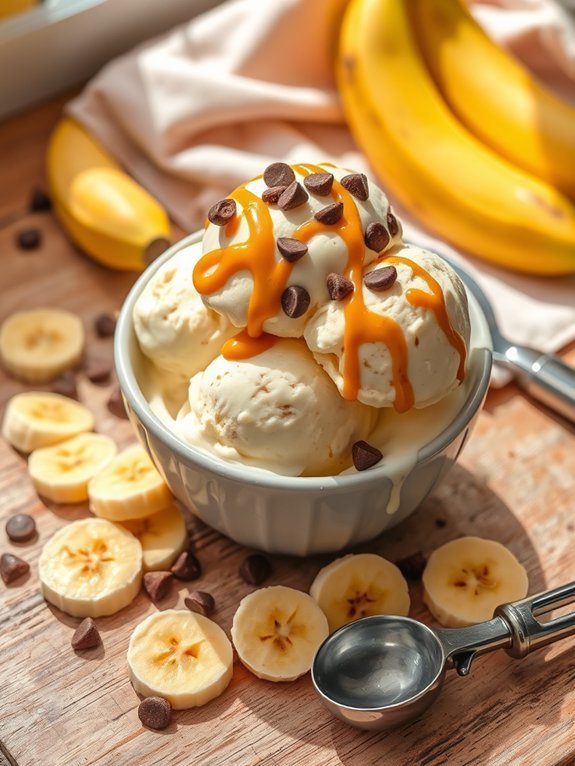
Banana ice cream is a delightful and health-conscious dessert that requires just a few simple steps to make. This creamy treat isn’t only delicious and invigorating, but it’s also a fantastic way to satisfy your sweet tooth without relying on heavy creams or added sugars. By using ripe bananas as the base, you transform the fruit into a decadent ice cream that’s rich in flavor yet light on calories.
The beauty of banana ice cream lies in its versatility. You can enjoy it plain or add other ingredients to customize the flavor profile according to your preference. Whether you opt for a swirl of peanut butter, a sprinkle of chocolate chips, or a handful of nuts, this banana ice cream can be tailored to meet your taste. As a bonus, it’s an excellent way to use up overripe bananas that would otherwise go to waste.
- 3 ripe bananas
- 1 tablespoon of nut butter (optional)
- ¼ teaspoon of vanilla extract (optional)
- Pinch of salt (optional)
Slice the bananas into thick pieces and freeze them for a minimum of two hours or until solid. Once frozen, place the banana slices in a food processor and blend until smooth and creamy, scraping down the sides as needed. If desired, add the nut butter, vanilla extract, and salt to enhance the flavor. Continue to blend until everything is well combined and the consistency resembles soft-serve ice cream.
Scoop the mixture into a bowl, and you can serve it immediately or transfer it to an airtight container to freeze for a firmer texture.
For the perfect banana ice cream, verify that your bananas are very ripe; the more speckles they have, the sweeter they’ll taste. If you want a creamier texture, let the ice cream sit at room temperature for a few minutes before serving to soften it slightly.
Additionally, feel free to experiment by incorporating other fruits, like berries or mango, for a unique twist on this classic recipe.
Quick Berry Crumble
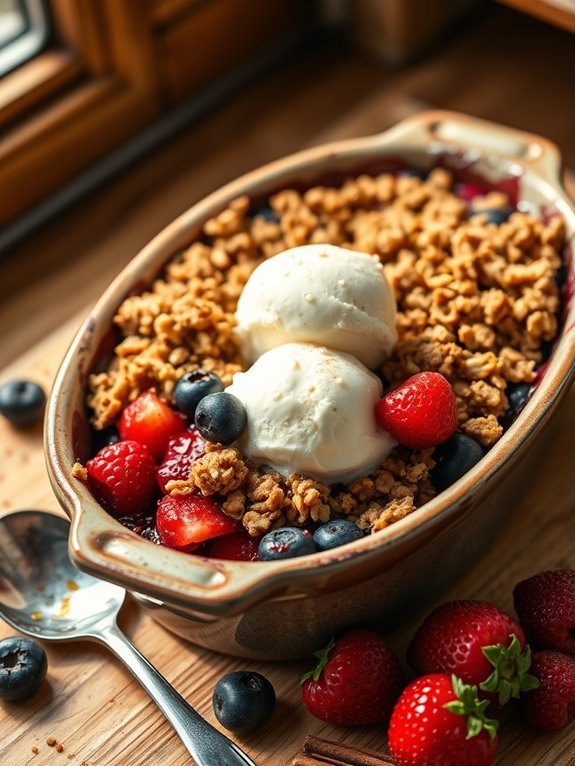
When you’re craving a sweet treat but don’t want to spend too much time in the kitchen, a Quick Berry Crumble is your perfect solution. This delightful dessert combines the natural sweetness of fresh berries with a crumbly topping that’s both satisfying and easy to whip up. You can use any combination of berries you have on hand, be it blueberries, raspberries, strawberries, or blackberries. The best part? This recipe can be prepared in under 30 minutes, making it ideal for both busy weeknights and impromptu gatherings.
The beauty of a crumble lies in its simplicity. With minimal ingredients required, you can achieve a gourmet taste with little effort. Whether served warm with a scoop of vanilla ice cream or at room temperature, the Quick Berry Crumble is sure to impress. Let’s explore the ingredients and cooking methods needed to create this sweet dish in no time.
- 2 cups mixed fresh berries (e.g., blueberries, raspberries, strawberries, blackberries)
- 1/4 cup granulated sugar
- 1 tablespoon cornstarch
- 1 teaspoon vanilla extract
- 1 cup rolled oats
- 1/2 cup all-purpose flour
- 1/4 cup brown sugar
- 1/2 teaspoon cinnamon
- 1/4 cup unsalted butter, melted
- Pinch of salt
In a bowl, combine the mixed berries with granulated sugar, cornstarch, and vanilla extract, then gently toss to coat the berries evenly. Transfer the berry mixture to a greased baking dish.
In another bowl, mix the rolled oats, flour, brown sugar, cinnamon, melted butter, and salt until crumbly. Spread the oat mixture over the berries. Bake in a preheated oven at 350°F (175°C) for about 20 minutes, or until the topping is golden and the berries are bubbly.
For the best results, make sure to use ripe, fresh berries, as they’ll enhance the flavor of the crumble. If you prefer a healthier option, consider swapping out half of the all-purpose flour for whole wheat flour or adding nuts to the topping for extra crunch.
Serve your crumble with a dollop of whipped cream or a scoop of ice cream to elevate the dessert even further. Enjoy this simple yet delicious treat!
S’mores Dip
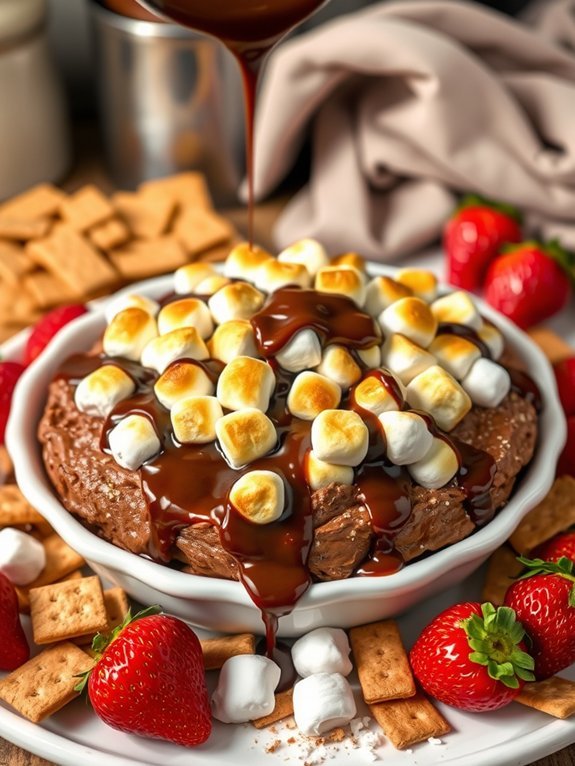
S’mores Dip is a delightful twist on the classic campfire treat, allowing you to enjoy the flavors of chocolate, marshmallows, and graham crackers without the hassle of an open flame. This dessert is perfect for gatherings, parties, or simply a cozy night in. It captures the essence of s’mores in a warm, gooey dip that can be easily shared among friends and family.
Making S’mores Dip isn’t only quick and easy, but it also requires minimal cleanup, making it an ideal choice for those who want to indulge in a sweet treat without a lot of fuss. By melting chocolate and marshmallows together in the oven or on the stovetop, you create a dip that’s perfect for scooping with graham crackers, strawberries, or even pretzels.
Get ready to bring a fun and interactive dessert to your table!
Ingredients:
- 1 cup semi-sweet chocolate chips
- 1 cup mini marshmallows
- 1 tablespoon butter
- 1 teaspoon vanilla extract
- 6-8 graham crackers, broken into pieces
- Optional toppings: crushed graham cracker crumbs, chocolate sauce, or caramel sauce
In a medium oven-safe dish, combine the semi-sweet chocolate chips and butter. Place the dish in a preheated oven at 375°F (190°C) until the chocolate is melted, about 5 minutes. Remove from the oven and stir in the vanilla extract.
Evenly top the melted chocolate with mini marshmallows, returning the dish to the oven for an additional 5-7 minutes, or until the marshmallows are golden and gooey. Serve warm alongside graham cracker pieces for dipping.
When making S’mores Dip, consider adding your personal twist by mixing in other ingredients, such as peanut butter or caramel, to enhance the flavor.
Keep an eye on the marshmallows while they’re baking to ascertain they don’t burn; you want them beautifully toasted. For an even more indulgent experience, drizzle some chocolate or caramel sauce over the top just before serving and add a sprinkling of crushed graham cracker for added texture.
Enjoy this dessert straight out of the dish for a fun and interactive treat!
Recommended Items
Dive into our delightful selection of must-have ingredients and tools for your dessert-making adventure!
Chocolate Avocado Mousse
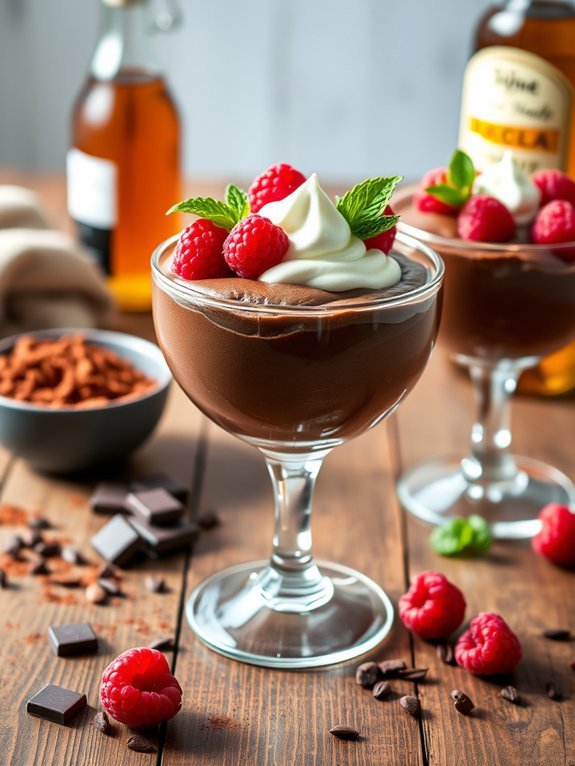
Chocolate avocado mousse is a delightful treat that combines the creaminess of ripe avocados with rich dark chocolate for a decadent dessert that’s surprisingly healthy. This vegan-friendly recipe isn’t only easy to prepare but also packed with nutrients, making it a guilt-free indulgence that everyone will love. The natural fats from the avocado contribute a smooth texture while ensuring that the mousse is incredibly satisfying.
To make this dessert, you’ll need just a few basic ingredients that you might already have in your pantry. This recipe is perfect for those spontaneous dessert cravings, requiring minimal effort with maximum results. Whether you’re hosting a dinner party or craving something sweet on a quiet night in, this chocolate avocado mousse will certainly impress.
- 2 ripe avocados
- 1/2 cup unsweetened cocoa powder
- 1/3 cup maple syrup or honey
- 1/4 cup almond milk (or any milk of your choice)
- 1 teaspoon vanilla extract
- A pinch of salt
In a blender or food processor, combine the ripe avocados, cocoa powder, maple syrup (or honey), almond milk, vanilla extract, and a pinch of salt. Blend until the mixture becomes smooth and creamy, ensuring there are no lumps.
You can taste and adjust the sweetness, adding more maple syrup or honey if desired. Once blended, transfer the mousse into serving bowls or glasses and chill it in the refrigerator for about 30 minutes to allow the flavors to meld together.
For an extra touch, feel free to garnish the mousse with toppings such as fresh berries, whipped coconut cream, or a sprinkle of sea salt. You can also experiment with flavors by adding a dash of espresso or a hint of peppermint extract for a unique twist.
This dessert is best enjoyed fresh but can be stored in an airtight container in the refrigerator for up to two days. Just give it a quick stir before serving, as it may thicken slightly when chilled.
Fruit and Yogurt Parfait

Fruit and yogurt parfaits are a delightful and invigorating dessert that are incredibly easy to prepare. They’re perfect for warm weather and can be customized to include your favorite fruits or flavored yogurts. The layers of creamy yogurt, vibrant fruit, and crunchy granola not only create a visually appealing dish, but they also offer a satisfying combination of textures and flavors.
Whether you’re looking for a quick sweet treat, a healthy snack, or a light dessert after a meal, fruit and yogurt parfaits deliver on all fronts. They can be made in just a matter of minutes and can be served in individual cups or bowls, making them a charming addition to any gathering or brunch. With a few simple ingredients, you can create a nutritious treat that will impress your family and friends.
- 2 cups of your favorite yogurt (plain or flavored)
- 2 cups of mixed berries (strawberries, blueberries, raspberries)
- 1 cup of granola
- 1 tablespoon of honey or maple syrup (optional)
- Mint leaves for garnish (optional)
In a clear glass or bowl, begin by adding a layer of yogurt to the bottom, followed by a layer of mixed berries, then a layer of granola. Repeat the layers until all ingredients are used, finishing with a layer of fruit on top. Drizzle honey or maple syrup over the top if desired, and garnish with a sprig of mint for an extra touch.
When preparing fruit and yogurt parfaits, feel free to get creative with the ingredients. You can substitute the yogurt for dairy-free options like almond or coconut yogurt if you’re looking for a vegan alternative.
Also, try experimenting with different fruits throughout the seasons for variety. Keep in mind that the parfaits can be made a few hours ahead of time; just be aware that granola may lose its crunch if stored too long with the yogurt. Enjoy your delicious, healthy dessert!
Quick and Simple Dessert Guide
Easy Rice Pudding
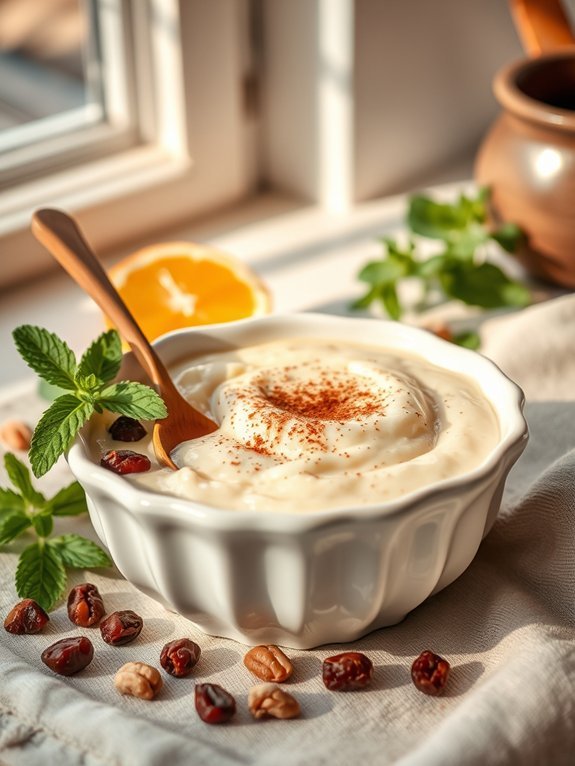
Rice pudding is a classic dessert that has warmed hearts and homes for generations. Its creamy, comforting texture and delightful flavor make it a wonderful option for satisfying sweet cravings. Not only is it incredibly easy to make, but it also offers a versatile base, allowing you to customize it with your favorite toppings or spices.
Whether enjoyed warm on a chilly evening or chilled for a revitalizing summertime treat, rice pudding is sure to please. Making rice pudding requires minimal ingredients and very little time, making it an ideal dessert for beginners or seasoned cooks alike. You can easily turn leftover rice into a delicious dessert, or whip it up from scratch with just a few pantry staples.
This recipe brings together simple components to create a delightful dish that everyone will love.
- 1 cup uncooked rice
- 4 cups milk
- 1/2 cup sugar
- 1 teaspoon vanilla extract
- 1/2 teaspoon ground cinnamon
- A pinch of salt
- Optional toppings: raisins, nuts, or whipped cream
Rinse the uncooked rice under cold water until the water runs clear, then combine it with the milk, sugar, vanilla extract, cinnamon, and salt in a large saucepan. Bring the mixture to a gentle boil over medium heat, then reduce the heat to low.
Simmer uncovered, stirring often, for about 20 to 25 minutes or until the rice is tender and the pudding has thickened to your desired consistency. To enhance your rice pudding, feel free to experiment with different add-ins and toppings. For an extra depth of flavor, consider adding citrus zest, such as lemon or orange, while cooking.
You can also substitute some of the milk with coconut milk for a tropical twist. If you enjoy a creamier texture, stir in a dollop of heavy cream or a spoonful of butter before serving. Remember to let it cool slightly before serving if you’re using raisins, as they may become too hot during cooking.
Instant Chocolate Flourless Cake
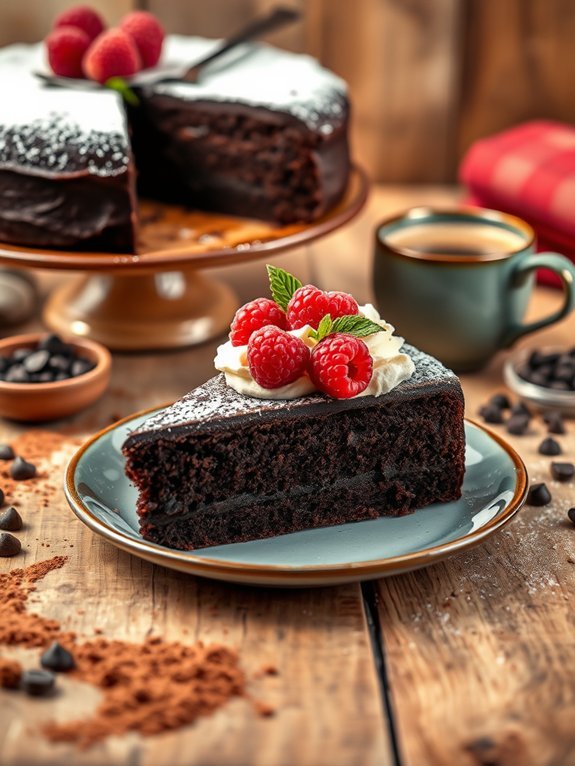
If you’re in the mood for a rich and decadent dessert but don’t want to spend hours in the kitchen, then this Instant Chocolate Flourless Cake is the perfect solution.
With its dense texture and chocolatey flavor, it’s a truly indulgent treat that has the added bonus of being gluten-free. All you need are a few pantry staples, and in no time, you can indulge in a slice—or two—of this delightful cake.
This recipe is incredibly straightforward and can be whipped up in under an hour. It’s perfect for unexpected guests or a last-minute dinner party.
The cake can be dressed up with a dusting of powdered sugar or served with a dollop of whipped cream and fresh berries for a touch of elegance. Regardless of how you choose to serve it, this cake is sure to impress.
Ingredients
- 1 cup dark chocolate chips (or chopped chocolate)
- ½ cup unsalted butter
- ¾ cup granulated sugar
- 3 large eggs
- 1 teaspoon vanilla extract
- ½ cup unsweetened cocoa powder
- ¼ teaspoon salt
Melt the dark chocolate and butter together in a microwave-safe bowl, stirring every 30 seconds until smooth.
In a separate large bowl, whisk together the sugar, eggs, and vanilla until light and frothy.
Slowly incorporate the melted chocolate mixture into the egg mixture, followed by the cocoa powder and salt.
Pour the batter into a greased round cake pan and bake in a preheated oven at 350°F (175°C) for about 25 minutes, or until a toothpick comes out with moist crumbs.
For the best results, make sure to let the cake cool completely in the pan before transferring it to a wire rack. This helps maintain its shape and prevents it from breaking apart.
Additionally, you can experiment with different types of chocolate, such as semi-sweet or bittersweet, to find your perfect flavor balance.
Serving it warm enhances its fudginess, but it also tastes wonderful once cooled. If you want a richer flavor, consider pairing the cake with a scoop of vanilla ice cream or a sprinkle of sea salt on top.

