This post may contain affiliate links. Please read our policy page.
Looking for quick and tasty meal ideas? Try wraps like the Classic Turkey and Avocado Wrap and Caprese Salad Wrap, or go for hearty sandwiches like the BBQ Chicken or Reuben. You can mix flavors with a Sweet Potato and Black Bean Wrap or a Spicy Tuna Salad Sandwich. These meals are customizable, nutritious, and perfect for any time of day. Keep exploring, and you’ll discover even more delicious ways to satisfy your cravings.
Classic Turkey and Avocado Wrap
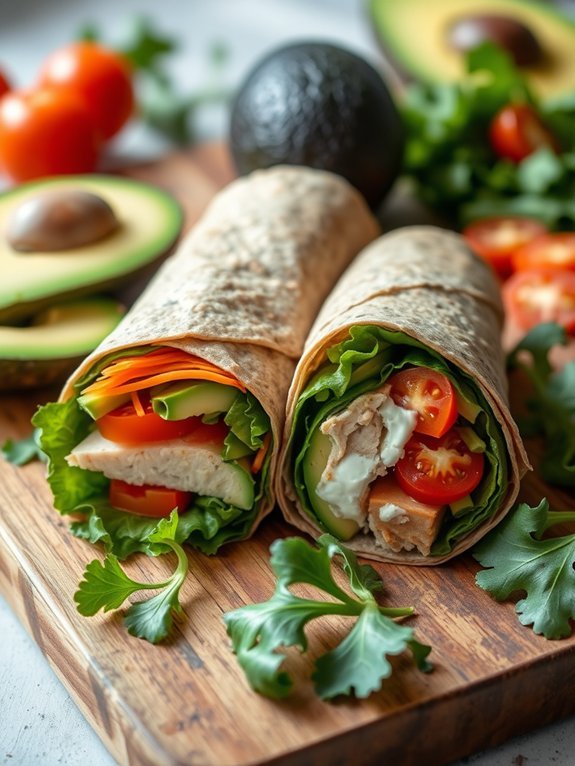
The Classic Turkey and Avocado Wrap is a delightful and nutritious meal option that’s perfect for lunch or a quick dinner. With an ideal combination of protein from the turkey, healthy fats from the avocado, and fresh vegetables, this wrap provides a satisfying and balanced meal. Not only is it simple to prepare, but it can also be customized with your favorite ingredients to suit your taste.
Making a turkey and avocado wrap is a great way to utilize deli meats and fresh produce, ensuring you have a healthy meal ready in minutes. The creamy texture of the avocado pairs perfectly with the savory turkey and crunchy vegetables, creating a symphony of flavors and textures. This wrap isn’t just delicious; it’s also portable, making it an excellent choice for lunches on the go or picnics in the park.
- 1 large whole wheat or spinach wrap
- 4-6 slices of deli turkey breast
- 1 ripe avocado, sliced
- 1 cup mixed greens (such as spinach, arugula, or romaine)
- 1 small tomato, sliced
- 1/4 cup shredded carrots
- 1 tablespoon mayonnaise or Greek yogurt (optional)
- Salt and pepper to taste
Lay your wrap flat on a clean surface and spread the mayonnaise or Greek yogurt evenly if using. Layer the turkey slices, avocado, mixed greens, tomato, and shredded carrots on top. Season with salt and pepper to taste.
Fold in the sides of the wrap and roll it tightly from the bottom to the top, ensuring all the fillings are enclosed. Slice in half diagonally for easy consumption.
When making this wrap, feel free to add or substitute ingredients based on your preference. You might consider adding cheese, cucumbers, or different types of lettuce for extra crunch. Additionally, to elevate the flavor, try adding a splash of lemon or lime juice over the avocado before wrapping it, which will also help to prevent browning. Enjoy your healthy, homemade turkey and avocado wrap!
Mediterranean Veggie Pita
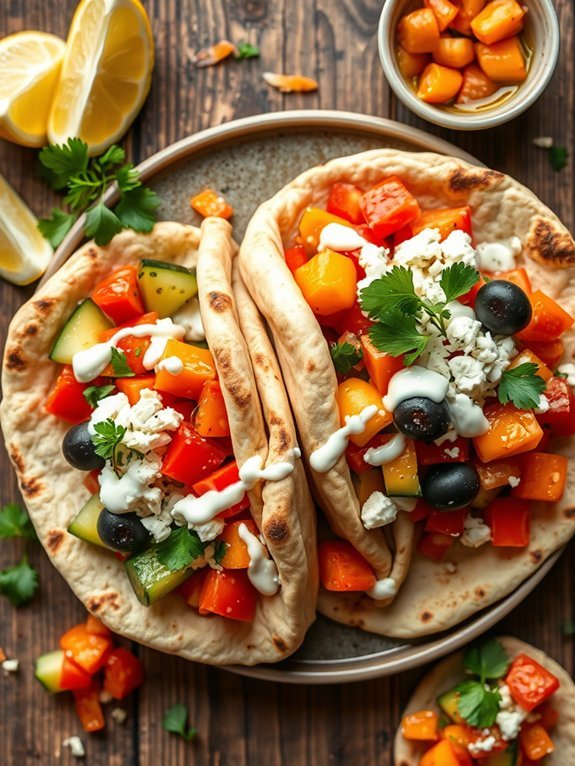
Mediterranean Veggie Pita is a delightful dish that brings the vibrant flavors of the Mediterranean to your table, wrapped in a soft, warm pita.
Perfect for a quick lunch or a wholesome snack, this recipe is packed with fresh vegetables, creamy feta cheese, and zesty tzatziki sauce that all come together for a revitalizing bite. The combination of crunchy cucumbers, ripe tomatoes, and colorful bell peppers not only looks appealing but also provides a nutritious punch to satisfy your cravings.
What makes the Mediterranean Veggie Pita particularly special is its versatility. You can customize the filling based on seasonal produce or what you have on hand. This dish is vegetarian-friendly, making it a fantastic option for meatless meals. It’s simple to prepare, allowing you to whip it up in under 30 minutes, making it an ideal choice for busy weeknights or casual get-togethers.
Ingredients:
- 2 whole wheat pita pockets
- 1 cup of diced cucumbers
- 1 cup of cherry tomatoes, halved
- 1/2 cup of bell peppers, diced (red, yellow, or green)
- 1/2 cup of shredded carrots
- 1/4 cup of red onion, thinly sliced
- 1/2 cup of crumbled feta cheese
- 1/4 cup of kalamata olives, pitted and sliced
- 1/4 cup of tzatziki sauce
- Fresh parsley, for garnishing
- Salt and pepper to taste
To prepare the Mediterranean Veggie Pita, start by lightly heating the pitas in a dry skillet over medium heat for about 1-2 minutes on each side until warm.
While the pitas heat, prepare the veggie filling by combining the cucumbers, cherry tomatoes, bell peppers, shredded carrots, red onion, feta cheese, and olives in a large bowl.
Season the mixture with salt and pepper, then toss to combine. Once the pitas are warm, carefully open them up and fill each with the veggie mixture.
Drizzle the tzatziki sauce inside before garnishing with fresh parsley.
For an extra burst of flavor, consider adding grilled zucchini or roasted red peppers to the filling. If you prefer a bit more protein, feel free to include chickpeas or even grilled chicken for a heartier version.
These pitas also make fantastic leftovers; simply store the filling and pitas separately to maintain freshness, and assemble when you’re ready to enjoy again.
BBQ Chicken Sandwich
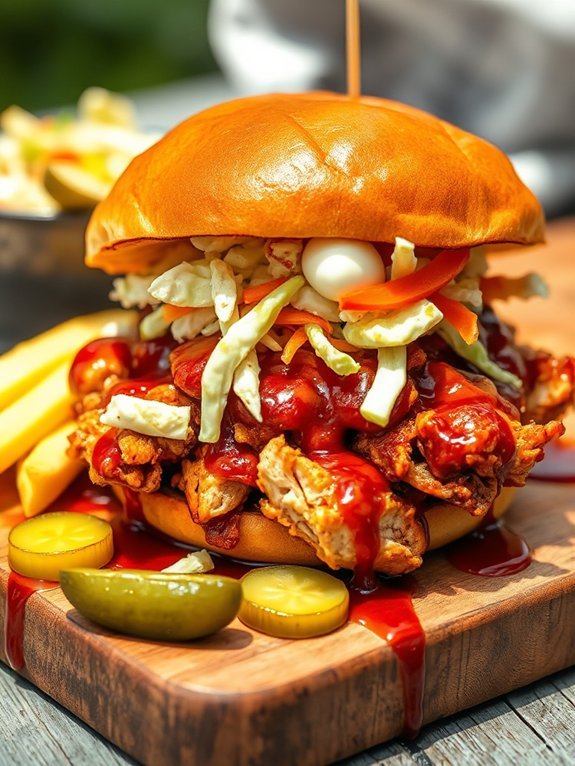
BBQ chicken sandwiches are a beloved comfort food, perfect for casual gatherings or a quick weeknight dinner. They aren’t only easy to prepare, but the combination of smoky BBQ flavors with tender chicken makes them a crowd-pleaser.
Whether served on a toasted bun or accompanied by homemade coleslaw, these sandwiches bring a taste of summer to the table year-round.
To start, you’ll need either grilled or cooked chicken breasts. Shredded chicken works great for this recipe and can be prepared in advance. The key ingredient is your favorite BBQ sauce, which infuses the chicken with flavor and zest.
For an extra layer of texture and taste, consider adding toppings like crispy pickles or creamy coleslaw. These ingredients come together to create a delicious meal that’s bound to satisfy your cravings.
Ingredients:
- 2 cups shredded cooked chicken
- 1 cup BBQ sauce (store-bought or homemade)
- 4 hamburger buns
- 1 cup coleslaw (optional)
- Sliced pickles (optional)
- 1 tablespoon olive oil (for toasting the buns)
- Salt and pepper, to taste
In a mixing bowl, combine the shredded chicken and BBQ sauce, stirring well to guarantee the chicken is evenly coated. Heat the mixture in a skillet over medium heat until warmed through, about 5-7 minutes.
Meanwhile, lightly toast the hamburger buns in a separate skillet with olive oil to achieve a nice golden color. Once everything is hot and ready, pile the BBQ chicken onto the toasted buns, add a layer of coleslaw and pickles (if using), then close the sandwiches.
When preparing your BBQ chicken sandwiches, feel free to experiment with different BBQ sauces to find the flavor that suits you best, whether it’s sweet, spicy, or smoky.
Additionally, for an added flavor boost, you can marinate the chicken in the BBQ sauce for a couple of hours before cooking. Keep any leftover BBQ chicken in the fridge for up to three days, making it easy to whip up a quick meal later in the week.
Recommended Items
Get ready to elevate your wrap and sandwich game with these must-have ingredients and tools!
Products
Caprese Salad Wrap

The Caprese Salad Wrap is a delightful twist on the classic Italian salad that combines fresh flavors into a portable meal. This dish is perfect for a light lunch, picnic, or even as a quick dinner option, allowing you to enjoy the traditional taste of a Caprese salad while on the go.
With just a few fresh ingredients rolled up in a wrap, you can savor the taste of basil, mozzarella, and tomatoes all in one bite. To make this summer-inspired wrap, you’ll want to choose quality ingredients for the freshest flavor. Fresh basil leaves, ripe tomatoes, and creamy mozzarella add not only taste but also vibrant colors to your dish.
The use of a soft tortilla or wrap guarantees that everything stays together while being easy to eat, making it a great option for lunchboxes or gatherings.
- Large flour tortillas or wraps
- Fresh mozzarella cheese, sliced
- Ripe tomatoes, sliced
- Fresh basil leaves
- Balsamic glaze
- Salt and pepper to taste
To prepare, start by laying your tortilla or wrap flat on a clean surface. Layer the fresh mozzarella slices, tomato slices, and basil leaves evenly across the center of the tortilla. Drizzle a little balsamic glaze over the top, and season with salt and pepper.
Carefully fold in the edges of the tortilla, then roll it up tightly from the bottom to the top, making sure all the ingredients are enclosed. For an extra boost of flavor, try adding a spread like pesto or hummus to the tortilla before laying down your fillings.
You can also experiment with different types of wraps, such as spinach or whole wheat, for added nutrition and flavor. If you have extra fillings or leftovers, consider making a layered salad in a jar for a quick meal prep option or serving the wrap with a side of mixed greens dressed lightly with olive oil and vinegar.
Enjoy your Caprese Wrap as a fresh and tasty meal anytime!
Spicy Tuna Salad Sandwich

The Spicy Tuna Salad Sandwich is a zesty twist on a classic favorite, perfect for a quick lunch or a satisfying snack. With its blend of creamy textures, spicy kick, and the freshness of herbs, this sandwich offers an appealing contrast that tantalizes the taste buds.
Whether you’re packing it for a picnic or enjoying it at home, this recipe is sure to become a go-to for any tuna lover seeking an extra kick.
Making your spicy tuna salad sandwich isn’t only easy but also allows you to customize it according to your taste preferences. You can tweak the spice level by adjusting the amount of sriracha you use or by adding other ingredients like diced jalapeños or chopped red onions.
Served on your favorite bread, this sandwich is versatile enough to be enjoyed any day of the week and can be paired with a side of chips or a fresh salad for a complete meal.
Ingredients:
- 1 can (5 oz) of tuna, drained
- 2 tablespoons mayonnaise
- 1 tablespoon sriracha (or to taste)
- 1 tablespoon diced pickles
- 1 tablespoon chopped green onions
- Salt and pepper, to taste
- 2 slices of bread (whole grain, sourdough, or your choice)
- Leafy greens (such as spinach or lettuce)
- Optional: sliced avocado or tomato
Combine the drained tuna with mayonnaise, sriracha, diced pickles, and chopped green onions in a bowl. Mix well, then season with salt and pepper to taste.
Spread the spicy tuna salad between two slices of your preferred bread, adding leafy greens and any additional toppings like avocado or tomato. Cut the sandwich in half and serve immediately, or wrap it up to enjoy later.
When preparing your spicy tuna salad sandwich, consider chilling the salad for 15-30 minutes before assembling the sandwich. This allows the flavors to meld together beautifully.
Additionally, if you’re a fan of crunch, adding celery or diced bell peppers can enhance the texture of the filling.
Finally, don’t hesitate to experiment with different types of bread, such as a baguette or ciabatta, to elevate your sandwich experience.
Hummus and Roasted Vegetable Wrap
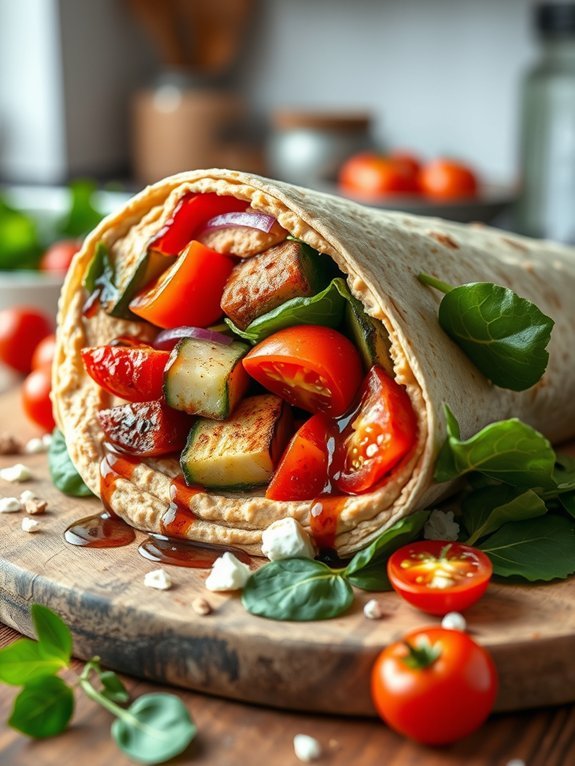
Hummus and roasted vegetable wraps are a delightful and nutritious option for lunch or a light dinner. They offer a wonderful combination of flavors and textures, making them satisfying yet healthy. Roasting vegetables enhances their natural sweetness and flavors, while the creamy, rich hummus adds a wonderful contrast. This wrap isn’t only simple to prepare, but it’s also fully customizable depending on your favorite vegetables and hummus flavors.
These wraps are perfect for meal prep, as you can roast a batch of vegetables in advance and keep them on hand for easy assembly. Additionally, they’re a great way to use up any leftover vegetables you may have in your fridge. Serve these wraps cold or warm, depending on your preference, and enjoy a bite of wholesome goodness in every mouthful.
Ingredients:
- 4 large whole wheat tortillas or wraps
- 1 cup hummus (store-bought or homemade)
- 1 red bell pepper, sliced
- 1 zucchini, sliced
- 1 cup cherry tomatoes, halved
- 1 red onion, sliced
- 2 tablespoons olive oil
- Salt and pepper, to taste
- Fresh spinach or mixed greens (optional)
- Feta cheese or avocado (optional)
Toss your sliced vegetables with olive oil, salt, and pepper, then spread them evenly on a baking sheet. Roast in a preheated oven at 400°F (200°C) for about 20-25 minutes, or until they’re tender and slightly caramelized.
Once the vegetables are done, remove them from the oven and let them cool slightly. To assemble the wraps, spread a generous layer of hummus over each tortilla, add a layer of roasted vegetables, and top with fresh spinach or mixed greens if desired. Roll the tortillas tightly, slice in half, and enjoy!
When preparing hummus and roasted vegetable wraps, feel free to experiment with different types of hummus such as roasted red pepper, garlic, or spicy harissa for added flavor. You can also switch up the vegetables depending on the season, incorporating things like eggplant, squash, or asparagus.
Wrapping tightly and cutting diagonally can make the wraps easier to eat and serve. Adding a drizzle of balsamic glaze or a squeeze of lemon juice before rolling can elevate the taste even further.
Proposed Recipe
Italian Submarine Sandwich

The Italian Submarine Sandwich, or simply the Italian Sub, is a delightful culinary experience that combines a variety of flavorful ingredients nestled in a fresh, crusty sub roll. This sandwich brings together a mix of deli meats, cheeses, and classic Italian toppings, making it a perfect choice for a hearty lunch or a casual dinner. With its enticing mix of flavors, this sandwich is sure to please everyone at the table.
Creating an authentic Italian sub at home allows you to customize the ingredients according to your taste preferences. Whether you enjoy the tanginess of pickles or the spice of pepperoncini, you can create your perfect combination. Paired with a drizzle of olive oil and a few leaves of fresh basil, this sandwich truly captures the essence of Italian cuisine.
- 1 large sub roll or hoagie bread
- 4 slices of provolone cheese
- 4 slices of salami
- 4 slices of capicola
- 4 slices of ham
- 4 slices of pepperoni
- Handful of lettuce (romaine or iceberg)
- 1 small tomato, sliced
- ¼ red onion, thinly sliced
- Pepperoncini (optional)
- Olive oil
- Balsamic vinegar
- Salt and pepper to taste
To assemble the Italian Submarine Sandwich, start by slicing the sub roll lengthwise without cutting all the way through. Layer the provolone cheese on one side. Next, stack the salami, capicola, ham, and pepperoni evenly over the cheese.
Add the lettuce, tomato slices, and red onion on top of the meats. If desired, include pepperoncini for some added heat. Drizzle a generous amount of olive oil and a splash of balsamic vinegar over the toppings, and season with salt and pepper. Close the sandwich, press down gently, and optionally wrap it in parchment paper to help meld the flavors together before serving.
For an elevated flavor experience, consider toasting the sandwich lightly in the oven or on a griddle. This can help melt the cheese slightly and warm the meats, creating a satisfying texture.
Additionally, feel free to experiment with different types of bread, such as ciabatta or focaccia, for a unique twist on tradition. Finally, serving the sandwich with a side of homemade Italian pasta salad or chips can create a complete meal that echoes the spirit of Italian dining.
Breakfast Burrito
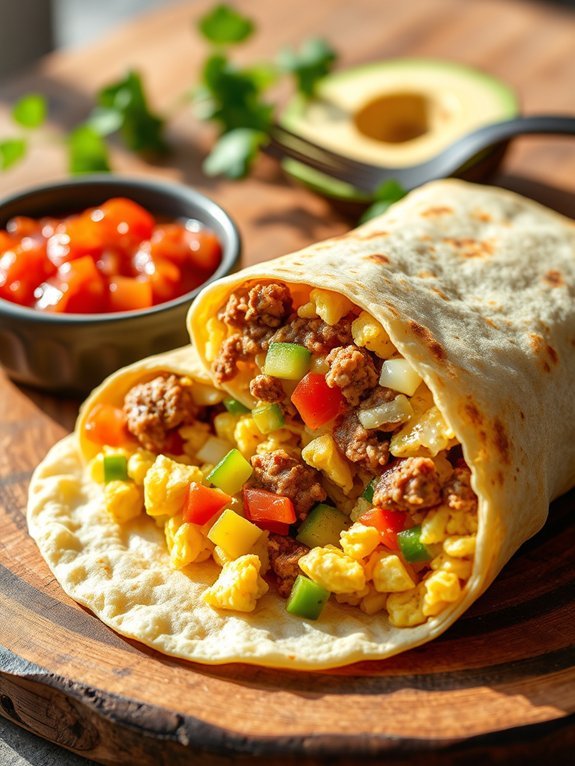
A breakfast burrito is a delicious and satisfying way to kick-start your day. This versatile dish combines hearty ingredients such as eggs, meats, and cheese, all wrapped in a warm tortilla. Perfect for busy mornings, breakfast burritos can be made ahead of time and enjoyed on-the-go.
Whether you prefer a classic version or want to experiment with different fillings, this recipe will guide you to a perfect breakfast burrito that your family will love. The beauty of breakfast burritos lies in their adaptability. You can swap out ingredients based on your taste preferences or what you have on hand. From spicy chorizo to sweet bell peppers, the options are endless.
You can also serve them with salsa, avocado, or sour cream to elevate the flavors. Get ready to meal prep or just whip up a quick and energizing breakfast that will keep you full until lunchtime.
- 4 large eggs
- 1/4 cup milk
- 1 cup cooked breakfast sausage or bacon, crumbled
- 1/2 cup shredded cheese (cheddar, Monterey Jack, or your choice)
- 1/2 cup diced bell peppers
- 1/4 cup diced onions
- 4 large flour tortillas
- Salt and pepper to taste
- Olive oil or cooking spray
In a large skillet, heat a little olive oil over medium heat and sauté the diced bell peppers and onions until they’re soft. In a separate bowl, whisk together the eggs and milk, and season with salt and pepper.
Pour the egg mixture into the skillet with the sautéed vegetables and stir gently until the eggs are just set. Add the crumbled sausage or bacon and cheese, mixing everything together until the cheese is melted. Remove the skillet from heat.
Warm the tortillas briefly in a clean skillet or microwave, then spoon a generous portion of the egg mixture into each tortilla and roll them up tightly.
When making breakfast burritos, don’t be afraid to customize them to your liking. Experiment with different proteins, such as diced ham or tofu, and add extras like black beans or spinach for added nutrition.
If you’re making a batch to enjoy throughout the week, consider wrapping them in aluminum foil or parchment paper before storing them in the refrigerator for easy reheating. You can even freeze them for a future breakfast option; just make sure to wrap them tightly and reheat thoroughly before serving.
Buffalo Cauliflower Wrap

If you’re looking for a delicious and healthy alternative to traditional buffalo wings, the Buffalo Cauliflower Wrap is a must-try. This dish combines the spicy and tangy flavors of buffalo sauce with the delightful crunch of roasted cauliflower, all wrapped up in a soft tortilla. It’s perfect for a quick lunch or a light dinner and is sure to satisfy your cravings for something bold and flavorful without the calories of fried chicken.
The beauty of this wrap lies in its versatility. You can easily modify it to fit various dietary needs—whether you’re vegan, vegetarian, or just trying to eat more plant-based meals. Paired with crunchy vegetables and creamy sauces, this wrap offers not just a kick of heat, but also a balanced meal packed with nutrients. Get ready to enjoy a scrumptious meal that transforms an oft-unhealthy favorite into a wholesome delight.
Ingredients:
- 1 medium head of cauliflower, cut into florets
- 1 cup buffalo sauce (store-bought or homemade)
- 2 tablespoons olive oil
- 1 teaspoon garlic powder
- 1 teaspoon onion powder
- Salt and pepper to taste
- 4 large tortillas (whole wheat or your choice)
- 1 cup shredded lettuce
- 1 medium cucumber, thinly sliced
- 1 avocado, sliced
- ½ cup ranch or blue cheese dressing (optional)
Preheat your oven to 450°F (230°C). In a large mixing bowl, combine the cauliflower florets with olive oil, garlic powder, onion powder, salt, and pepper, tossing them until evenly coated. Spread the cauliflower onto a baking sheet in a single layer and roast for about 20 minutes, or until it’s tender and slightly crispy.
Remove the pan from the oven and toss the cauliflower in buffalo sauce until well-coated. Return it to the oven and roast for an additional 5-10 minutes to caramelize the sauce slightly. Once done, assemble your wrap by placing the buffalo cauliflower, shredded lettuce, cucumber slices, avocado, and drizzle of dressing in the center of each tortilla before folding and rolling it up.
For an extra kick, consider adding a sprinkle of crumbled blue cheese or feta on top before rolling the wrap. Additionally, feel free to experiment with different vegetables or toppings according to your preference—carrots, radishes, or even crispy chickpeas can add unique textures and flavors!
If you’re meal prepping, the buffalo cauliflower can also be made in advance and stored in the fridge for a few days; simply reheat it before wrapping. Enjoy your homemade Buffalo Cauliflower Wrap!
Smoked Salmon and Cream Cheese Bagel

The smoked salmon and cream cheese bagel is a classic combination that marries the rich, savory flavors of salmon with the creamy, tangy notes of cream cheese. This delightful dish isn’t only easy to prepare but also perfect for a leisurely breakfast, brunch, or a quick snack.
The crunch of the toasted bagel adds texture, while the fresh vegetables complement the bold flavors of the smoked salmon.
To make this bagel even more enjoyable, feel free to customize it with your favorite toppings such as capers, red onions, or even slices of cucumber for a revitalizing bite. Smoked salmon isn’t only delicious but also packed with omega-3 fatty acids, making this dish a healthy choice that doesn’t compromise on taste.
Whether you’re hosting a gathering or just treating yourself, this bagel is sure to impress.
- 1 bagel (your choice of type)
- 2 ounces smoked salmon
- 2 tablespoons cream cheese
- 1 tablespoon capers (optional)
- 1/4 red onion, thinly sliced (optional)
- Fresh dill or chives for garnish (optional)
- Lettuce or arugula (optional)
To prepare your smoked salmon and cream cheese bagel, start by slicing the bagel in half and toasting it until golden brown.
Once toasted, spread a generous layer of cream cheese on both halves. Next, layer the smoked salmon atop the cream cheese, followed by your choice of toppings, such as capers and red onion.
For an added touch, sprinkle some fresh dill or chives over the top and finish with a handful of lettuce or arugula, if desired.
For an extra burst of flavor, consider experimenting with different cream cheese varieties, such as herbed or garlic-infused cream cheese.
You can also toast the bagel lightly in a skillet with a bit of butter for a richer taste.
If you have time, let the assembled bagel sit for a few minutes to allow the flavors to meld together before digging in.
Enjoy this simple yet elegant dish as part of a larger spread or on its own!
Grilled Chicken Caesar Wrap

The Grilled Chicken Caesar Wrap is a delicious and satisfying meal that combines the flavors of a classic Caesar salad with the convenience of a portable wrap.
Perfect for a quick lunch or a light dinner, this recipe features tender grilled chicken breast, crisp romaine lettuce, creamy Caesar dressing, and freshly grated Parmesan cheese, all wrapped in a soft tortilla. The combination of flavors and textures makes this wrap a favorite among both kids and adults, and it can be customized with your choice of additional toppings, such as cherry tomatoes or crispy bacon.
Preparing this wrap is a breeze, especially if you have pre-cooked chicken or leftovers on hand. The grilling process infuses the chicken with a smoky flavor that complements the other ingredients beautifully. Whether you’re making this meal for yourself or a group of friends, it’s a crowd-pleaser that can be assembled in minutes, making it an ideal option for busy weeknights or meal prep.
Let’s get started!
- 2 boneless, skinless chicken breasts
- 1 tablespoon olive oil
- Salt and pepper to taste
- 2 large whole wheat or spinach tortillas
- 2 cups romaine lettuce, chopped
- ½ cup Caesar dressing
- ¼ cup grated Parmesan cheese
- Optional: cherry tomatoes, sliced; crispy bacon bits
Season the chicken breasts with olive oil, salt, and pepper, then grill them over medium heat for 6-7 minutes on each side, or until fully cooked.
Allow the chicken to rest for a few minutes, then slice it into strips. In a large bowl, toss the chopped romaine lettuce with the Caesar dressing and Parmesan cheese.
Lay a tortilla flat, fill it with the salad mixture and grilled chicken, then roll it tightly from one side to secure the filling inside. Cut the wrap in half and serve.
For the best flavor, marinate the chicken breasts in Caesar dressing for a few hours or overnight before grilling. Additionally, you can incorporate extra toppings to enhance the wrap’s flavor and texture.
Don’t be afraid to experiment with different types of tortillas or greens, and consider serving with a side of extra dressing for dipping. Enjoy your Grilled Chicken Caesar Wrap as a nutritious and flavorful meal that can be easily customized to suit your taste!
Falafel and Tzatziki Pita

Falafel and Tzatziki Pita is a delicious and satisfying meat-free option that brings the vibrant flavors of the Mediterranean straight to your table. This dish features crispy falafel made from ground chickpeas, blended with fresh herbs and spices, served in a warm pita, and topped with a revitalizing tzatziki sauce. Not only is it a great choice for vegetarians, but it also packs a punch of flavors and textures that everyone can enjoy.
To create the perfect falafel and tzatziki pita, you’ll want to start by preparing your falafel mixture and letting it rest while you whip up the tzatziki sauce. Tzatziki, made from Greek yogurt, cucumbers, garlic, and herbs, is a classic condiment that adds a cool contrast to the spiced falafel. When everything is ready, simply combine them in a pita, and you’ll have a beautifully balanced meal that can be served anytime of the day.
Ingredients:
- 1 cup dried chickpeas (soaked overnight)
- 1 small onion, chopped
- 2 cloves garlic, minced
- 1 cup fresh parsley, chopped
- 1 tsp ground cumin
- 1 tsp ground coriander
- ½ tsp cayenne pepper
- Salt to taste
- 1 tsp baking powder
- Oil for frying
- 4 pita breads
For the tzatziki:
- 1 cup Greek yogurt
- 1 medium cucumber, grated and drained
- 1 clove garlic, minced
- 1 tbsp olive oil
- 1 tbsp fresh dill or mint, chopped
- Salt and pepper to taste
To prepare the falafel, combine soaked chickpeas, onion, garlic, parsley, cumin, coriander, cayenne, salt, and baking powder in a food processor. Pulse until the mixture is coarse but holds together when formed into balls.
Heat oil in a deep pan over medium heat, and fry the falafel balls in batches until golden brown, about 4-5 minutes per side.
Meanwhile, mix Greek yogurt with grated cucumber, garlic, olive oil, dill or mint, salt, and pepper to prepare the tzatziki sauce.
Once the falafel are cooked and crispy, slice the pita in half and stuff each pocket with falafel and a generous dollop of tzatziki.
When making falafel, it’s important not to over-process the chickpeas; you want the mixture to remain textured. If your falafel falls apart while frying, try adding a little more flour or baking powder to help bind the mixture.
Additionally, you can make the tzatziki ahead of time to allow the flavors to meld together. For a fun twist, consider adding your favorite toppings like sliced tomatoes, lettuce, or pickled onions to elevate your pita even further. Enjoy your meal!
Reuben Sandwich

The Reuben sandwich is a classic American deli staple that combines savory flavors to create a deliciously indulgent meal. Traditionally made with corned beef, sauerkraut, Swiss cheese, and Russian or Thousand Island dressing, this sandwich is a tantalizing blend of salty, tangy, and creamy flavors.
It’s typically grilled to golden perfection, allowing the cheese to melt and the bread to develop a satisfying crunch. Whether enjoyed for lunch or dinner, the Reuben is sure to satisfy your taste buds.
Crafting a perfect Reuben sandwich at home isn’t only simple but also rewarding. You can customize the ingredients to suit your preferences, such as opting for turkey instead of corned beef, or adding extra dressing for a bolder taste.
With just a few key ingredients and some easy steps, you can enjoy this comforting dish right from your kitchen, making it an ideal option for a quick weekday meal or a leisurely weekend brunch with friends.
- 2 slices of rye bread
- 4 ounces of corned beef, sliced
- 2 ounces of Swiss cheese, sliced
- 1/4 cup of sauerkraut, drained
- 2 tablespoons of Russian or Thousand Island dressing
- Butter, for grilling
To prepare your Reuben sandwich, start by buttering one side of each slice of rye bread. On the unbuttered side of one slice, layer the corned beef, followed by the sauerkraut, Swiss cheese, and a generous spread of dressing.
Top with the second slice of bread, buttered side facing out. Heat a skillet over medium heat and place the sandwich in the skillet. Grill for 3-4 minutes on each side or until the bread is golden brown and the cheese is melted.
When assembling your Reuben, verify that the sauerkraut is well-drained to avoid sogginess, which can detract from the overall texture of the sandwich. You can also experiment with different types of bread – while rye is traditional, pumpernickel or sourdough can add unique flavors.
For an extra kick, consider adding a layer of pickles or some spicy mustard. Enjoy pairing your Reuben with a side of dill pickles or potato chips for a complete meal experience!
Sweet Potato and Black Bean Wrap
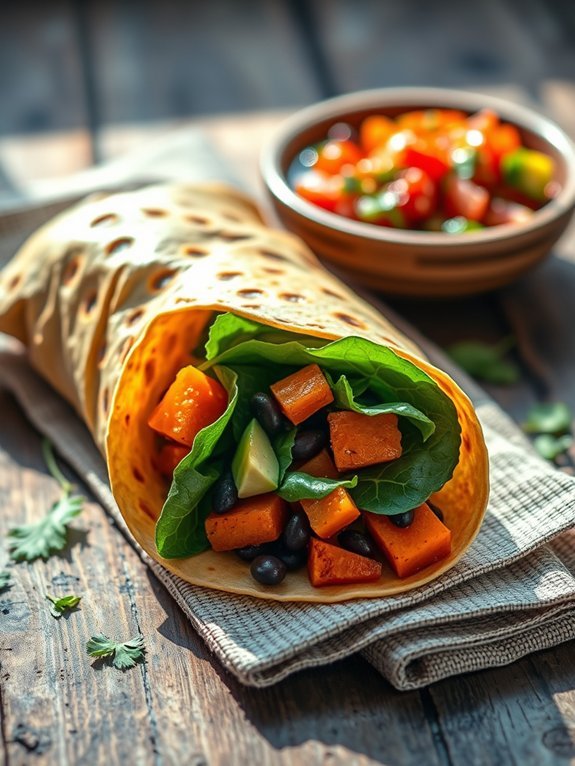
Sweet Potato and Black Bean Wrap is a delicious and nutritious option that can be enjoyed for lunch or as a light dinner. This dish embraces the earthy sweetness of roasted sweet potatoes combined with the hearty texture of black beans, all wrapped in a soft tortilla. The crispy veggies and optional toppings create a satisfying and flavorful bite, making it a perfect meal for busy days when you crave something both healthy and filling.
To prepare this wrap, you’ll start by roasting sweet potatoes until they’re tender and caramelized. Meanwhile, the black beans can be seasoned and warmed, providing a protein-rich filling. With just a few additional toppings, such as fresh greens, avocado, or a zesty sauce, you have a well-rounded meal that’s both quick to assemble and packed with flavor.
Ingredients:
- 2 medium sweet potatoes, peeled and diced
- 1 can of black beans, rinsed and drained
- 1 tablespoon olive oil
- 1 teaspoon cumin
- Salt and pepper, to taste
- 4 large tortillas
- 1 cup fresh spinach or mixed greens
- 1 avocado, sliced
- Optional: hot sauce or salsa for drizzling
Preheat your oven to 425°F (220°C). Toss the diced sweet potatoes with olive oil, cumin, salt, and pepper, and roast them on a baking sheet for about 25-30 minutes or until they’re tender and lightly browned.
While the sweet potatoes are roasting, heat the black beans in a saucepan over medium heat until warmed through.
Once everything is cooked, assemble the wraps by layering the sweet potatoes, black beans, fresh greens, and avocado in the tortillas. Roll them up tightly, slice in half, and serve with your favorite hot sauce or salsa.
When making this wrap, feel free to customize the ingredients according to your taste preferences. You can add other vegetables like bell peppers or corn, or even sprinkle in some cheese for extra flavor.
Additionally, if you’re meal prepping, the sweet potatoes and beans can be cooked in advance and stored in the fridge, making it easy to assemble your wraps quickly throughout the week.
Chicken Salad Sandwich

A chicken salad sandwich is a delightful twist on the traditional recipe that offers both flavor and convenience, making it perfect for lunch or a light dinner. This dish combines tender shredded chicken with creamy dressing and fresh vegetables, all nestled between slices of bread. The best part about chicken salad is its versatility; you can add your favorite ingredients or swap them out based on what you have available in your kitchen.
To create a well-balanced chicken salad sandwich, it’s best to use cooked chicken, which can be shredded or diced. You can utilize leftover roast chicken, poached chicken, or even store-bought rotisserie chicken for a quick option. Enhance the salad with crunchy celery, sweet grapes or apples, and a sprinkle of herbs for freshness. The result is a flavorful filling that pairs wonderfully with various types of bread, whether you prefer classic whole wheat, crusty ciabatta, or tender brioche.
- 2 cups cooked chicken, shredded or diced
- 1/2 cup mayonnaise
- 1/4 cup Greek yogurt (optional, for a lighter dressing)
- 1/4 cup celery, finely chopped
- 1/4 cup red grapes or apples, diced
- 1 tablespoon fresh dill or parsley, chopped
- 1 tablespoon Dijon mustard (optional)
- Salt and pepper, to taste
- Bread of your choice (whole wheat, ciabatta, or brioche)
- Lettuce leaves (optional)
In a medium mixing bowl, combine the shredded chicken, mayonnaise, Greek yogurt (if using), chopped celery, diced grapes or apples, and herbs. Add the Dijon mustard for an extra kick, and season it with salt and pepper to taste. Mix everything until well combined; chill in the refrigerator for about 30 minutes to allow the flavors to meld.
Once ready, spread a generous amount of the chicken salad mixture onto slices of your favorite bread, add lettuce leaves if desired, and top with another slice of bread.
When making a chicken salad sandwich, feel free to personalize the recipe by adding ingredients you enjoy. Consider adding chopped nuts for crunch, diced bell peppers for sweetness, or even a dash of curry powder for a unique twist.
Additionally, for a make-ahead option, prepare the chicken salad a day in advance and store it in the fridge; this will enhance the flavors further. Just make sure to toast the bread lightly before assembling to prevent sogginess!

